Location: Sidebar → Inventory → Adjustments
The Inventory Adjustments section allows users to manually update stock levels to reflect real-world changes such as damages, losses, corrections, or stock counts.
From this page, you can view and manage all inventory adjustment records. Each adjustment updates the quantity of a product in a specific warehouse
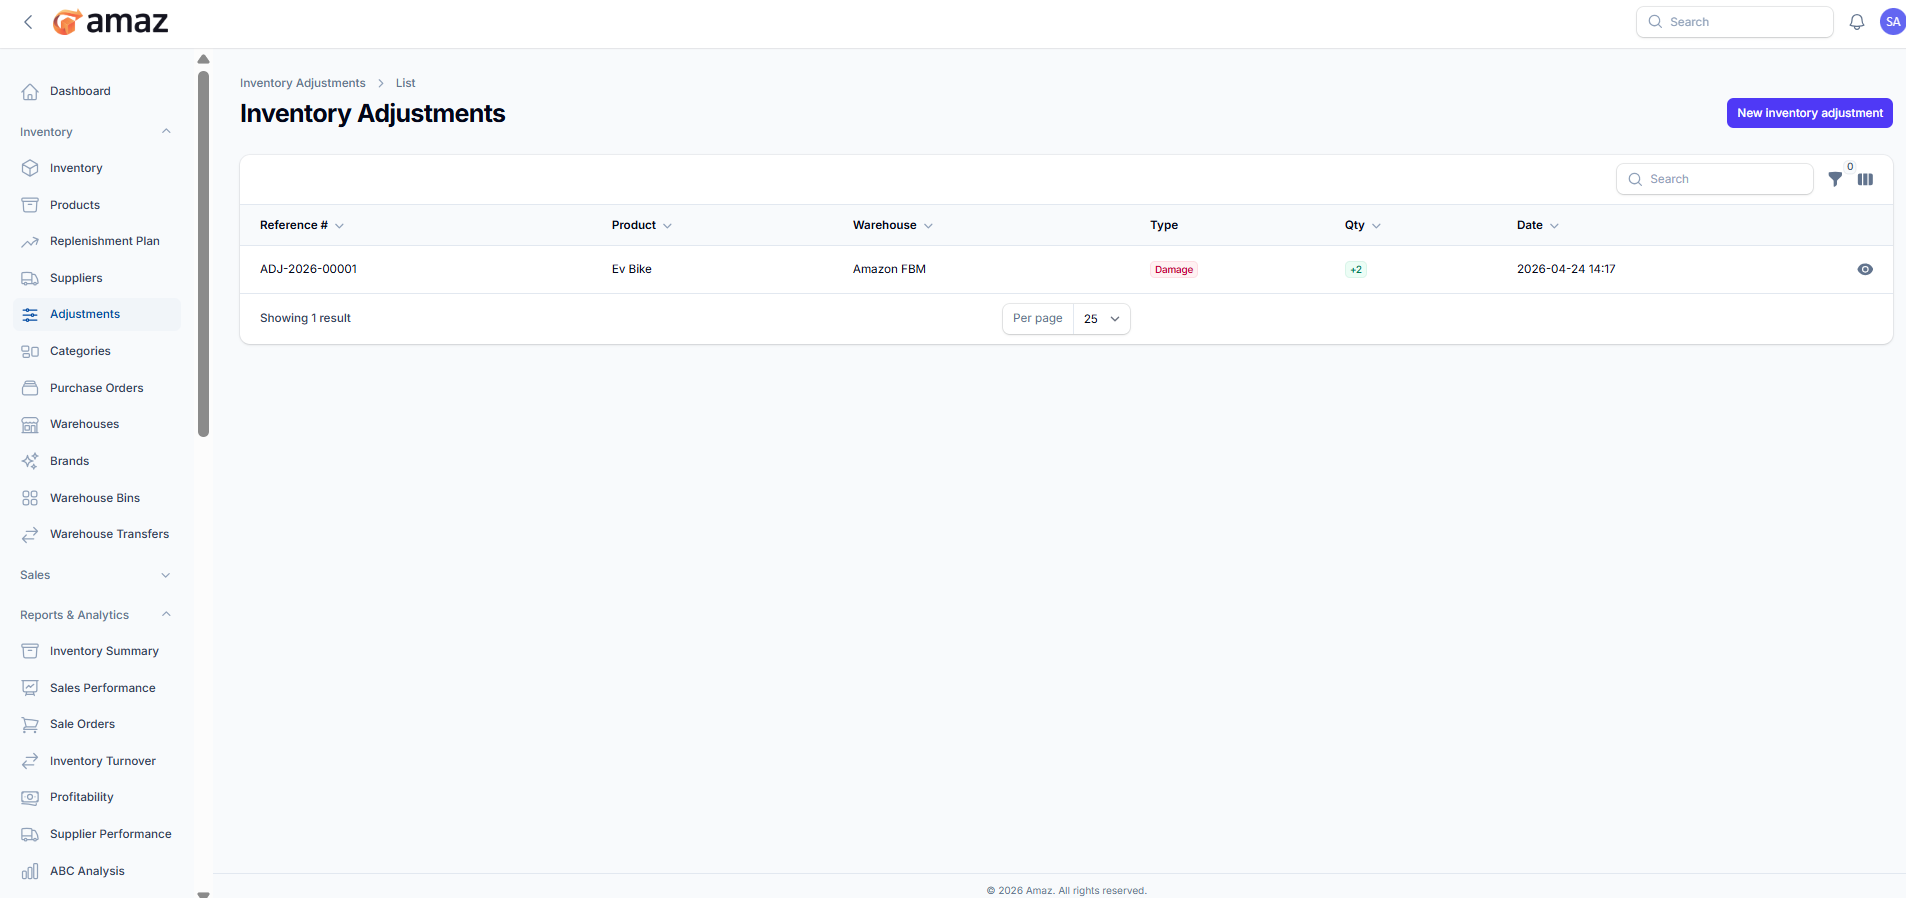
Adjustment List View
The table provides detailed information for each adjustment:
Reference – Unique ID for the adjustment (e.g., ADJ-2026-00001)
Product – Name of the affected product
Warehouse – Warehouse where the adjustment is applied
Type – Type of adjustment (e.g., Damage, Increase, Decrease)
Qty – Quantity adjusted (positive or negative)
Date – Date and time of the adjustment
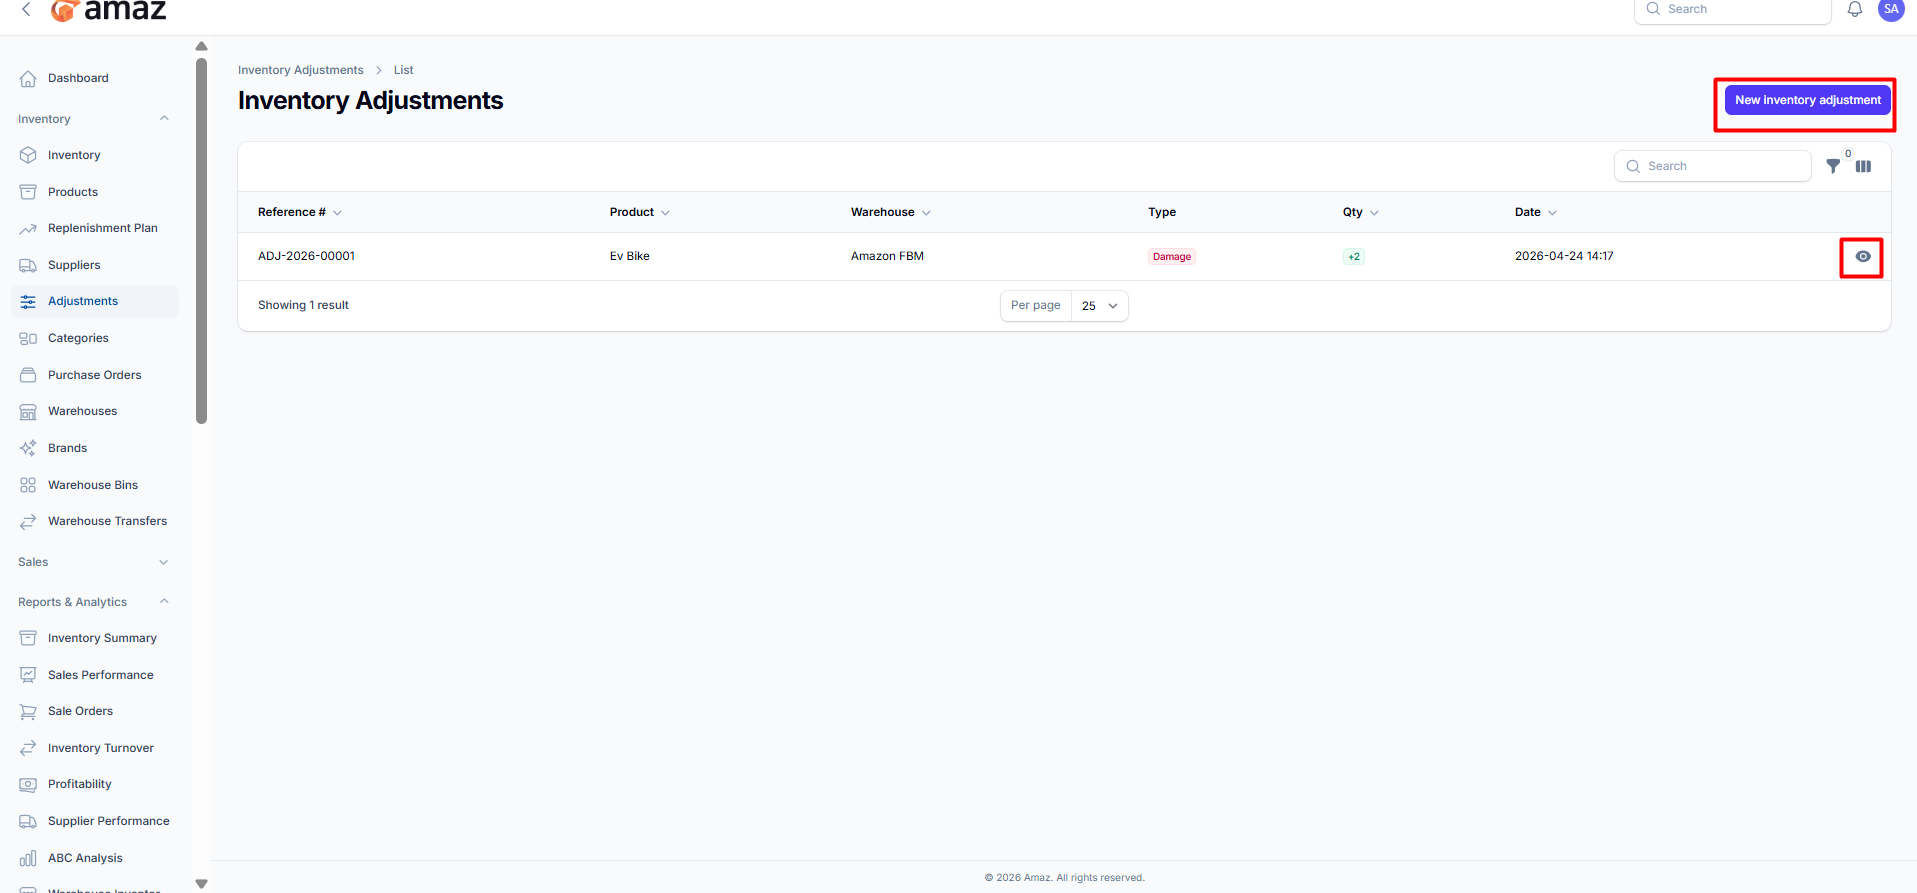
New Inventory Adjustment
Click the “New inventory adjustment” button (top-right) to create a new adjustment.
View Details
Use the view (eye) icon to see detailed information about a specific adjustment.
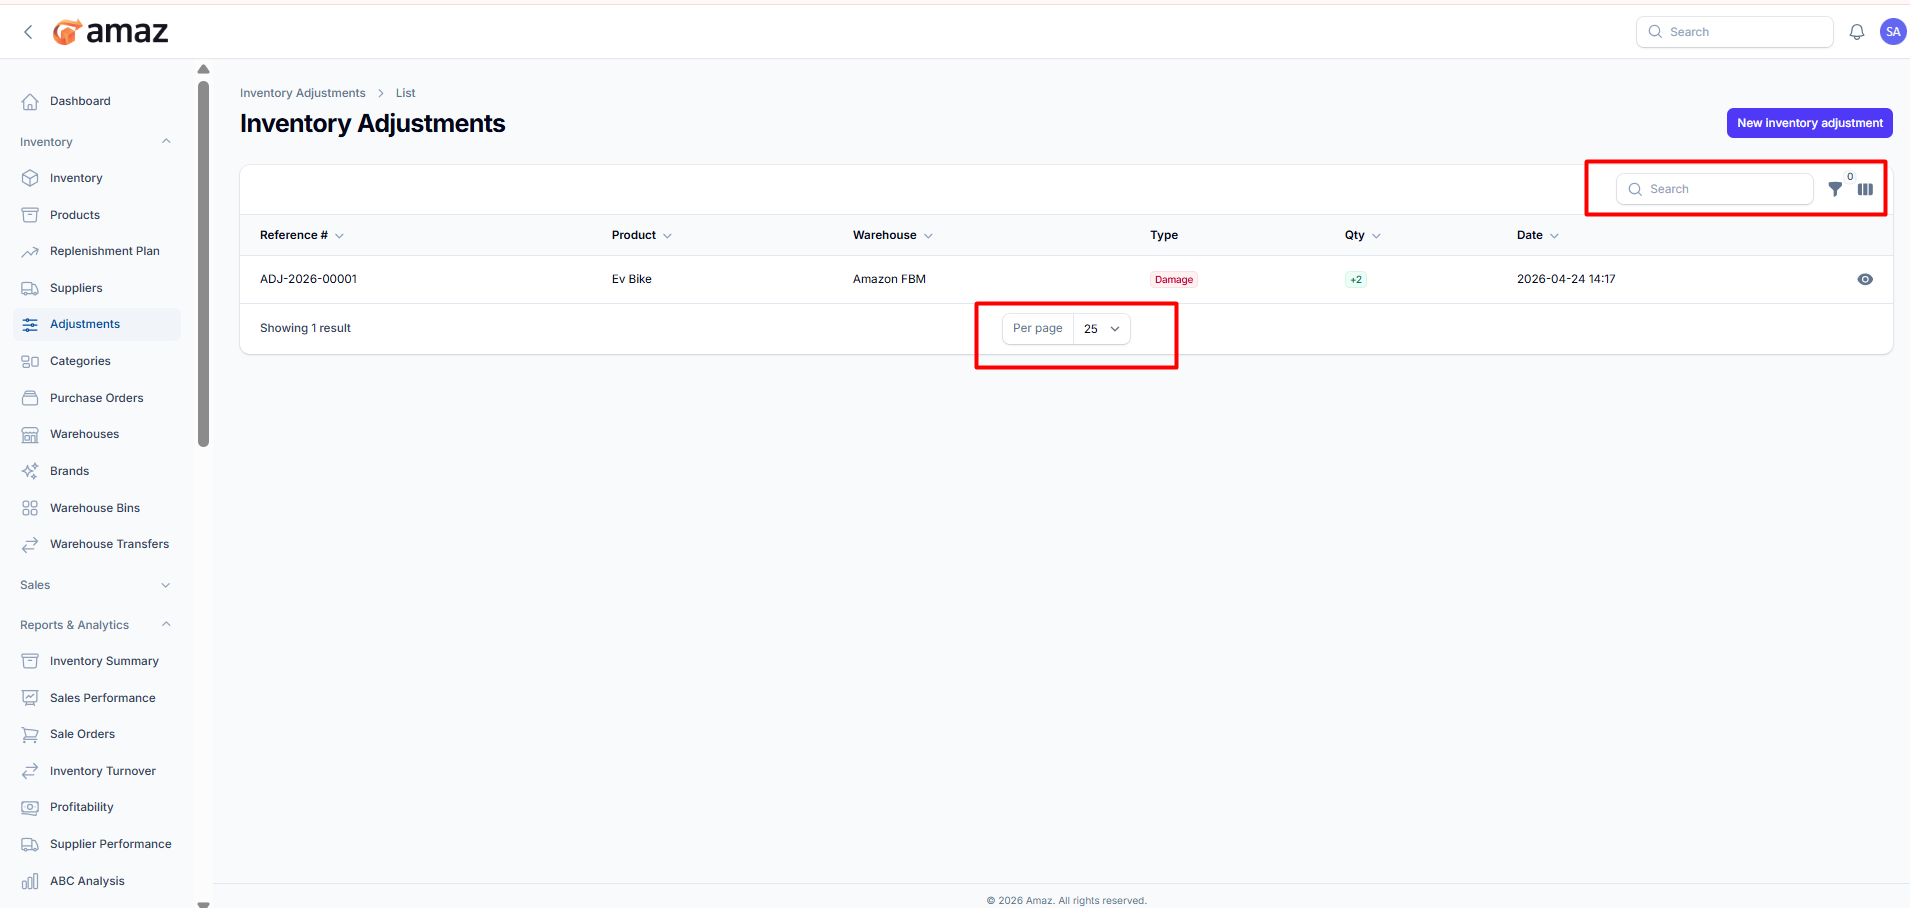
Search Bar
Quickly locate specific adjustment records by entering keywords.
Column Controls
Use available controls (icons next to search) to manage column visibility or filtering options.
Pagination
Adjust the number of records displayed per page using the “Per page” dropdown.
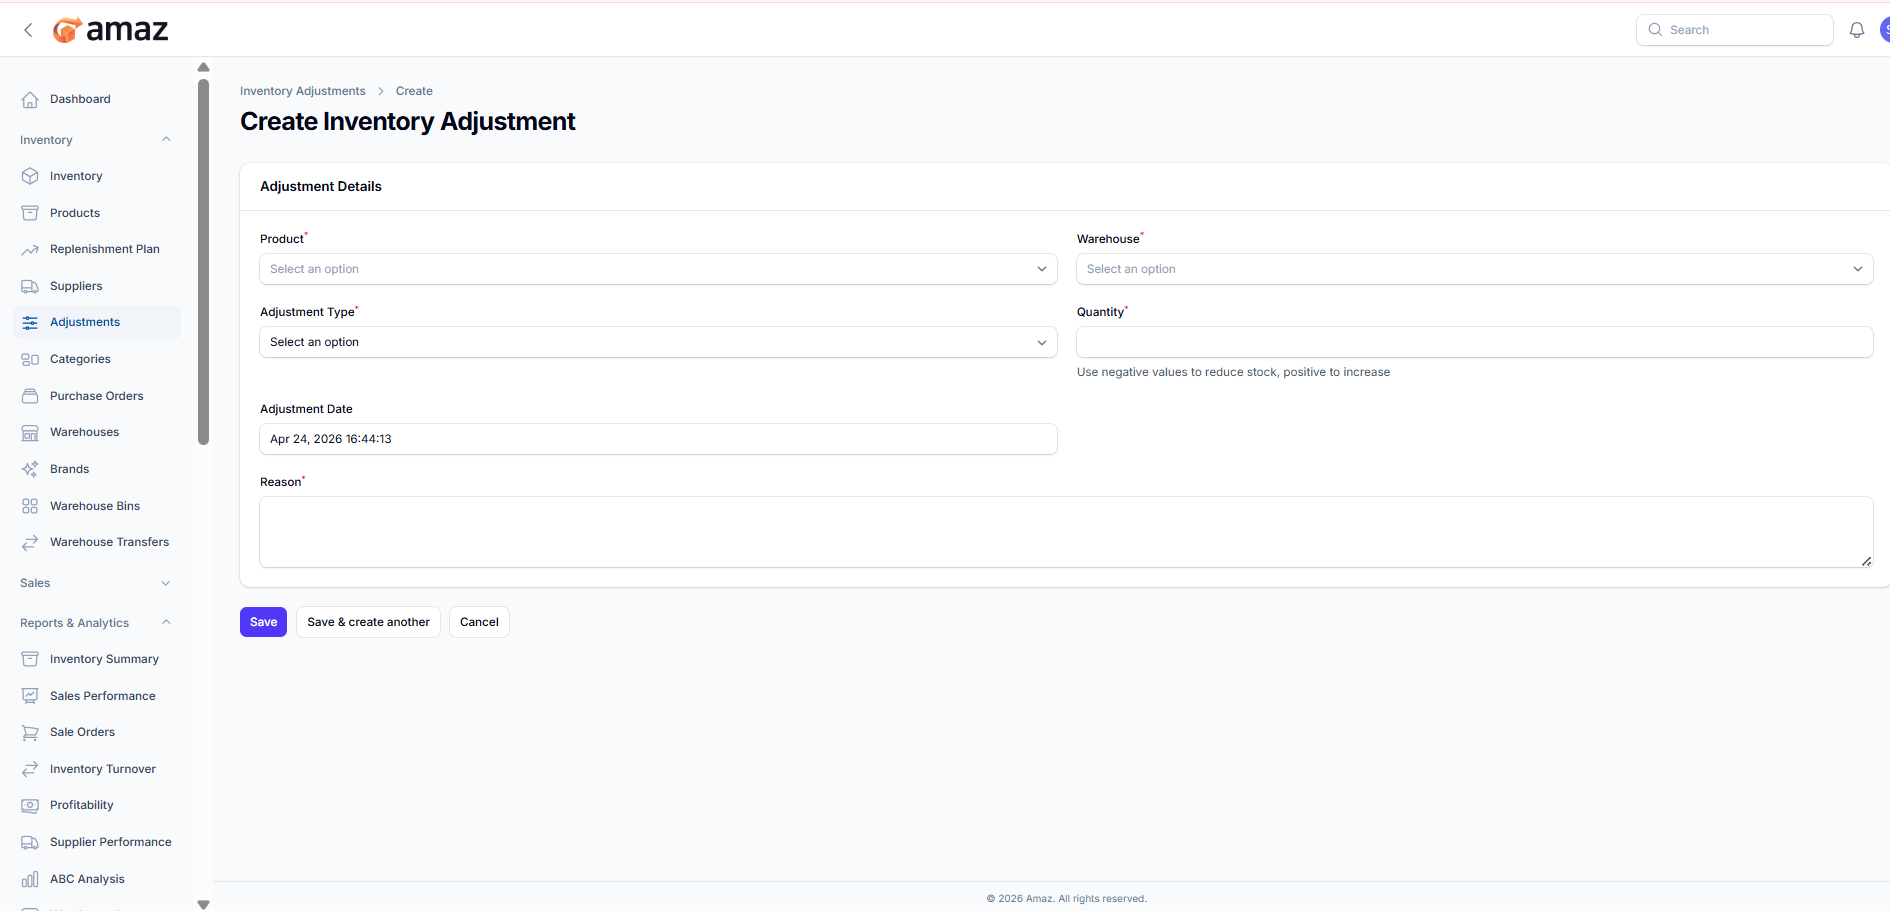
Create Inventory Adjustment
To create a new adjustment, follow the steps below:
Click on the “Create” button
Fill in the required details:
Product: Select the product
Warehouse: Select the warehouse
Adjustment Type: Choose the type (e.g., Damage, Loss, Correction)
Quantity: Enter the quantity
Use positive value to increase stock
Use negative value to decrease stock
Adjustment Date: Select or keep the default date
Reason: Enter the reason for adjustment
Click Save to create the adjustment