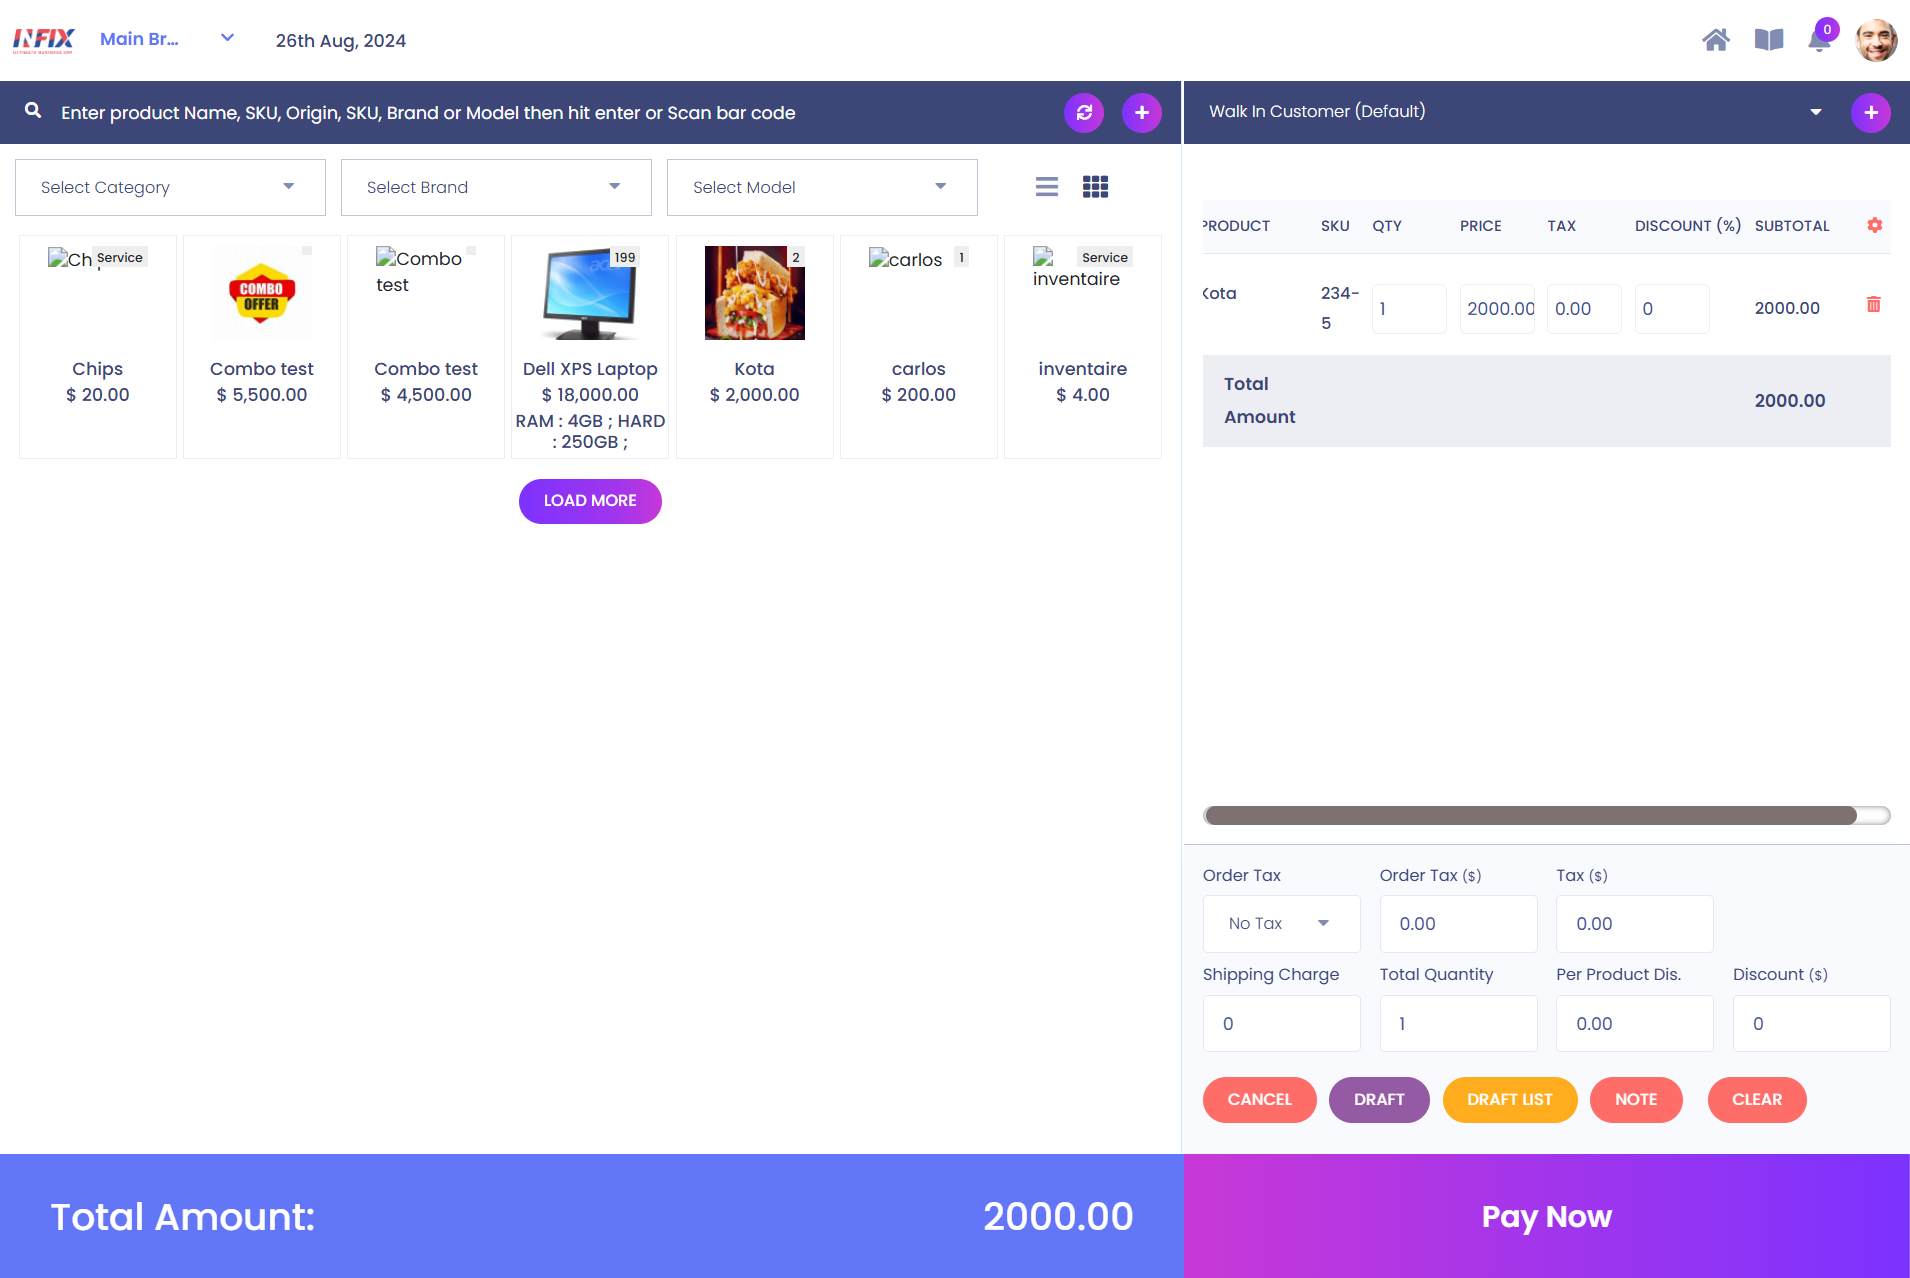
1. Select Category
Here you can select category.
2. Select Brand
Here you can select brand.
3. Select Model
Here you can select model.
4. POS View
On that section you can change the pos view.
5. Select Customer
Here you can select customer.
6. (+) Icon
On that section you can add a new contact.
7. Quantity
Here you can set quantity of a product.
8. Discount
Here you can set discount for selected product.
9. Delete
On that section you can delete a product from pos order list.
10. Order Tax
Here you can select order tax for products.
11. Shipping Charge
Here you can add shipping charge.
12. Cancel
Here you can cancel the order process.
13. Draft
On that section you can draft the order.
14. Draft List
Here you can see the draft order list.
15. Note
Here you can add note.
16. Clear
On that section you can clear the pos order.
17. Pay Now
After placing the order, press the "Pay Now" button to make the payment.
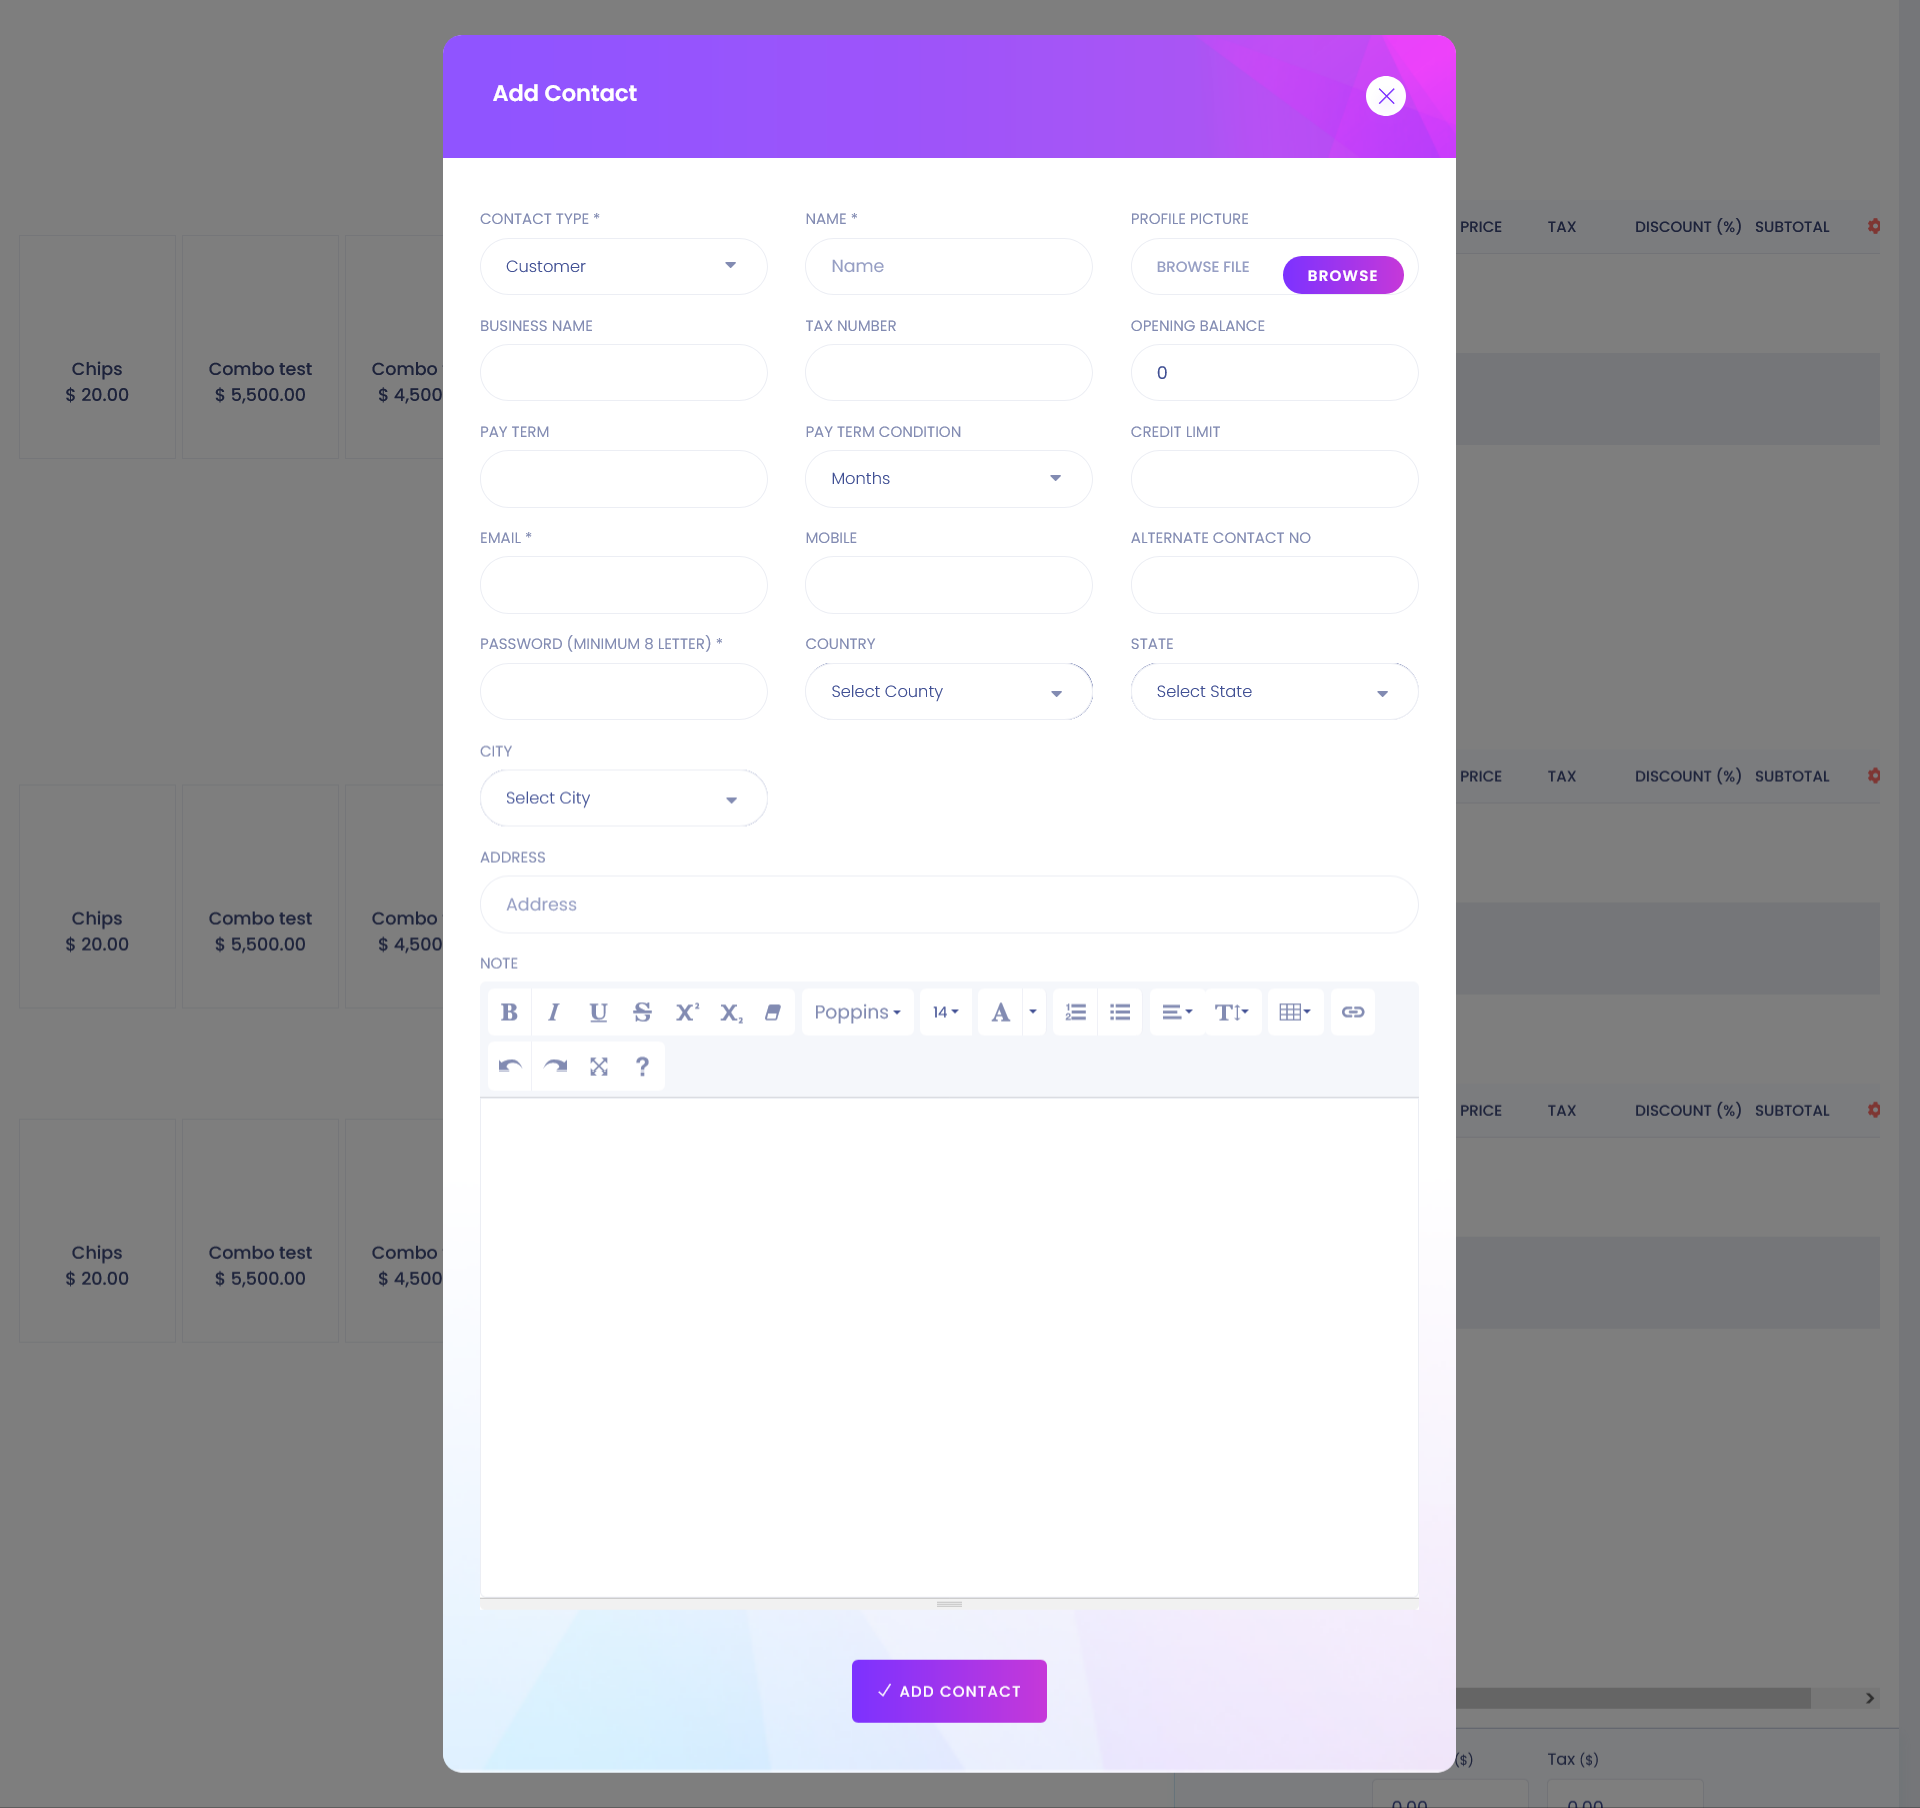
1. Contact Type
Here you can select customer as a contact type.
2. Add Contact
After filling all the required fields press "Add Contact" button to complete add new contact creation.
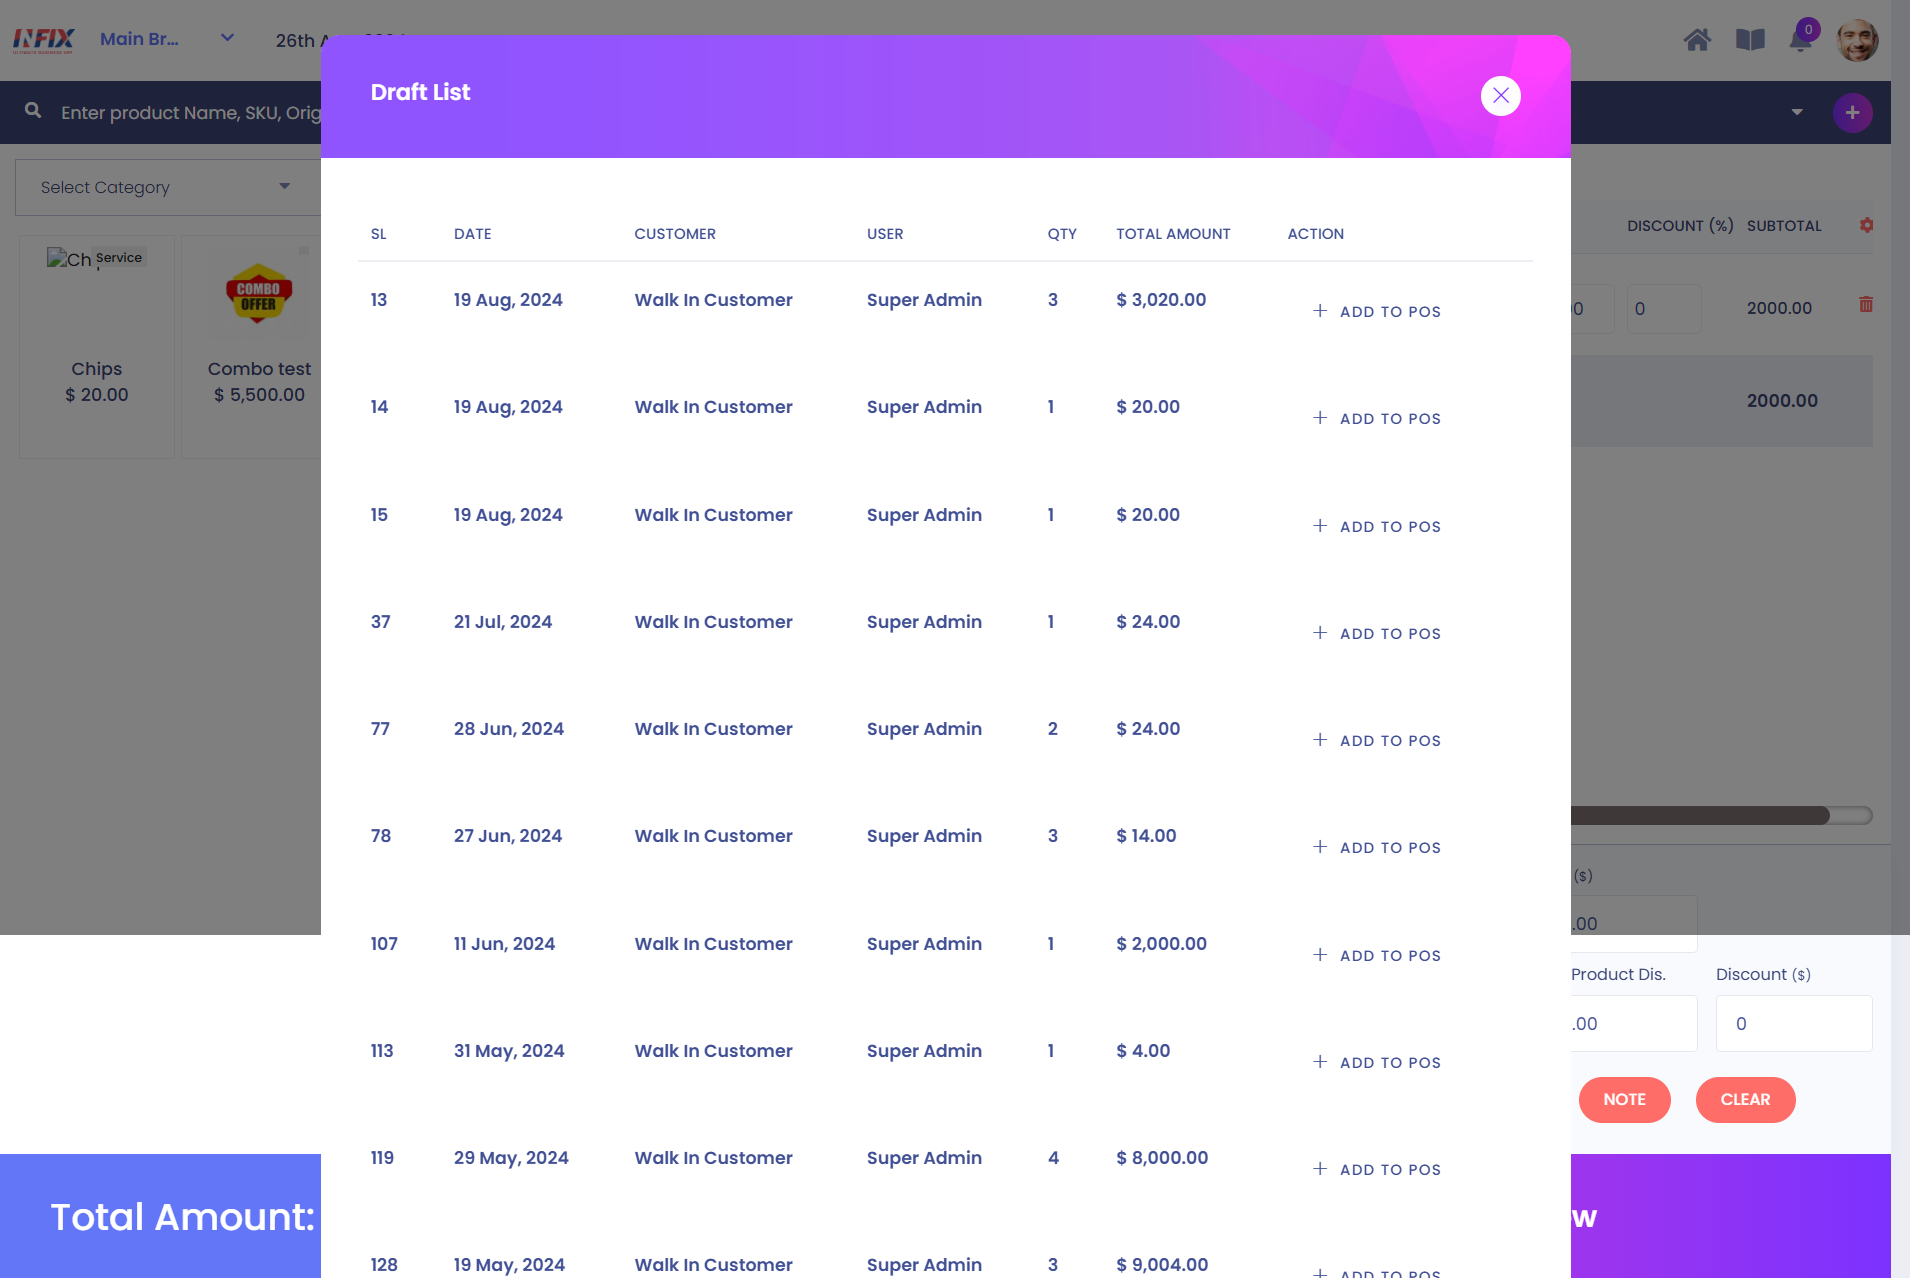
1. Action Menu
In action menu you can add to POS the order from the list.
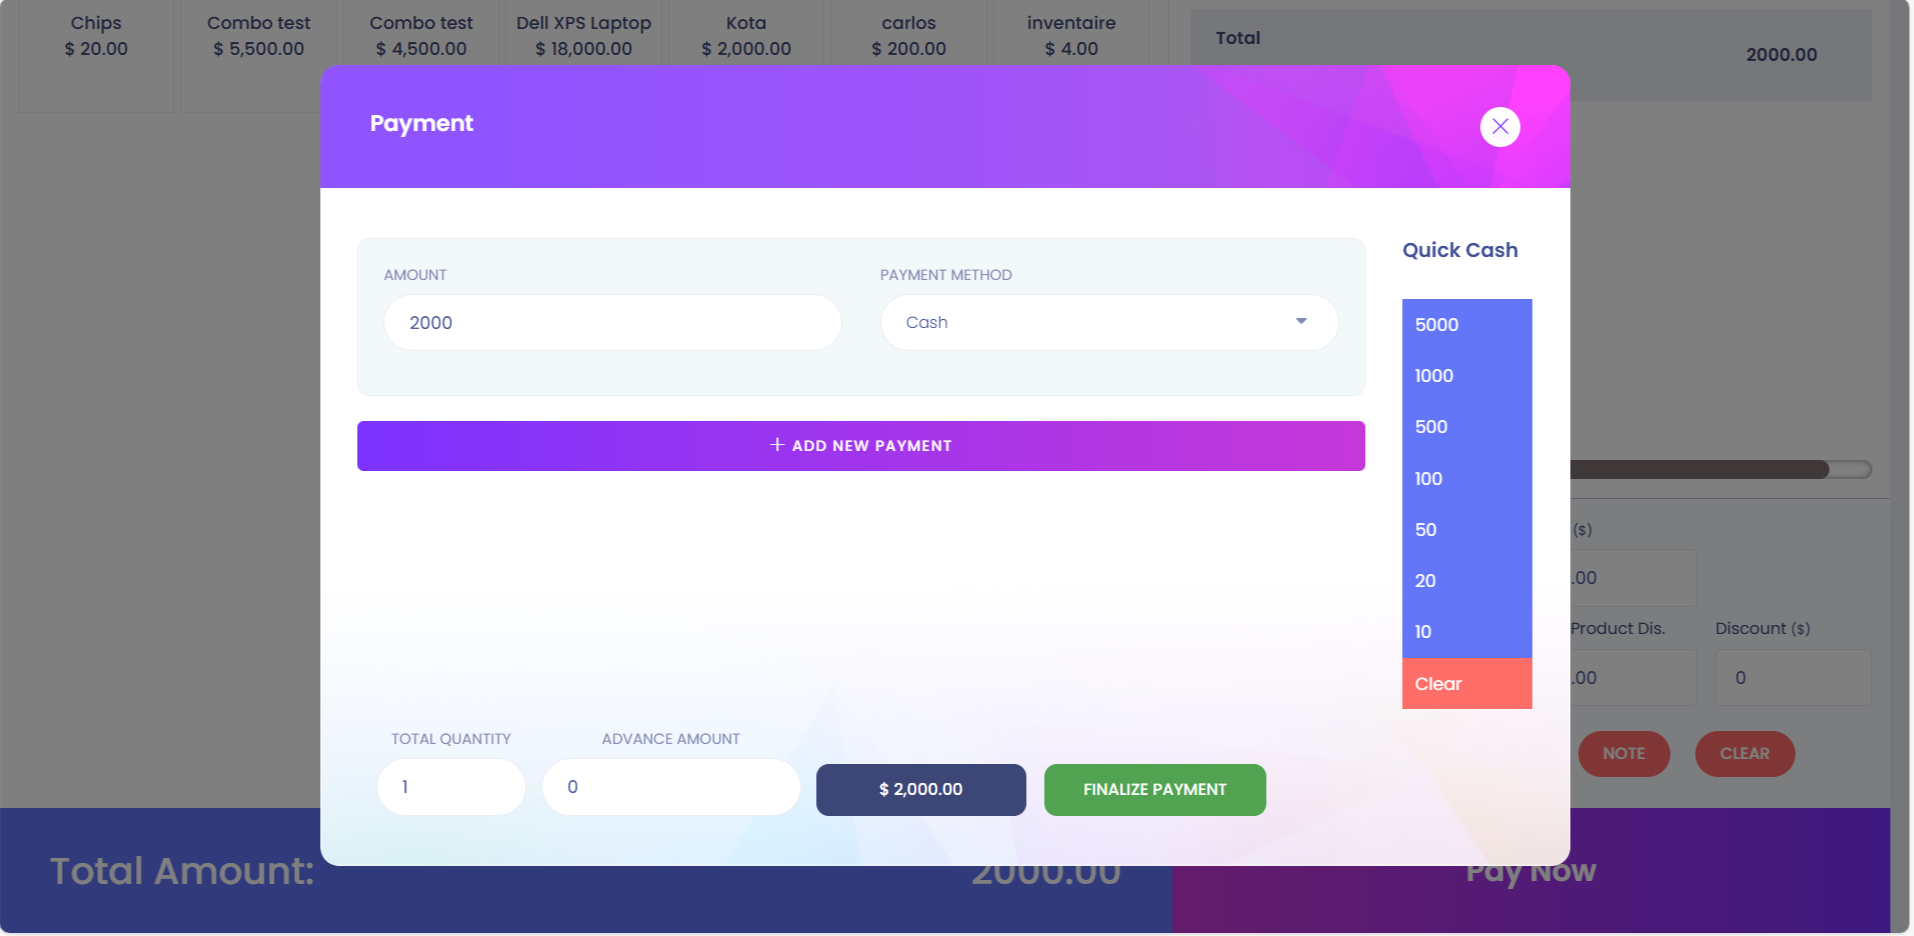
1. Amount
Here you can add amount.
2. Payment Method
On that section you can select a payment method.
3. Add New Payment
Here you can add a new payment.
4. Quick Cash
Here you can select amount for quick payment.
5. Clear
On that section you can clear the amount.
6. Finalize Payment
Here you can finalize the payment process.

