Short Direction
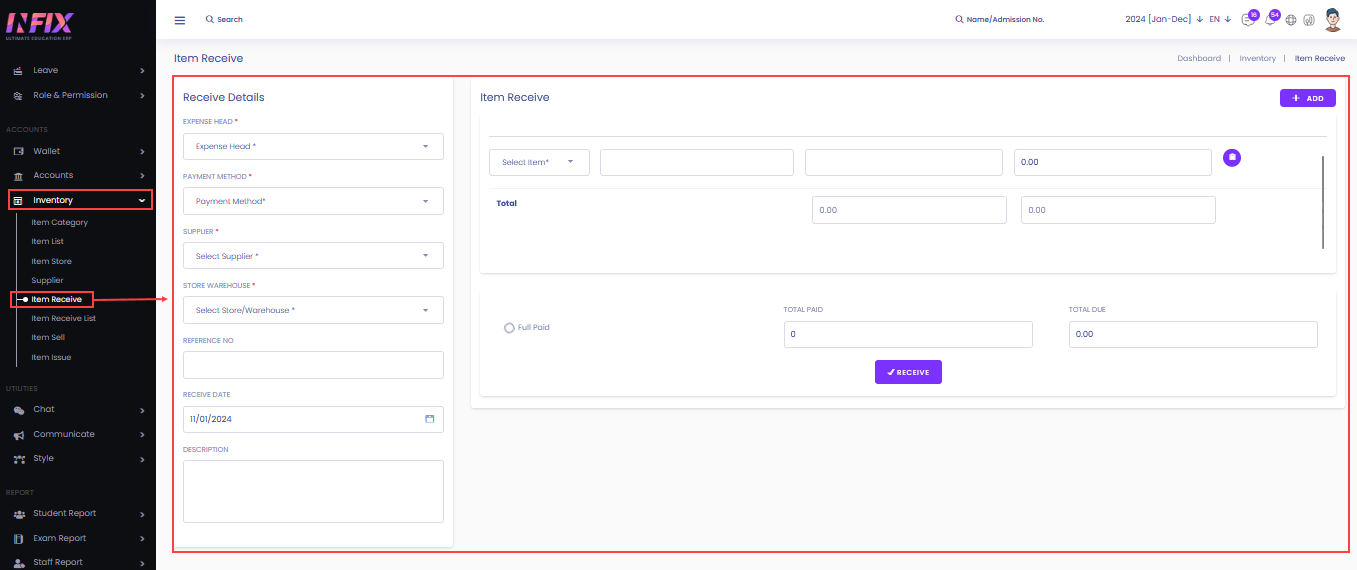
Admin Panel → ACCOUNT → Inventory → Item Receive
Route
/item-receive
In this option, you can easily add an item received.
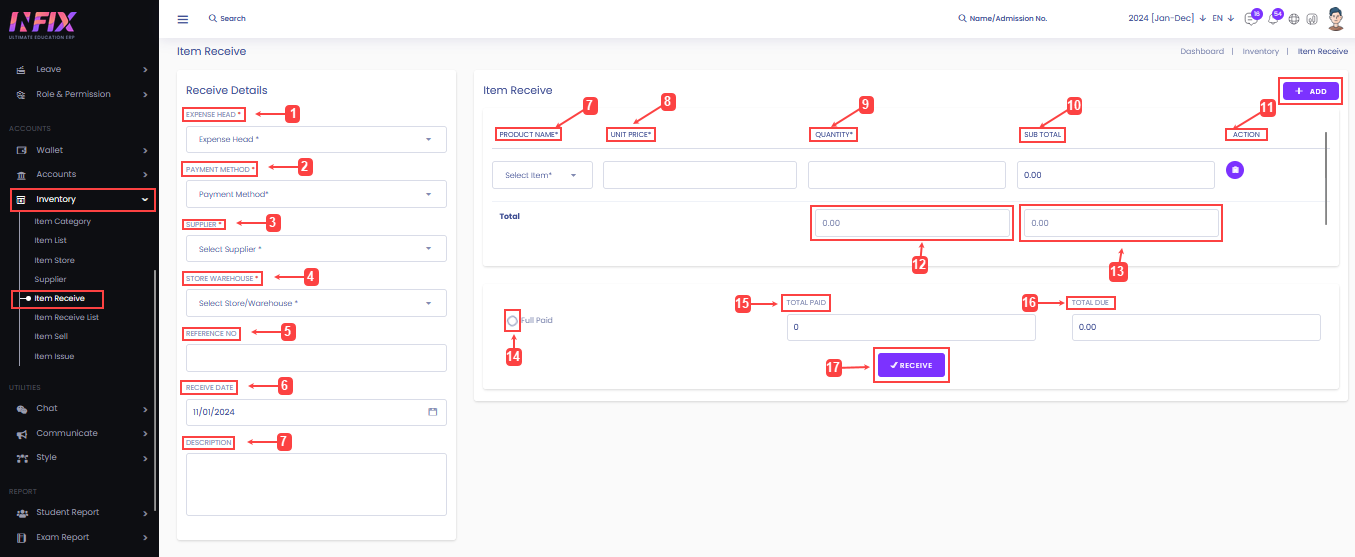
You can add an Item Receive by selecting Expense Head[1], Payment Method[2], Supplier[3], Store/Warehouse[4], Reference No[5], Receive Date[6], and Item[7].
On the right side, you can select the product Name[8], the Unit price[9], Quantity [10], and Sub Total[11] and delete that specific field by clicking on the Trash bin Icon[12]. You will see the total amount in the field under Quantity [13] and Sub Total[14]. If you click on the Full Paid Checkbox[15], you won't be able to put any value in the Total due field[17] and fill in the Total amount in the Total Paid[16] field.
Finally, click on Receive[18] to save all the information.
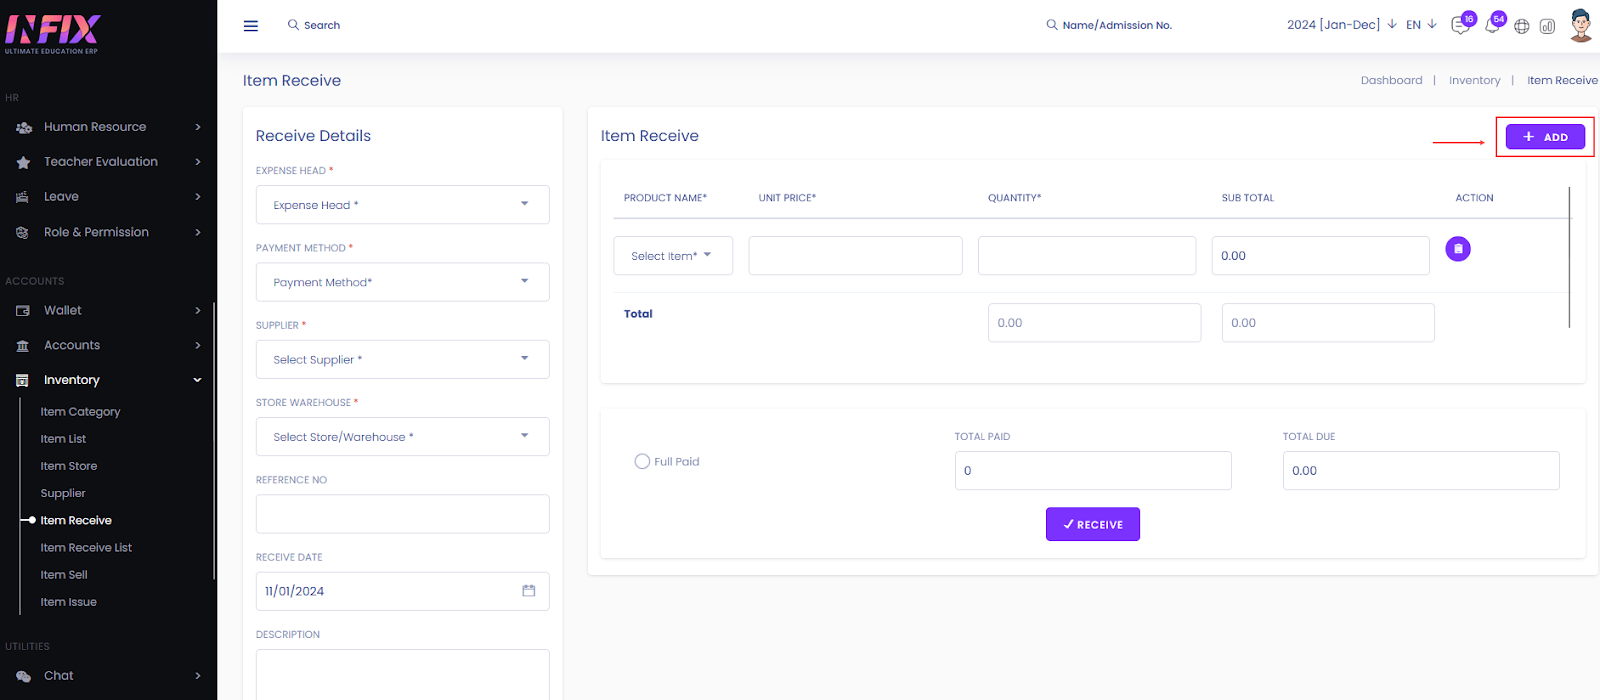
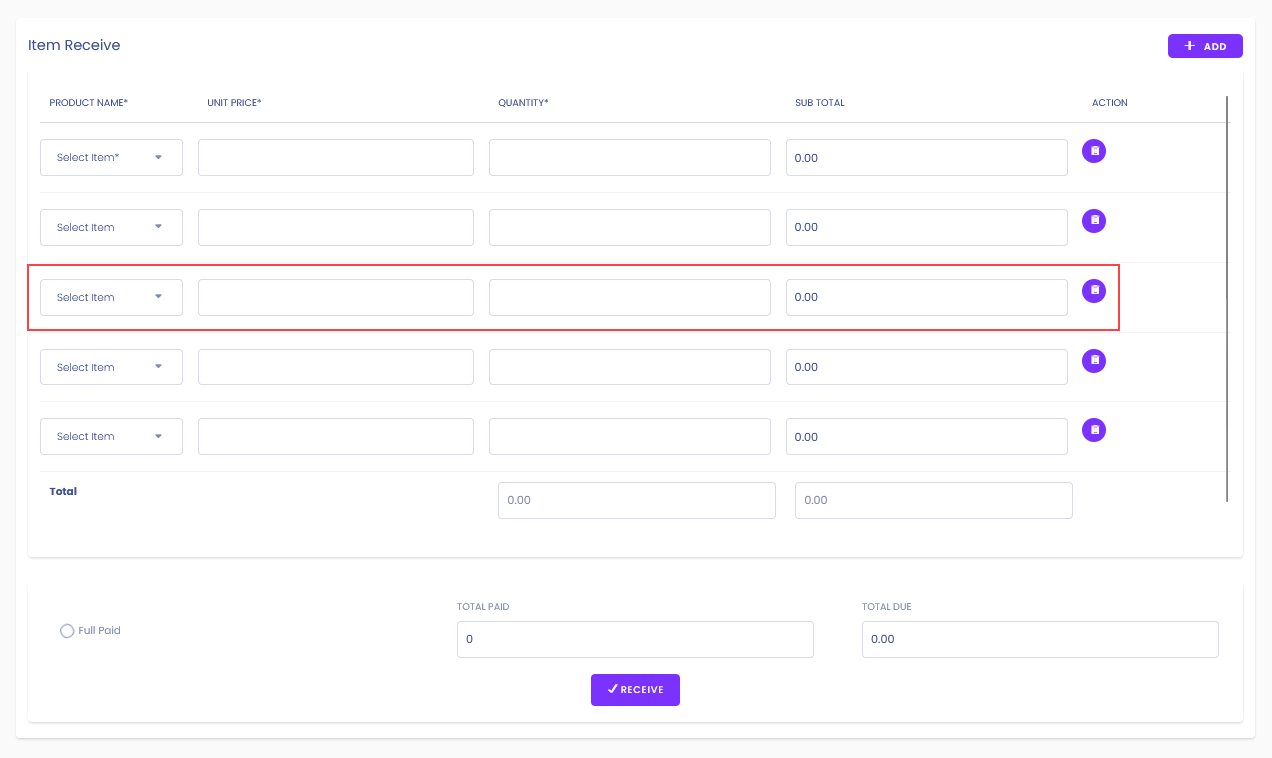
You can add a new field by clicking on the Add Button.
After clicking on the Add button, you should see a new field added to the list of Items Receive.
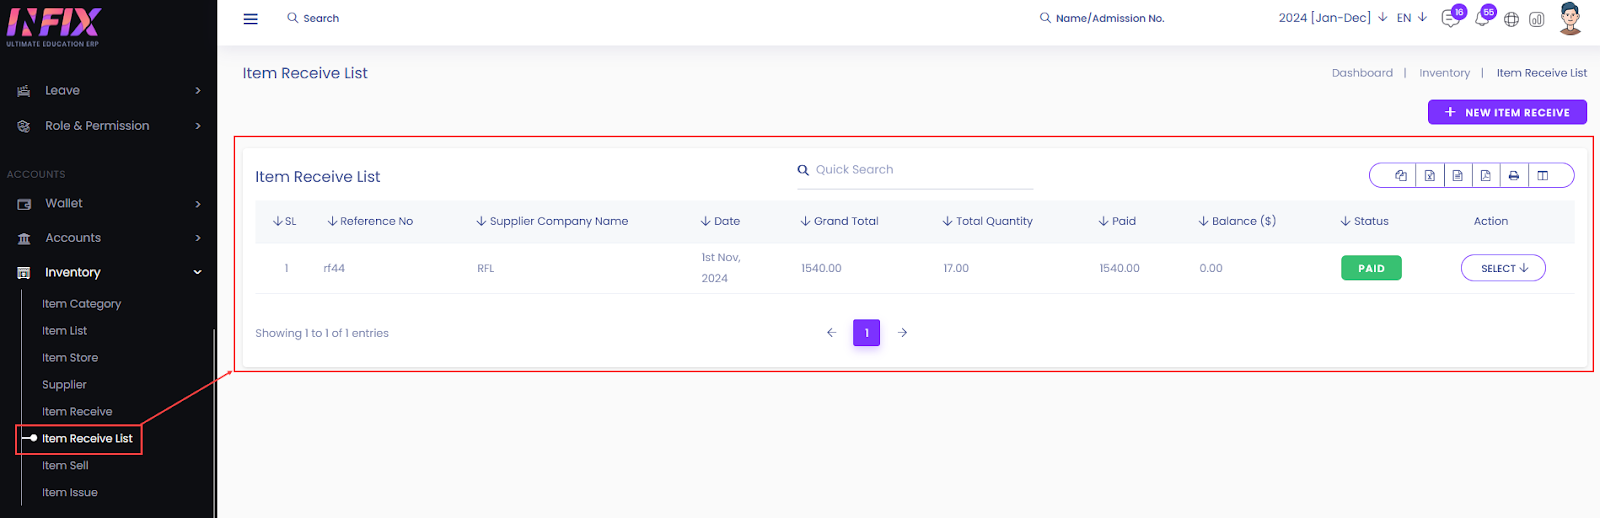
After Clicking on the Receive button, you will be forwarded to the Item Receive List option.
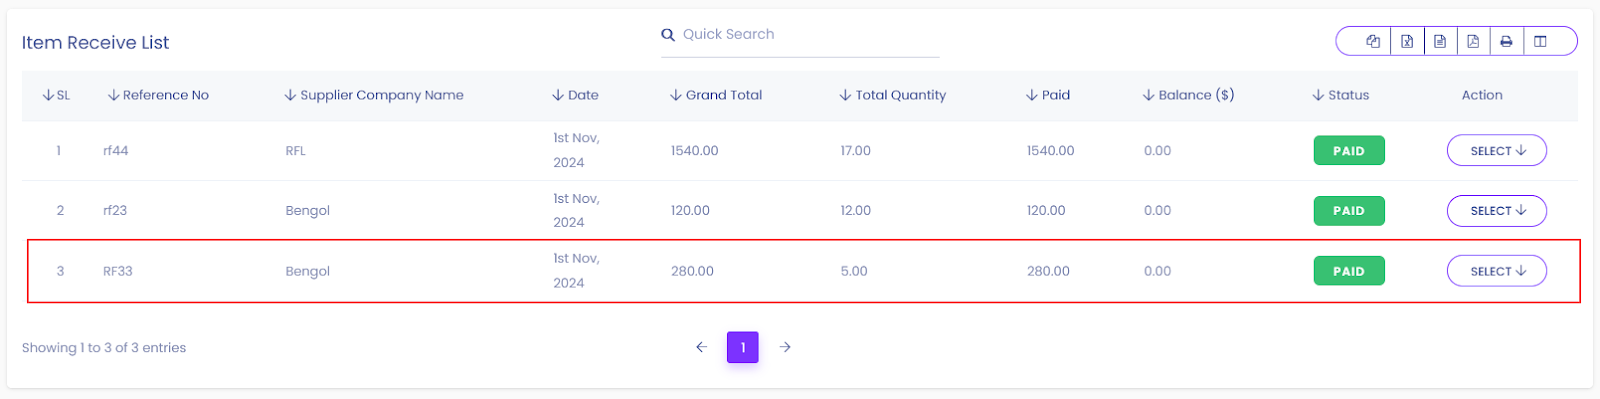
You also should see the new Item Receive in the Item Recieve List.