Chat Box
The Chat Box is the interface where users can type, send, and read messages. It usually includes features like a text input area, send button, emoji support, and a display of ongoing conversations.
You can view all the users you have messaged in the chat list. To send a message to a user from the chat list, follow the steps below:
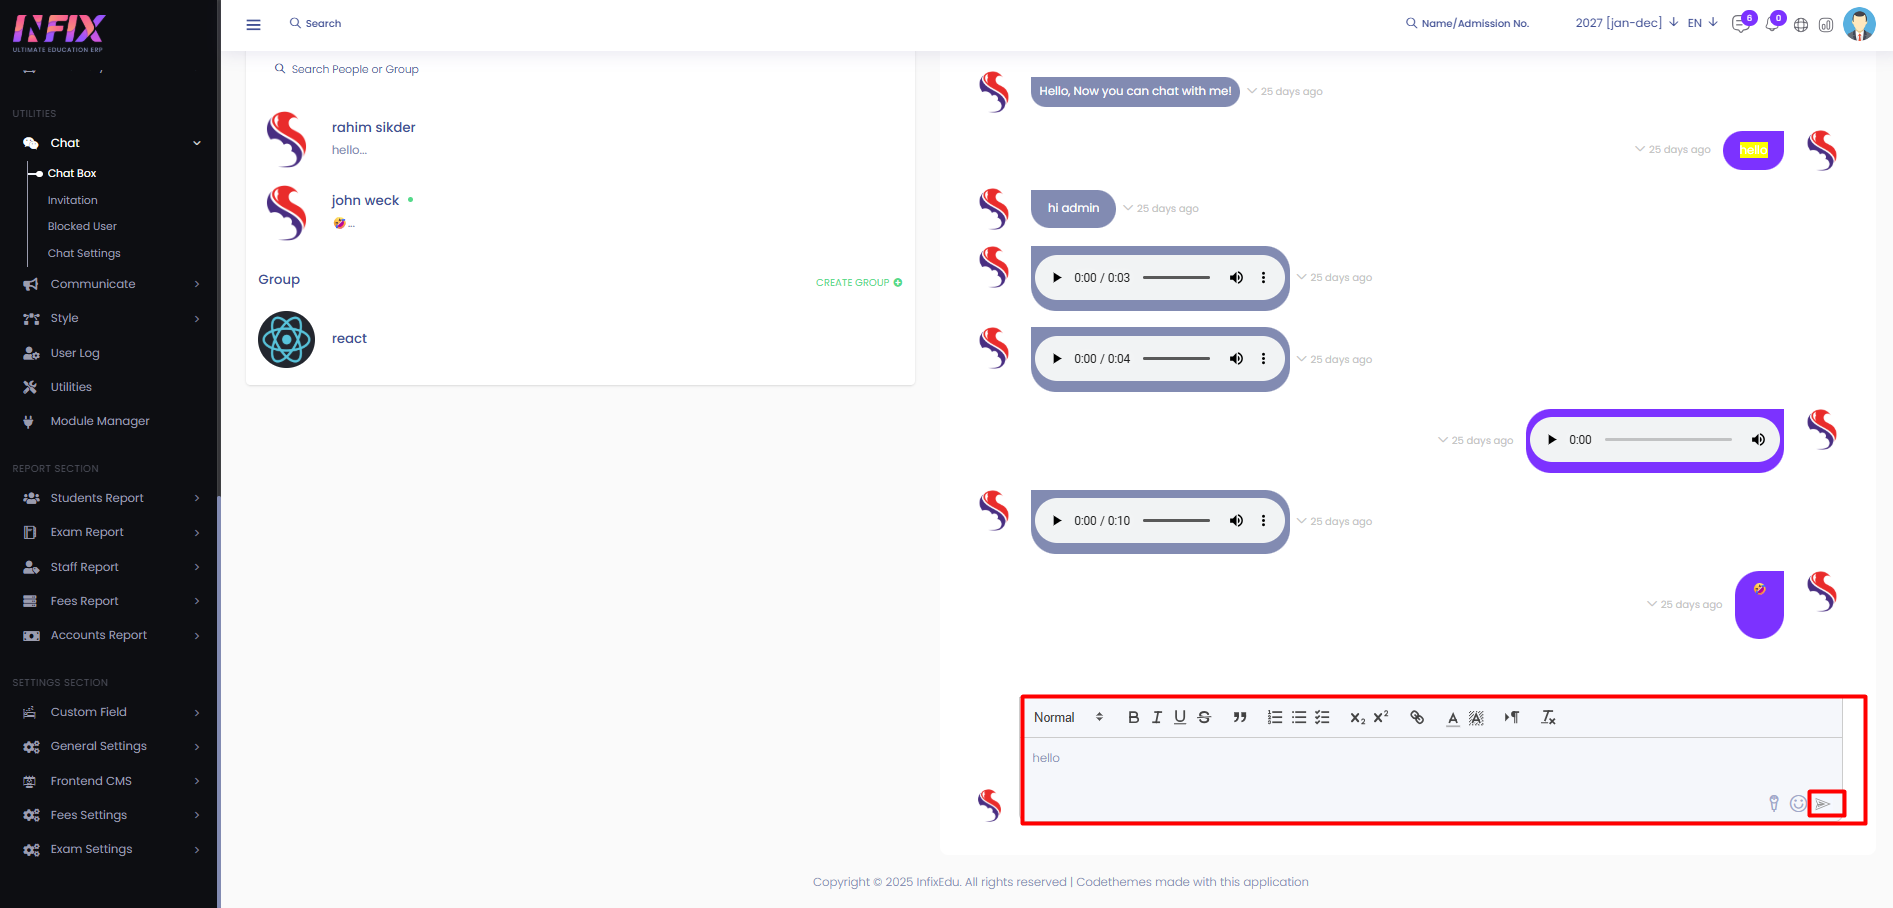
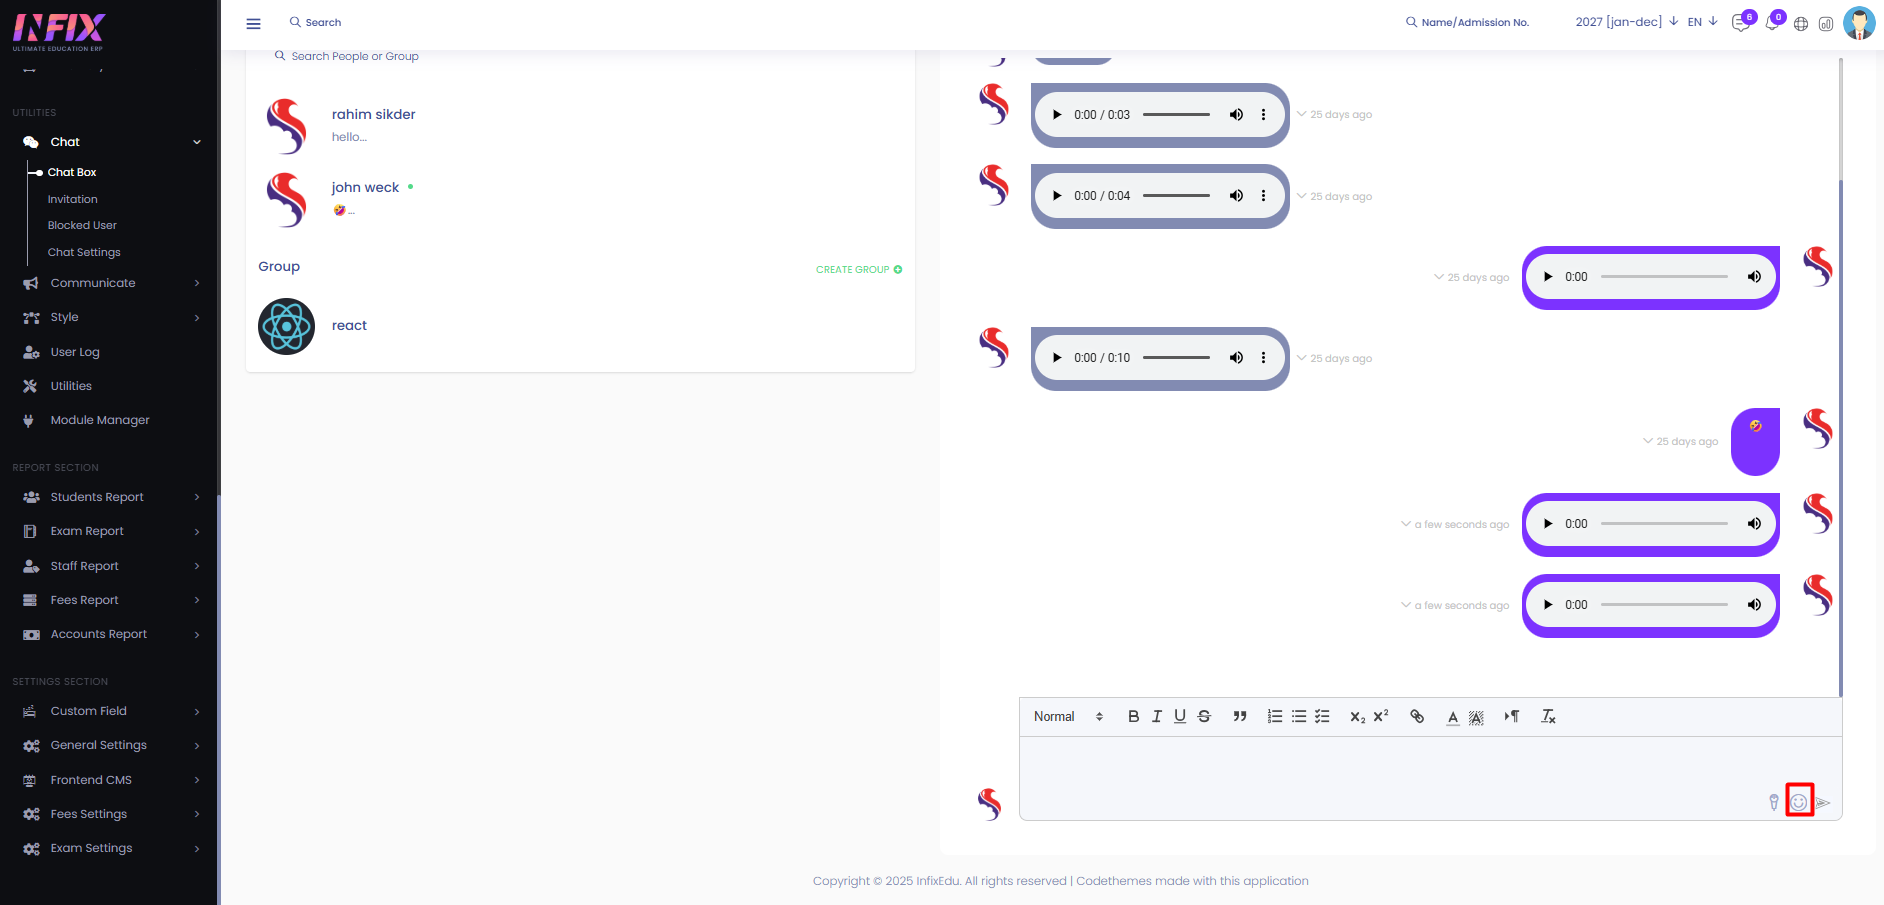
Select the user you want to message and click on their name. A chat box will appear on the right side, showing all previous conversations along with a text area. Type your message in the text area and click the send arrow to deliver your message to the user. Using this chat module you can send text messages, voice messages, files and also can send emoji’s.
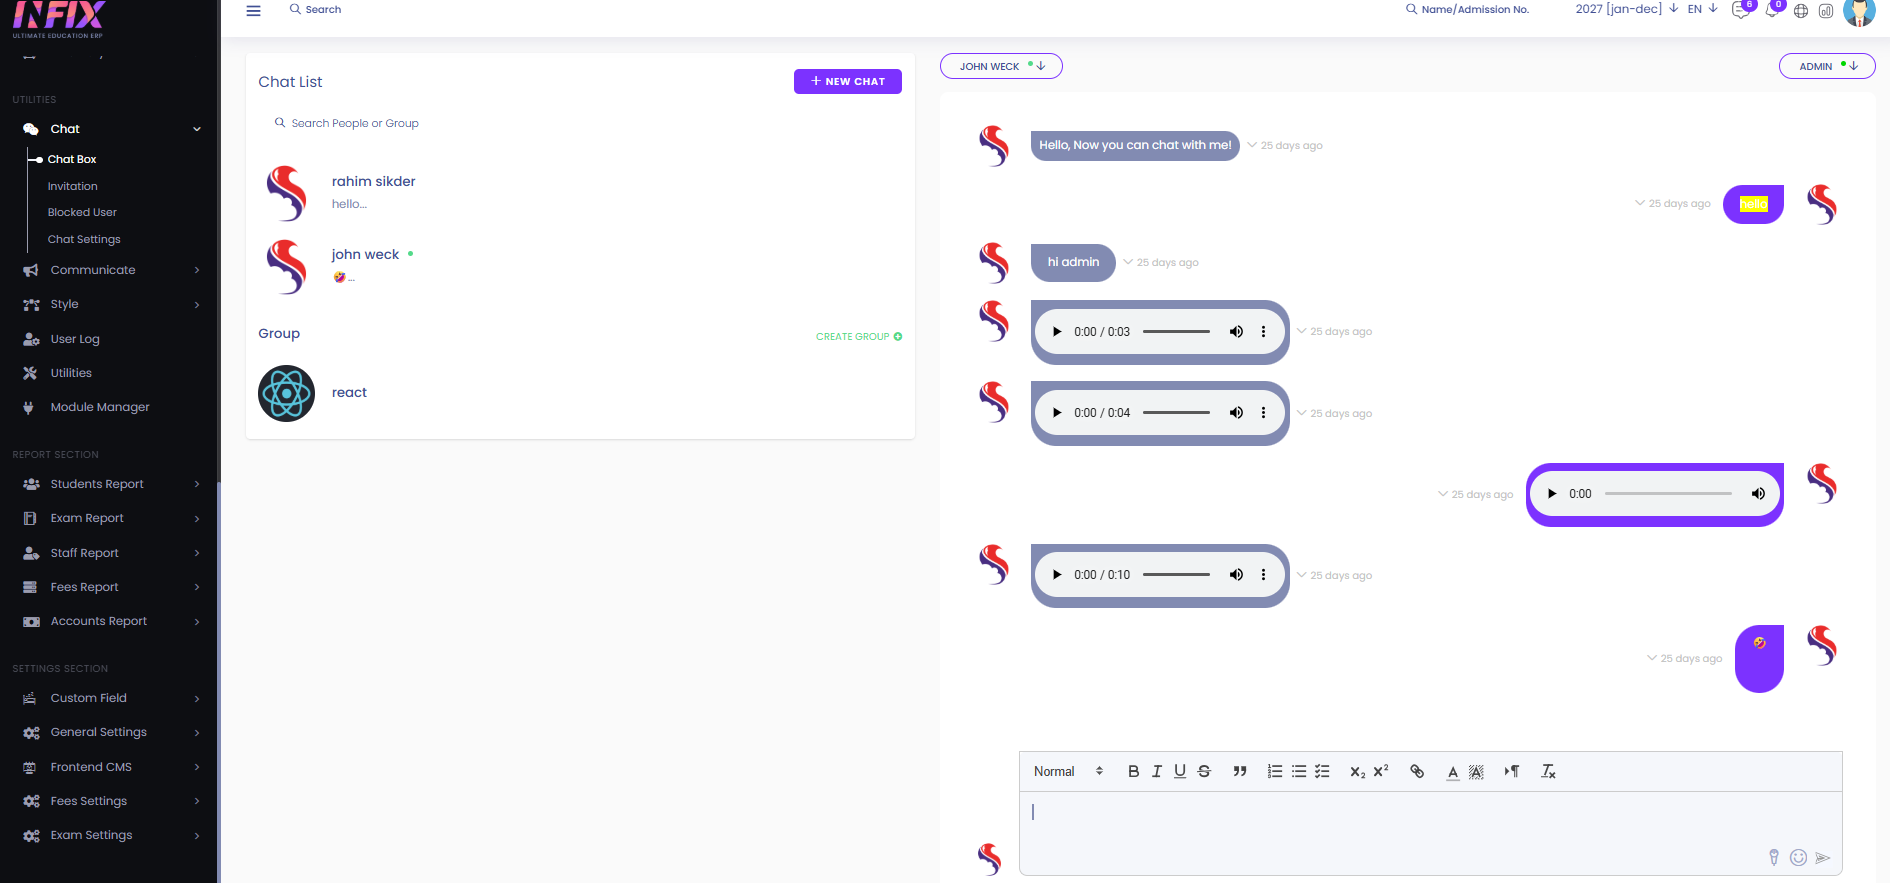
To send text messages, voice messages & emoji’s just follow the below steps:
Text Messages: Just type your message and click on send arrow.
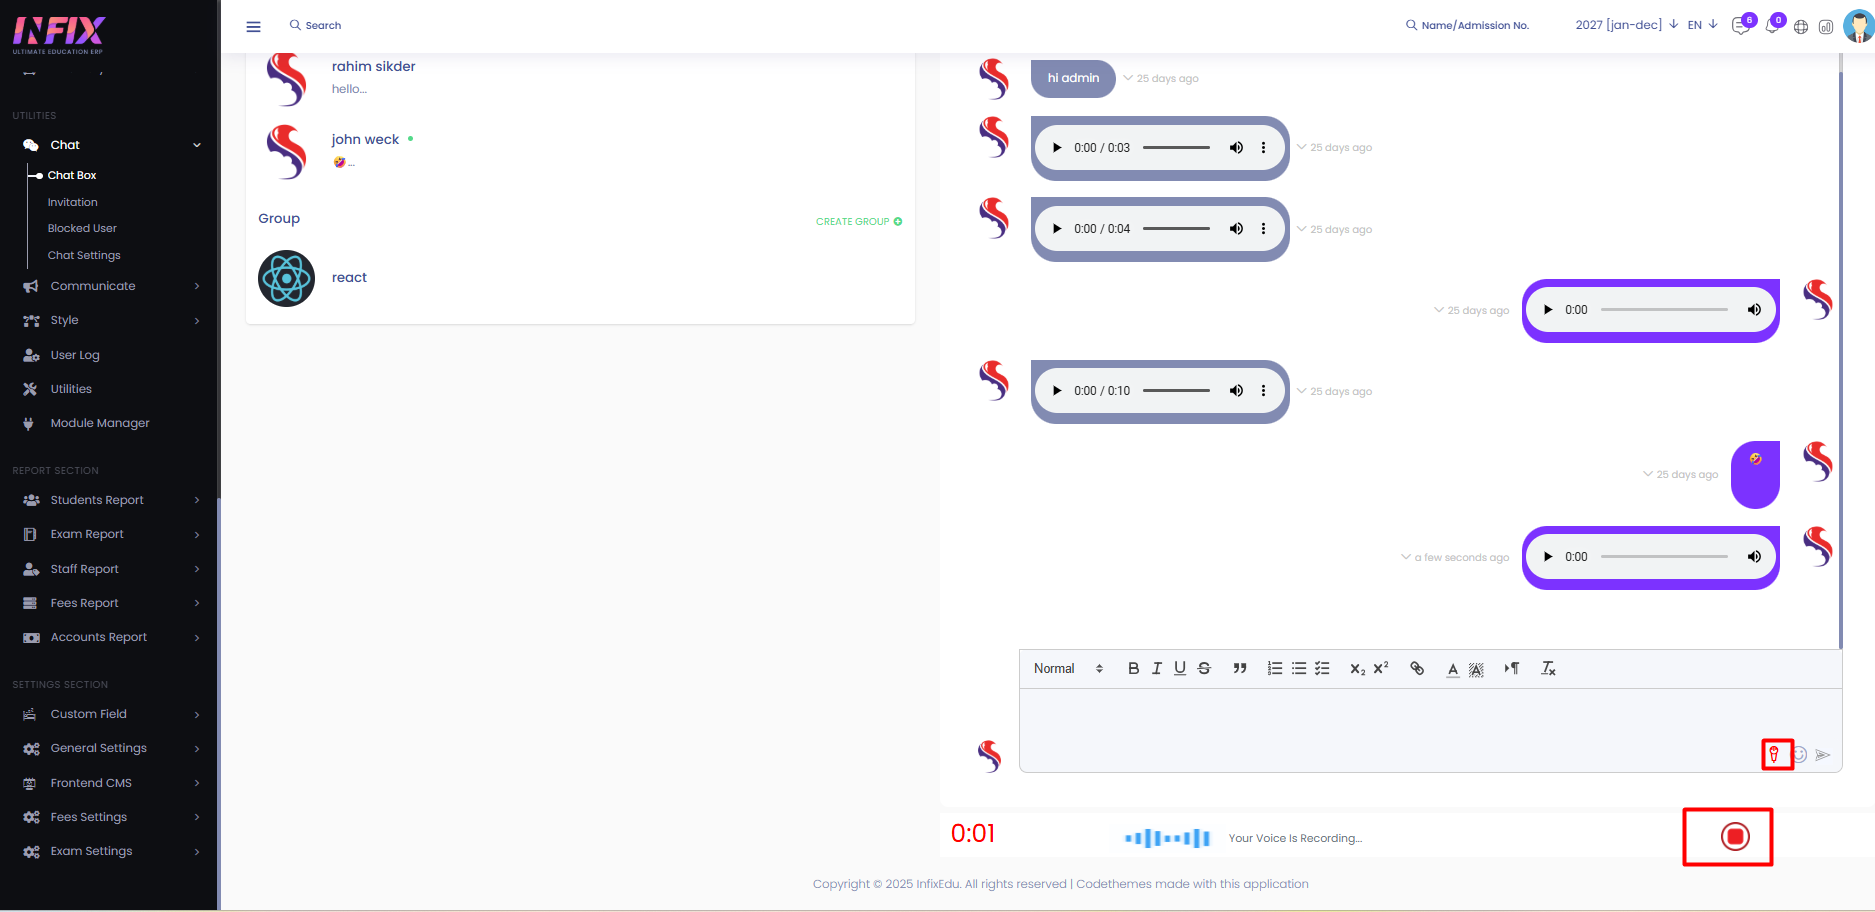
Voice Messages: Click on the mic icon in the text area to open the voice recorder. Record your message, save the recording, and it will be sent automatically as a voice message.
Emoji: Click on the emoji icon and send your emoji’s.
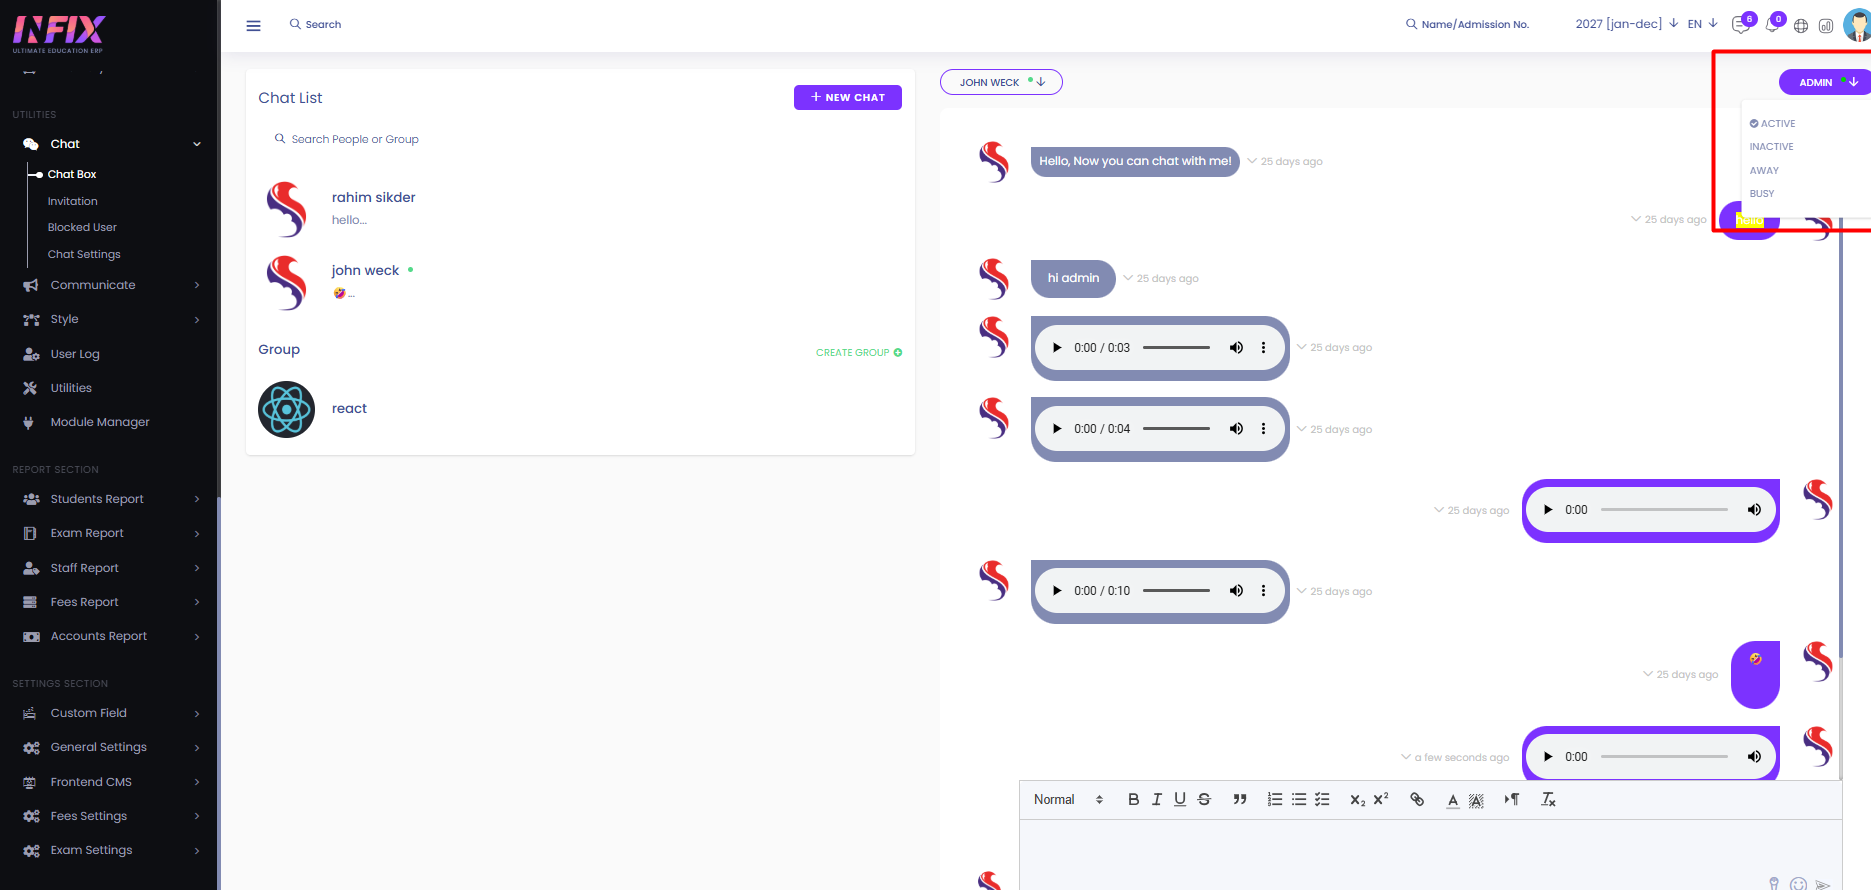
From here, you can set your status based on your preference. If you set it to Active, other users will see you as active. If you choose Busy, it will show as busy to others. Setting it to Inactive will display you as inactive, and selecting Away will show you as away to other users.
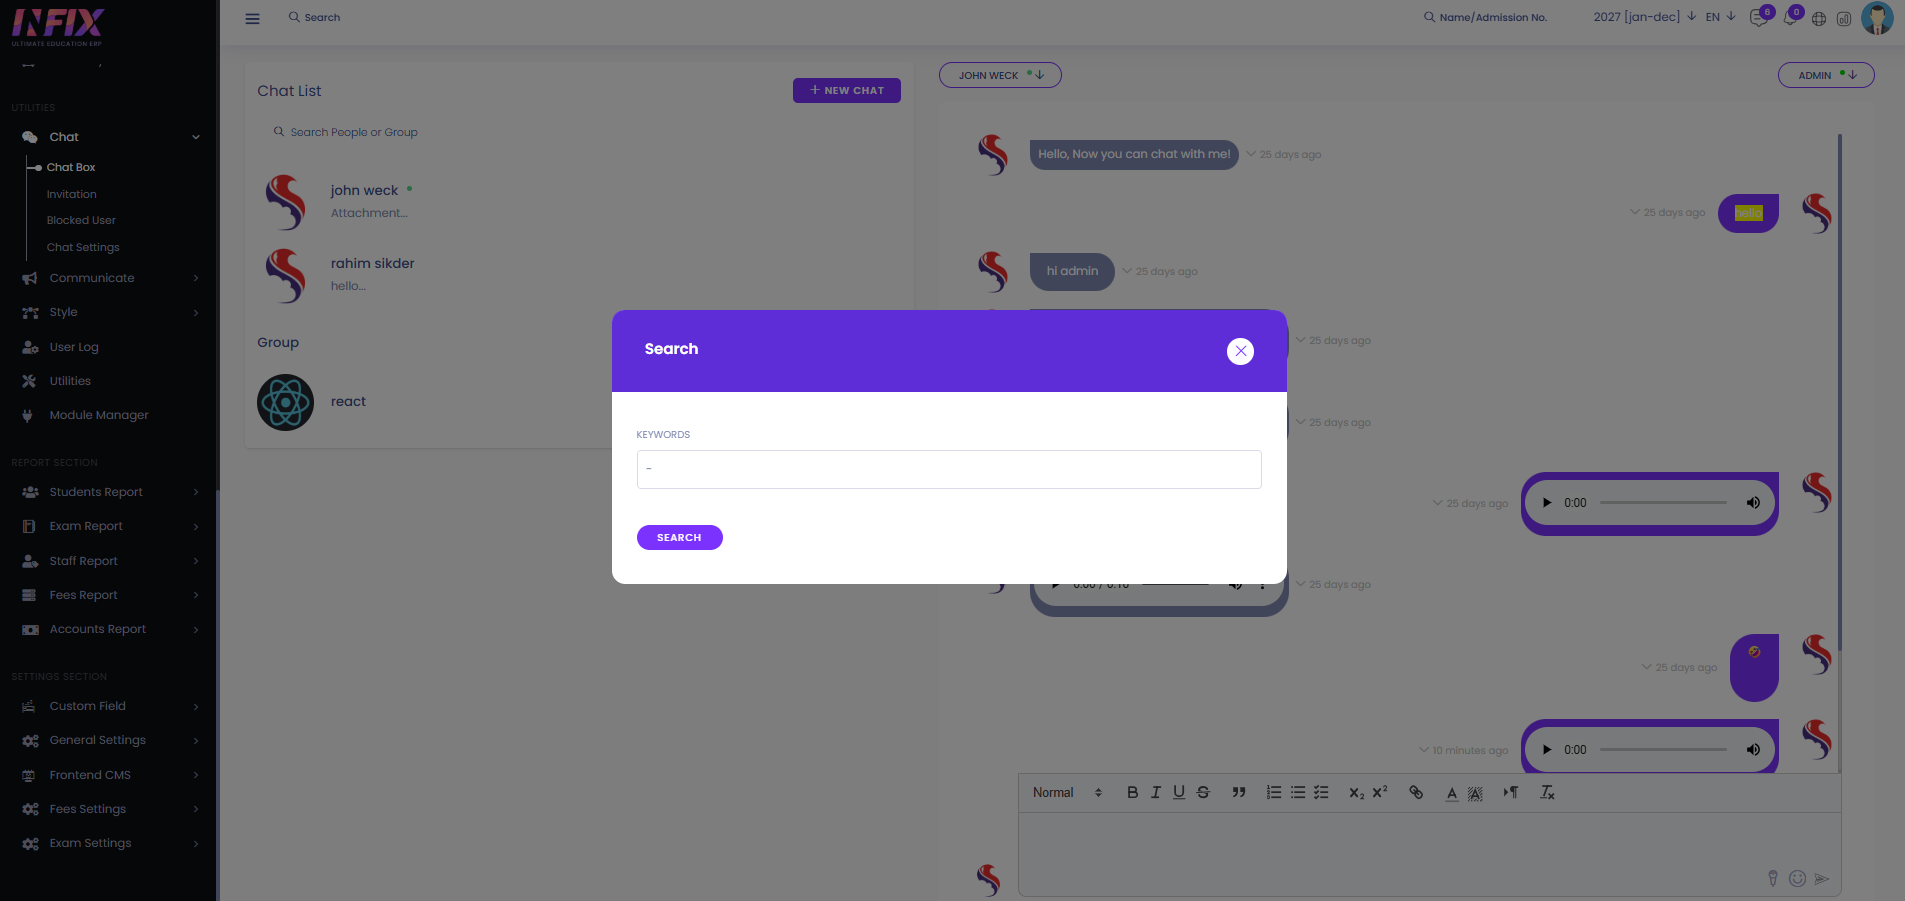
You can find any specific chat from the entire conversation by using the keyword search feature.
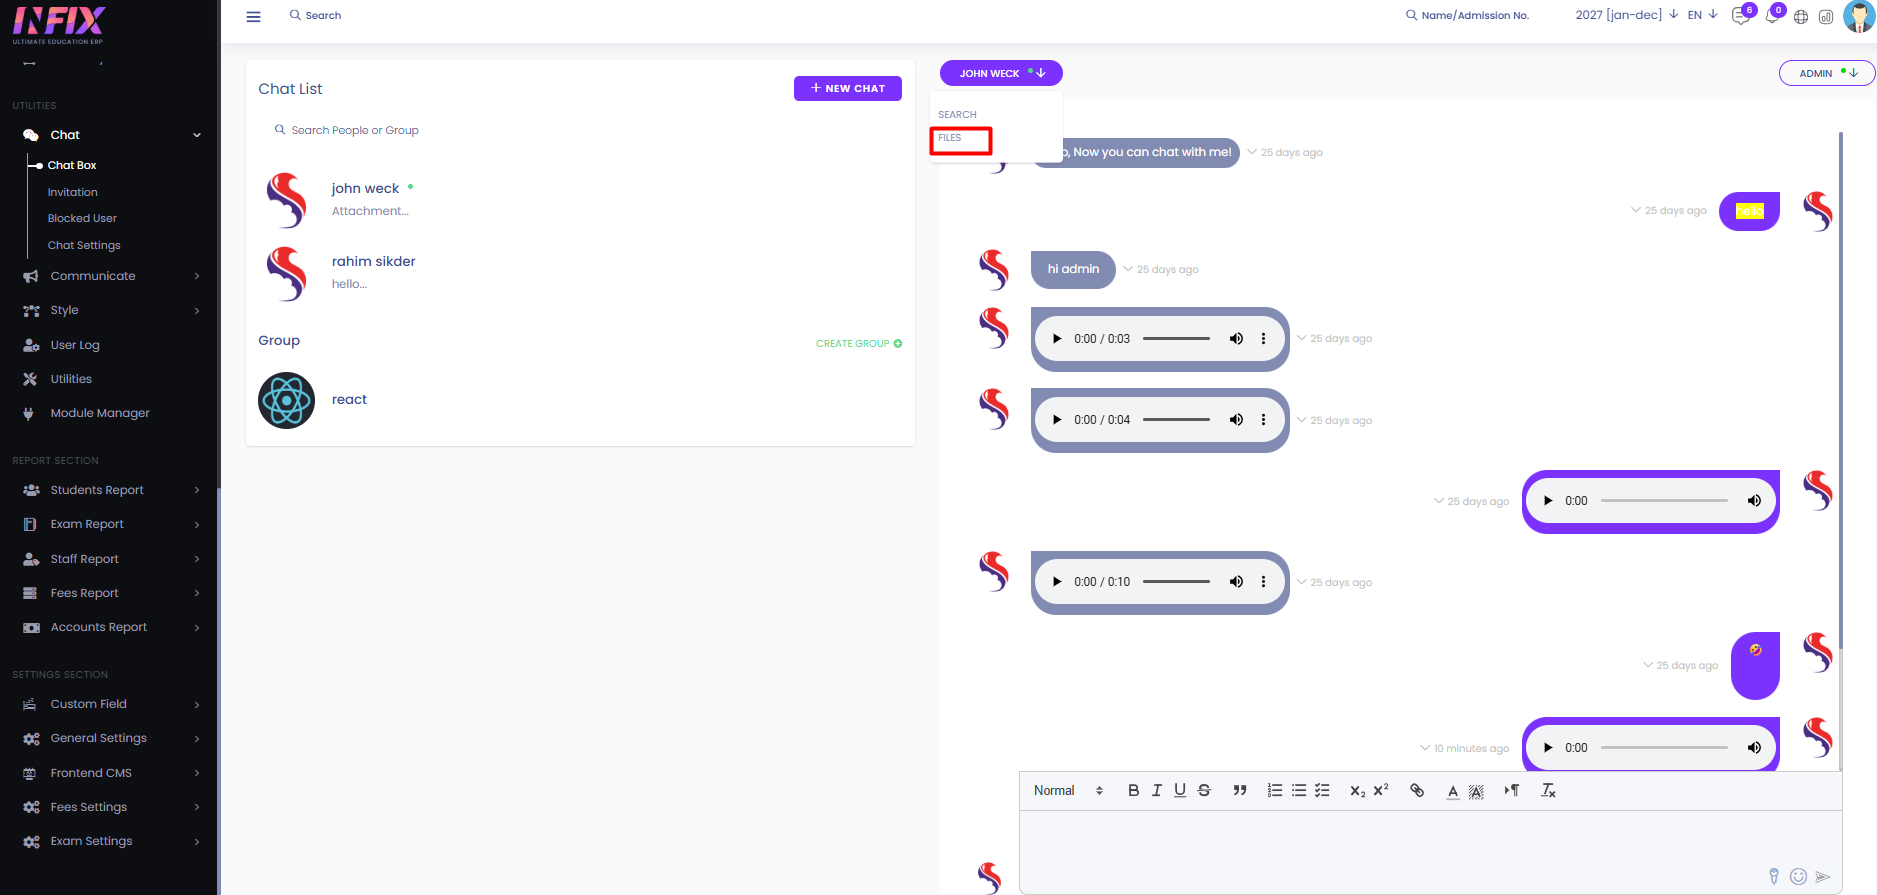
You can view all the files sent to you and easily access them here.
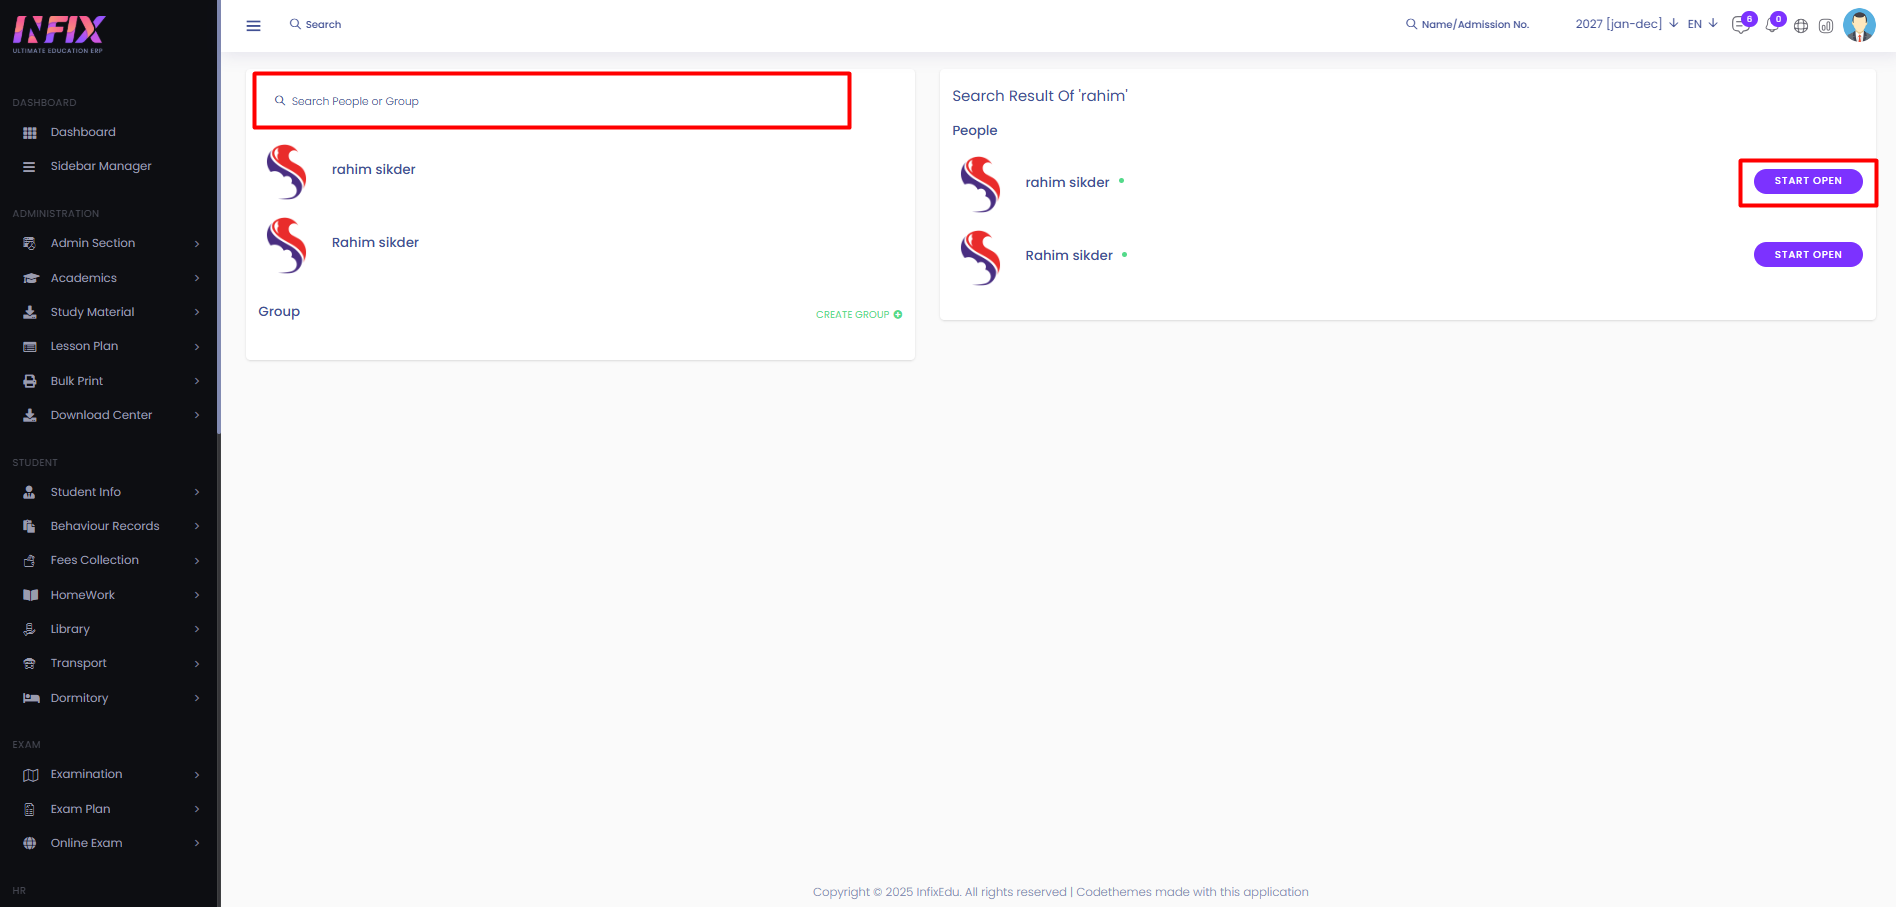
Search: If the user you want to message is not in the chat list, type their name in the search box and press Enter. The user will then be displayed. And click on start to send a message.
New Chat: Clicking on New Chat will display all users in a list on the right side. Select the user you want to chat with and click the Start button to begin the conversation.
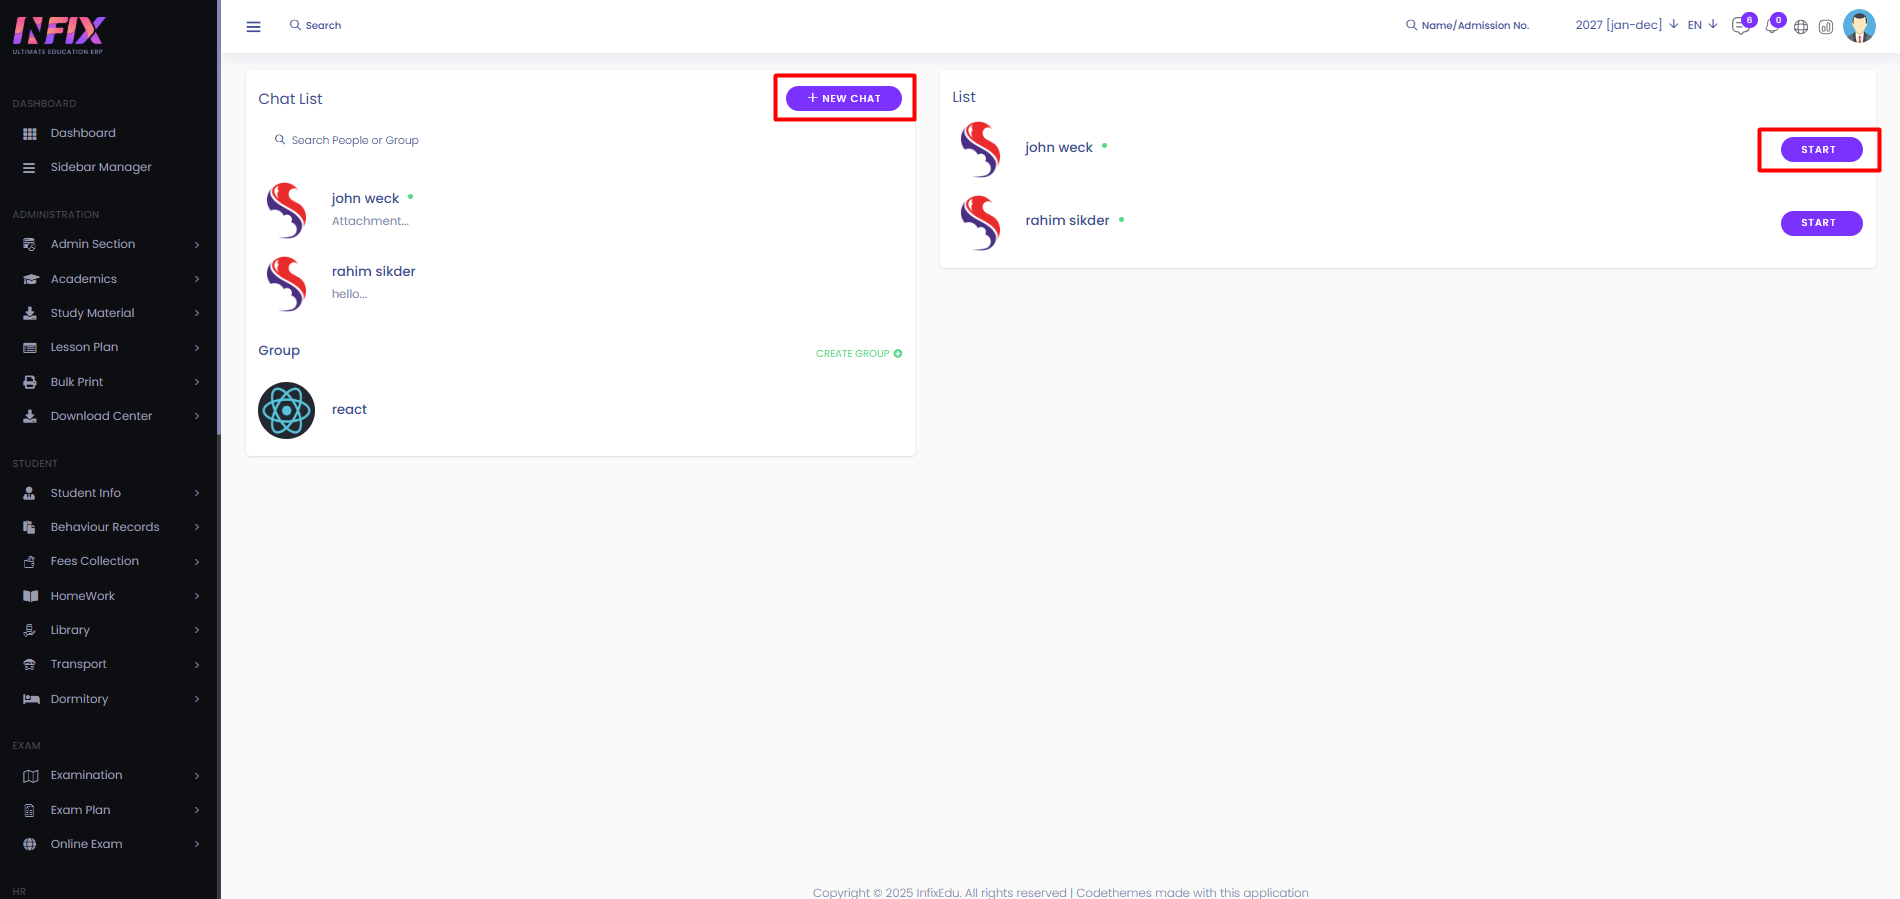
Group: To chat with multiple users at once, you can create a group. All users added to the group will be its members.

Create Group: To chat with group members, you first need to create a group. Follow the steps below:
Group Name: Enter a name for the group.
Group Photo: Browse and upload a photo for the group.
Members: Select and add members to the group.
Create Group: Click the button to finalize and create the group.

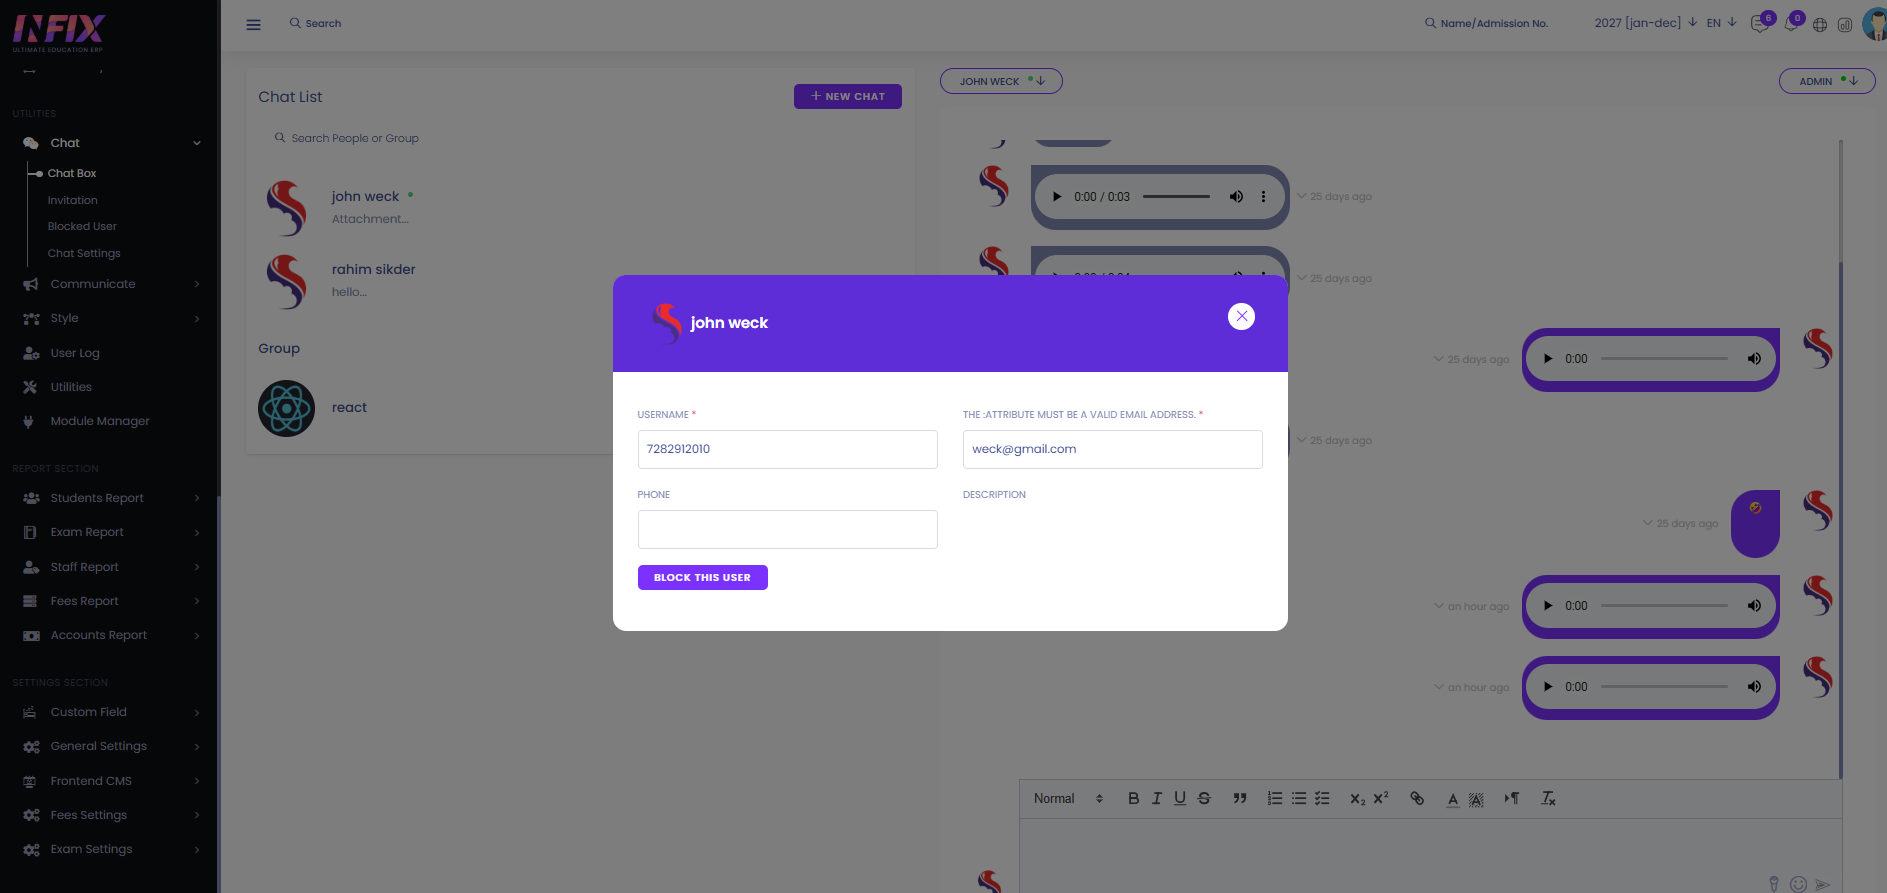
If you click on the user profile picture you can see the details about the user. Such as:
User Name: You can see the user name.
Email Address: You can see the email address of the user.
Phone Number: You can see the user phone number.
Description: You can see the user description.
Block This User: You can block the user by clicking the button.