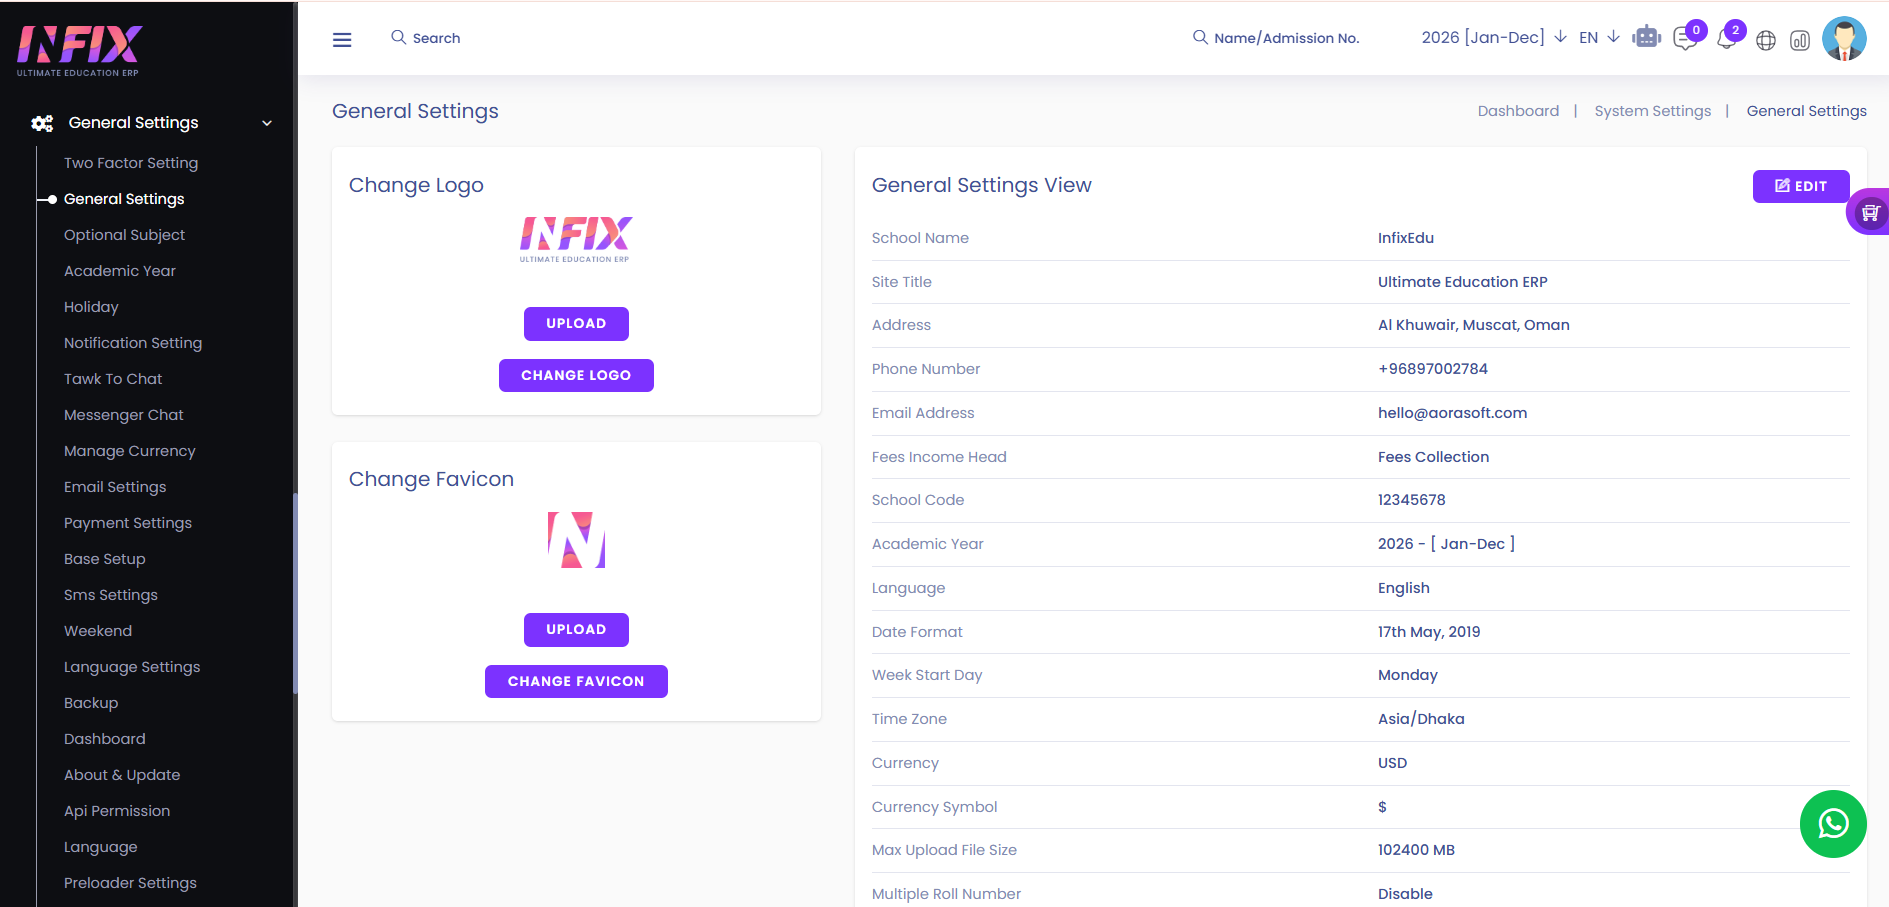
From here you can set all kinds of general settings.
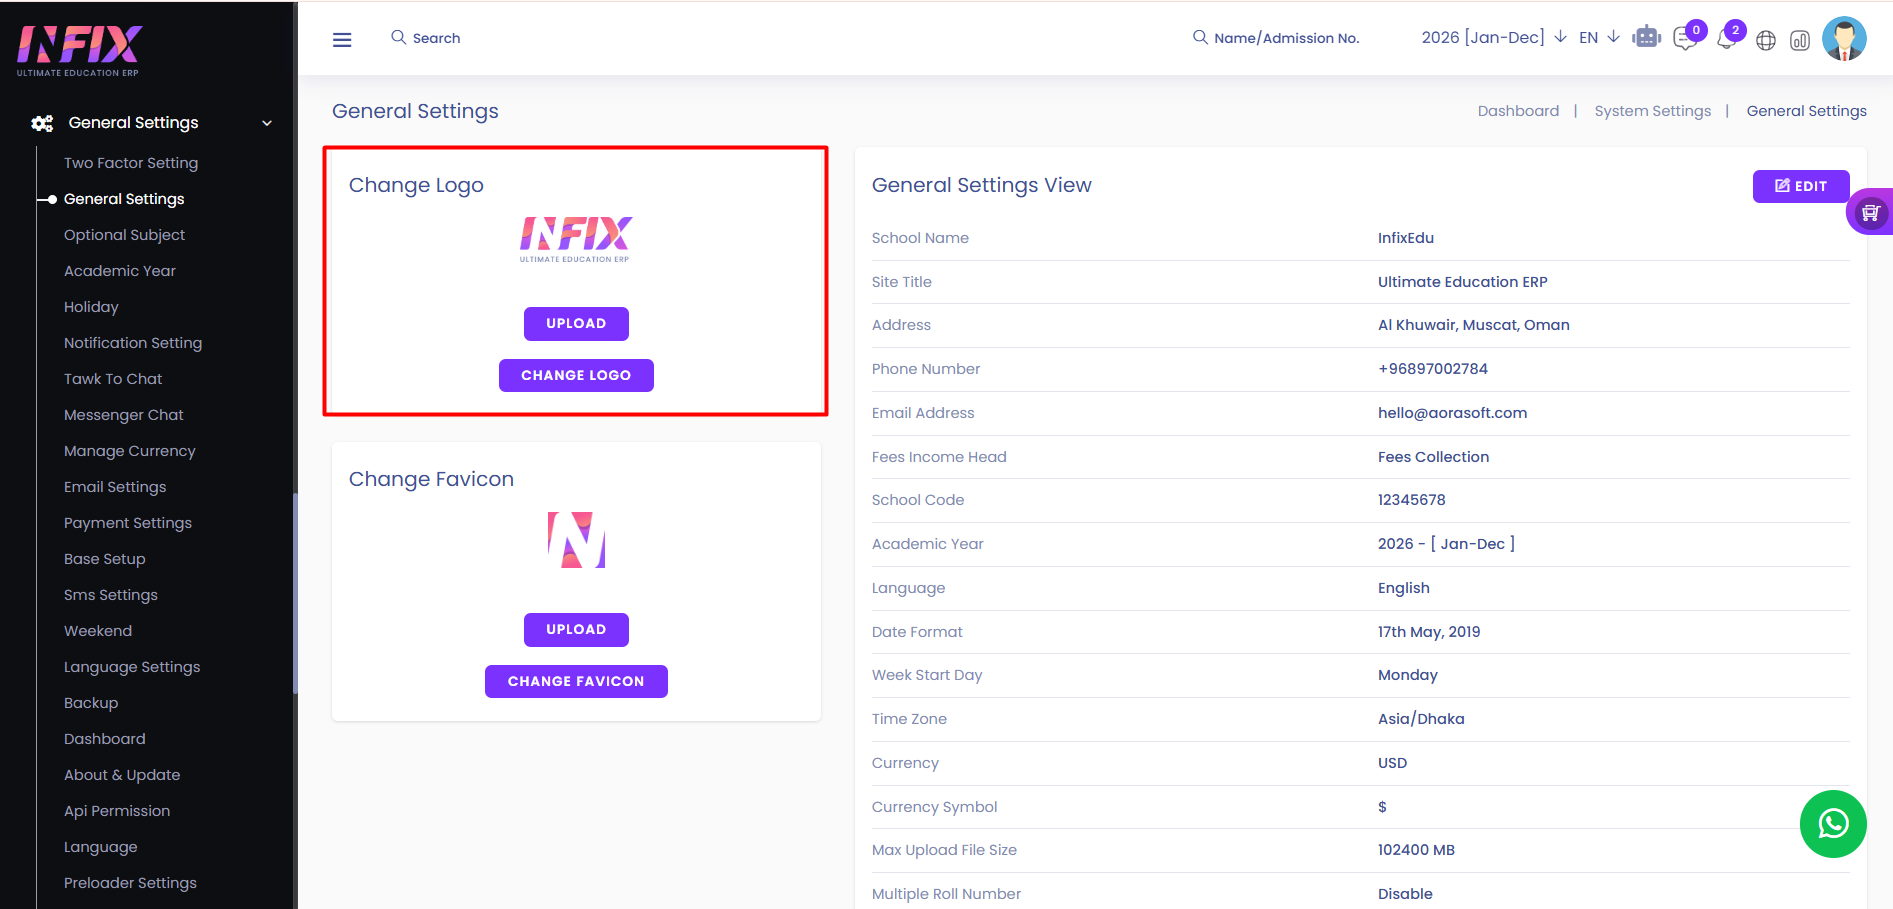
From here you can upload and change the website logo.
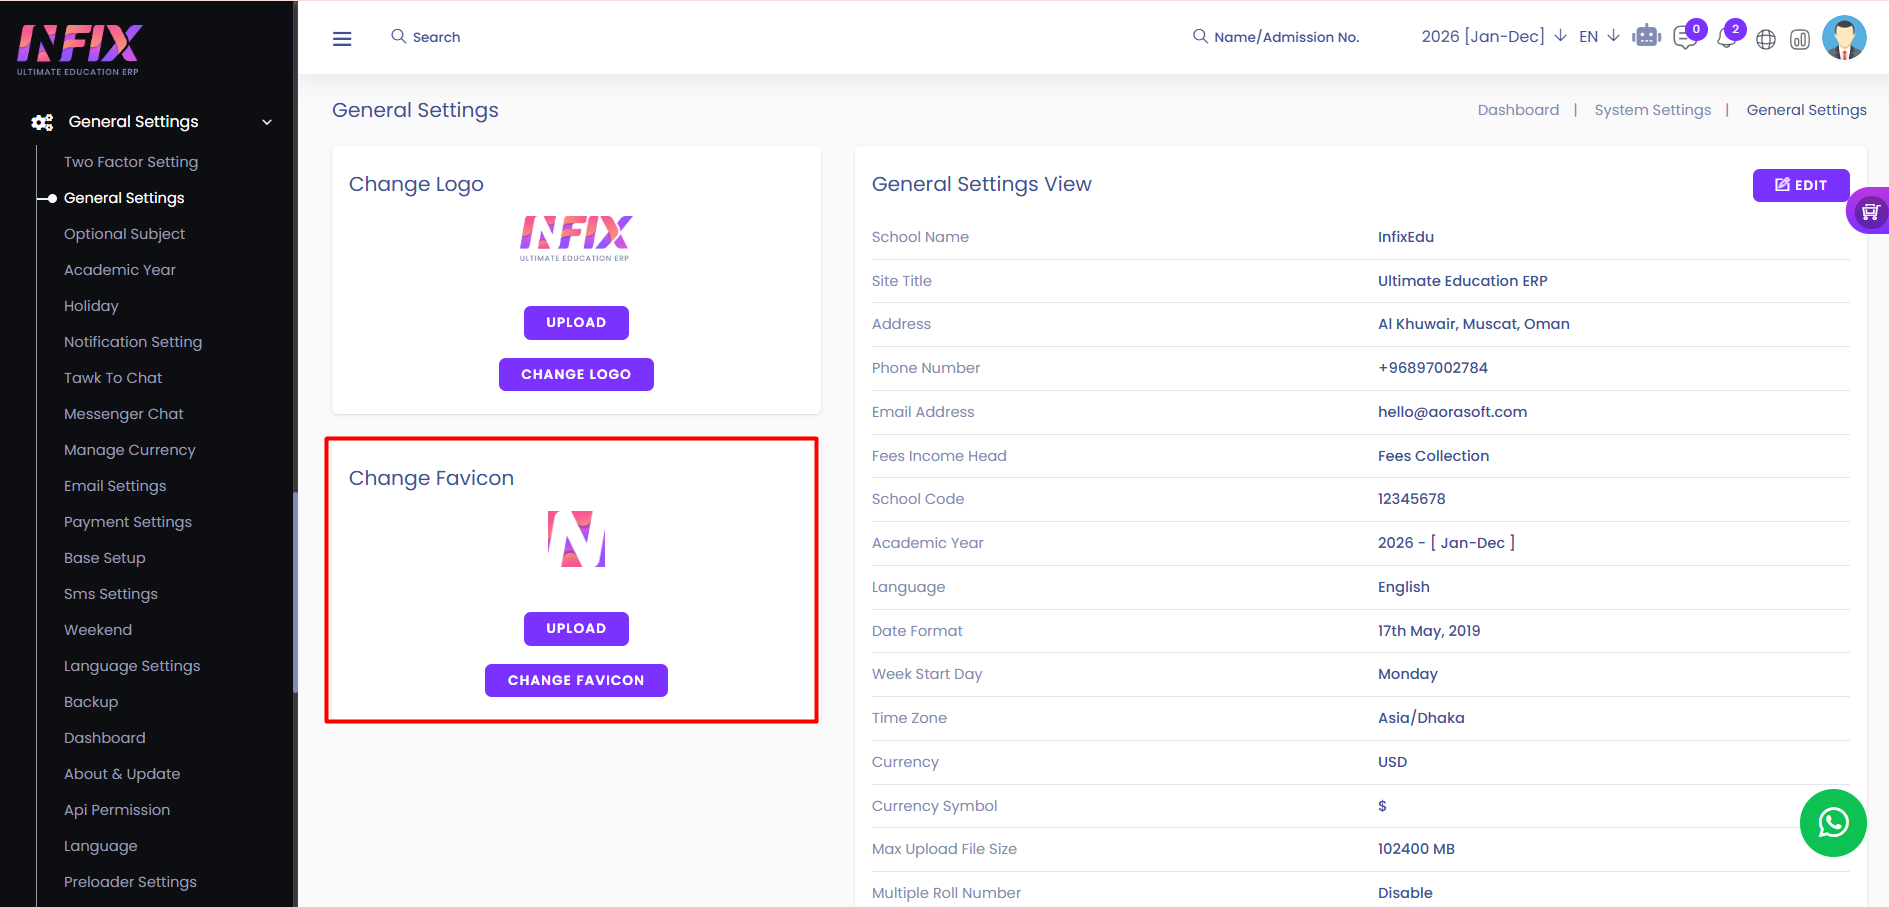
From here you can upload and change the favicon.
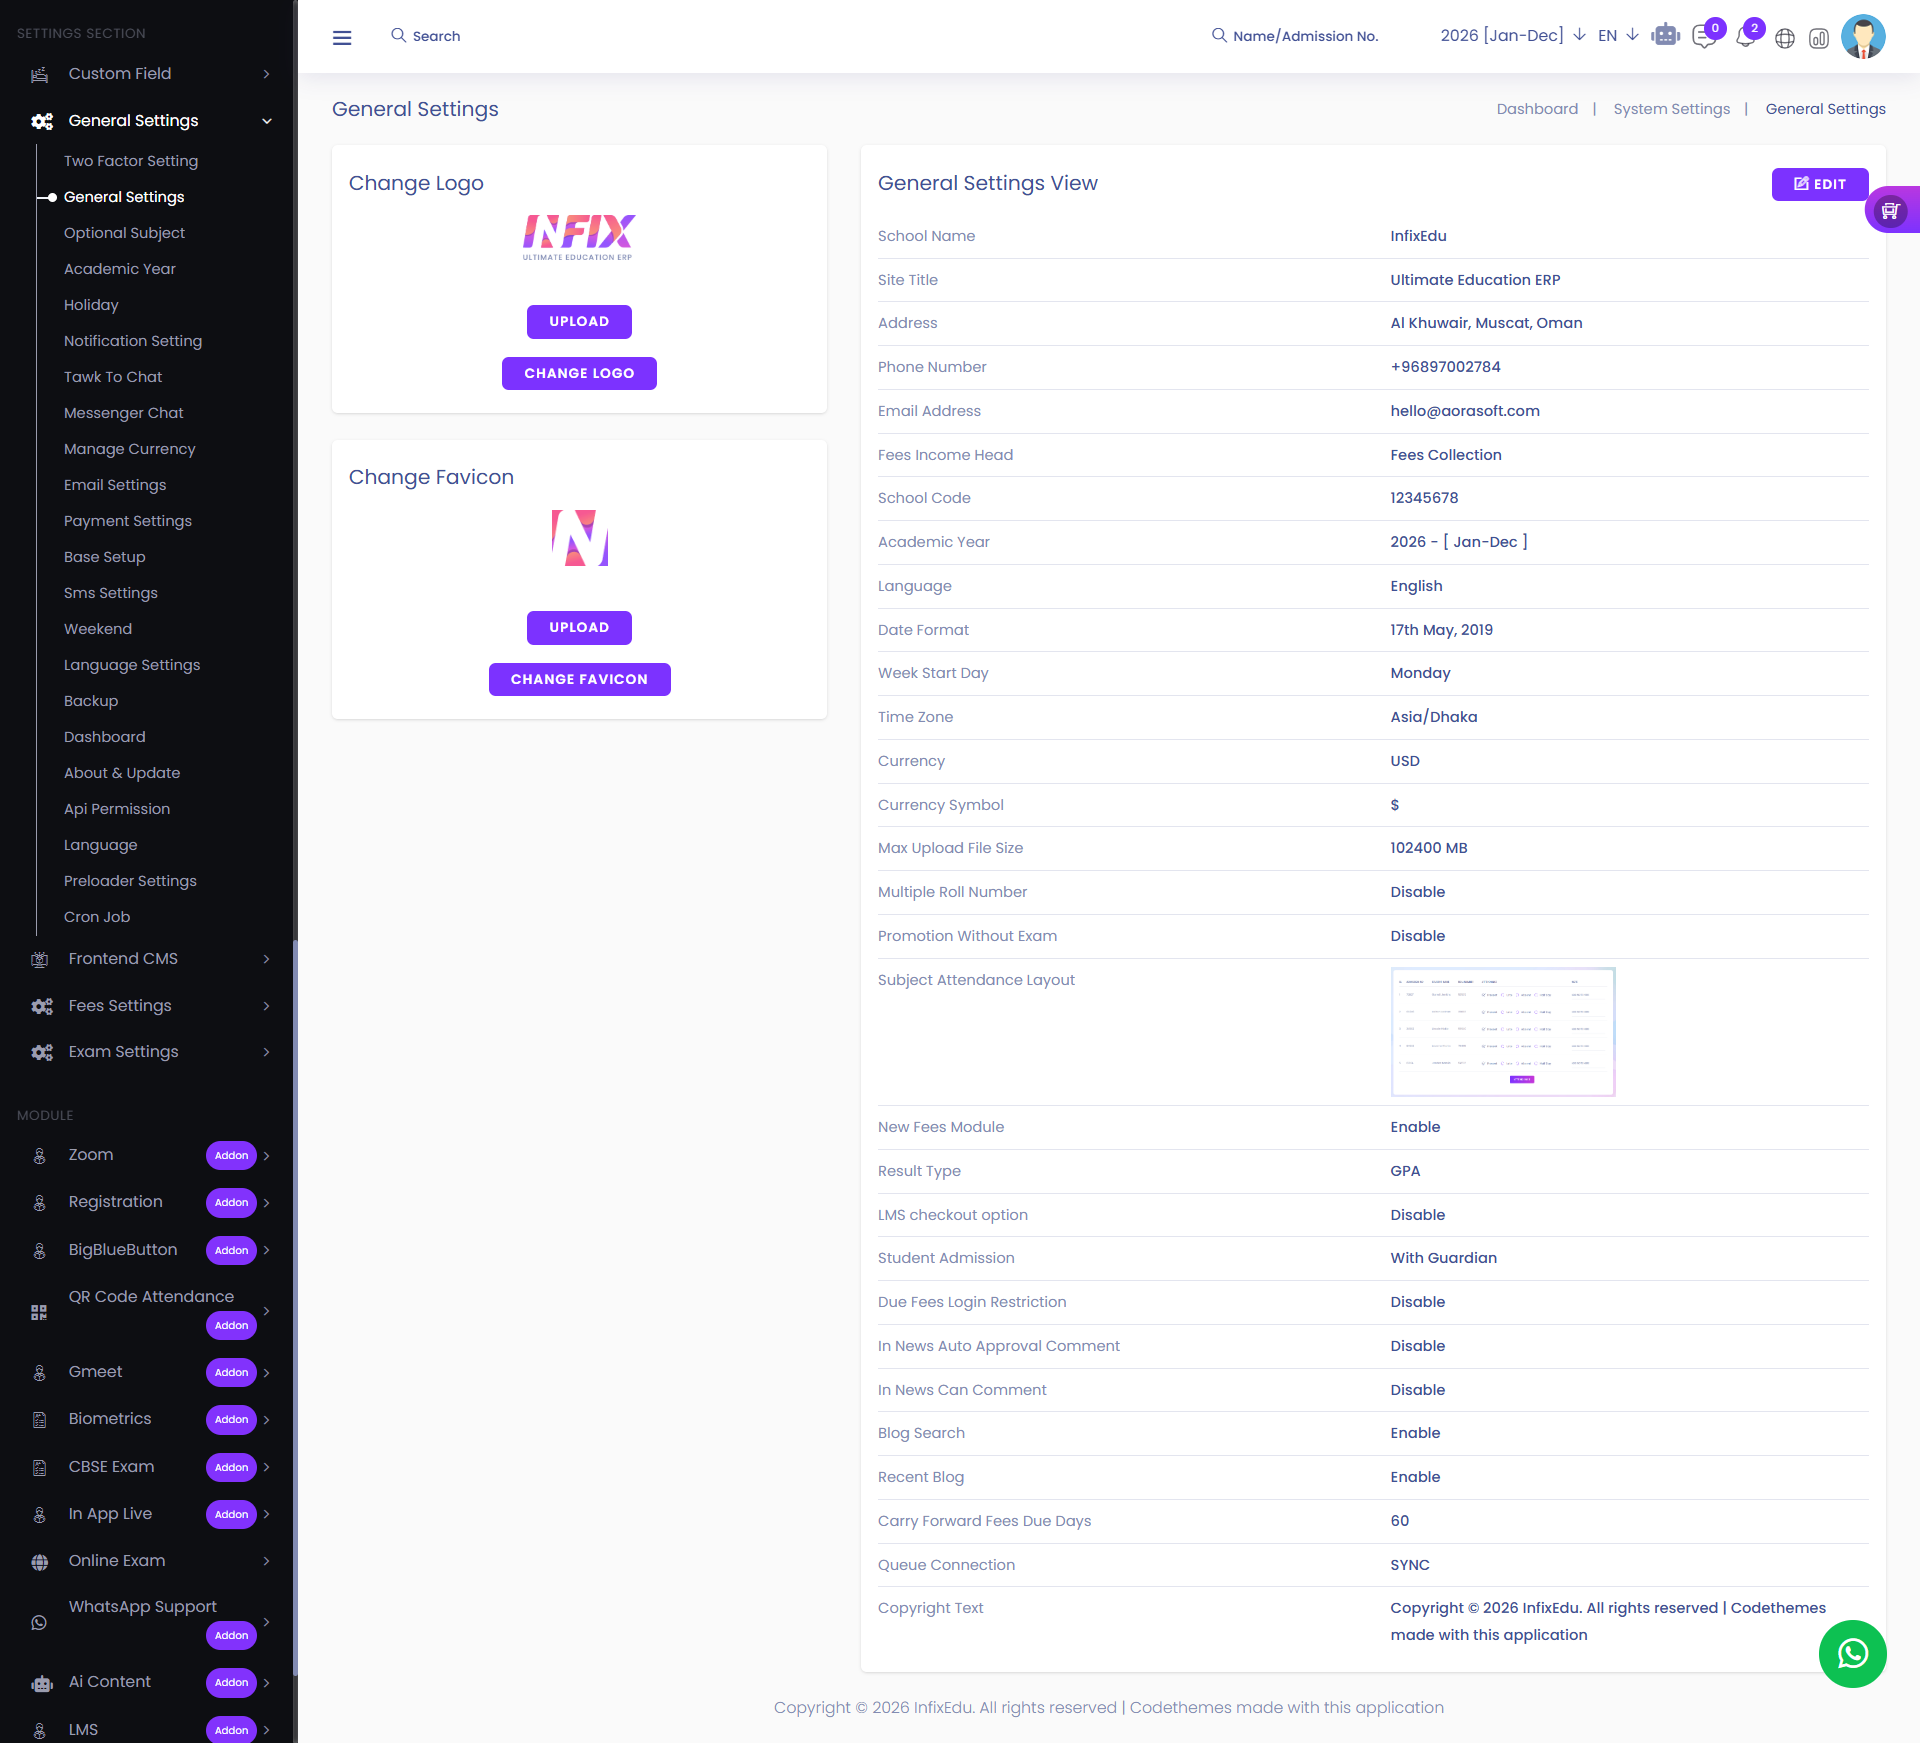
Here, you can view all general settings in detail, including the school name, site title, address, phone number, email address, fees income head, school code, academic year, language, date format, week start date, time zone, currency, and currency symbol. Additionally, you can manage settings such as the maximum upload file size, multiple roll numbers, promotion without exams, subject attendance layout, new fees module, result type, LMS checkout option, student admission, dues fee login restriction, news auto-approval for comments, news commenting permissions, blog search, recent blog settings, queue connection, and copyright text.
By clicking the edit button you can edit the general setting.
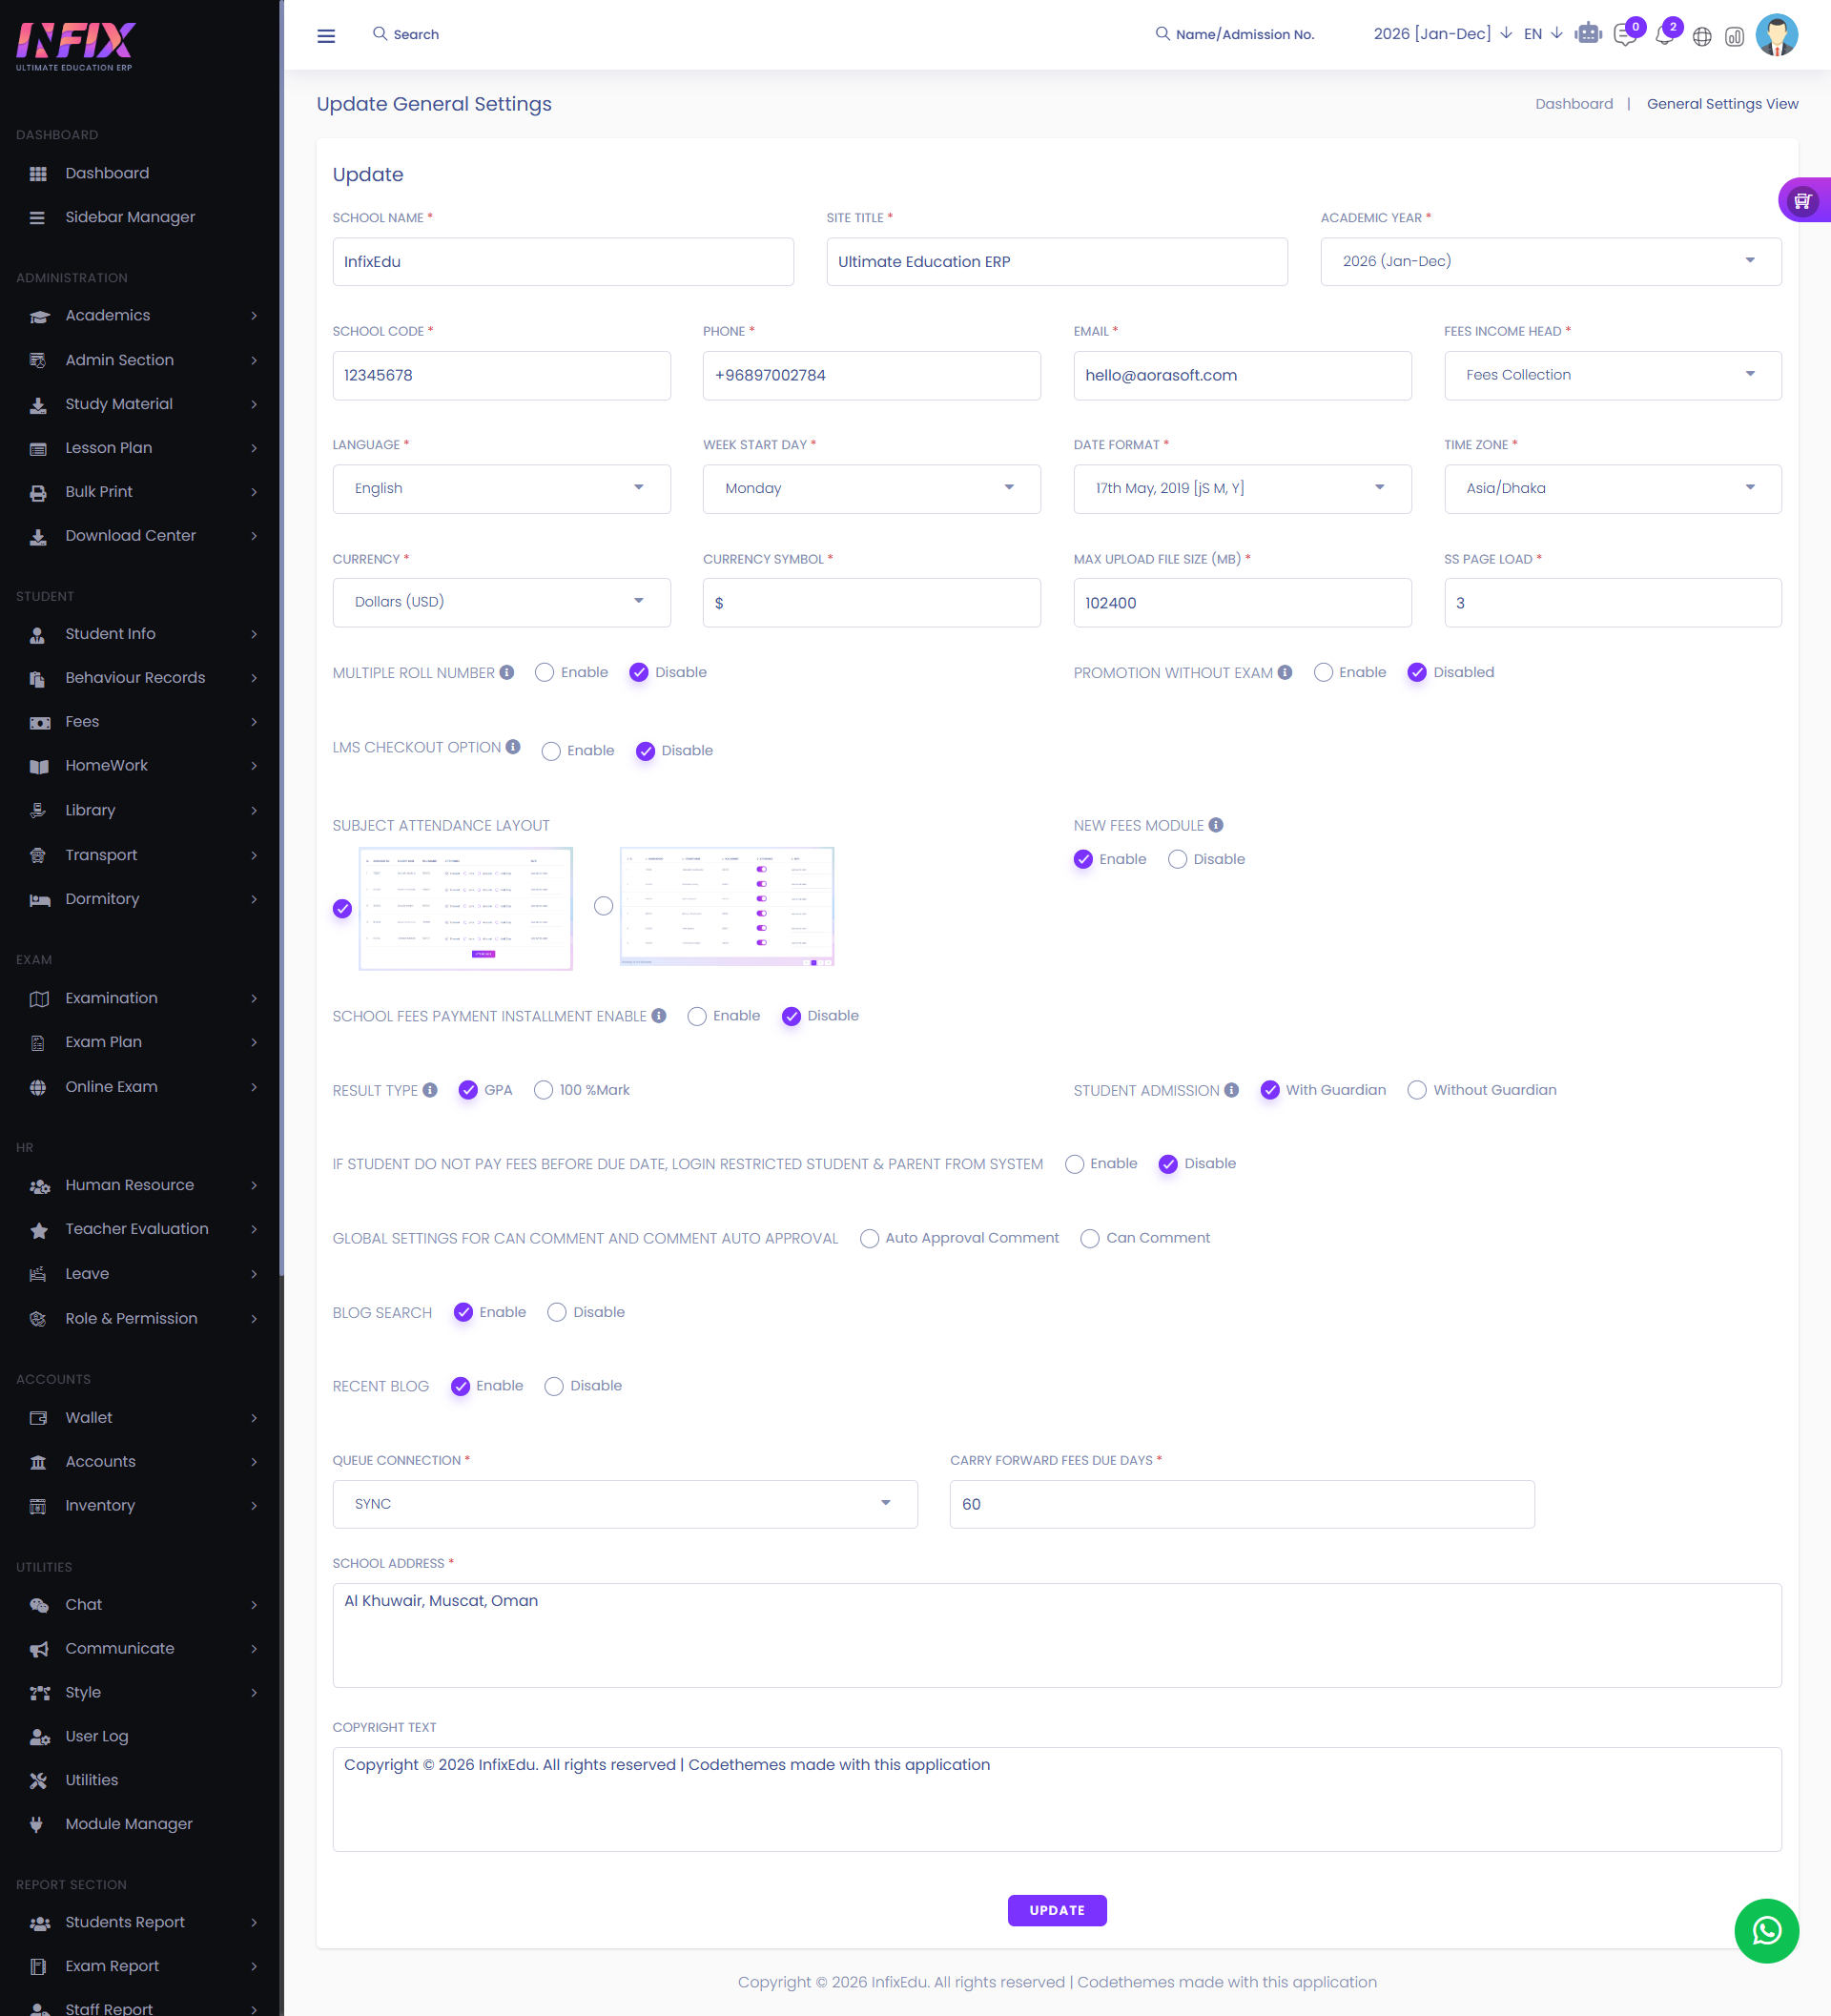
After clicking the edit button you can perform multiple actions. Such as:
School Name: From here you can set the name of the school.
Site Title : From here you can set the site title of the software.
Academic Year: This section allows you to set the academic year. When a new user logs into their account for the first time, a default academic year will be displayed. If you wish to create a new academic year, you can do so by navigating to the Academic Year section under Settings.
School Code: From here you can set the school code if there is any.
Phone Number: From here you can set the phone number.
Email: From here you can set the email address.
Fees Income Head: From here you can select the fees income head. Fees Income head which are those which are collected from the students.
Language: From here you can set your preferred language.
Week Start Day: This option lets you select the first day of the week. For example, you can choose Sunday, Monday, or any other day as the starting point of your weekly calendar.
Date Format: From here you can set up the date format.
Time Zone: This setting allows you to choose the time zone that matches your location or preference. It ensures that all system times—such as class schedules, event times, and logs are displayed correctly according to the selected time zone.
Currency: This setting lets you select the currency you want to use in the system. It will be applied to all financial transactions, such as fees, payments, and reports, ensuring consistency in monetary values across the platform.
Currency Symbol: After selecting the currency it’s symbol will show automatically here.
Max Upload File Size: This setting allows you to define the largest file size that can be uploaded to the system. It helps manage storage usage and ensures users do not upload files that exceed the allowed limit, maintaining system performance and reliability.
SS Page Load: This refers to the time or process it takes for the Staff/Student (SS) page to fully load in the system. A smooth SS page load ensures users can quickly access relevant information such as profiles, attendance, results, or other details without delays. From here you can set the ss page load.
Multiple Roll Number: This option allows assigning more than one roll number to a student if needed. It can be useful in cases where a student is enrolled in multiple sections, classes, or programs, helping to manage and track their records separately under each assigned roll number. From here you can enable or disable the multiple roll number.
Promotion Without Exam: This setting allows students to be promoted to the next class or level without taking or passing an exam. It is useful in special cases such as automatic promotion policies, emergency situations, or specific academic decisions where exams are not required for advancement. From here you can enable/ disable the promotion without an exam.
New Fees Module: If you enable the system then you can access the new fees module for fees related works. If you enable the module then you can see a menu called “Fees” in the sidebar. And if the new fees module is not active then you can see the system default fee system called “Fees Collections”
School Fees Payment Installment Enable: This setting allows you to enable or disable the option for students or parents to pay school fees in multiple installments instead of a single payment. Also note that the system will work properly for Old fees.
Result Type: This setting allows you to choose how student results will be calculated and displayed. The available options are:
GPA: Results are shown using the Grade Point Average system, where marks are converted into grade points based on a grading scale.
100% Mark: Results are shown as raw scores out of 100%, displaying the exact marks obtained by the student.
Student Admission: This setting lets you choose how student admission information is recorded. The available options are:
With Guardian: Admission requires guardian details to be provided, ensuring a responsible contact person is linked to the student.
Without Guardian: Admission can be completed without entering guardian information, useful for cases where guardian details are not immediately available.
If Student Do Not Pay Fees Before Due Date, Login Restricted Student & Parent From System:
This setting controls whether students and parents are allowed to log in to the system if fees are not paid by the due date.
Enable: If enabled, the system will restrict access for both students and parents until the outstanding fees are paid.
Disable: If disabled, students and parents can continue to log in even if fees remain unpaid.
Global Settings for Can Comment and Comment auto Approval:
This setting controls the overall behavior of the comment system across the platform. It includes:
Can Comment: When enabled, users are allowed to post comments where applicable—like assignments, courses, or announcements.
Auto Approval Comment: When enabled, comments will be published automatically without requiring manual review or approval. If disabled, comments will need to be reviewed and approved by an admin or moderator before becoming visible.
Blog Search: From here you can enable or disable the search option for blogs.
Recent Blog : From here you can enable or disable the recent blog options.
Queue: From here you can set up your queue. If you select the database as a queue then use the below cron.
School Address: From here you can set up the school address.
Copyright Text: From here you can set the copyright text.
Update: Click to update your settings