Download Python:
First you need to download python to run the desktop application. For download python goto https://www.python.org/downloads/ and click Download Python (ref: 1.1).
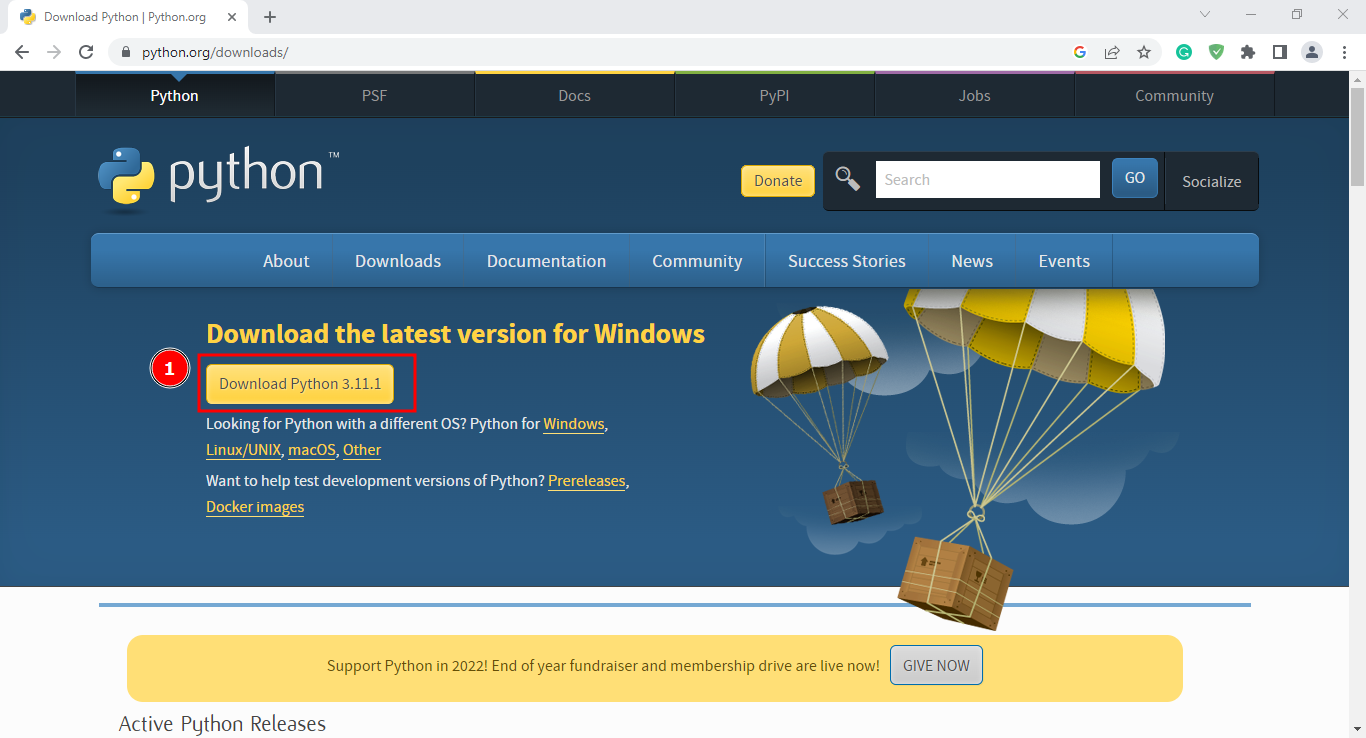
figure: 1
Install Python:
Step 1:
Go to your download folder. You will see the python installer (ref 2.1). Double-click the installer.
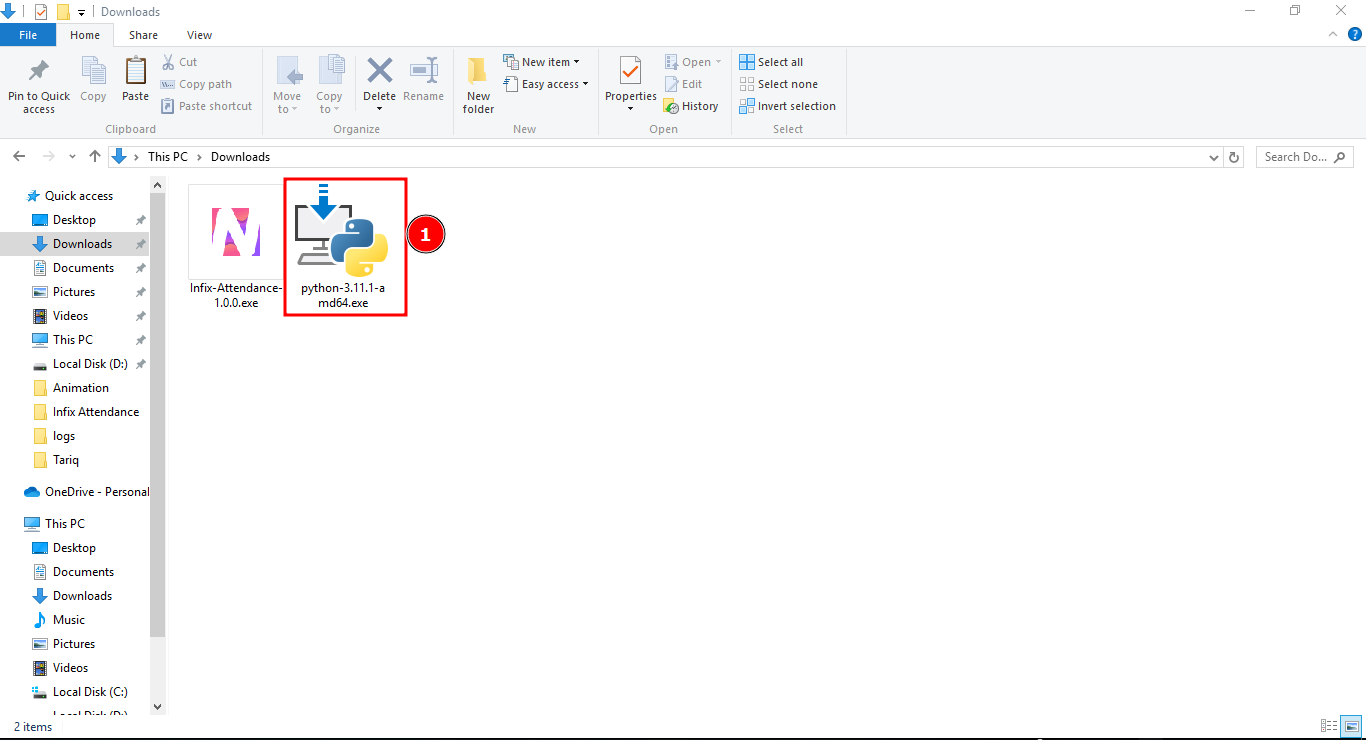
figure: 2
Step 2:
After double-click the installer you will see a screen like (figure: 3).
First check add python.exe to PATH (ref 3.1) and then click Install now.
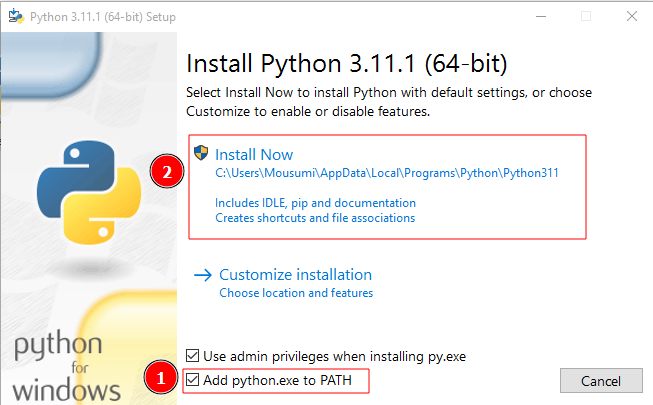
figure: 3
Step : 3
Click Yes (ref 4.1) to go to next step.
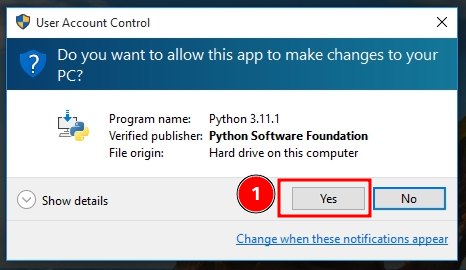
figure: 4
Step 4:
After success full installation, click the close button. (ref 5.1)
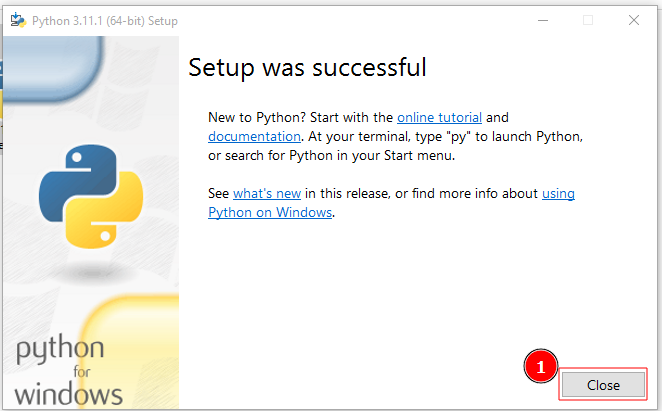
figure: 5
Install Required Modules:
After install python you need to install required modules. For installing required module, open your cmd and run the below command.
pip install pickledb pyzk PyQt5
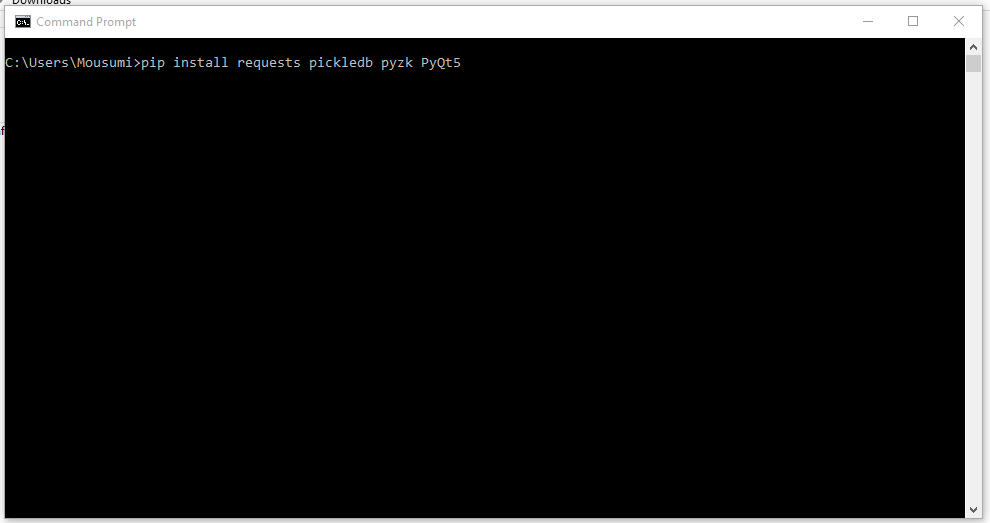
figure: 6
Install Desktop Application:
Step 1:
After download, the Infix Attendance Installer, Go to downloaded folder and double click on the Infix attendance installer (ref: 7.1)
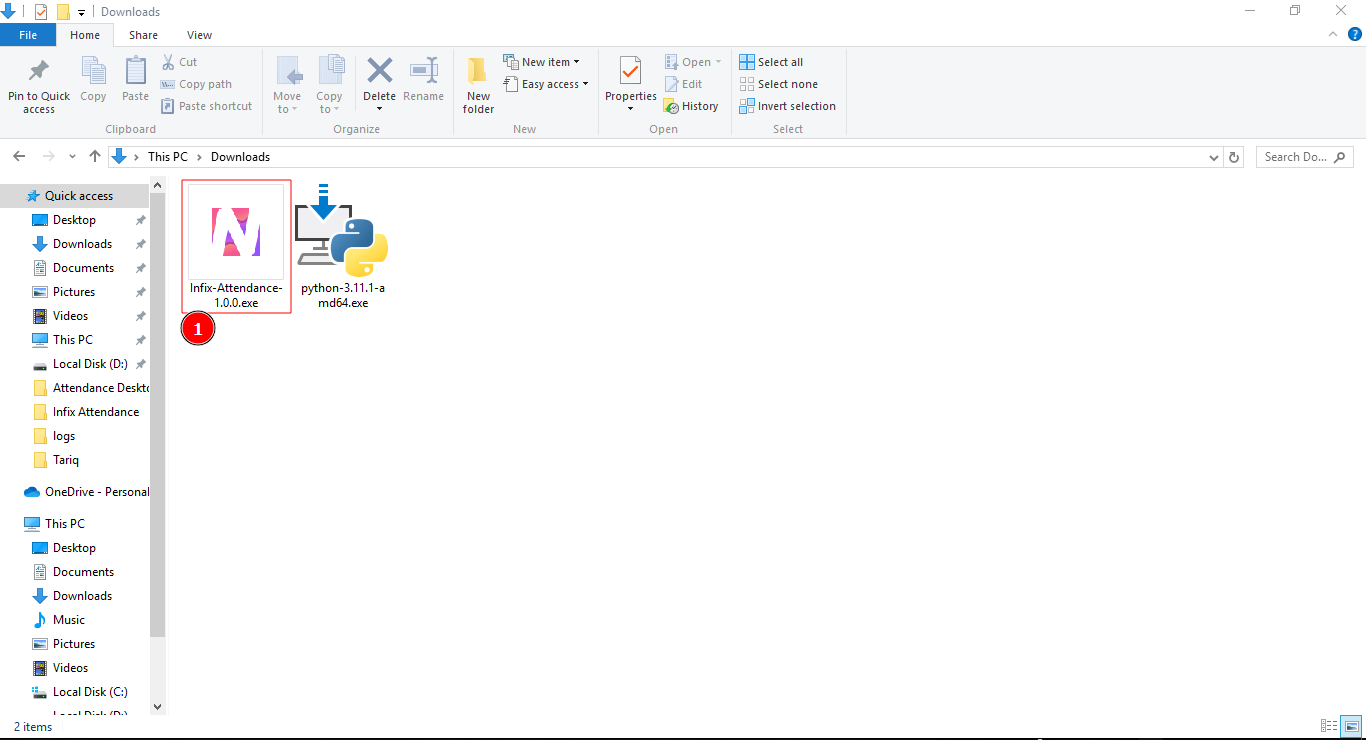
figure: 7
Step 2:
Click Yes (ref 8.1)
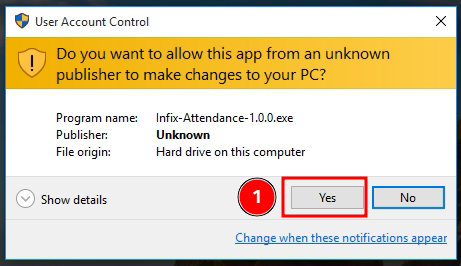
figure: 8
Step 3:
Click Next (ref 9.1)
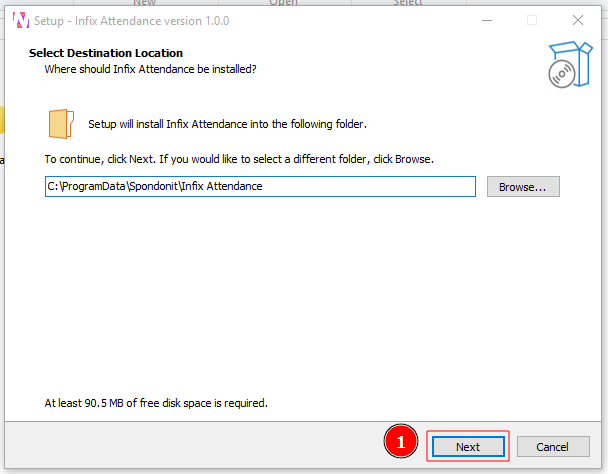
figure: 9
Step 4:
Click Next (ref 10.1)
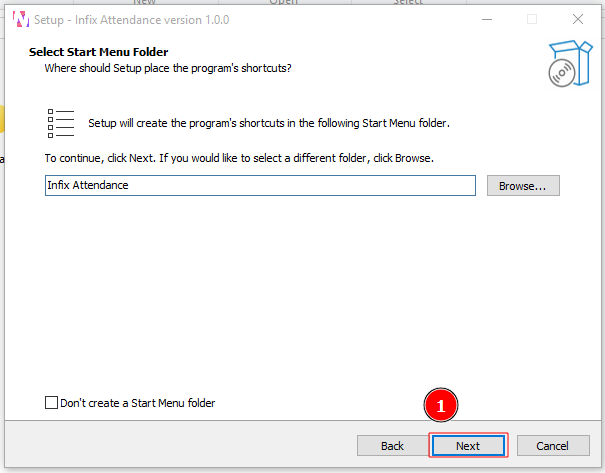
figure: 10
Step 5:
Check Create a desktop shortcut (ref 11.1)
Click Next (ref 11.2)
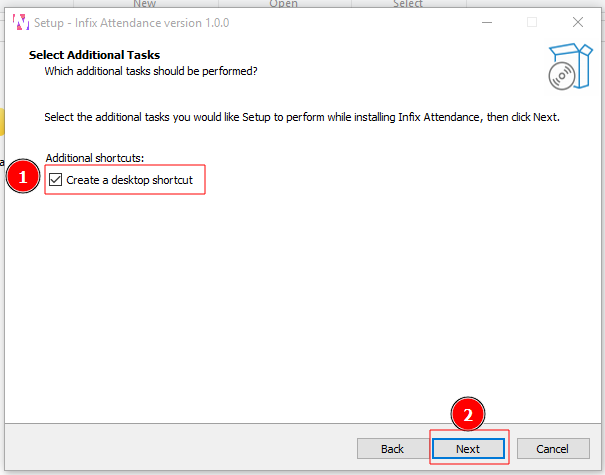
figure: 11
Step 6:
Click Install (ref 12.1)
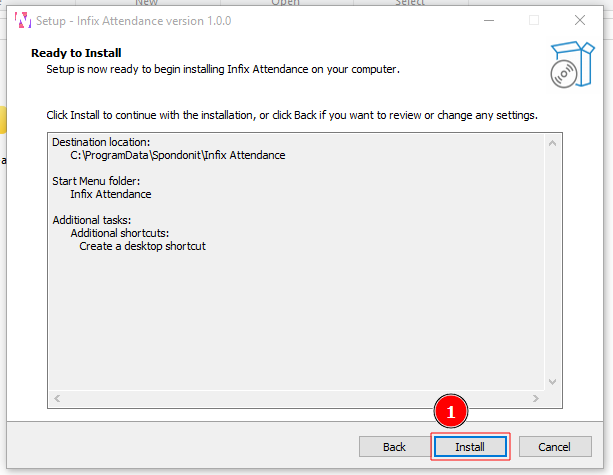
figure: 12
Step 7:
After successfull installation you can now click on finish (ref 13.1)
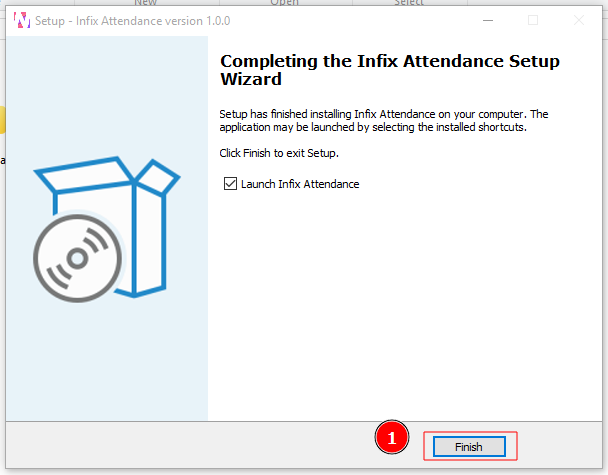
figure: 13
Desktop Application:
After launch the app first time you need to complete the setup.
ref 14.1 : Insert your Api secret (You will find it on your web application)
ref 14.2 : Insert your Api key (You will find it on your web application)
ref 14.3 : Insert your application url
ref 14.4 : If you use single school insert 1. If you are a saas user please contact your application saas administration for your school id
ref 14.5 : Pul frequency
ref 14.6 : Import start date, Before the inserted date attendance will be ignored.
ref 14.7 : If check Auto start service, It start service automatically after start the app.
ref 14.8 : Click the (+) icon for add a new device.
ref 14.9 : Click the (-) icon for remove a device. For remove device first you need to focus the device id or ip and then click the (-) icon
ref 14.10 : Insert your device id like (1, 2, 3 etc)
ref 14.11 : Insert your device IP
After setup the all field you need to click on Set configuration (ref 14.12) button for save the information.
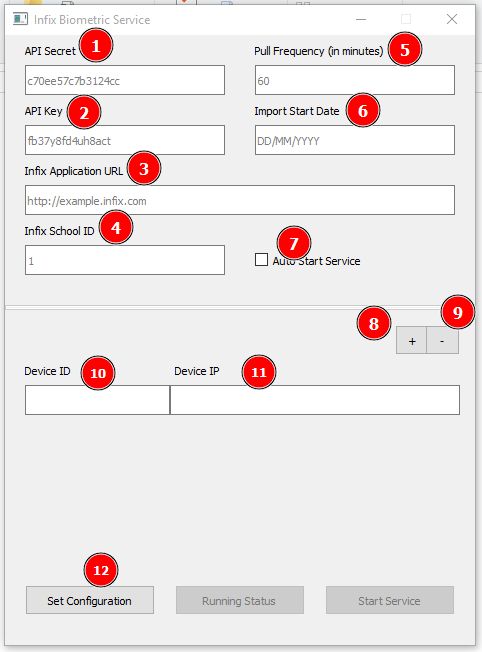
figure: 14
Whenever you change your configuration you need to click on the Set configuration (ref 15.1) button for save the information.
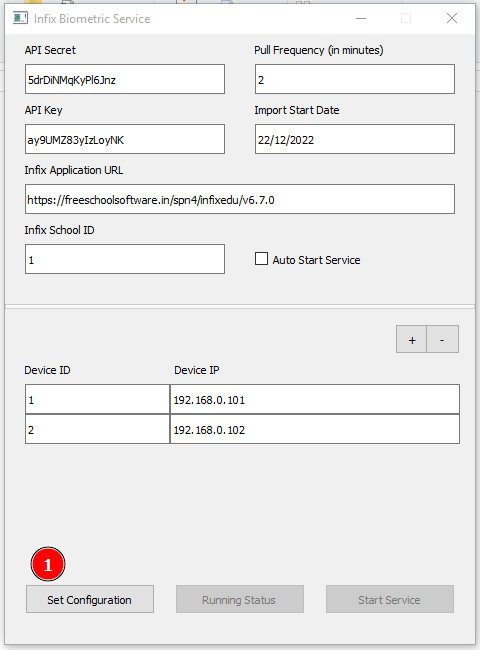
figure: 15
After successfully set the configuration, Start service (ref 16.1) button will be enabled. For start pulling the attendance from machine and push to web application click on Start Service button.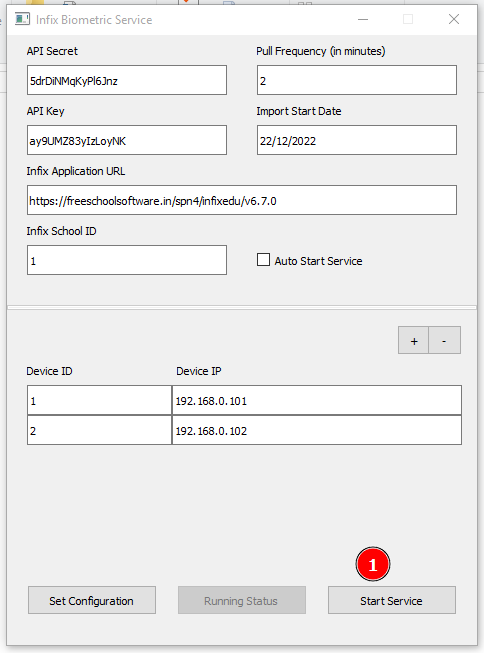
figure: 16
After click Start Service button you will get a Service has ben started popup. click ok (ref 17.1) for close the popup.
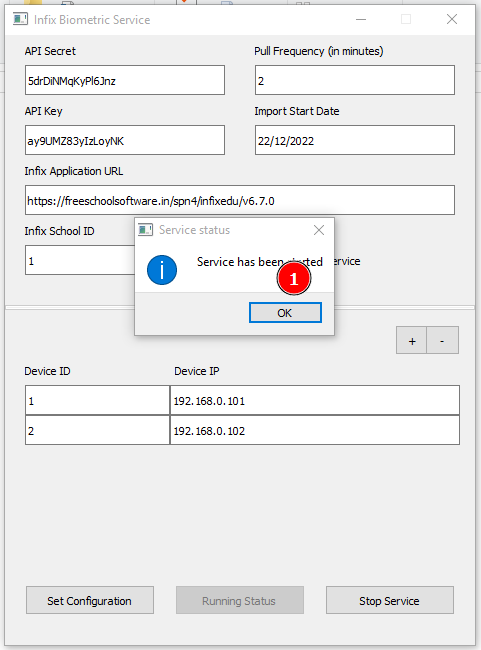
figure: 18
You can see the log by clicking Running status (ref 19.1). This button only enabled after the service start.

figure: 19
After start service, The start service button will change to stop service. Click Stop service (ref 2.01) for stop the service.
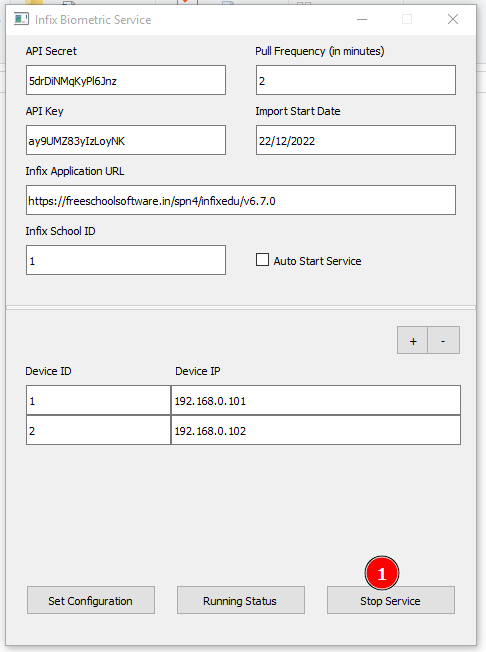
figure: 20
After click Stop Service button you will get a Service has ben stoped popup. click ok (ref 21.1) for close the popup.
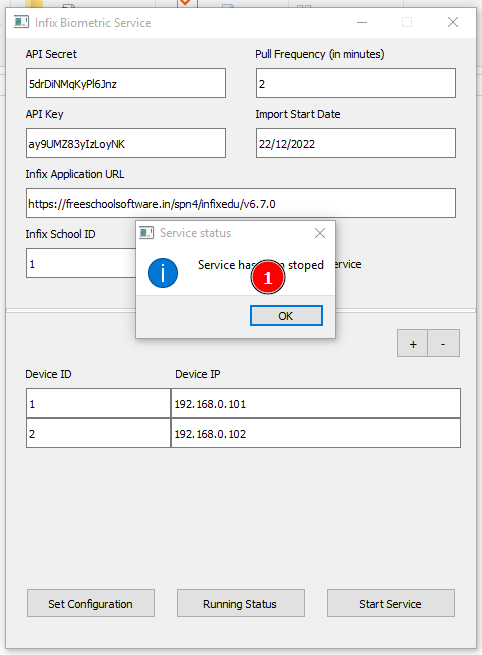
figure: 20
You can not close the application when the service is running. You will get Window can not be closed when the service is running pop up while try to close the application.
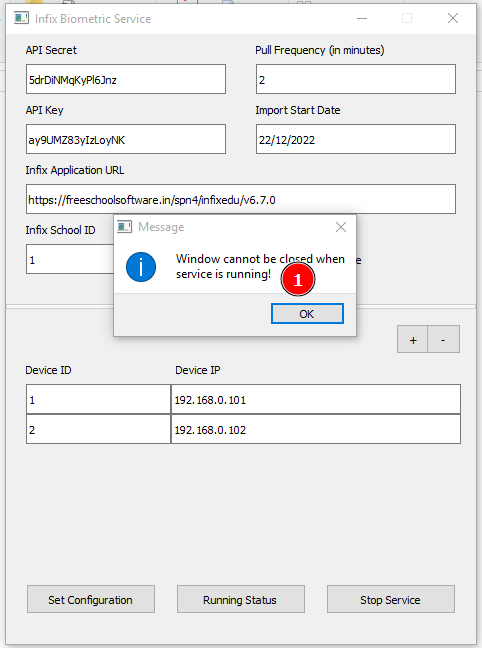
figure: 21


