Log in to the SaaS Admin Panel
Use your super admin credentials to log in.
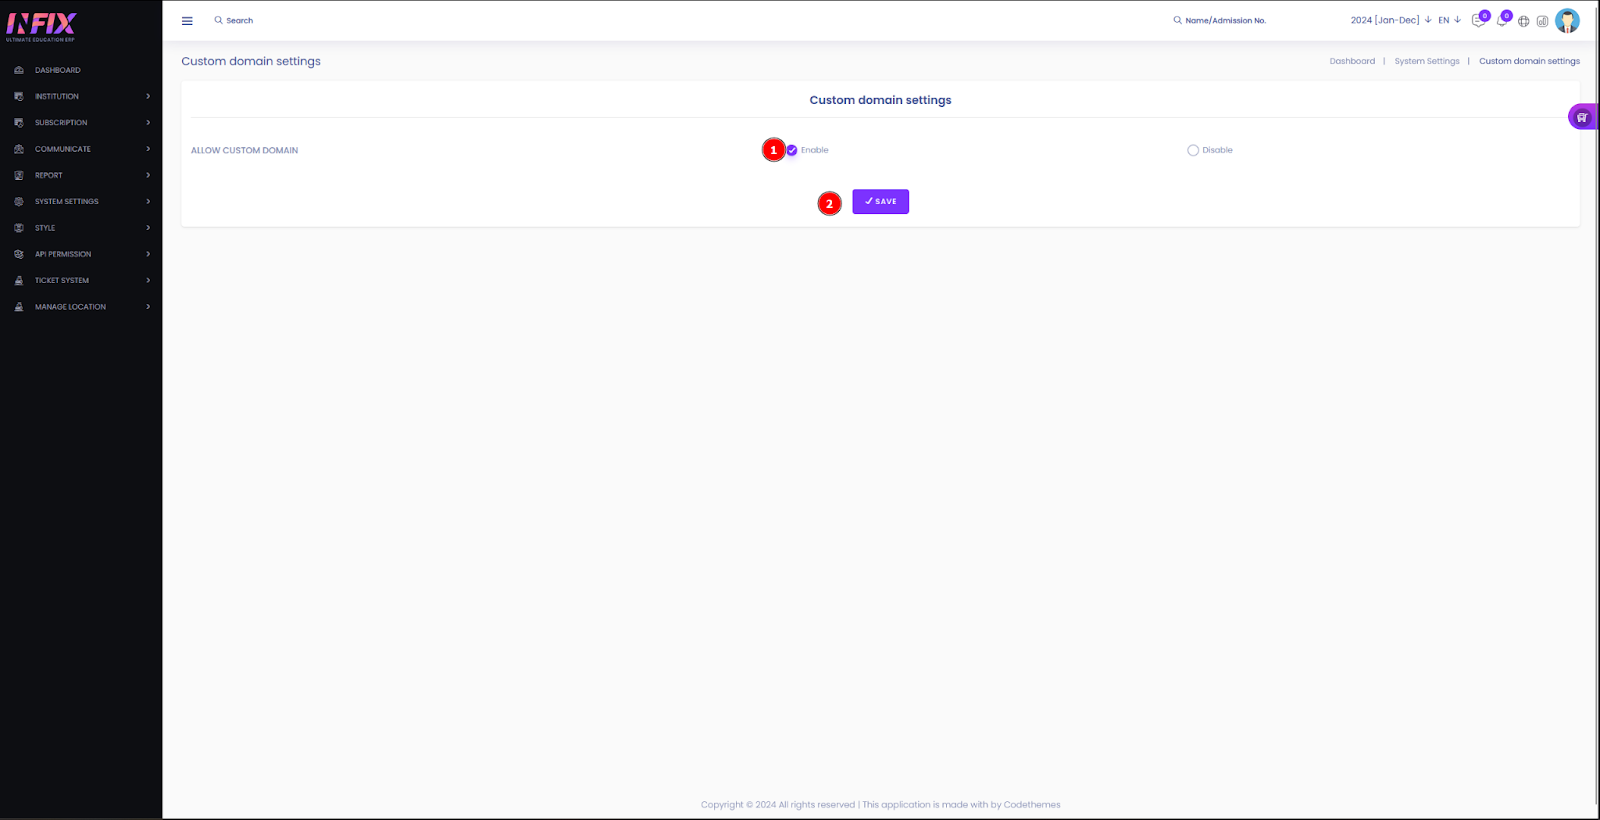
Navigate to Settings
Go to System Settings > Custom Domain Settings.
Enable Custom Domain
Click on the Enable option and save the changes.
Once enabled, SaaS school clients will see an option to set up a custom domain in their admin panel.
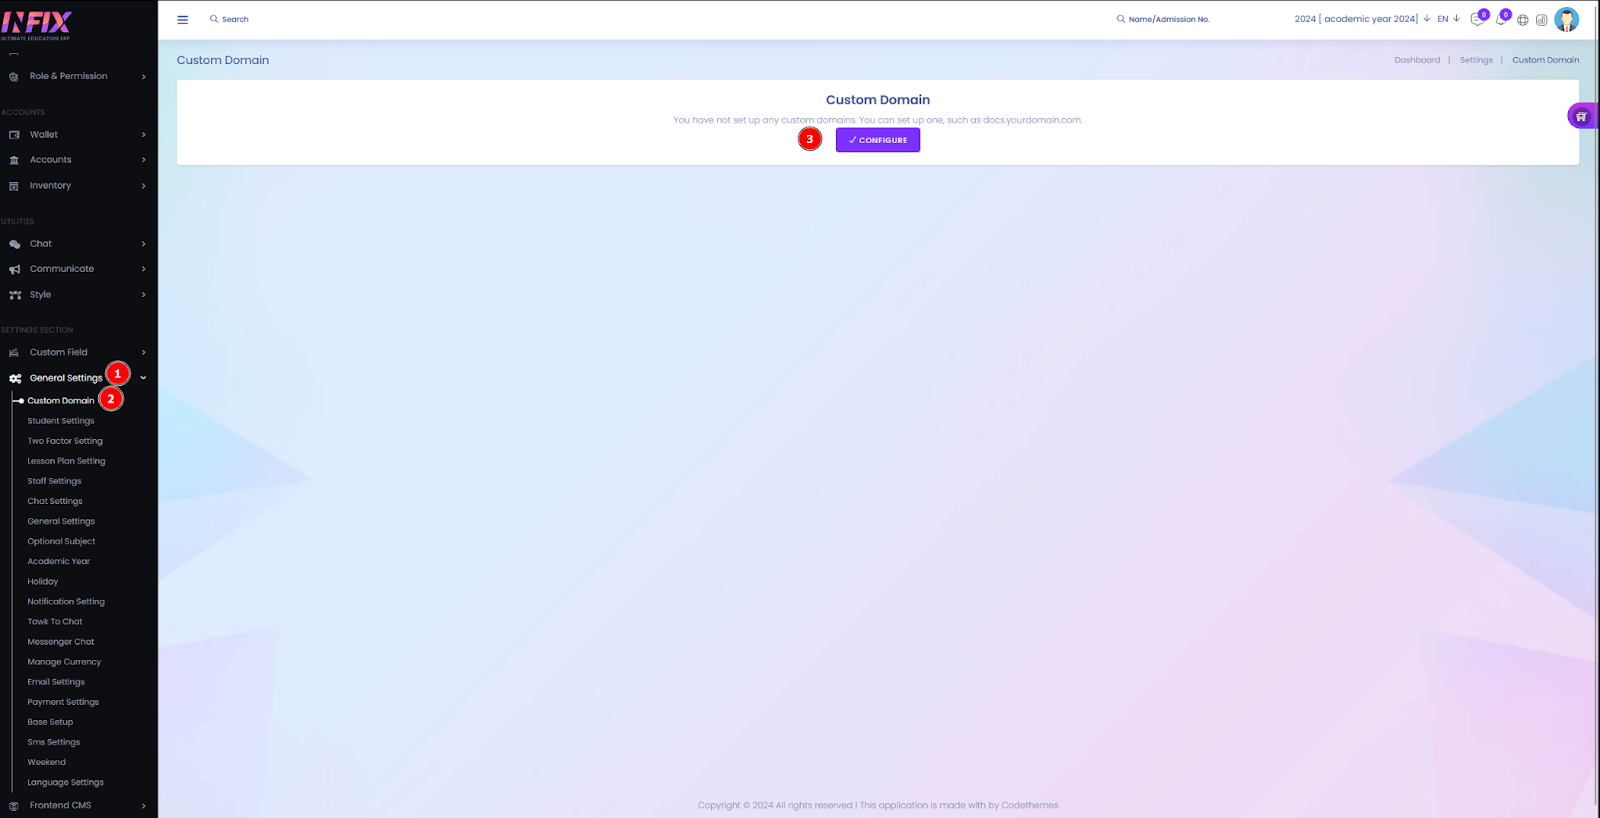
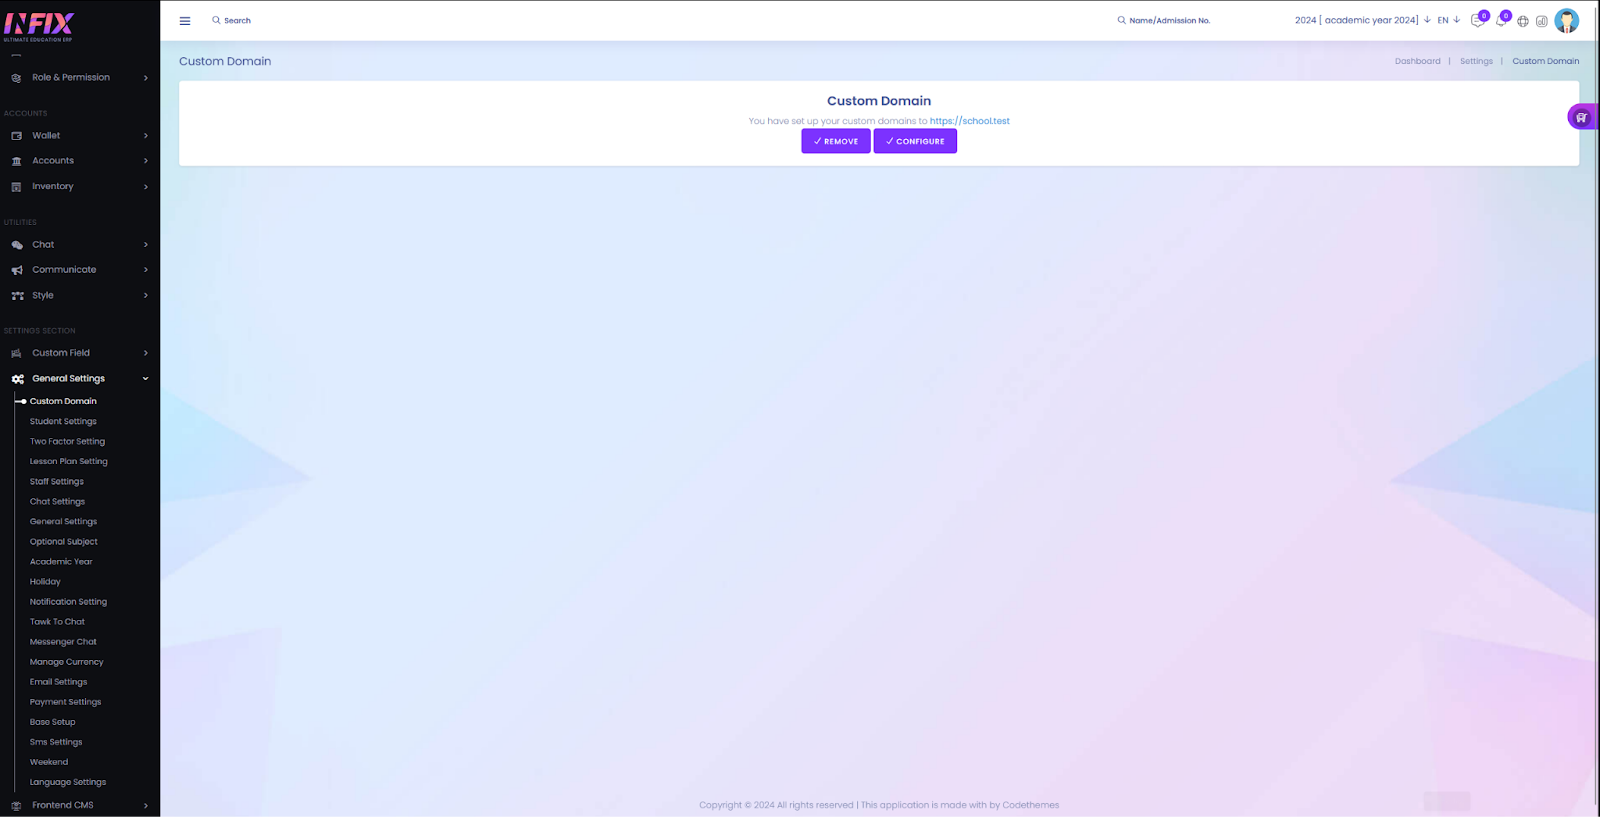
Access Custom Domain Settings
School admin users can go to General Settings > Custom Domain.
Configure Your Domain
On the Custom Domain page, click the Configure button.
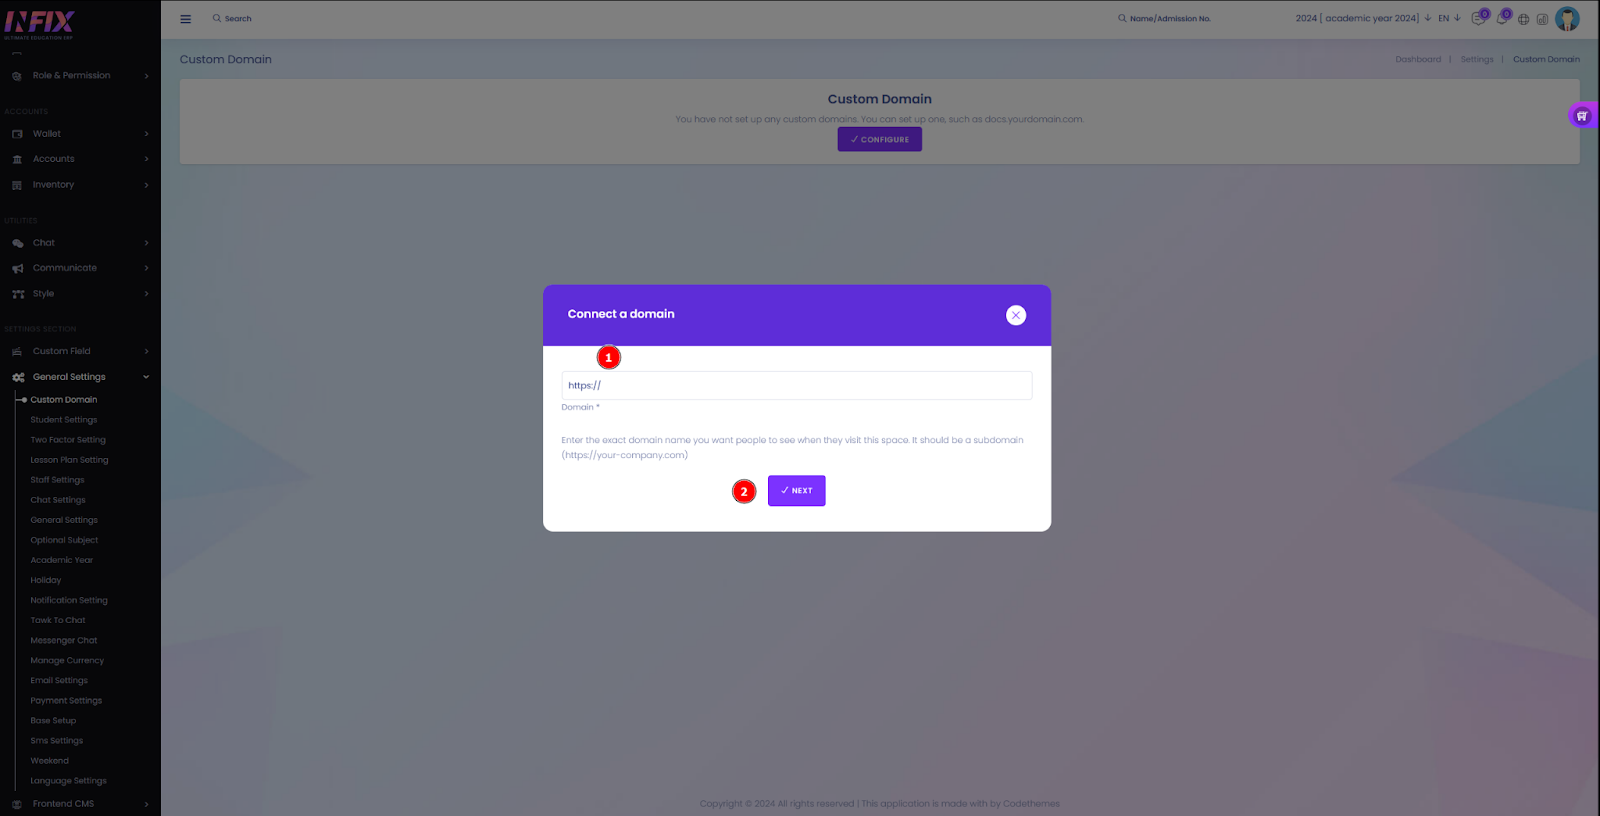
Enter your desired domain in the provided field.
If the domain is valid and not already registered to another school, you will see a Domain Valid badge.
Click the Next button to proceed.
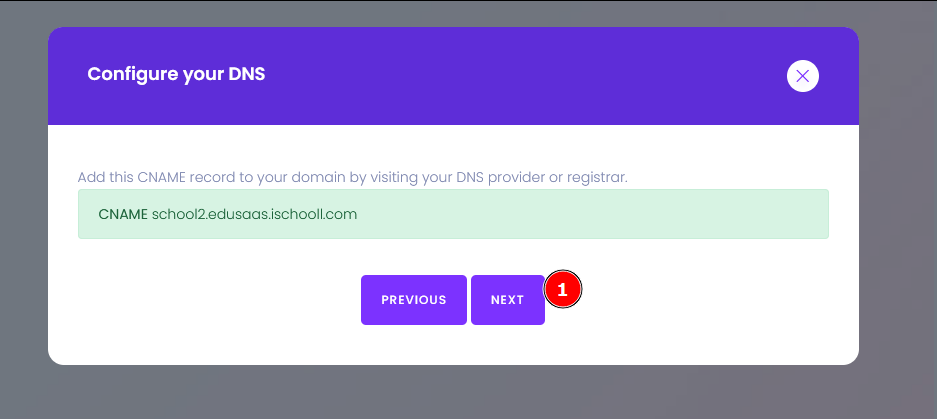
Obtain the CNAME
After clicking Next, you will receive a CNAME record that needs to be added to your domain.
Update Your DNS Settings
Log in to your DNS provider or registrar account.
Add the provided CNAME record to your domain's DNS settings.
Wait for DNS Activation
DNS changes can take up to 48 hours to propagate.
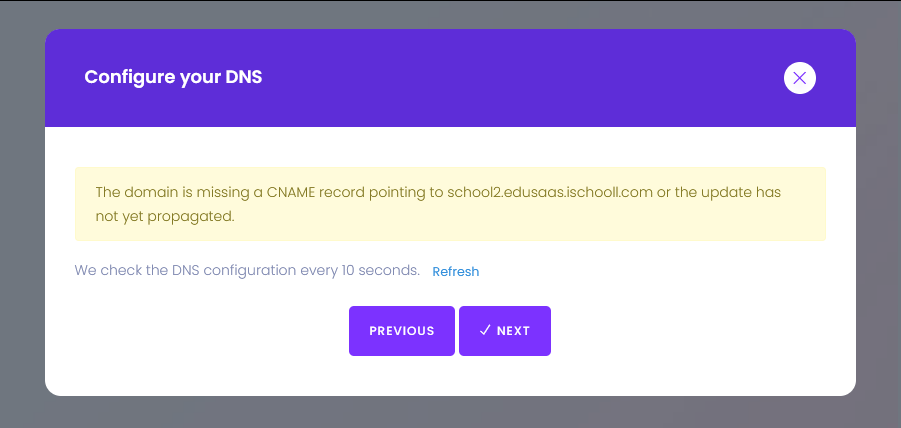
You can check the status of your DNS configuration using online DNS check tools. Like; https://dnschecker.org
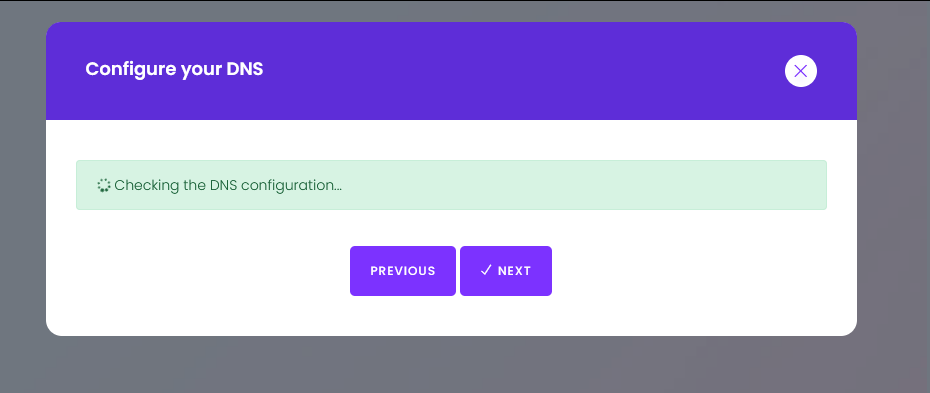
Verify DNS Configuration
Once the DNS is updated, return to the Custom Domain settings and click Next.
The system will check the DNS configuration.
If successful, you will see a confirmation screen.
If not, a warning screen will appear to guide you in resolving issues.\
Finalize the Domain Setup
Once verified, the custom domain is active.
You can now access your SaaS website through your configured domain.
On the custom domain page, you can:
Change the configured domain
Remove the domain
These options ensure flexibility for any future updates.
Your SaaS website is now successfully configured and accessible through your custom domain!