School Management Software is a tool to manage all educational and administrative tasks without any hassle. It enables schools to digitally monitor daily activities on a single platform. This software can automate and optimize teacher workload, helps schools to simplify enrollment processing, and enables teachers to monitor students' academic progress. These systems provide functionality from applications and class enrollment to detailed performance monitoring and financials.
Module Manage:
A Learning Module is an organized collection of the content presented together. A Learning Module can support a course goal, a course objective, a subject, a concept, or a theme. Instructors can set a structured path through the content items using a storyboard or a set of dependencies. Modules are used primarily to group object definitions together that have a common business purpose or use. For example, a module might contain all the data types and routines related to inventory management.
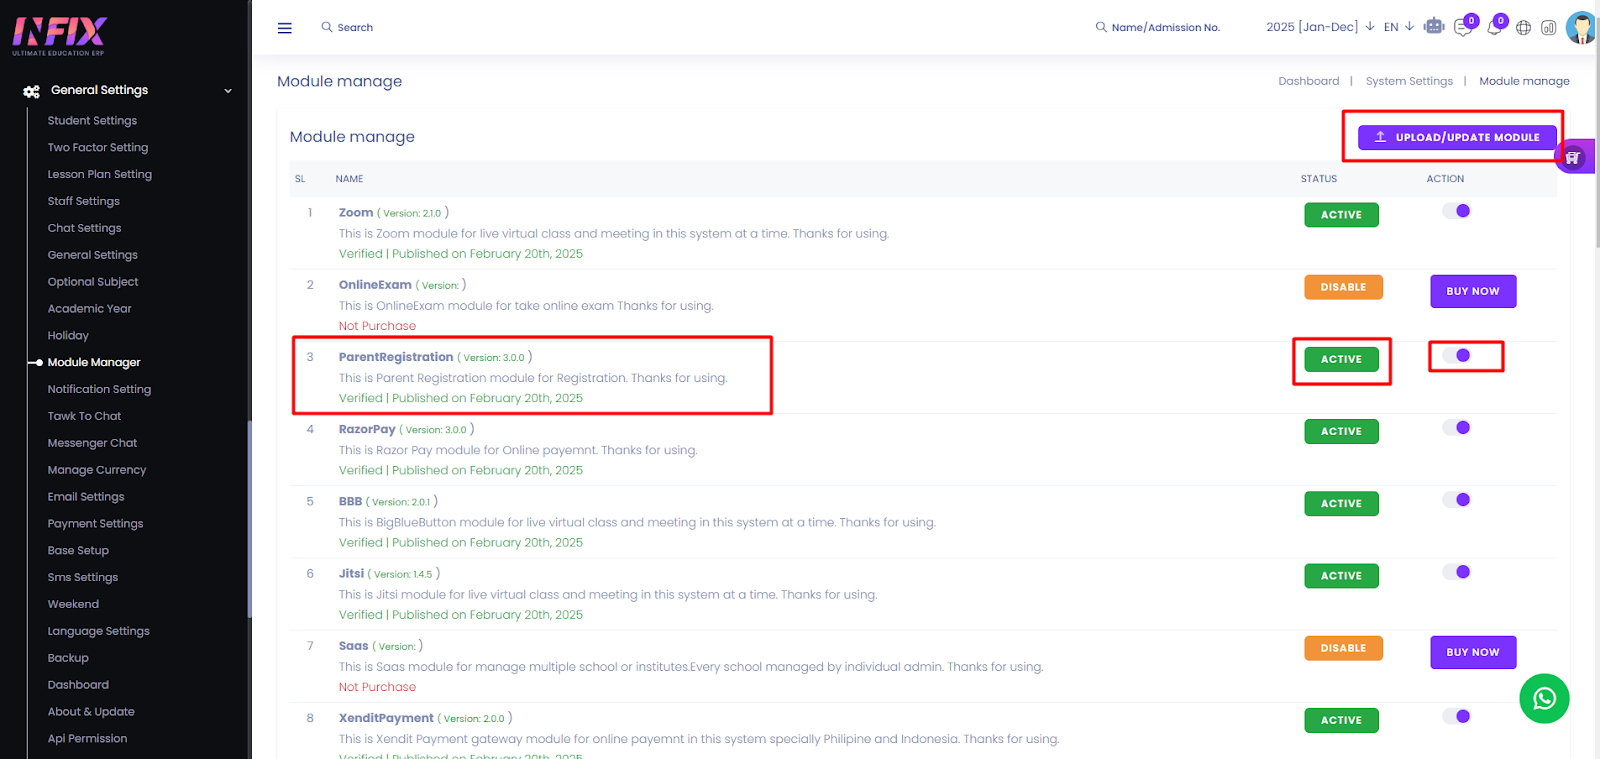
Short Direction: {InfixEdu> Dashboard> System Setting> Module Manager> Upload/Update Module> SL> Name> Status> Action> Parent Registration> Active> Enable Button.}
If you want to Buy or install the Parent Registration module then go to the InfixEdu dashboard to find the System Setting to a sub-category of the Module Manager[1] function to click on that, and you will see the new interface to Upload/Update Module[2] from this way. However, there is a list of all modules SL[3], Name[4], Status[5] & Action[6]. When you purchase the module of Parent registration[7] with Active[8] status from enable button[9] then automatically added the registration option on your InfixEdu dashboard. The important thing from here is without parent registration it will not add a registration settings option.
Registration Student List:
Student registration forms are used to register students for classes, tutoring, extracurricular activities, and various school organizations. A student registration system helps to manage one of the most important processes for student management which include student admission management as well. The admission process forms the backbone of any school and also helps to strengthen the economy as well.
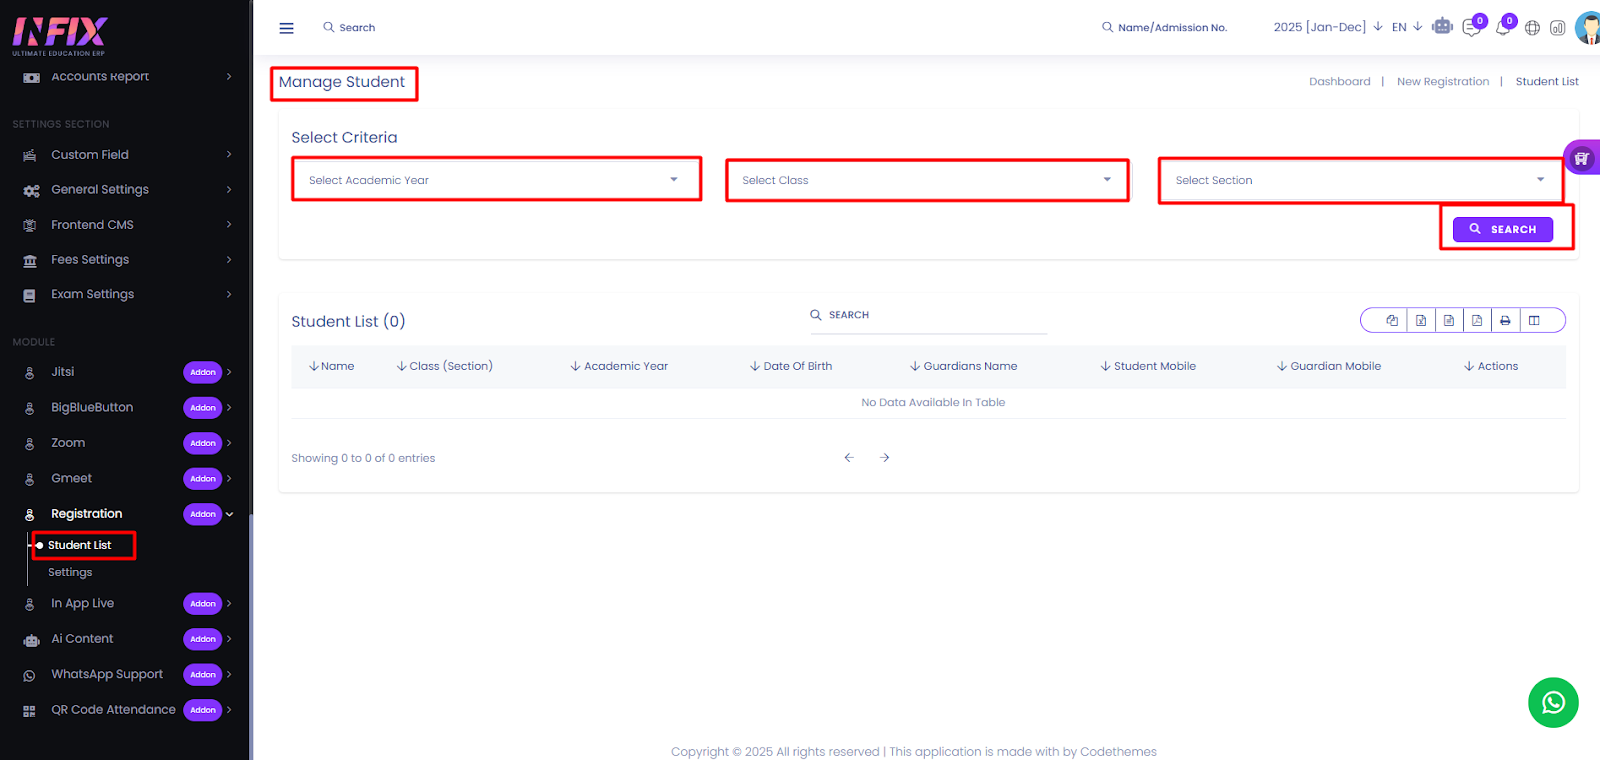
Short Direction: {InfixEdu> Dashboard> Registration> Student List> Manage Student> Select Academic Year> Select Class> Select Section> Search.}
If you want to check on the already registered student list[1] then go to the InfixEdu dashboard, find the managing student[2] section below from here the Select Academic Year[3], Select Class[4] that you want to search for the student specifically as also Select Section[5] & hit the Search[6] option button.
Registration Settings:
This is the primary administrative account for your sub-domain. It has access to all of the functionalities of your LMS, such as account administration, and course management. An online registration system eliminates the need of filling out paper forms manually and sending them to a registration office. When using online registration systems, the participants can simply register at their convenience and submit their information immediately. Registration systems, the third part of a demographic data system, are generally designed to count vital events: births, deaths, marriages, and entries and exits at international boundaries.
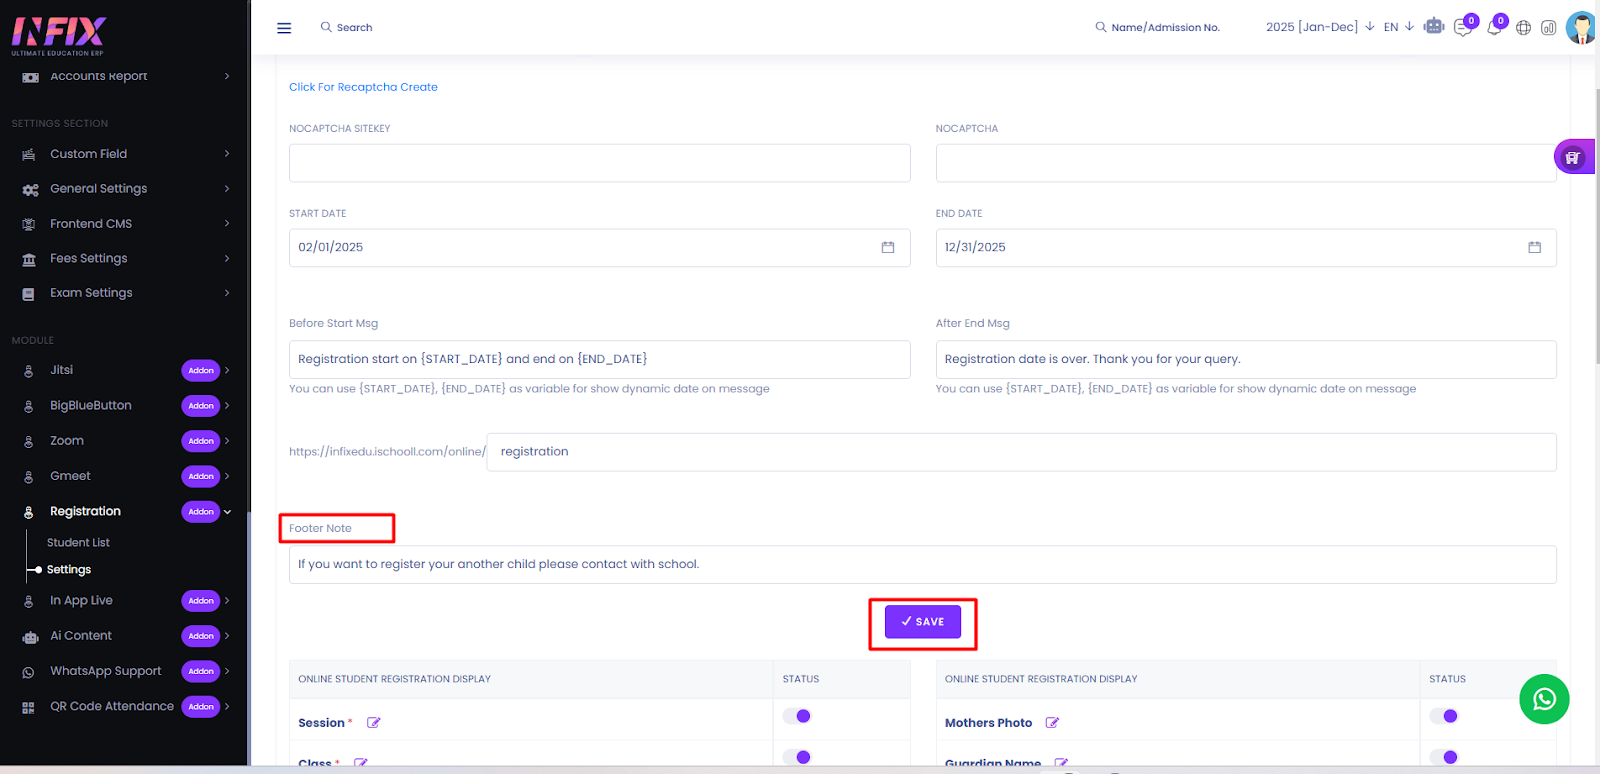
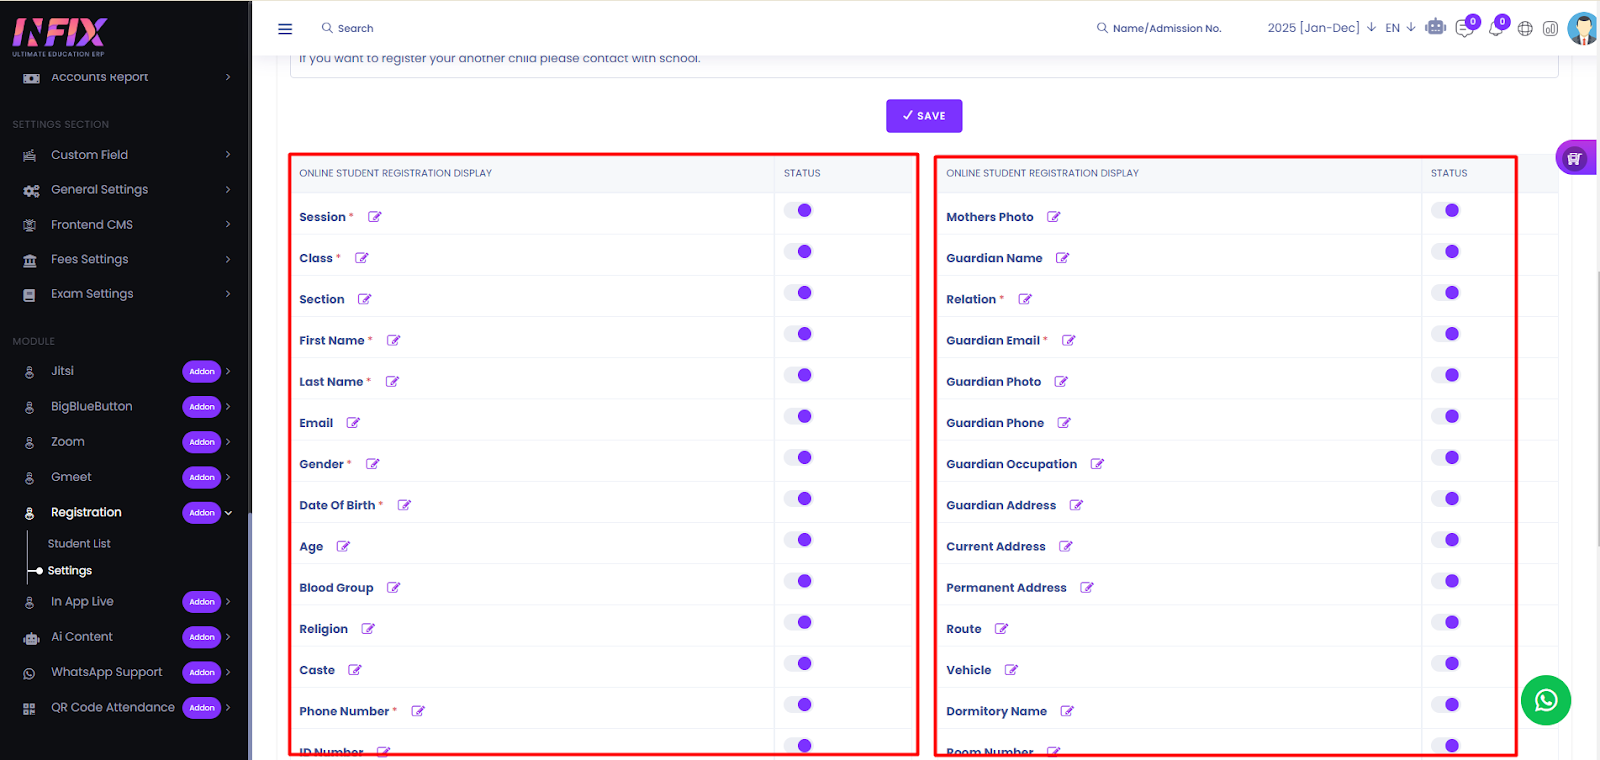
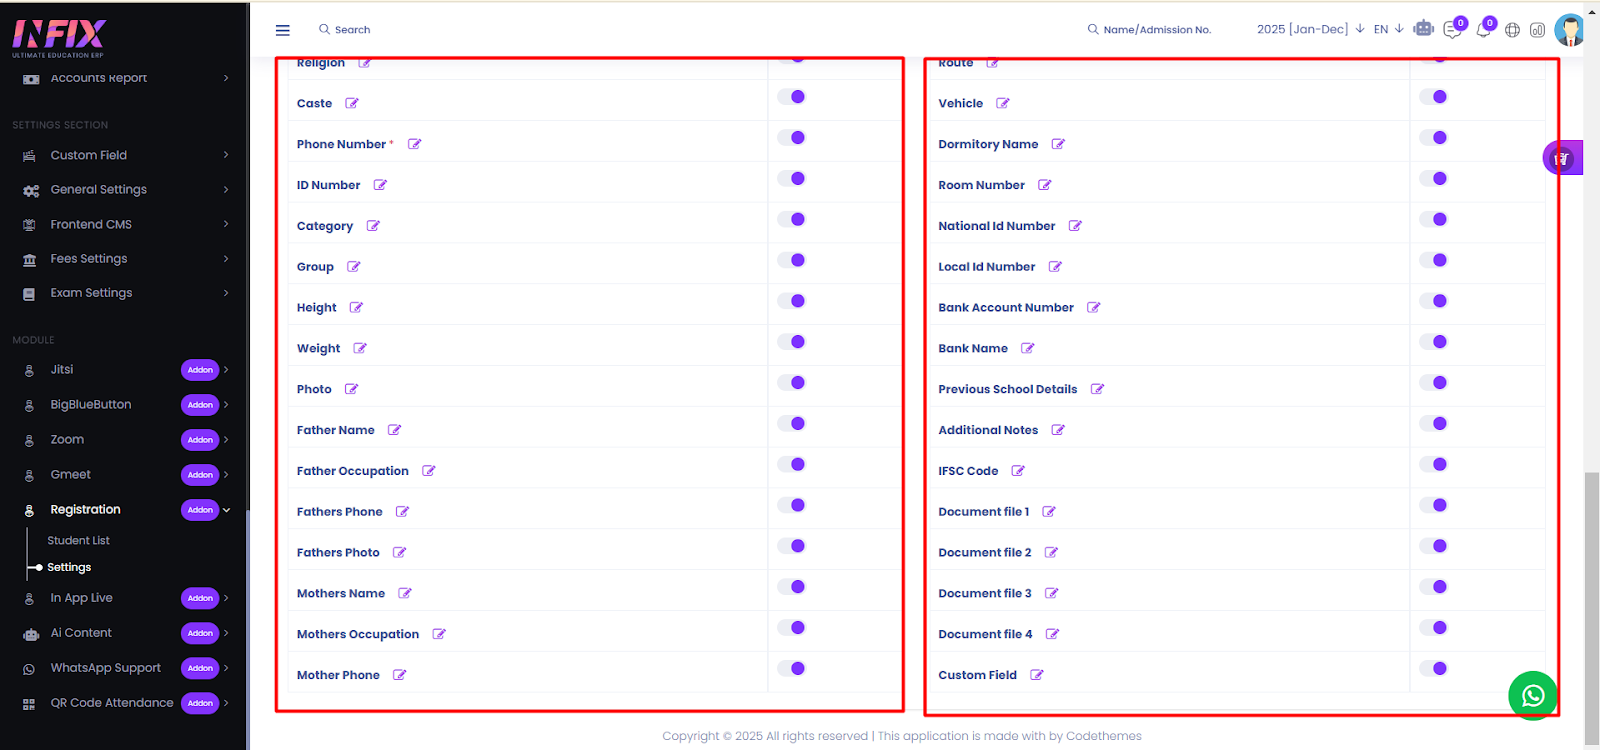
Short Direction: {InfixEdu> Dashboard> Registration> Setting> Registration Settings> Registration> Registration Button> After Registration Mail Send> After Registration Approve Mail Send> Recaptcha> Click For Recaptcha Create> Nocaptcha Sitekey> Nocaptcha> Start Date> End Date> Before Start Msg> After End Msg> Registration> Save.}
If you want to set up the parent registration module then go to the registration to setting[1] option and click on that, and you will see the registration settings[2] interface. There is some requirement to fill on the registration systematic functionality as well as whether registration[3] would be enabled or disabled. Also, you can manually change other options such as Registration Button[4] can be Header or Footer, After Registration Mail Send[5] can be yes or no, and After Registration Approve Mail Send would be Yes or No, there is the important function about Recaptcha[7] that can be Enable or Disable, either you can Click to Create Recaptcha[8]. However, Nocaptcha Sitekey[9] means The site key is used to invoke the reCAPTCHA service on your site or mobile application. The secret key authorizes communication between your application backend and the reCAPTCHA server to verify the user's response. The secret key needs to be kept safe for security purposes. Nocaptcha[10] stand for rolling out a new API that radically simplifies the reCAPTCHA experience. We're calling it the "No CAPTCHA reCAPTCHA" and this is how it looks: On websites using this new API, a significant number of users will be able to securely and easily verify they're human without actually having to solve a CAPTCHA. You have to set the registration Start Date[11] & End date[12], Before starting Msg[13] & After End Msg[14]. The URL section is set on the Name of the panel as like Registration[15] & hit the Save button.
Parent Registration :
An online registration system eliminates the need of filling out paper forms manually and sending them to a registration office. When using online registration systems, the participants can simply register at their convenience and submit their information immediately. Registering for classes means that you are allocated to attend activities like lectures, tutorials and workshops at specific times on your personal timetable. You cannot register for classes without first being enrolled in the subject. You may have many class options to choose from, or none, depending on the subject. A student registration system helps to manage one of the most important processes for student management which include student admission management as well.
Short Direction: {InfixEdu> Dashboard> Infixedu Home page> Parent Registration> .}
If you want to setup up the Parent registration[1] then go to the Infixedu home page. On this page on the top bar, you will see the parent registration option, when you click on this section, it will open a registration form for you. Just fill up the form.
Registration:
A signup page (also known as a registration page) enables users and organizations to independently register and gain access to your system. It is common to have multiple signup pages depending on the types of people and organizations you want to register. Student registration forms are used to register students into educational programs. Are you prepared to take an online class? Online learning will require you to meet certain technical requirements, but it also demands a different set of work habits, a different level of motivation and a different way of thinking about class.
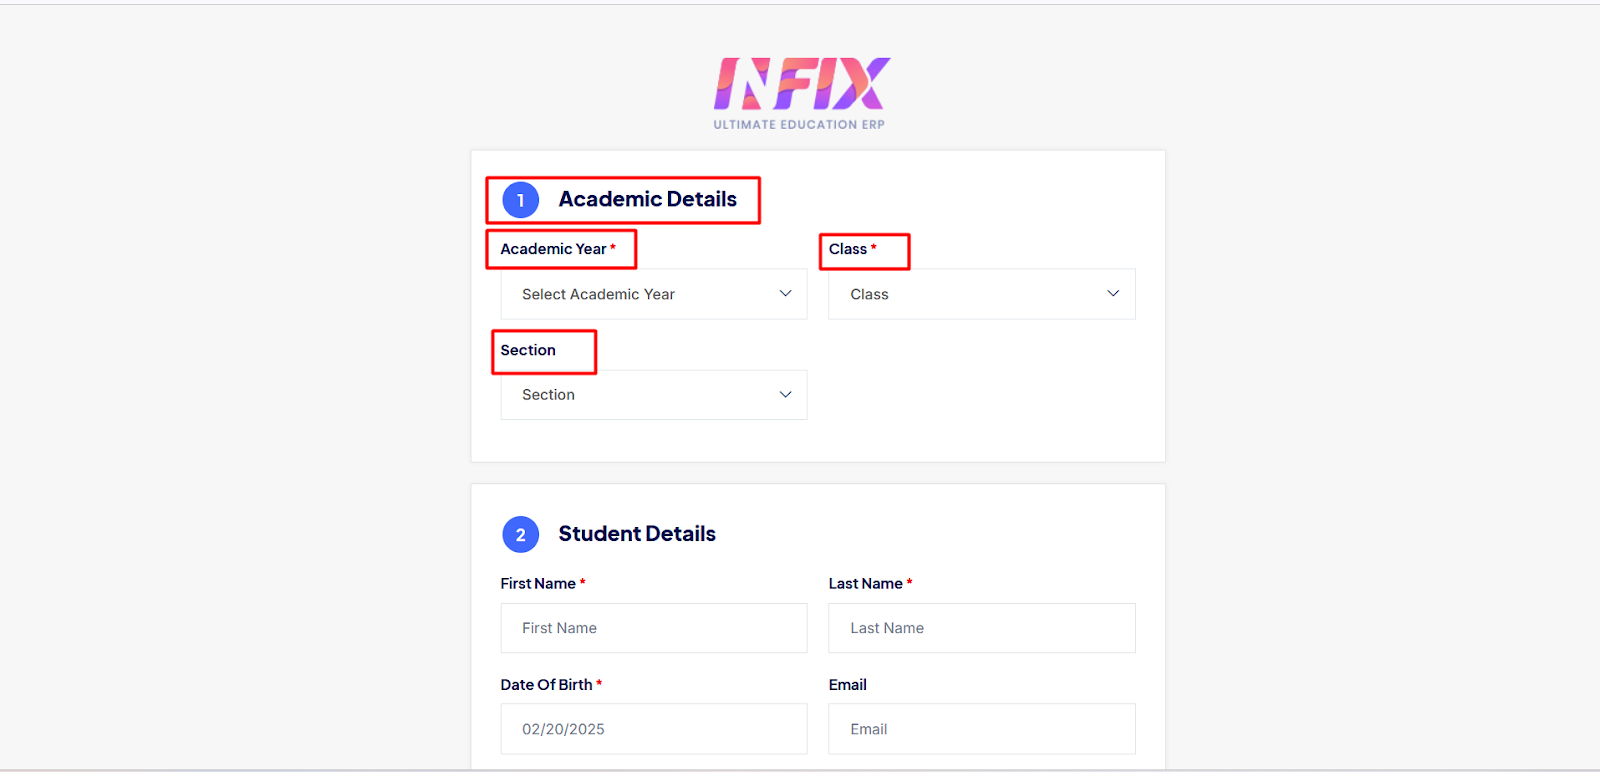
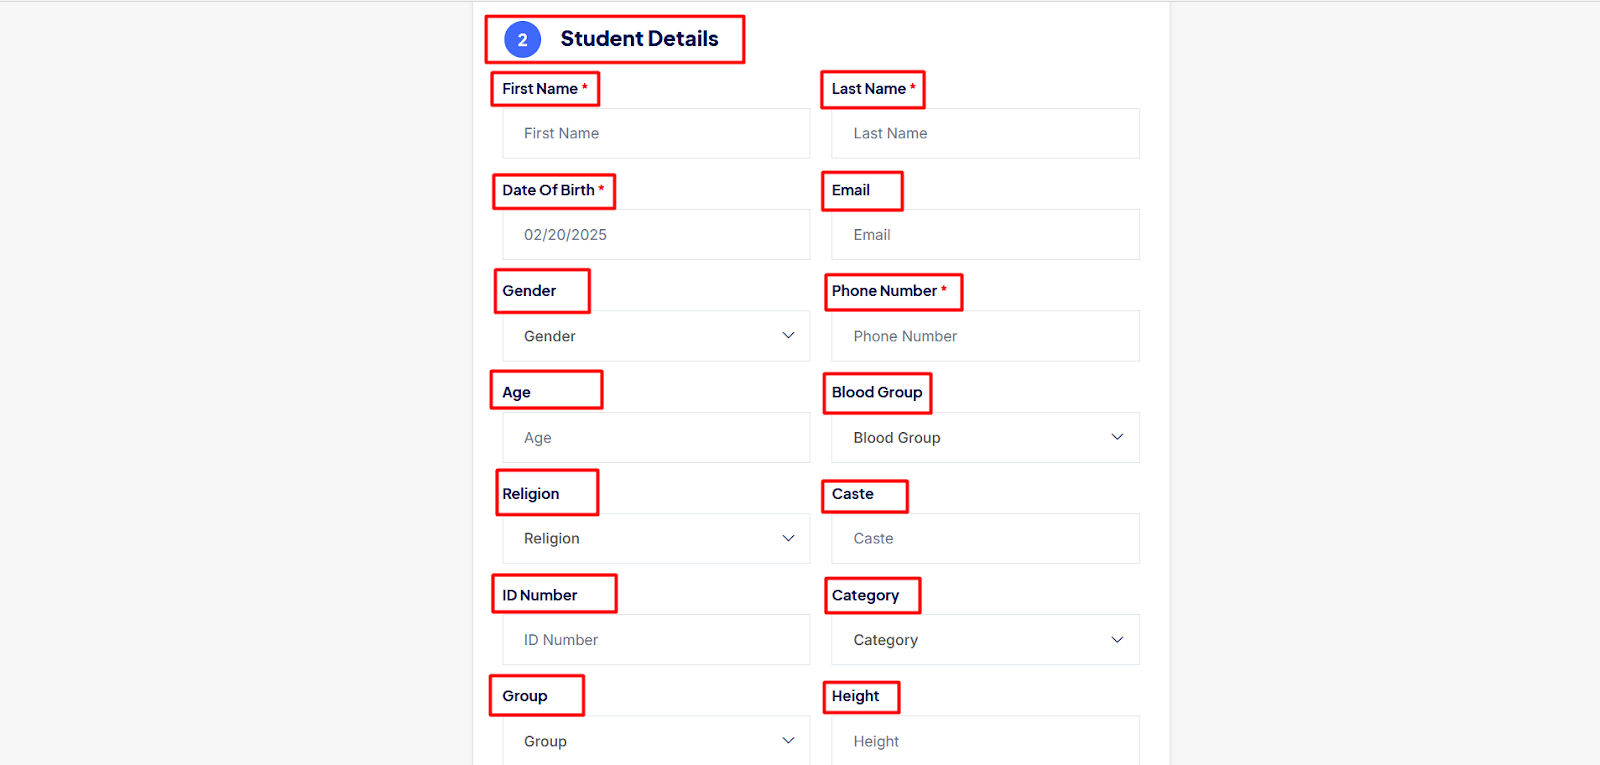
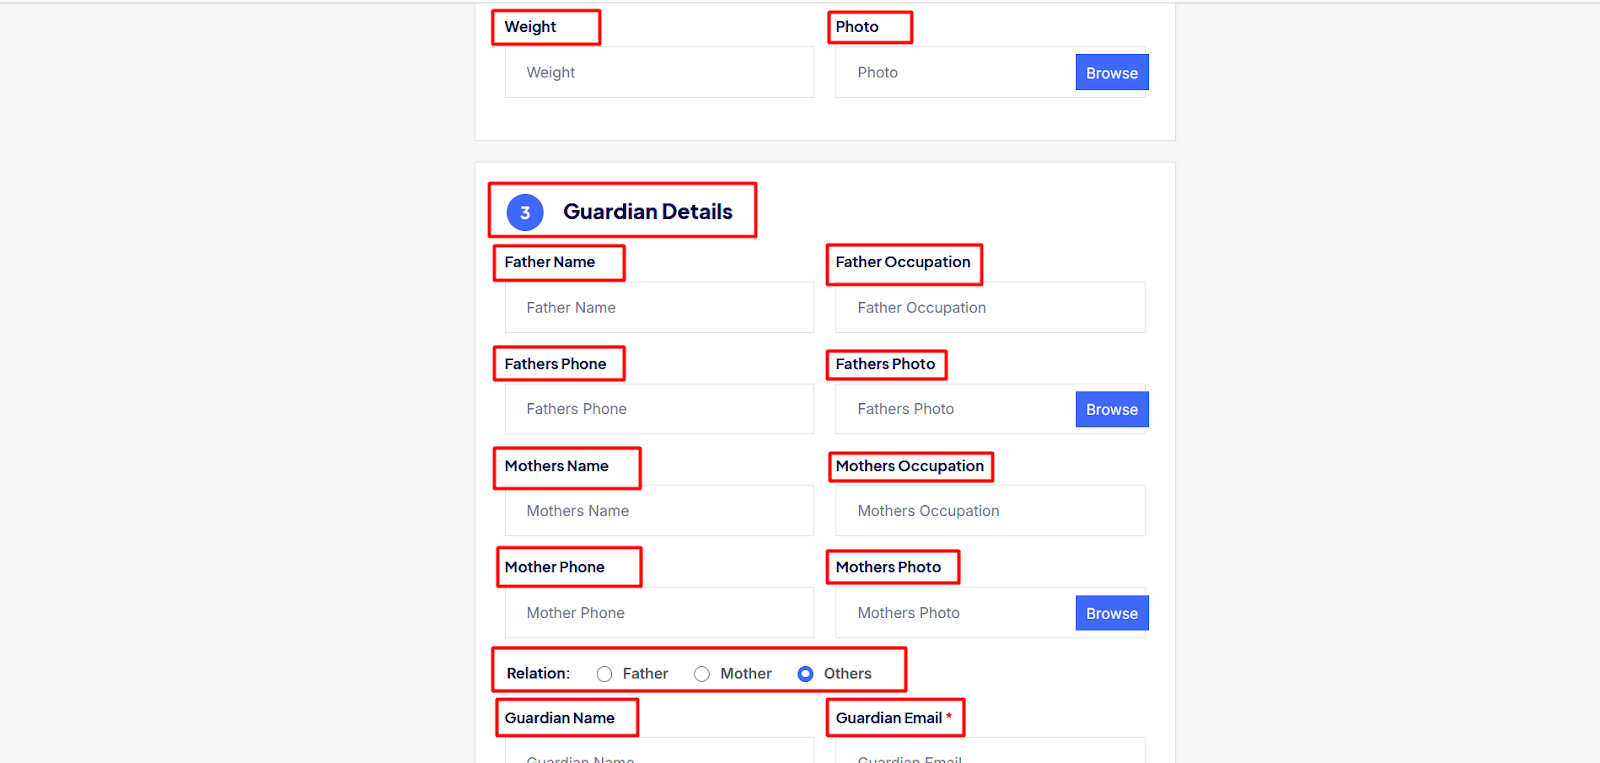
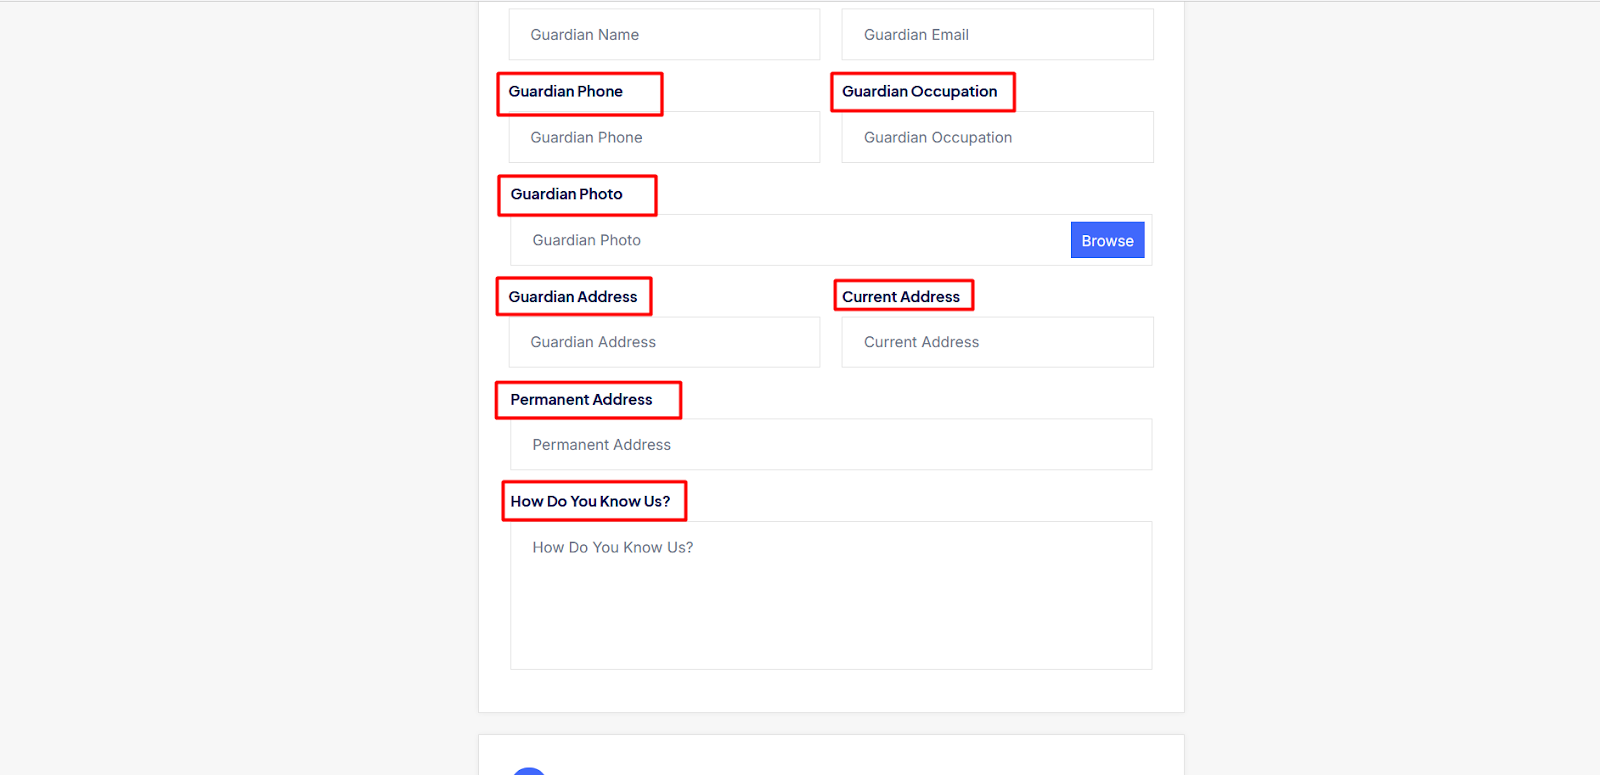
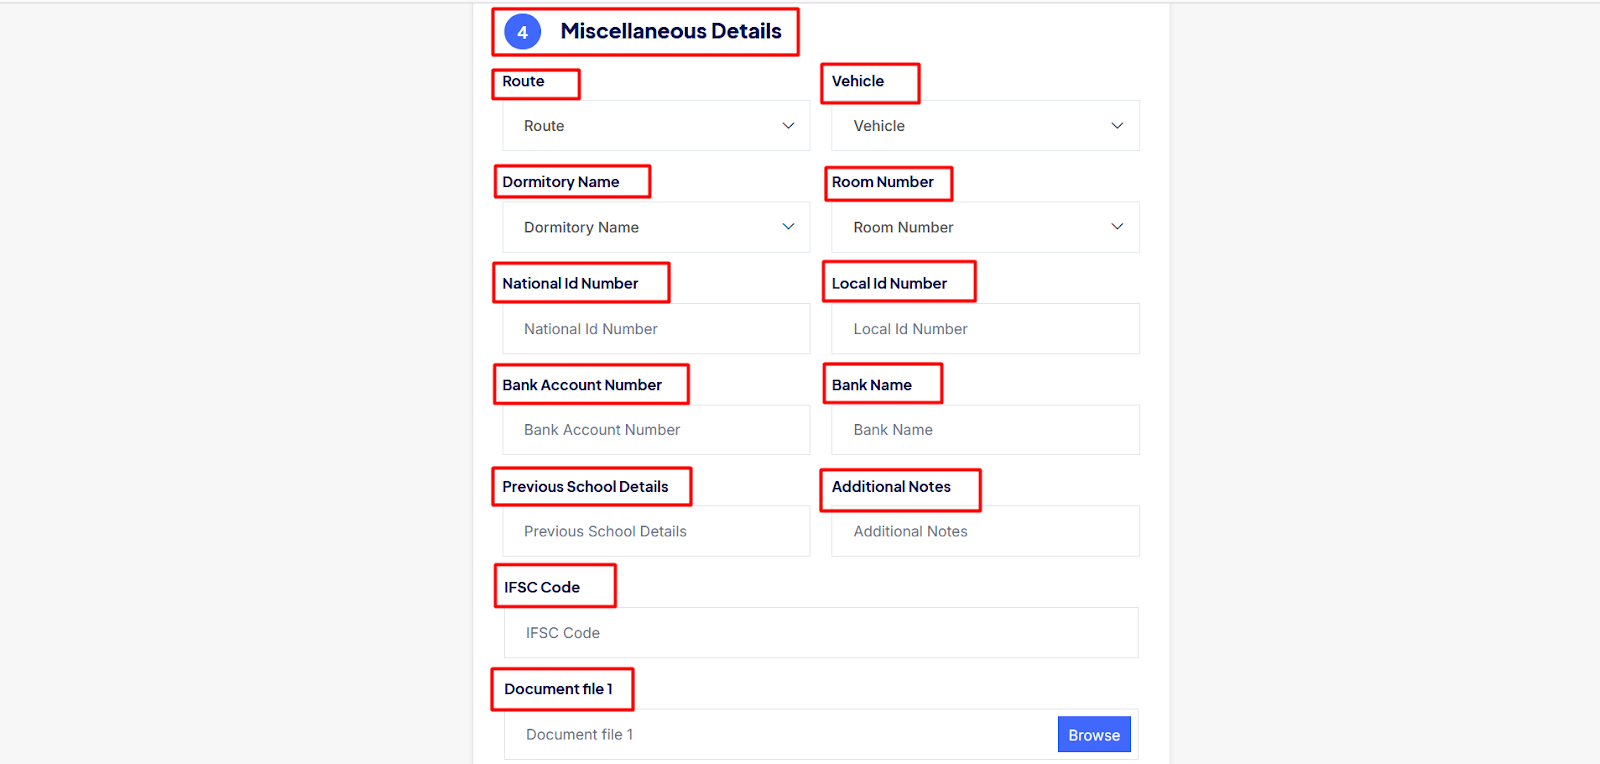
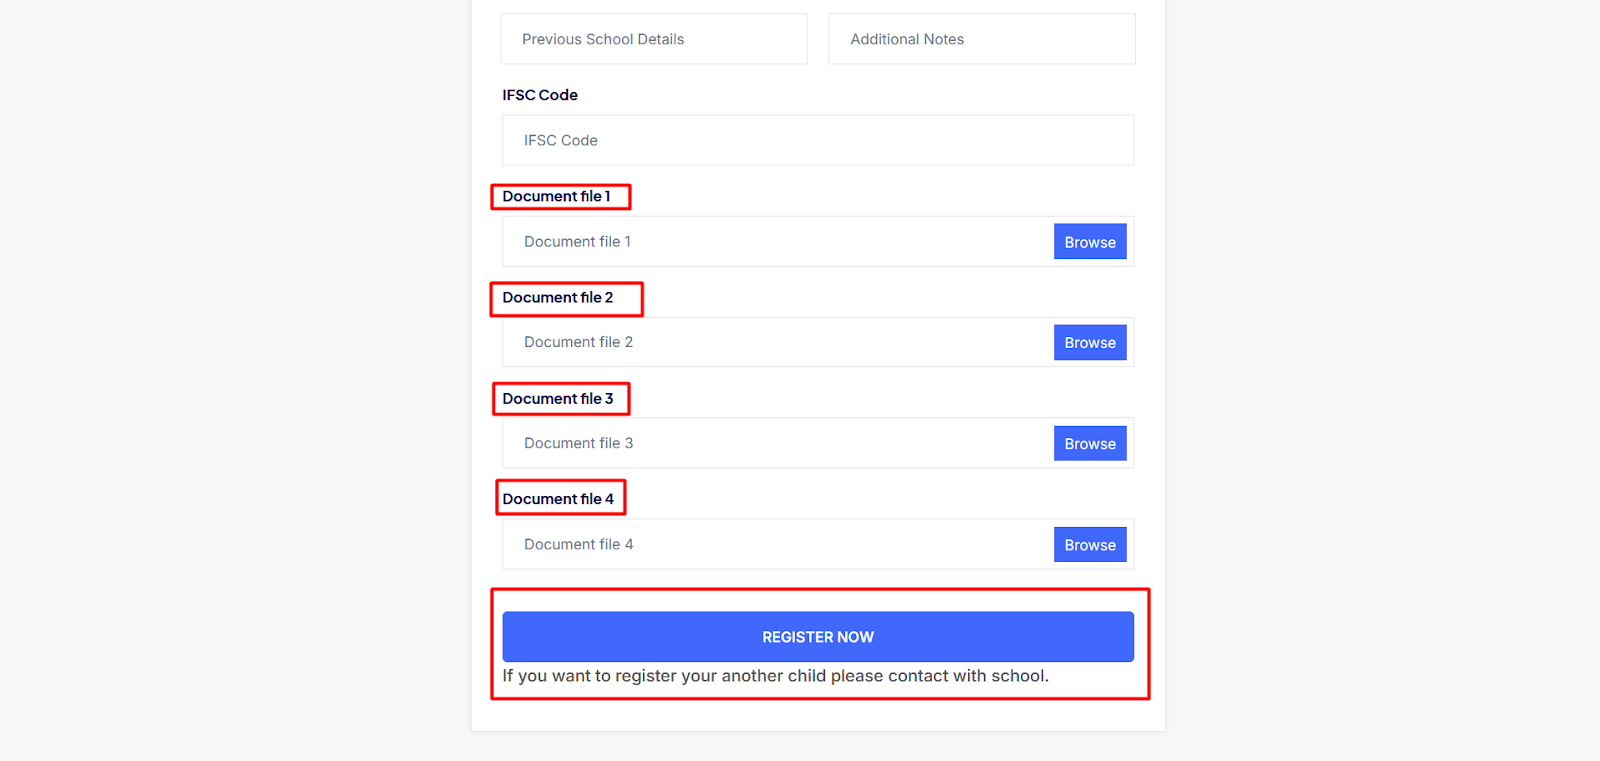
Short Direction: {InfixEdu> Dashboard> Parent Registration> Select Academic Year> Class> Section> First Name> Last Name> Gender> Date Of Birth> Age> Blood Group> Religon> Class> Email> ID Number> Student Mobile> Category> Group> Height> Weight> Attached Photo> Father Name> Father Occupation> Fathers Phone> Attached Father Photo> Mothers Name> Mothers Occumation> Mother Phone> Attached Mothers Photo> Guardian Name> Select Relation> Guardian Email> Guardian Phone> Attached Guardian Photo> Guardian Occupation> Guardian Address> Current Address> Permanent Address> How Do You Know Us?> Route> Vehicle> Dormitory Name> Room Number> National ID Number> Local ID Number> Bank Account Number> Bank Name> Previous School Details> Additional Notes> IFSC Code> Attached Document File> Submit.}
If you want to register on InfixEdu then go to the Infixedu Home pages on the top bar as Student Registration, all the criteria which are most necessary to fill on the empty boxes as follows as Select Academic Year, Class, Section, First Name, Last Name, Gender, Date Of Birth[8], Age, Blood Group, Religion, Class, Email, ID Number, Student Mobile, Category, Group, Height, Weight, Attached Photo, Father Name, Father Occupation, Fathers Phone, Attached Father Photo, Mothers Name, Mothers Occumation, Mother Phone, Attached Mothers Photo, Guardian Name, Select Relation as like Father, Mother, Or other. Also, fill in the Guardian Email, Guardian Phone, Attached Guardian Photo, Guardian Occupation Guardian Address, Current Address, Permanent Address, How Do You Know Us?, Route, Vehicle, Dormitory Name, Room Number, National ID Number, Local ID Number, Bank Account Number, Bank Name, Previous School Details, Additional Notes, IFSC Code stands for Indian Financial System Code. It is an 11-digit alpha-numeric code that uniquely identifies a bank branch participating in any RBI-regulated funds transfer system. The IFSC code helps to transfer money using RTGS, NEFT or IMPS methods. However, follow the instruction from the Attached Document File, & hit register] button.