Welcome to our software! This user guide will assist you in managing disabled or inactive students within our system. Follow the steps below along with the provided screenshots for a seamless experience.
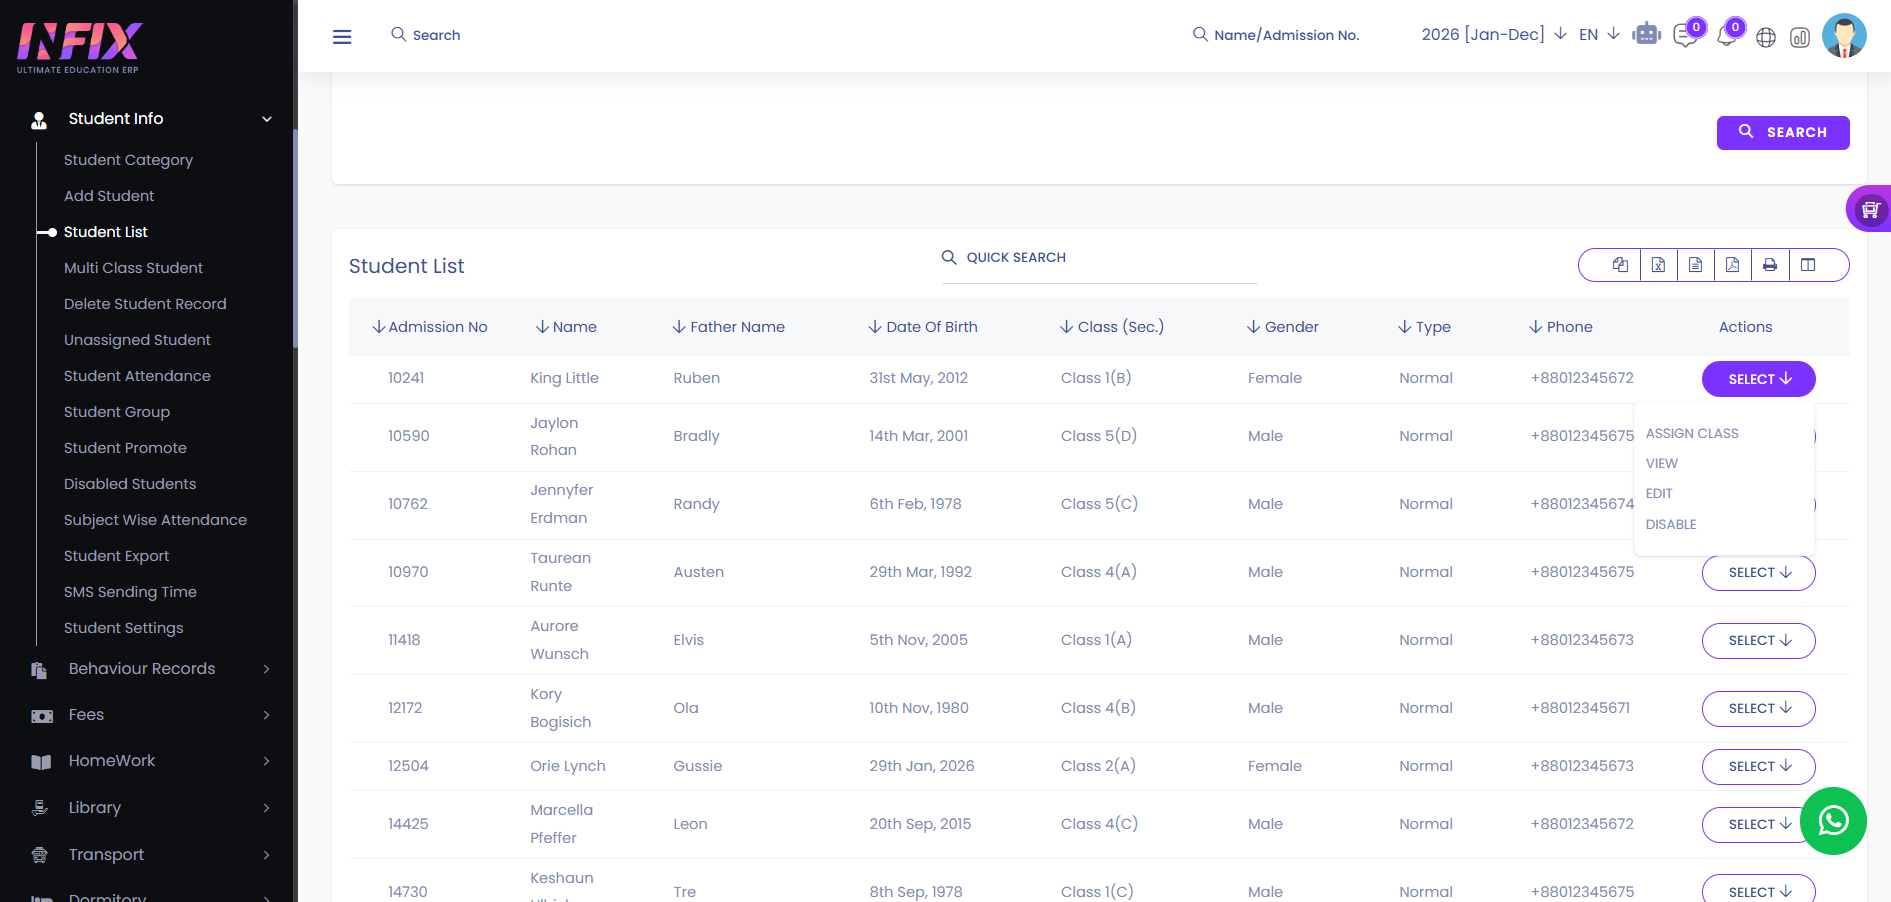
Navigate to Student List: Access the Student List option from the menu.
 \
\
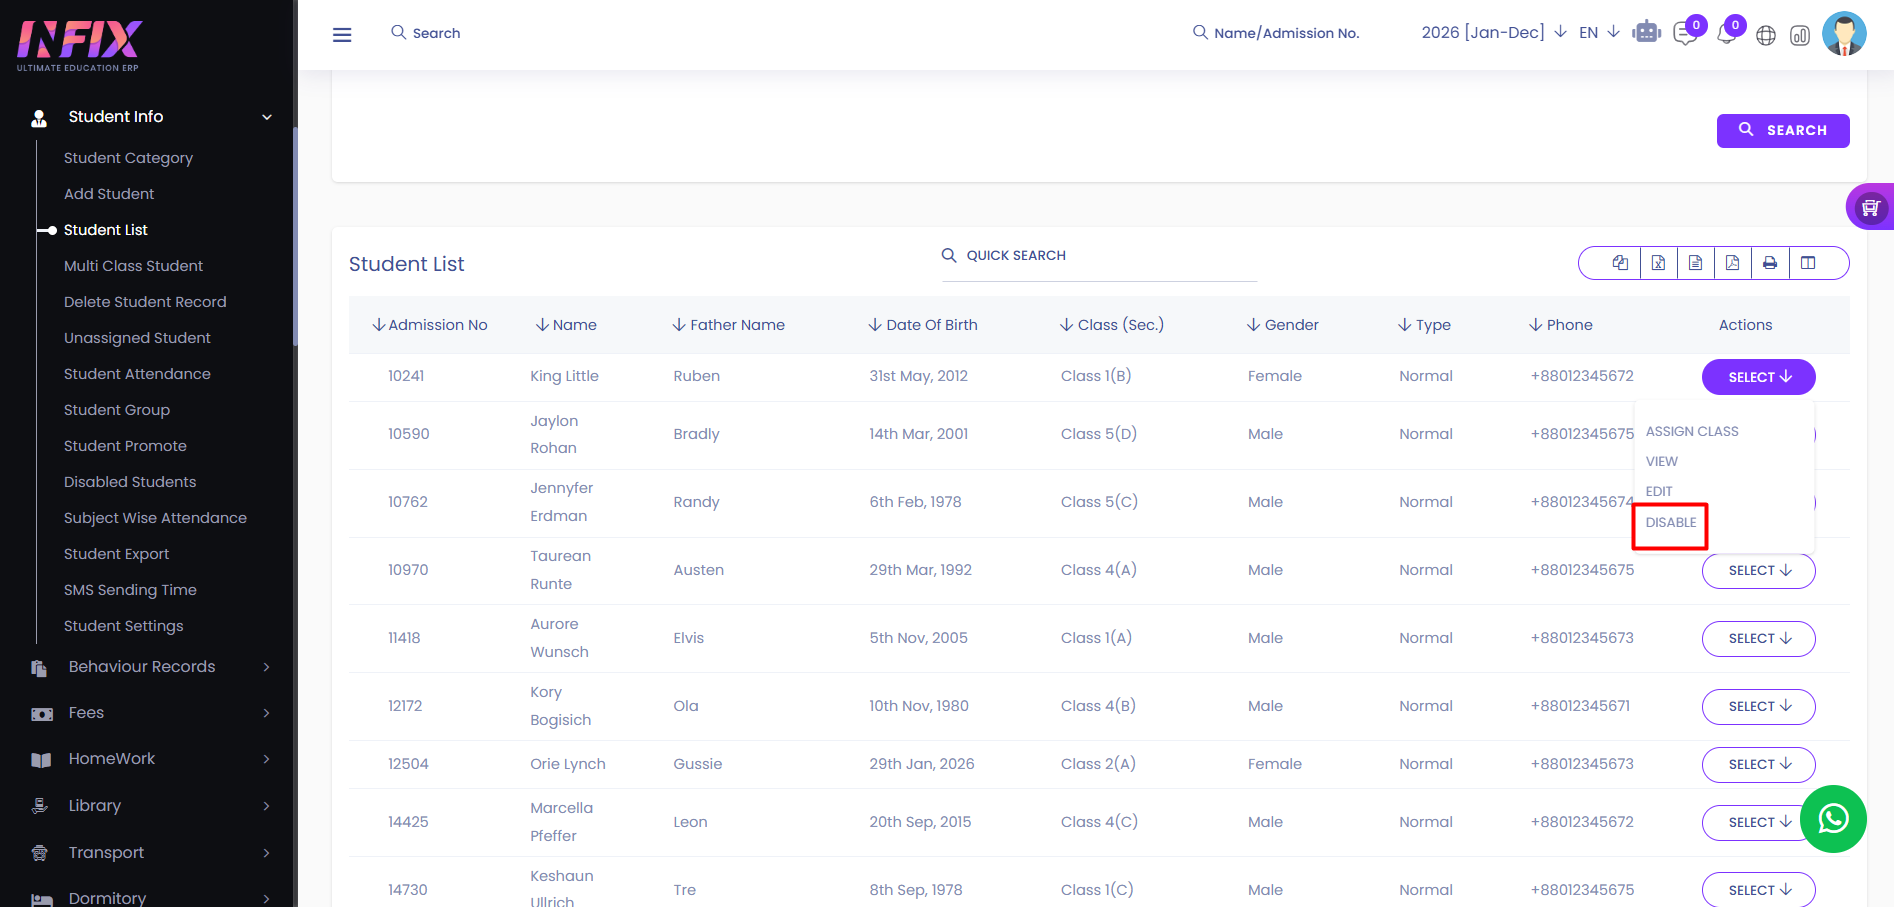
Mark a Student as Disabled: Within the Student List, locate the student you wish to disable and mark them as disabled.
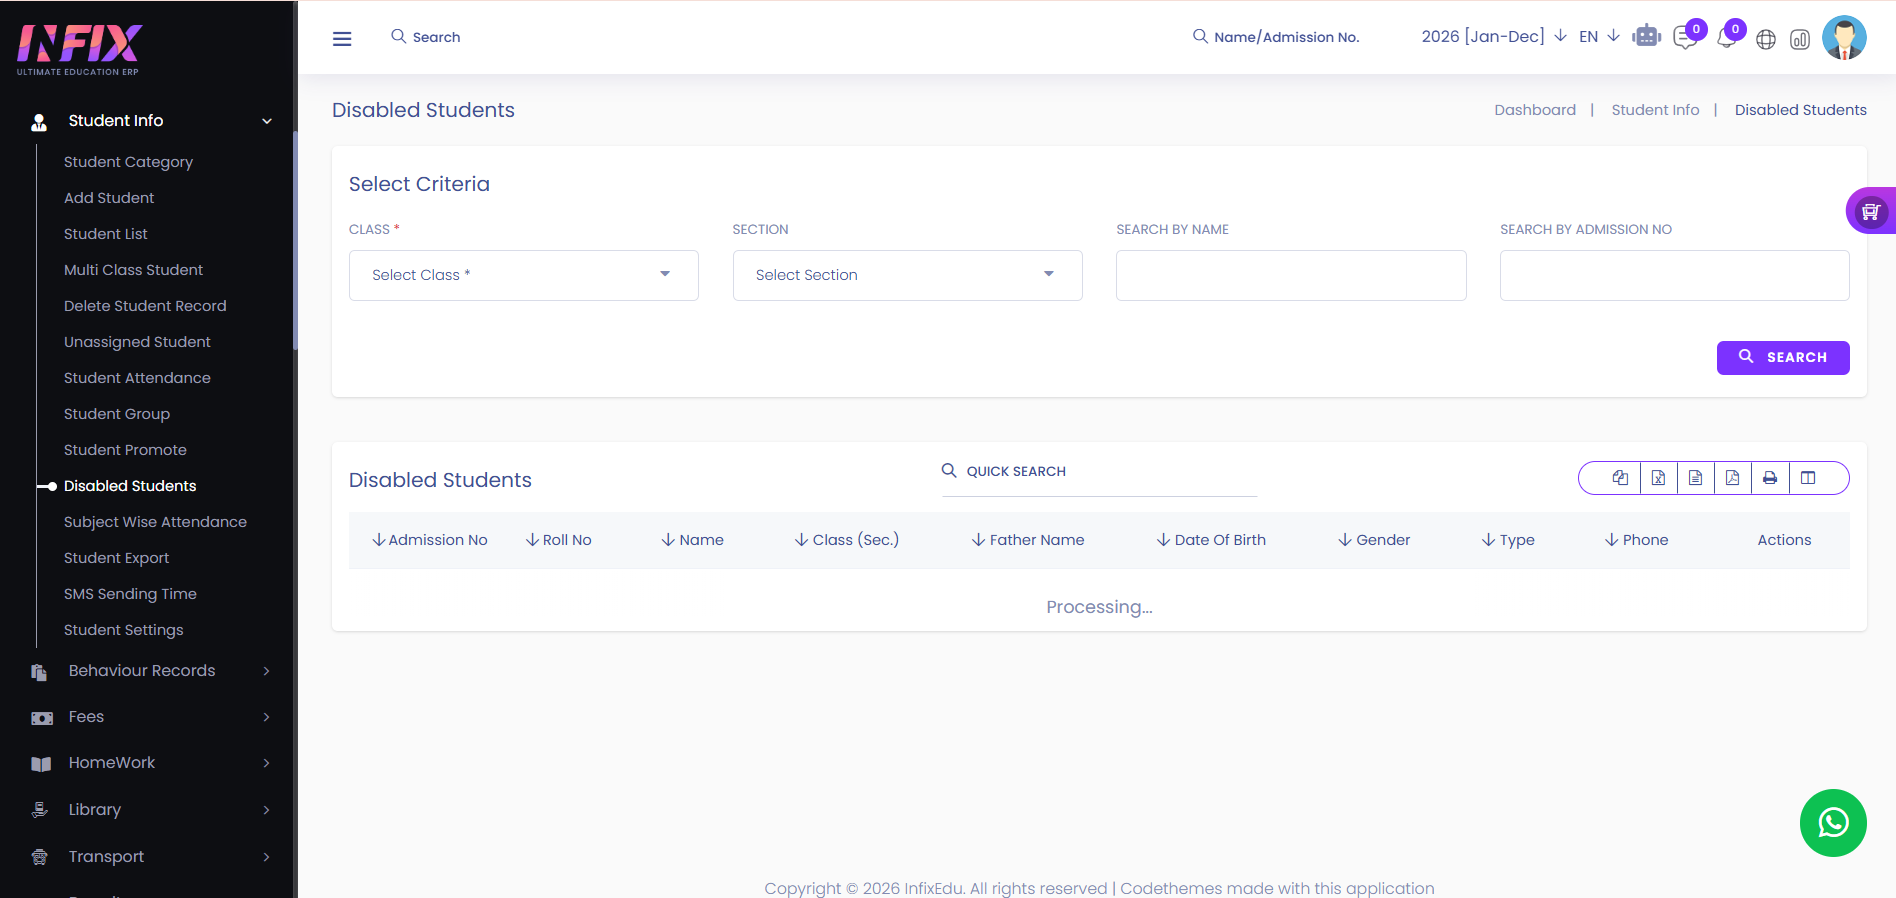
Select Search Criteria: Choose criteria such as Class, Section, Name, or Roll No to search for disabled students.
Click Search: After selecting your criteria, click the Search button to find disabled students matching your search.
Access Disabled Student List: Navigate to the option where you can view the list of disabled students.
Enable Students: Select the disabled students you wish to enable, then click on the "Select" option and choose "Enable".