Add Student
A student is an individual enrolled in a course or institution for learning and academic development. When the university module is activated, the student enrollment process is modified.
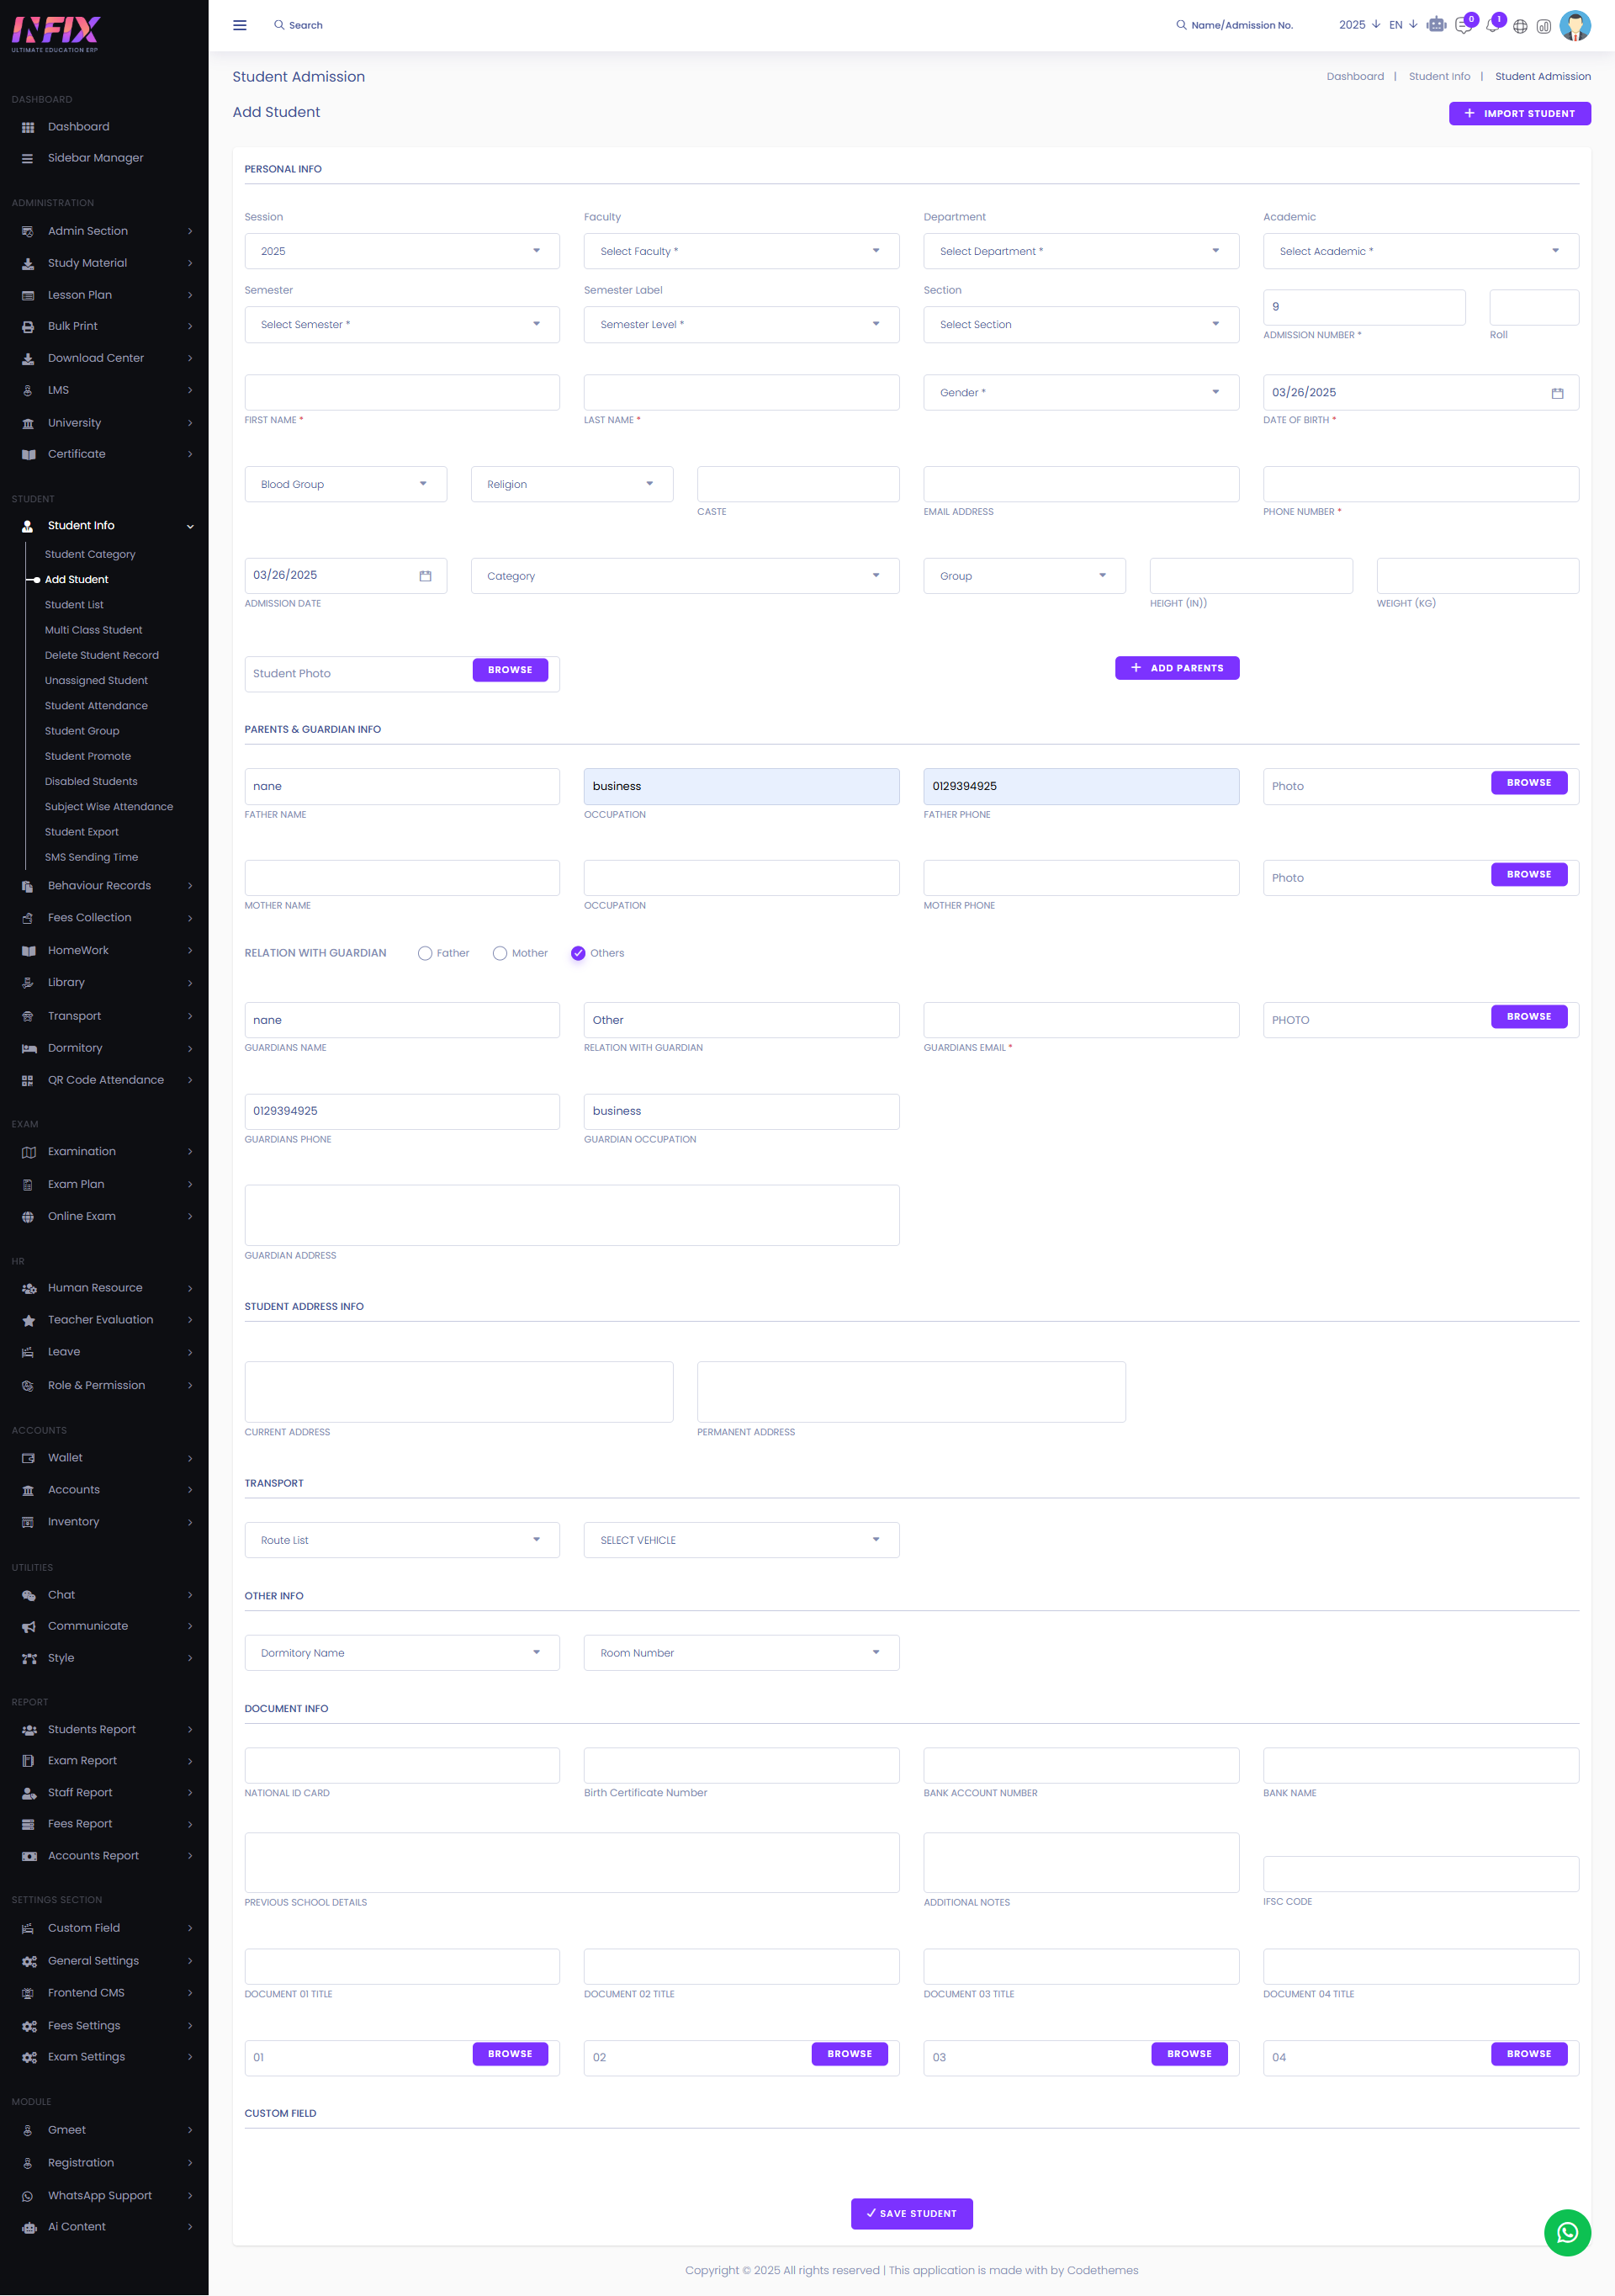
From here you can add a new student while the university module is activated. To add the student module just follow the below steps:
Personal Info: From here you can set all the personal information of the student.
Session: Select the session in which you want to enroll the student.
Faculty: Choose the faculty associated with the student.
Department: Select the student's department.
Academic: Specify the academic level or program.
Semester: Choose the semester for enrollment.
Semester Label: Assign a label to the semester.
Section: Select the section for the student.
Admission No: Set the admission no of the student.
Roll: Set the roll number of the student.
First Name: Set the first name of the student.
Last Name: Set the last name of the student.
Gender: Set the gender of the student.
Date Of Birth: Set the date of birth of the student.
Blood Group: Set the blood group.
Religion: Set the religion of the student.
Caste: Set the caste of the student.
Email Address: Set the email address of the student.
Phone Number: Set the phone number of the student.
Admission Date: Set the admission date of the student.
Category: Set the student category.
Group: Set the student group.
Height: Set the student height.
Weight: Set the student weight.
Student Photo: Upload the student photo.
Parents & Guardian Info: From here you can set the parents and guardian information of the student.
Father Name: You can set the father’s name of the student.
Occupation: Occupation of the student father.
Father Phone: Set father’s phone number
Photo: Upload the photo of the father.
Mother Name: You can set the mother’s name of the student.
Occupation: You can set the occupation of the mother.
Mother Phone: Set mother phone number.
Photo: Upload the photo of the mother.
Relation With Guardian: Set the student's relationship with their guardian. You can choose Father, Mother, or Other as the guardian.
If you choose other as guardian then add the guardian info. To add the info just follow the below steps:
Guardian Name: Set the name of the guardian.
Relation With Guardian: Set the relation with the guardian.
Guardian Email: Set the guardian email address.
Photo: Upload the photo of the guardian.
Guardian Phone: Set the guardian phone number.
Guardian Occupation: Set the guardian occupation.
Guardian Address: Set the guardian address.
Add Parents: If the student has siblings already listed, you can retrieve their parent information by clicking this. After clicking just follow the below steps:
Class: Select the class of the siblings.
Section: Select the section of the siblings.
Siblings: Select the siblings.
Save Information: Click to save the information.
Student Address Info: From here you can add student address information. Such as:
Current Address: Set the current address of the student.
Permanent Address: Set the permanent address of the student.
Transport: From here you can assign transport to the student. Such as:
Route: Select the route from the list.
Vehicle: Select vehicle from the list.
Others Info: From here you can assign dormitories to the student. Such as:
Dormitory: Select the dormitory from the list.
Room Number: Select the room number for the student.
Document Info: From here you can set up document information of the student. Such as:
National ID card: Set the number of the national id card.
Birth Certificate Number: Set the number of the birth certificate.
Bank Account Number: Set the bank account number.
Bank Name: Set the bank name.
Previous School Details: Set the previous school details.
Additional Notes: If there are any additional notes then write it here.
IFSC Code: Set the IFSC code.
Document Title: Set the document title.
Browse: Browse and upload the document title.
Custom Field: If there is any special custom field added for students then you can see it here.
Save Student: Click the button your student will be saved successfully.