Infixedu provided exclusive Xendit is a payment gateway that helps businesses make payments simple, secure and easy for customers. A secret key can perform any API request to Xendit on behalf of your account. Your secret keys should be kept confidential and only stored on your own Infixedu servers.
If you want to know how to get Secret API & how to set up the Xendit payment gateway then follow this step below.
Link: https://docs.xendit.co/api-integration/api-keys
Also, Know the Infix Module Installation process
Link: Infix Module Installation process
How to Install the Xendit Module in Infixedu:
Infixedu should be pre-installed on your server.
Purchase Xendit Module for Infixedu.
Download and install this Xendit Module to your Infixedu portal.
Configure the Xendit File and save it.
What are the benefits of using Xendit?
Accept and send payments easily.
Easy Onboarding process.
Simple Integration.
Web / Mobile Checkout - Suitable for online shops / Instagram sellers.
Instant transfer.
Real-Time notification.
Daily reconciliation/reporting.
Simple & competitive pricing – no hidden fees.
Active Xendit Pament Module:
If you want to add or active Xendit module for Infixedu then go to the general setting to find the module manager to find the Xendit.
Short Direction: {Infixedu> Dashboard> General Settings> Module Manager> UPLOAD/UPDATE MODULE> Xendit Payment> Active or Inactive.}

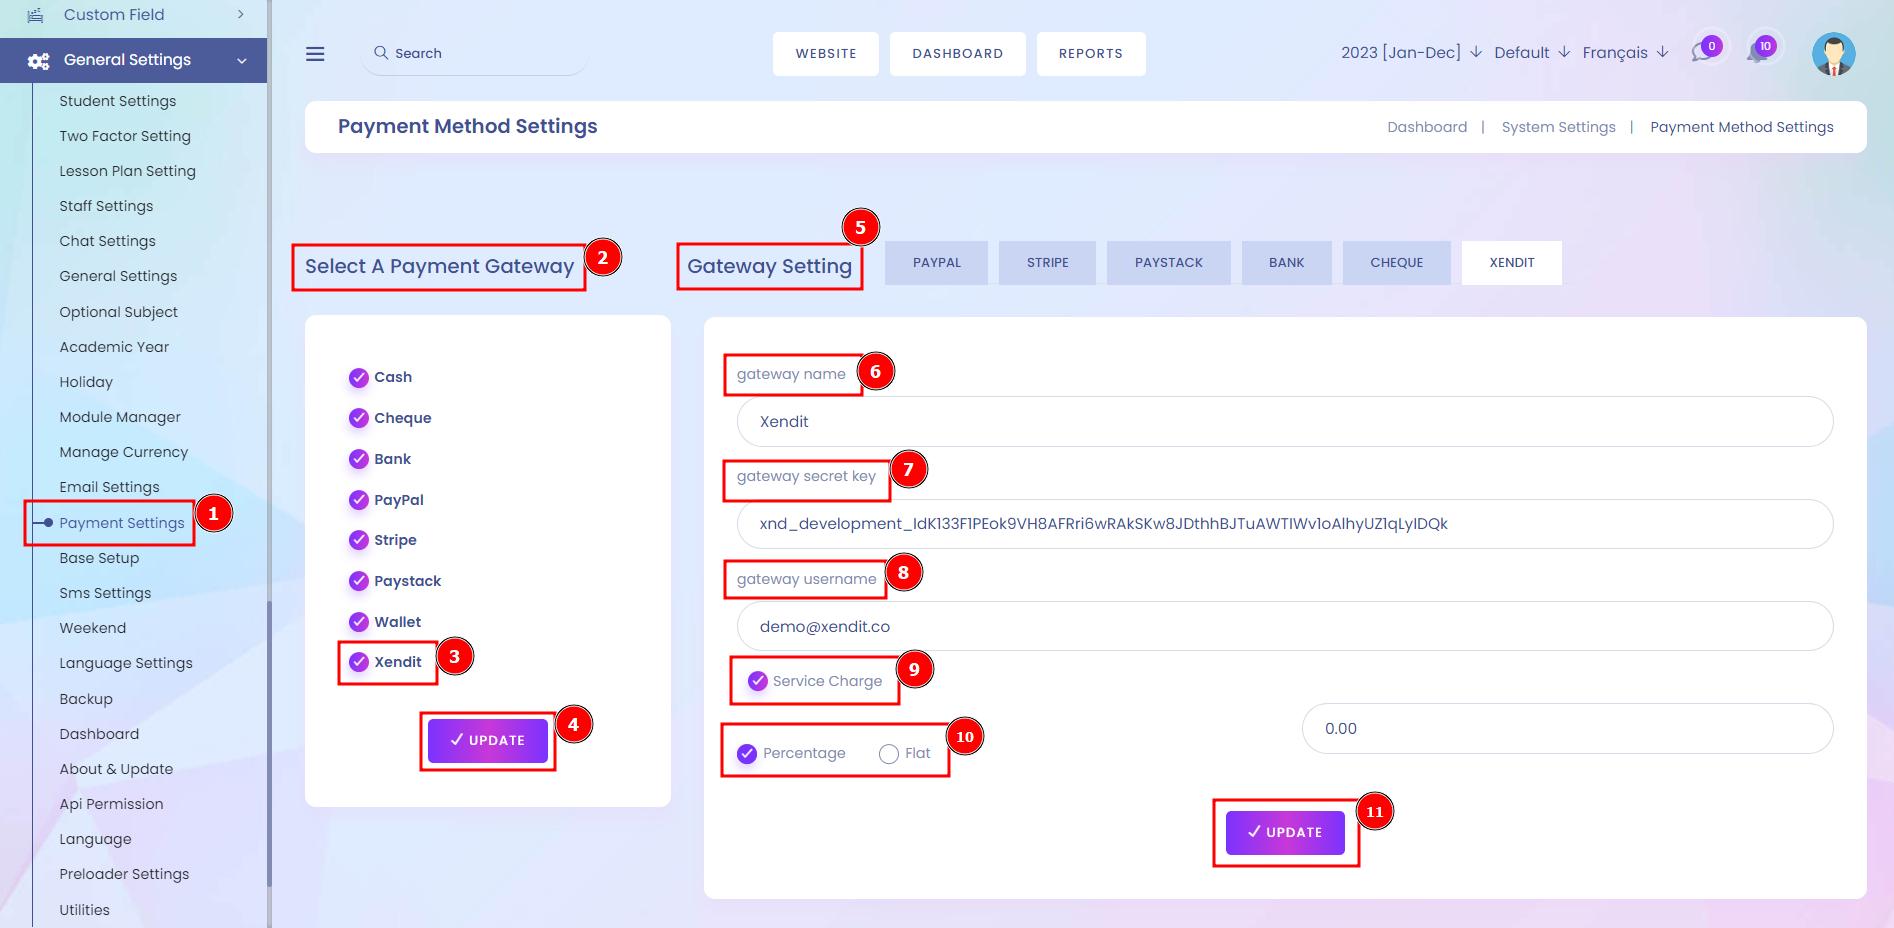
Select A Payment Gateway:
If you want to activate the Xendit payment gateway system for the student to pay their fees or other stuff then go to the General Settings to find the Payment Settings click on the Xendit & hit the update button.
Short Direction: {Infixedu> Dashboard> General Settings> Payment Settings> Select A Payment Gateway> Xendit> Update> GAteway Setting for select Xendit> Gateway Name> Gateway Secret Key> Gateway Unsername> Service Charge> Percentage or Flat> Update.}
Creating an API key can easily be done with the following steps:
Visit the API Key page
Click Generate secret key
Select the API key permission
Enter your user password to authenticate yourself
Save the API key securely and apply the new API key to your system.
Assign Permission For Student:
If you want to assign students for using their wallet payment system then go to the Infixedu dashboard to find the role & permission to click on the Role option to Assign permission.
Short Direction: {Infixedu> Dashboard> Role & Permission> Role> Student> Assign Permission> Wallet> Fees> Status> Pay with Xendit> Credit/ Debit Card> Card Number> Valid Thru> CVV> Pay Now> OTP> Submit> Resend Code> Total Amount shows 100*1000> Paid.}

Wallet Permission:
If you want permission for a role for the student then just simply mark it on the wallet & hit the submit button.

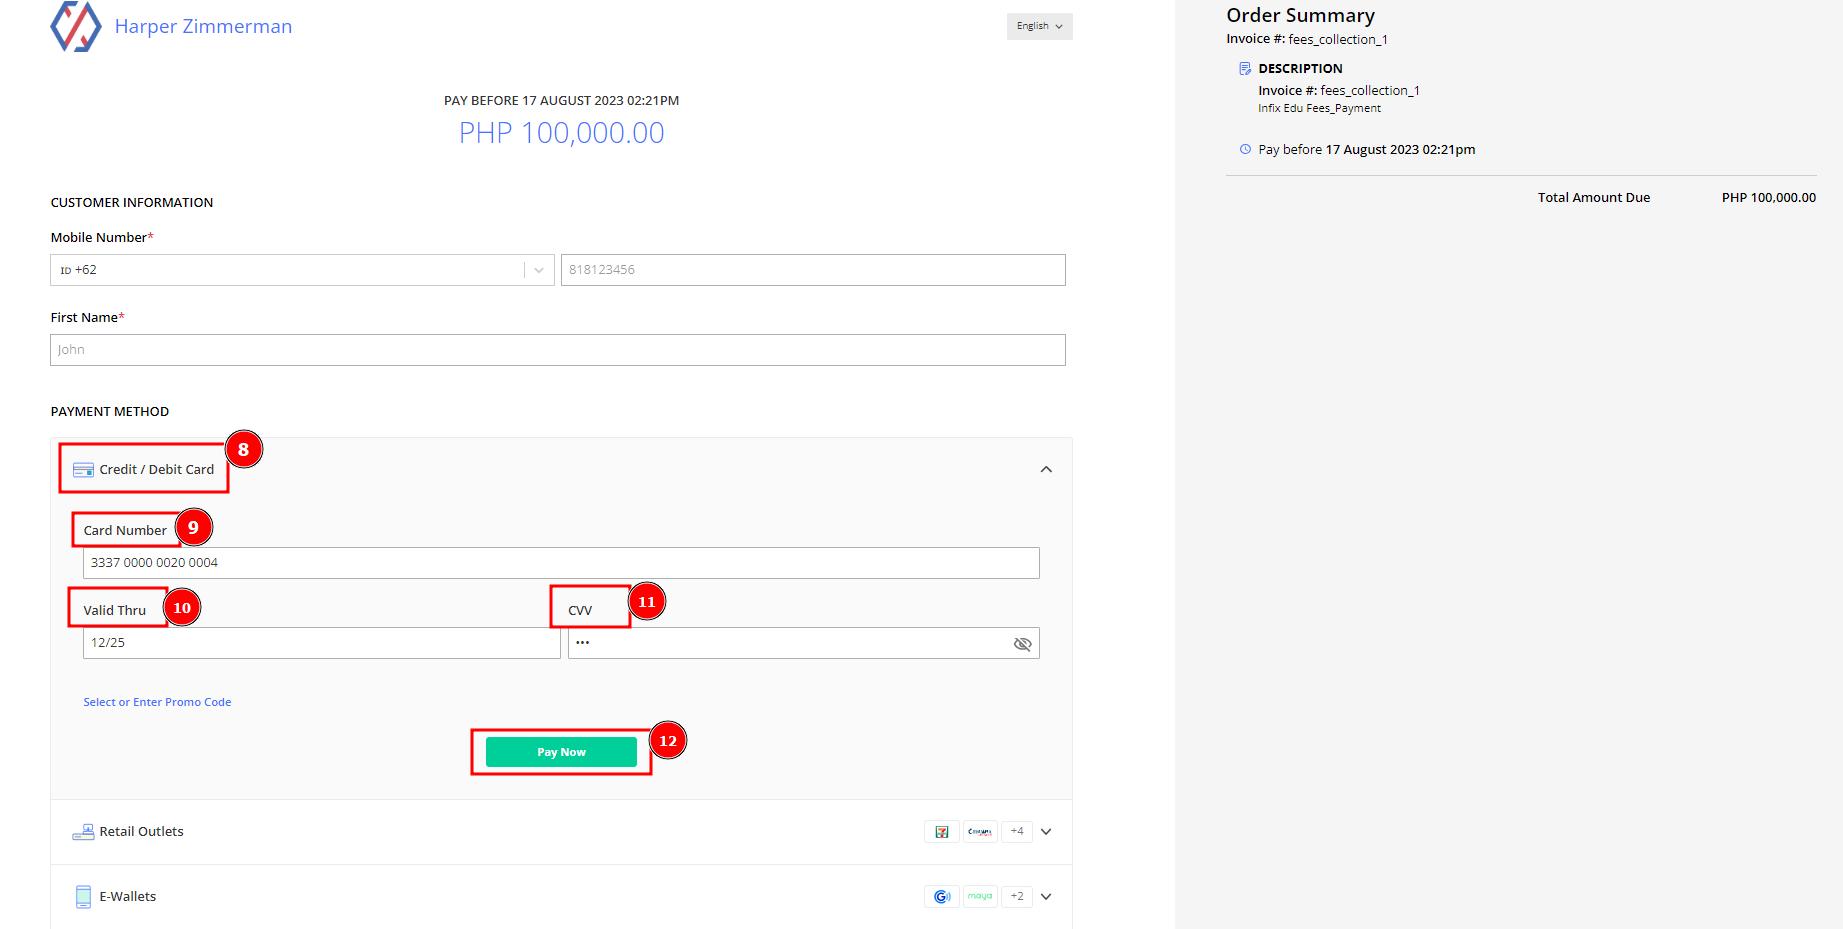
Fee Payment with Xendit:
If you want to pay the fees on Infixedu tuitions then a user can select several payment gateways as long as Xendit.

Credit or Debit Card Demo:
Before accepting real payment, you can use testing cards in this section to satisfy the testing requirements and scenarios for you to simulate different process results in development mode.
If you are looking for a demo card number then click on the link below:
Link: https://docs.xendit.co/credit-cards/integrations/test-scenarios
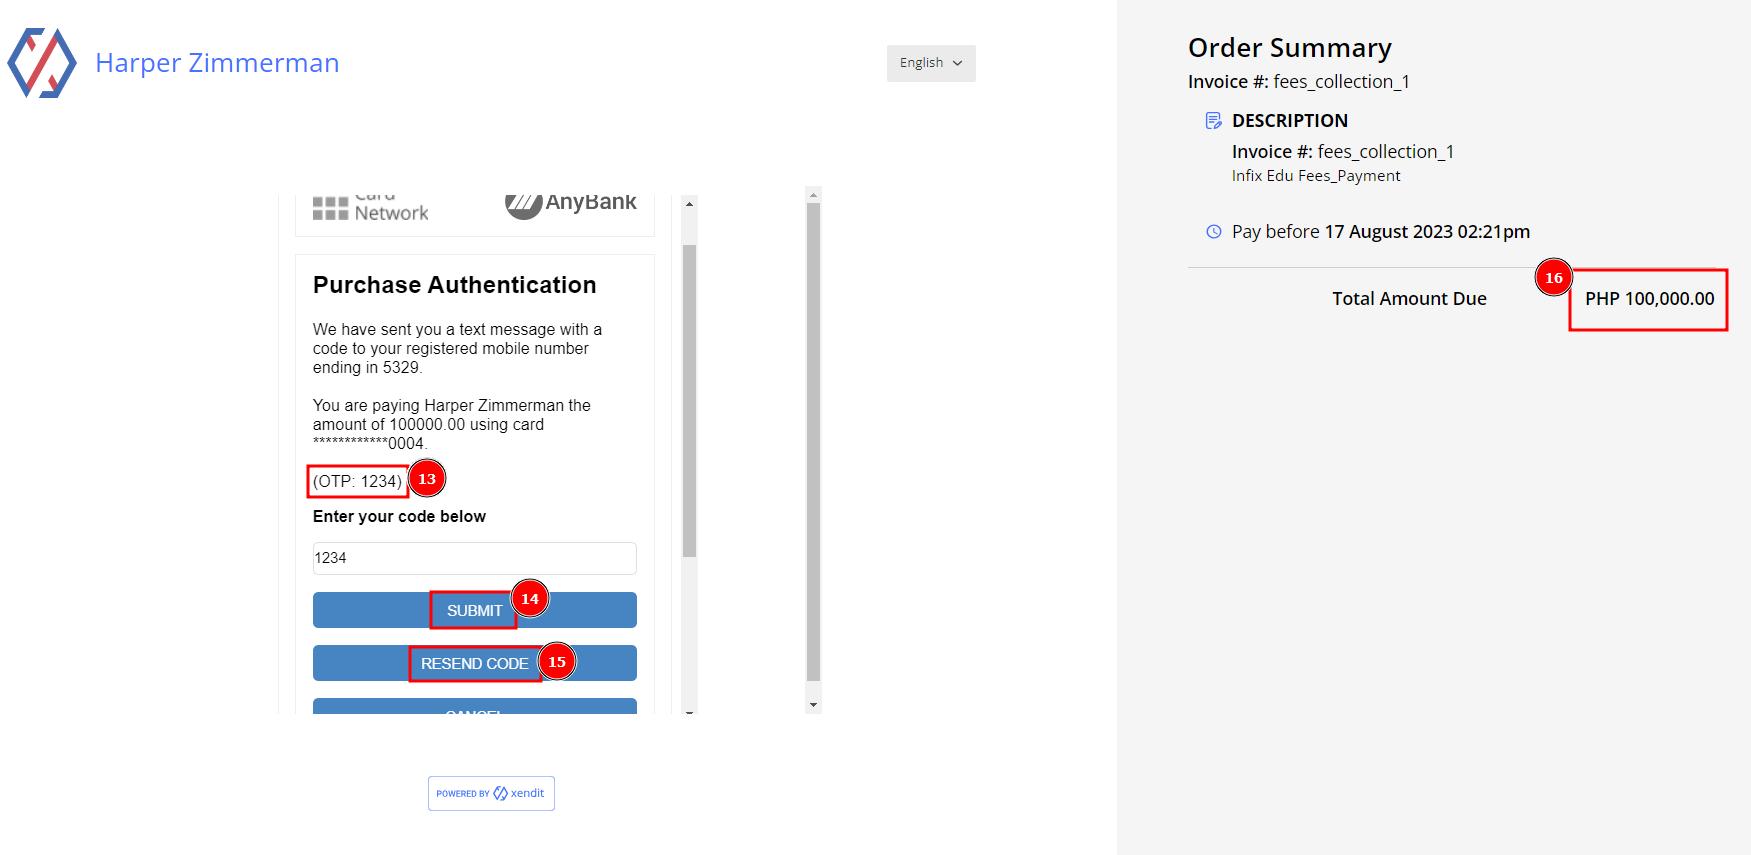
OTP & Submit Payment:
Here is the demo OTP code that is showing for the payment procedure. OTP means One Time Password: It's a temporary, secure PIN code sent to you via SMS or e-mail that is valid only for one session.
Paid Successfully:
When your payment is successful then the fee status will be changed & show the paid.

Add Xendit Amount in Student Dashboard:
Go to the Student dashboard to find the My Wallet section to click on the add balance to put on the amount.
Short Direction: {Infixedu> Dashboard> My Wallet> Add Balance> Add Amount> Amount> Payment Method> Xendit + Service Charge> Submit it.}
If you want to pay any amount will be converted Xendit into one thousand money. For example, if A user inputs ten takas, then the Xendit payment interface will show the (10❌1000)= 10,000Taka.