Hosting courses on your eLearning platform is excellent, but they lack the interactivity of a classroom, here is the presentation of the most vital live app extension for infixLMS. However, we know that Authentication is the act of validating the identity of each user before they access a system.
If you want to find the procedure of API credentialism click the link below & get a better know the way to process In Live App. The Configuration of Live Class For InfixLMS.
Link: Secure authentication with tokens
Also, Know the Infix Module Installation process
Link: Infix Module Installation process
In-App Live class:
So, we figured it’s best to give you an easy way of creating hosting and managing live classes online. To start creating live online lessons, you will need a few tools and configure some of them to your liking.
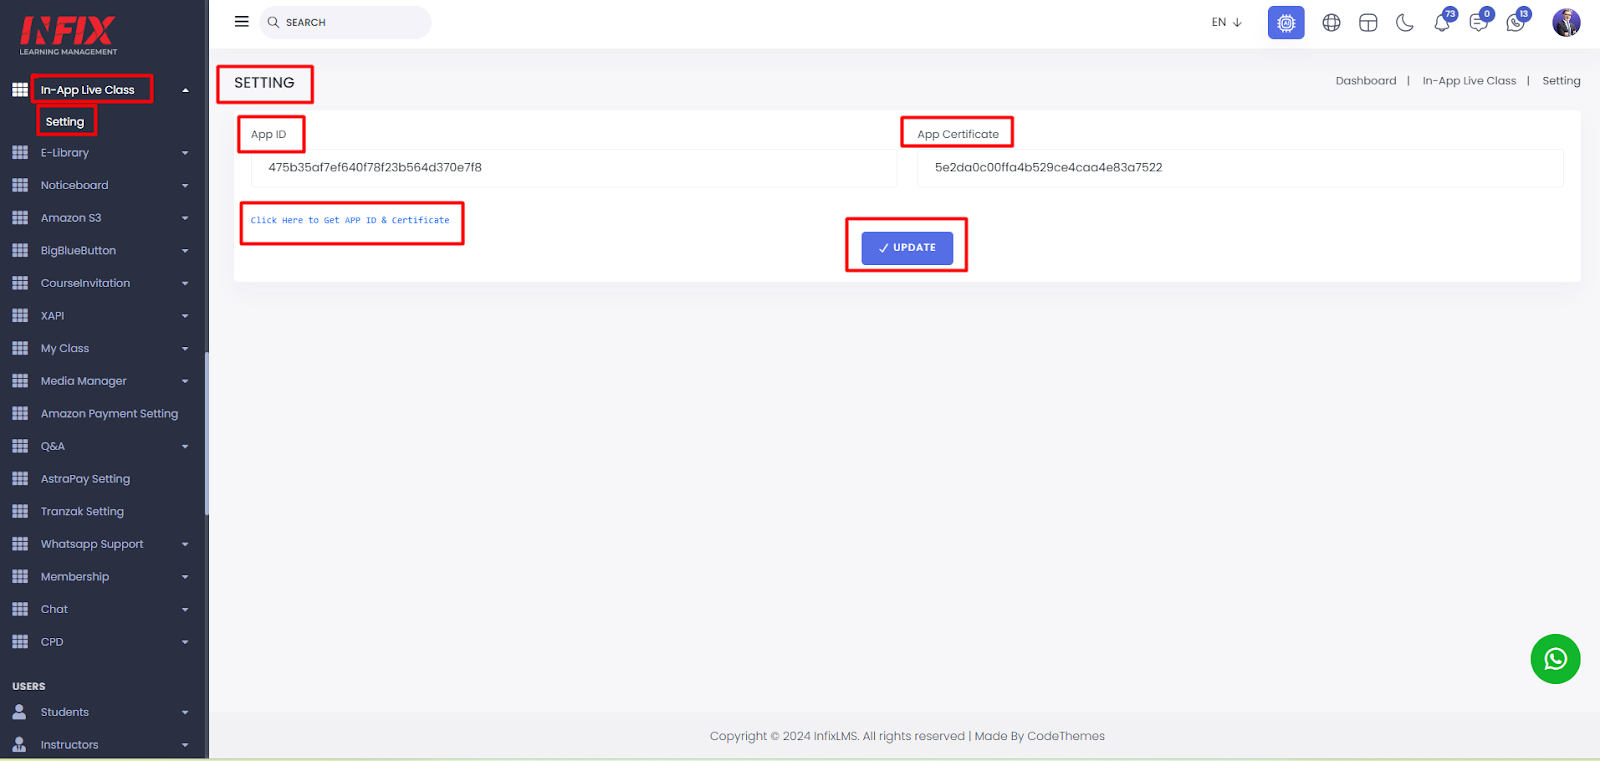
Short Direction: {InfixLMS> Dashboard> In-App Live Class> Setting> App ID> App Certificate> Click here to set App ID & Certificate> Update.}
However, to set the class infixedu for your virtual meeting, go to the In-App Live class in your admin panel.
1- Setting
2- App ID
3- App Certificate
4- Click here to set the App ID & Certificate
5- Update.
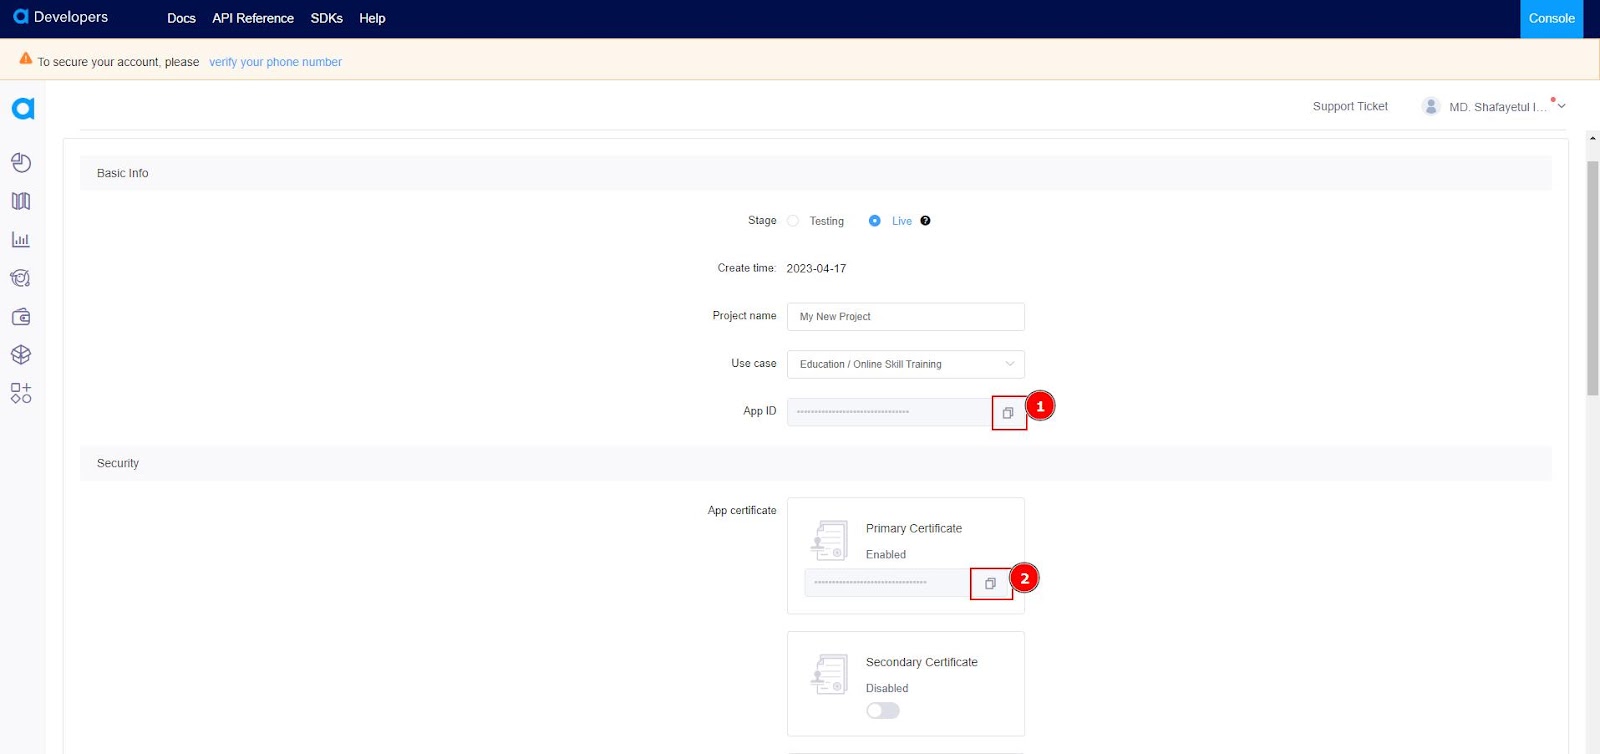
App ID & App Certificate Key:
If you want to find the App ID & Certificate key for setup of the InfixLMS In-App Live class then sign in to agora.io with your Gmail account, find the account dashboard click on the New project to configure it & copy your project App ID key & App Certificate key to replace you InfixLMS In-App Live Class server section.
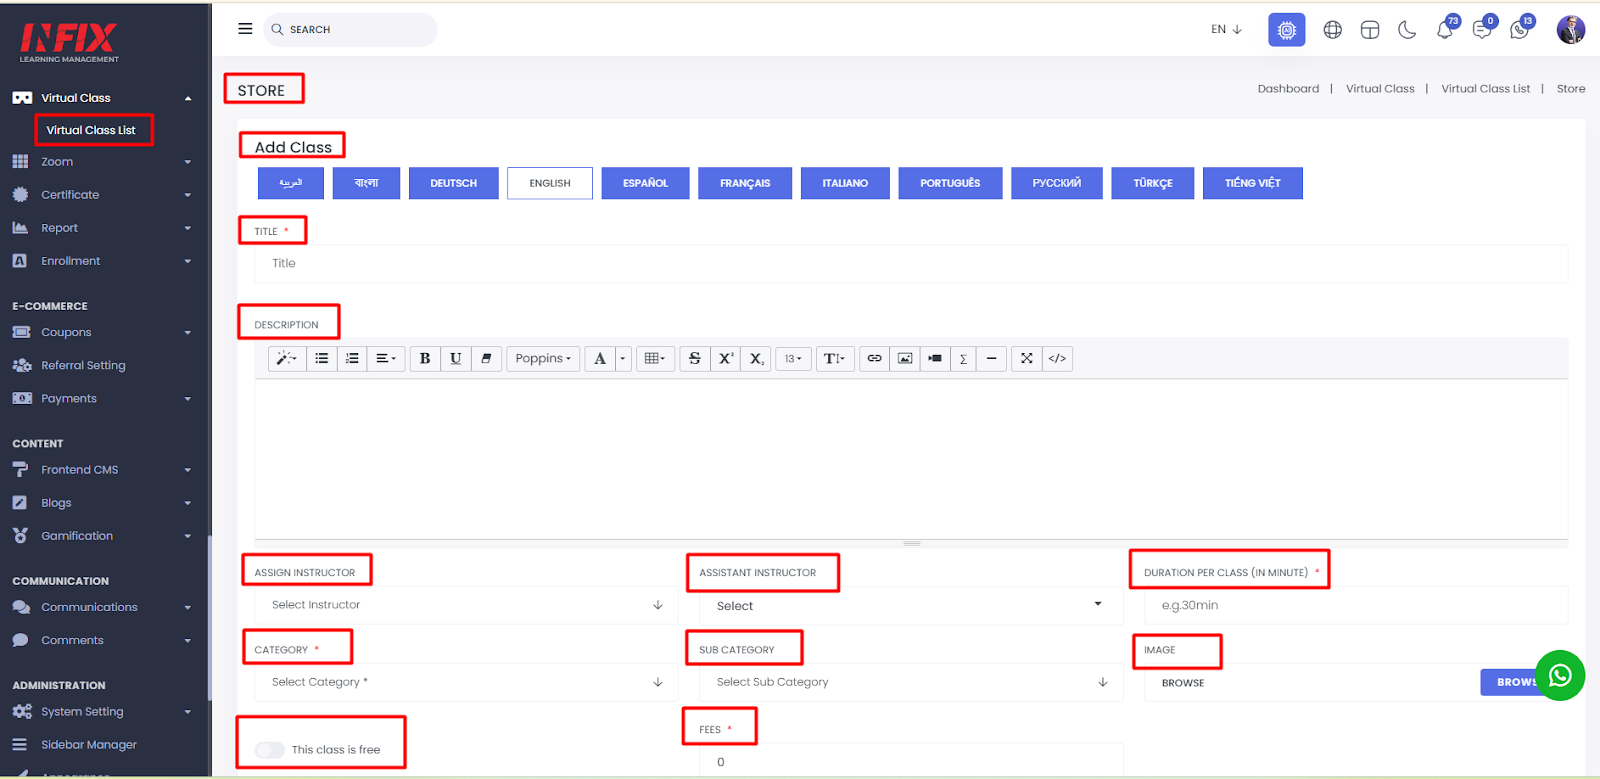
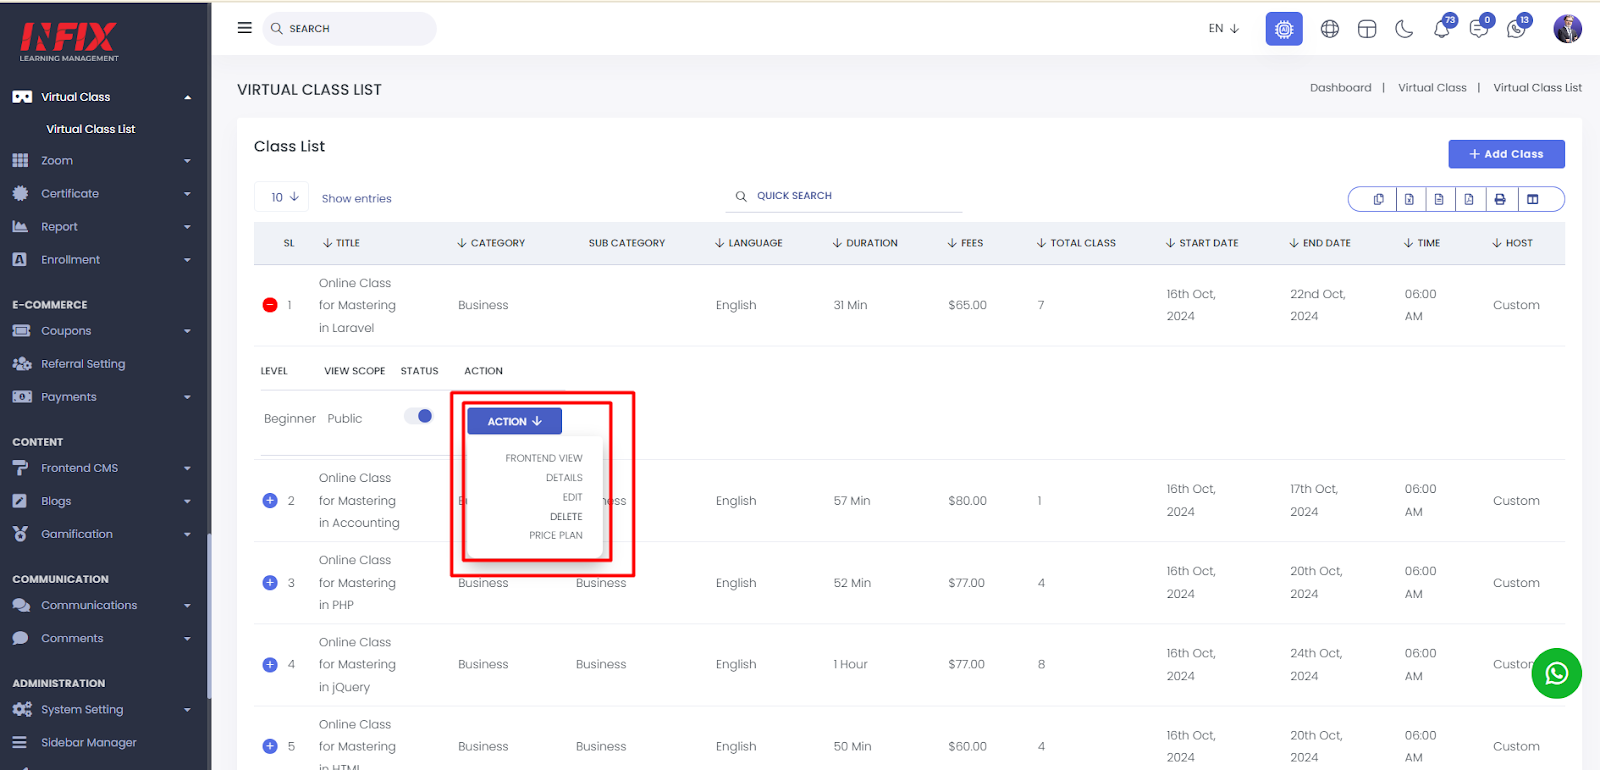
Add Virtual Class:
You can also create a virtual classroom by going to Virtual Classrooms from the left-side menu. Once you are there, you will see the add class section to fill it. Clicking on it will take you through the same process.
Short Direction: {InfixLMS> Dashboard> Virtual Class> Virtual Class List> Add Class> Title> Description> Assign Instructor> Assistant Instructor> Duration Per Class> Category> Sub Category> This Class is Free> Fees> Browse Image> View Scope> Language> Type> Date> Time> Host> Password> Attached File> Select Certificate> Capacity> Support> Save Class> Class List> Click the plus button For other options> Action for details, edit, price plan or delete.}
If You want to add a new virtual class for the InfixLMS system, go to the admin panel dashboard to find the Virtual class list.
1- Virtual Class List
2- Add Class
3- Title
4- Description
5- Assign Instructor
6- Assistant Instructor
7- Duration Per Class
8- Category for create Go to the course section to click on the category list to create a parent category.
[InfixLMS> Dashboard> Course> Category List> Add New Parent Category]
9- Sub Category means if you created by course section in the category list then select parent category for creating a sub-category for the virtual class list.
10- This Class is Free
11- Fees
12- Browse Image
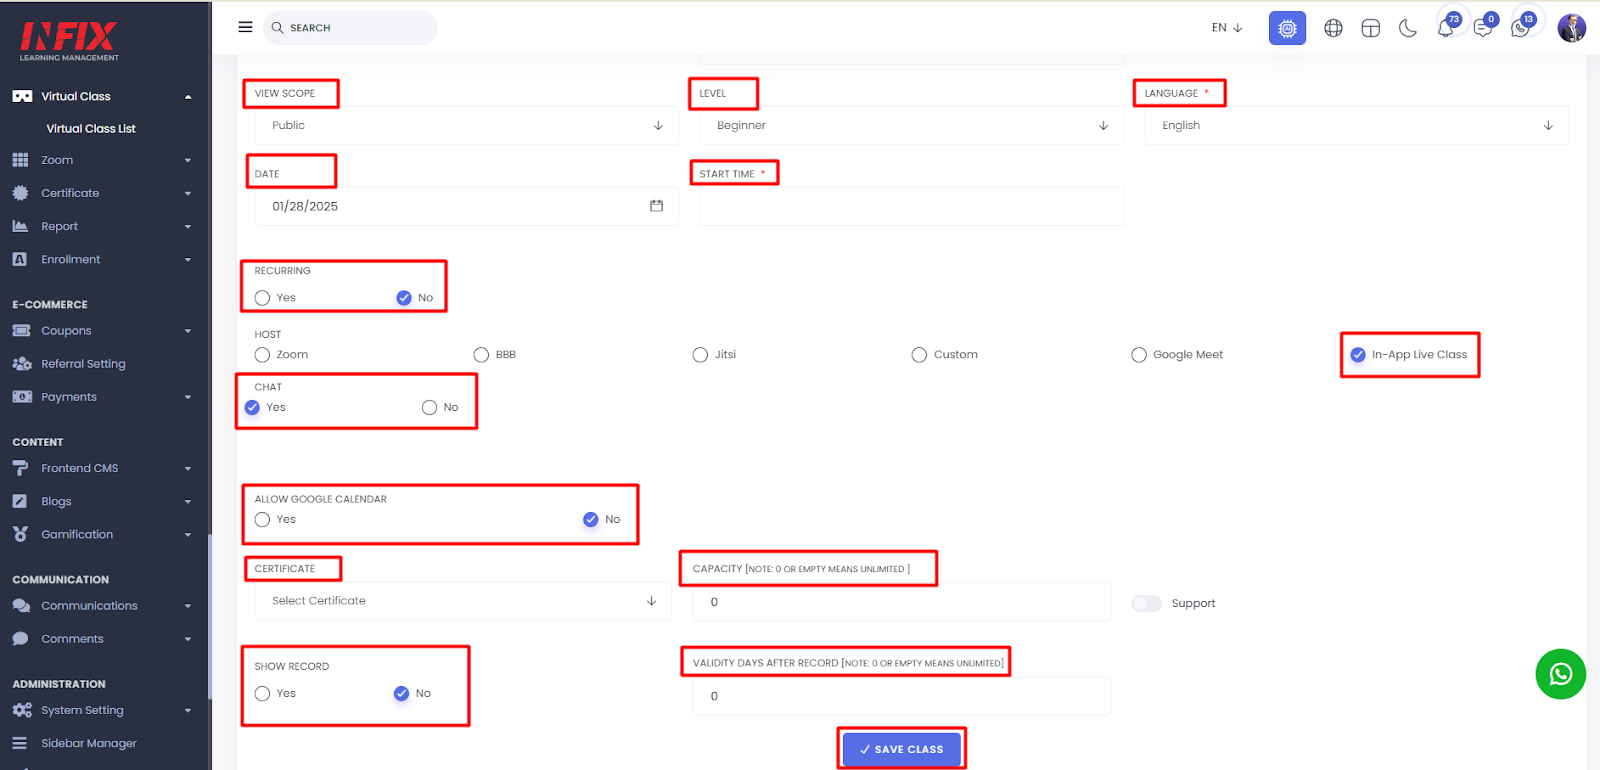
13- View Scope
14- Language
15- Type
16- Date
17- Time
18- Host
19- Password
20- Attached File
21- Select Certificate
22- Capacity
23- Support
24- Save Class
25- Class List
26- Click the plus button For other options such as start date, end date, time, host or view scope.
27- Action for details, edit, price plan or delete
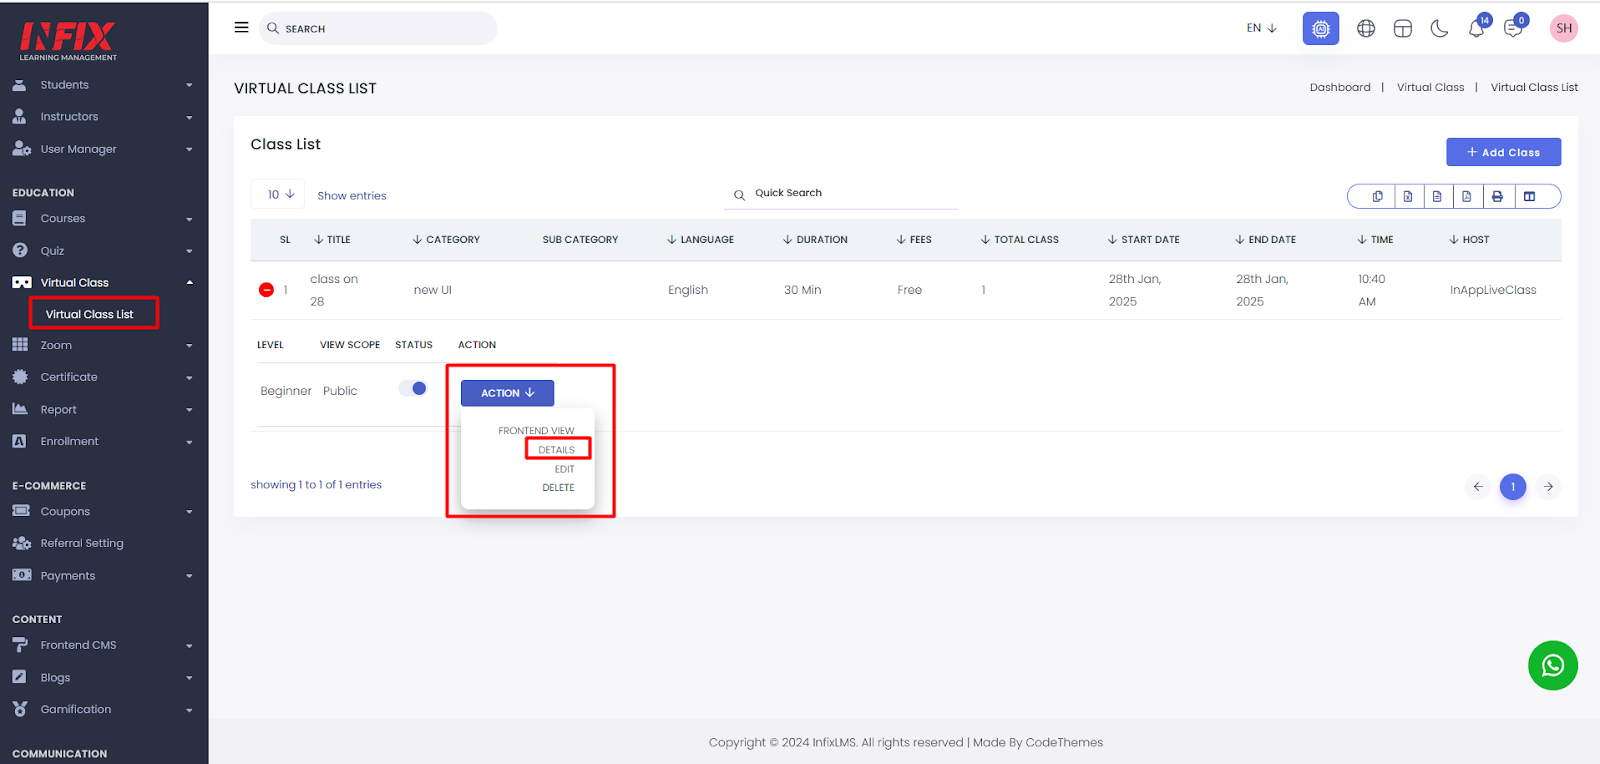
Student Panel Virtual Class List:
A Student can check on the virtual class list that they will be joining or starting class on time schedule. LMS virtual classroom is a video conferencing platform specifically built for learning that integrates seamlessly within a learning management system.
Short Direction: {InfixLMS> Student Dashboard> Instructor> Virtual Class List> Class List.}
If you want to start your virtual class then click on the action below details option to find the start class.
1- Instructor
2- Virtual Class List
3- Class List from clicking on the detail option to joining the virtual class.
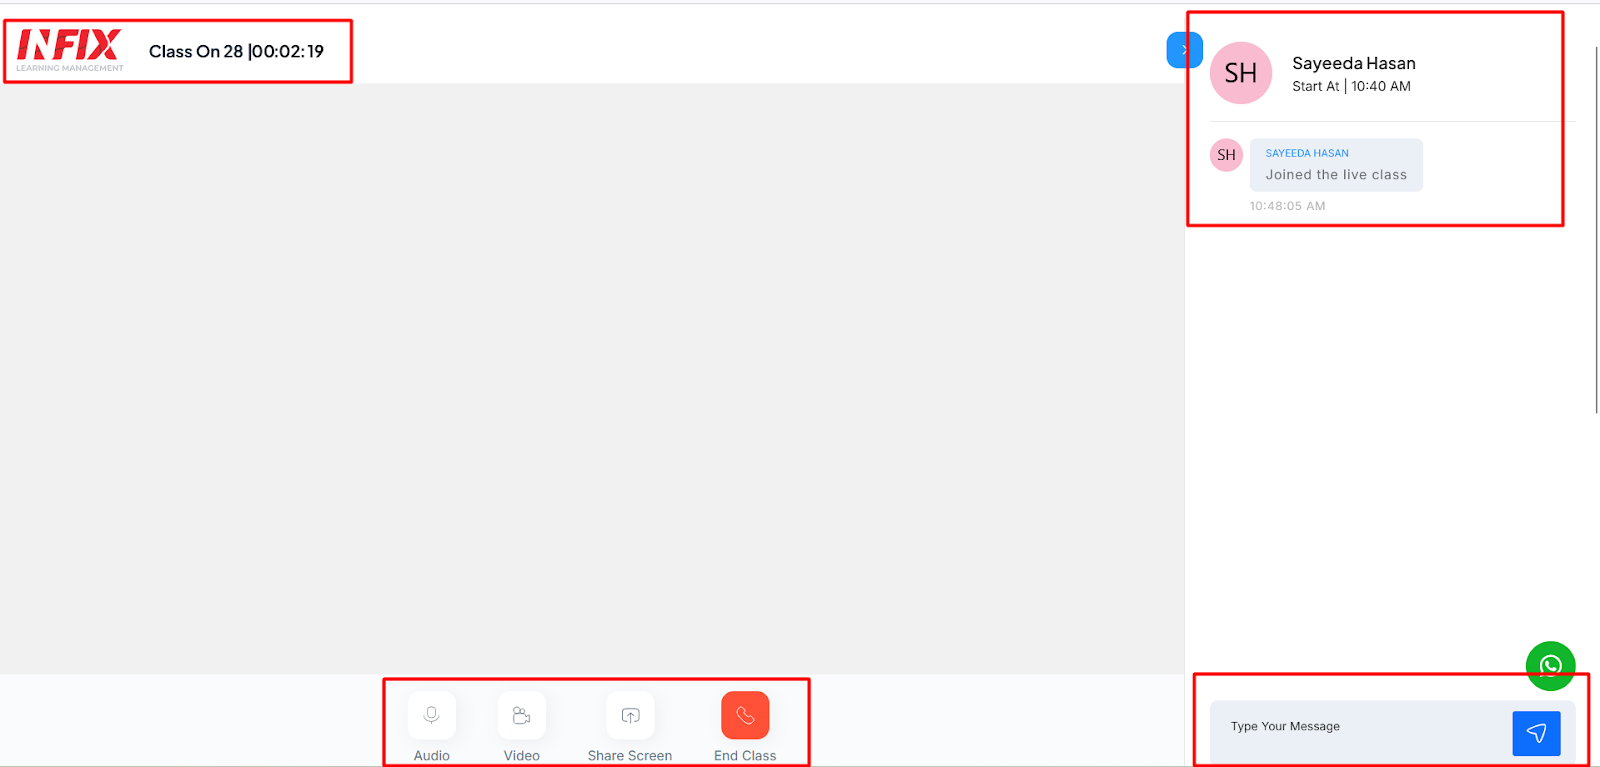
Live Class:
A virtual live classroom is an online learning environment in which students and teachers interact via the technical tools provided by the software. The virtual classroom is used by educational institutions to host classes remotely while maintaining the functionality available in a traditional classroom environment.
Short Direction: {InfixLMS> Student Dashboard> Class Title & Time> Joined the live class list member> Audio, Video, Share Screen or End Class> Type your message.}
Its seamless delivery of online training allows organizations across all industries to deploy virtual training to end-users through a virtual LMS platform.
1- Class Title & Time
2- Joined the live class list member
3- Audio, Video, Share Screen or End Class
4- Type your message