InfixLMS delivered paid module Bunny.net as known Bunnystorage, it is the content delivery platform that truly hops a reliable, powerful and lightning-fast storage content delivery network (CDN), they designed to offer incredible performance at the world's most cost-effective pricing Video player, transcoding, and security features are free of charge.
Also, Know the Infix Module Installation process:
Link: Infix Module Installation process
If you want to know how to Use Bunny CDN to Restrict and Embed Video on Your Site Then Click on the Link Below:
Link: https://www.paidmembershipspro.com/bunny-cdn/
If you are looking tutorial video on how to setup BunnyCDN with API Credintiality then click on the link below:
Link: https://drive.google.com/file/d/1cOi0SMpnjDEbLT7t31uweCmHhuTWQY1B/view?usp=sharing
How to Active Bunny Configuration Add-ons:
InfixLMS should be pre-installed on your server.
Purchase the BunnyStorage Modules for InfixLMS.
Download and install this BunnyStorage Add-on to your InfixLMS portal.
Upload BunnyStorage Add-on From System Setting> Module Manager.
Setup Bunny Storage App and configure it.
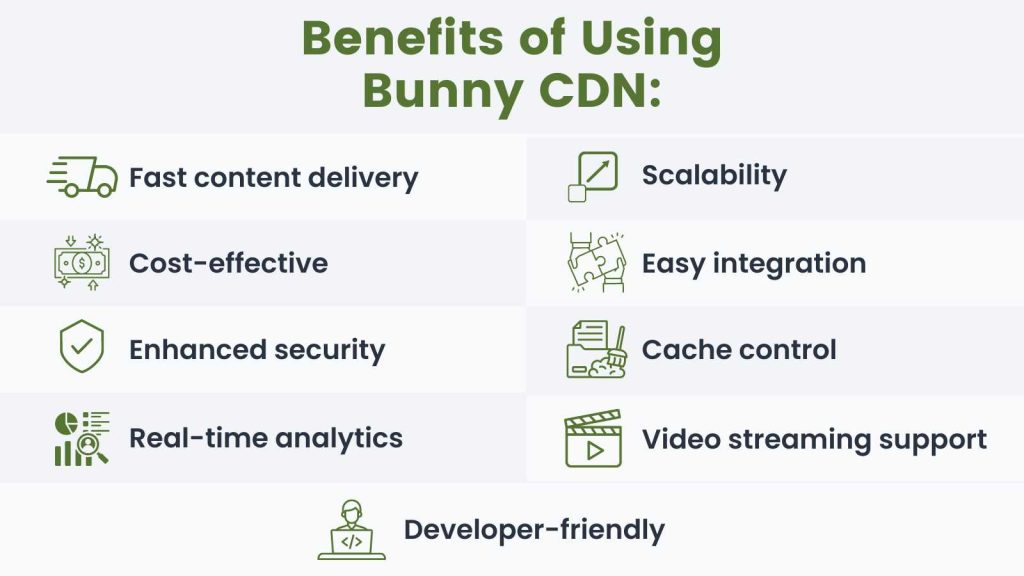
Benefits of Bunny Storage:
Bunny Storage uses a global network of servers to quickly deliver your content to users around the world.
As your website grows and experiences more traffic, Bunny CDN can easily handle the increased load without compromising performance.
Bunny Storage offers competitive pricing with a pay-as-you-go model, making it an affordable option for businesses of all sizes.
Bunny CDN provides simple integration options with popular platforms like LMS.
Bunny Storage offers various security features, such as SSL/TLS encryption, DDoS protection, and token authentication, to protect your content and website from malicious attacks.
Bunny Storage provides powerful cache control options that allow you to manage how your content is cached and served to users.
Bunny Storage offers real-time analytics and monitoring tools, giving you valuable insights into your content delivery performance and user engagement.
Bunny Storage supports video streaming, allowing you to deliver high-quality video content to your users quickly and efficiently.
Bunny Storage offers a comprehensive API and detailed documentation, making it easy for developers to integrate and customize the CDN services according to their specific needs.
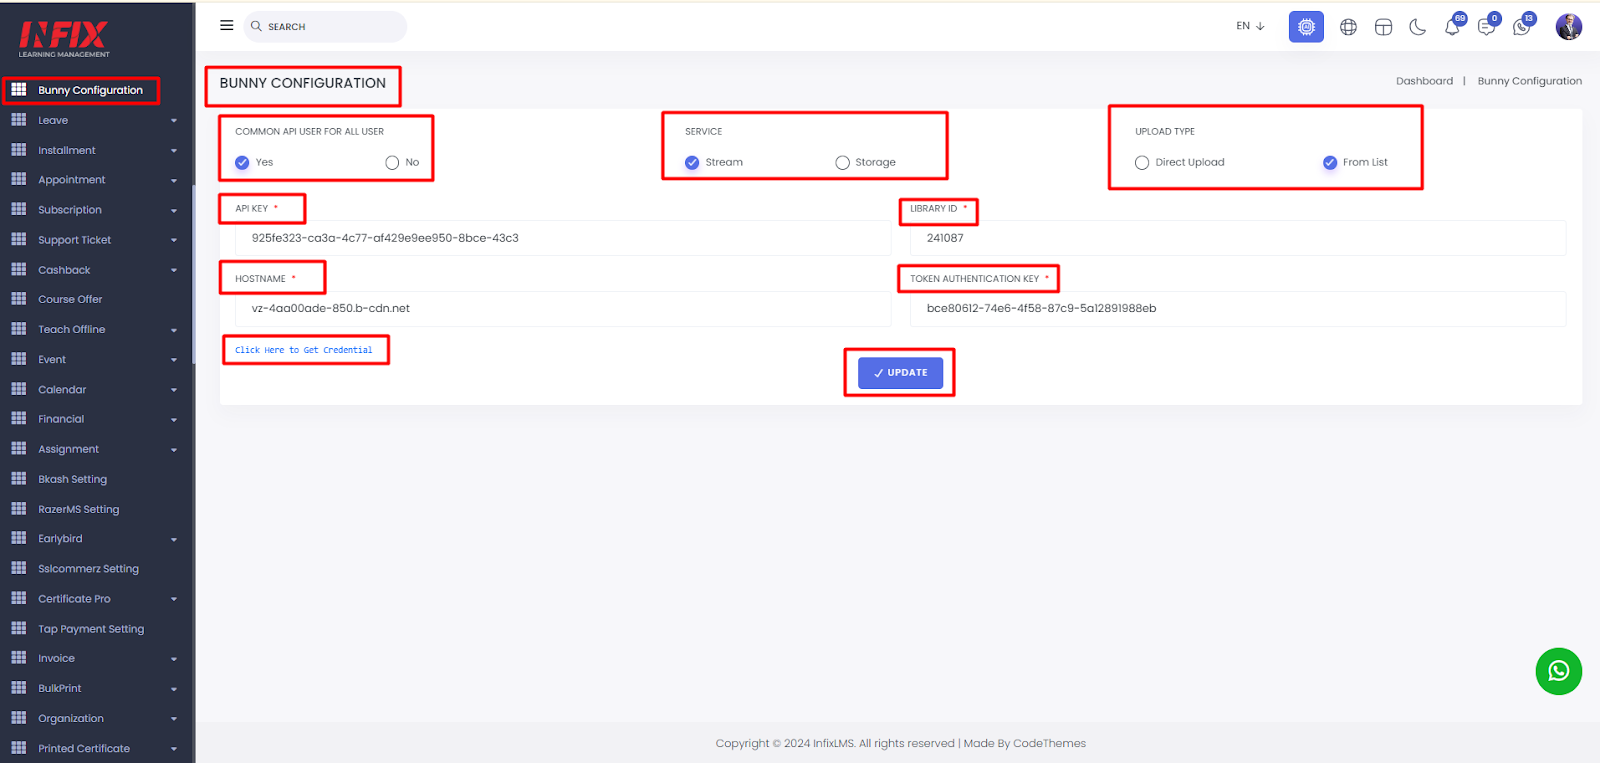
Bunny Configuration For Service Streaming:
Bunny Stream allows you to offer baseline standard quality up to 4k video. Each format will use more storage since your video is transcoded to the proper size. Here are the two sections about streaming & storage, so if you select the stream section then you have to fill in the API key, Library ID, Host Name & Token Authentication Key. If you want to get a direct link on the bunny CDN webpage then the ‘Click here to get Credential’[9] option.
Short Direction: {InfixLMS> Dashboard> Bunny Configuration> Common API User For All User can be yes or no> Service as Stream> Upload Type can be Direct Upload or From List> API Key> Library ID> Hostname> Token Authentication Key> Click here to Get Credential> Update> If you want to set the server as Storage> get Region letter> Storage zone}
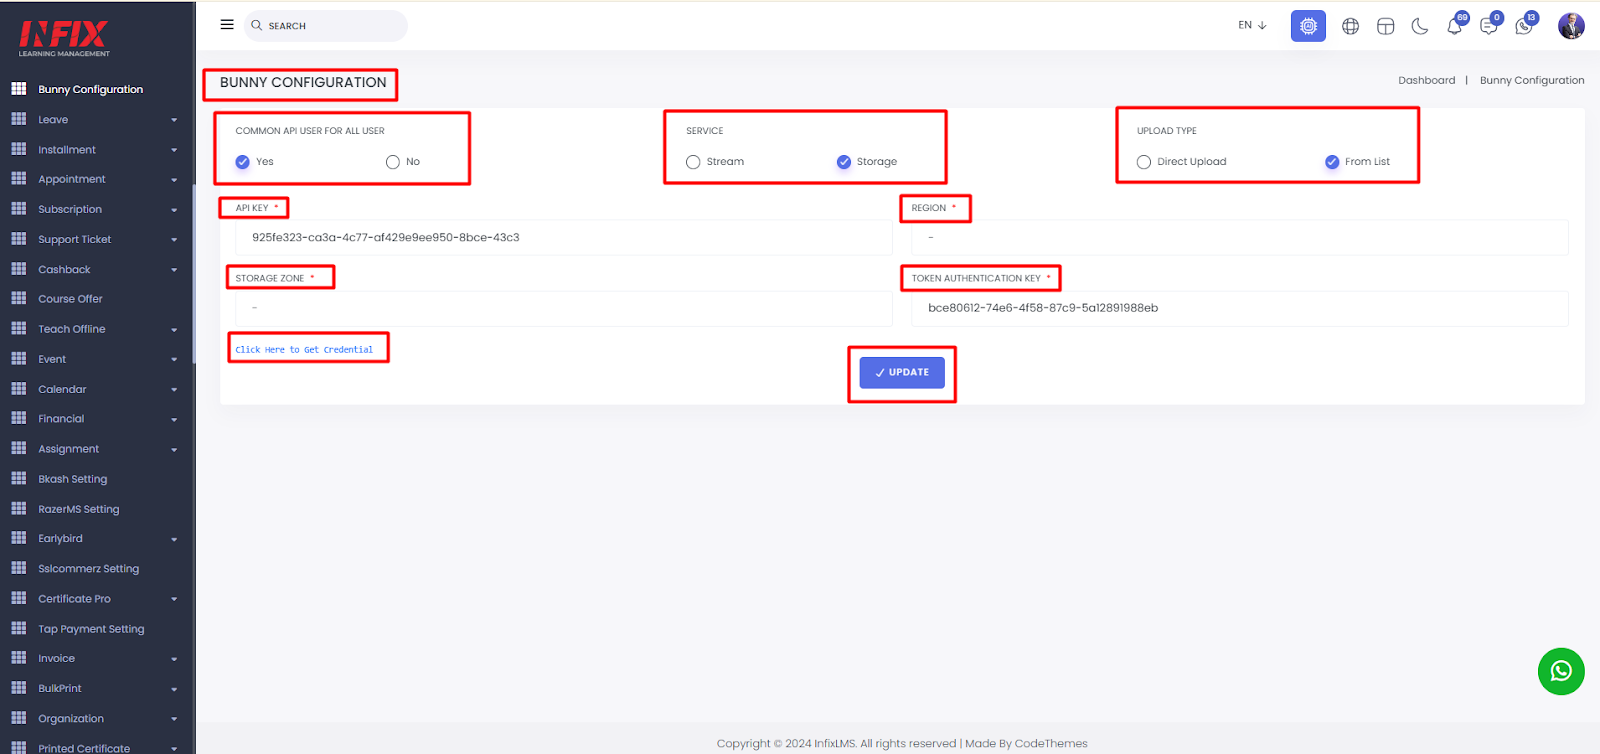
Bunny Configuration For Service Storage:
All files uploaded to Bunny Storage are private. They are only accessible through the API or by using one of the storage interfaces by providing the correct API key, Region(as long as you will get these two letters from the hostname[21] number) & storage zone will be the same name as the user name[20] number. Also, you have to know the Storage token authentication key for the next following [14] number step. This guide explains how to publically deliver files stored in Bunny Storage and how to secure public file delivery.
1.1Login/Register bunny storage:
First, you have to create a bunny.net account such as Gmail, Gitlab or Okta.
If you want to know better as sequencing number wise then follow the short direction below.
Short Direction: {bunny.net> Email> Password> Log In> User can choose Gmail, Gitlab or Okta> Choose an Account for Bunny Storage> Stream> Video Library Name> Add Video Library> API> Video Library ID> CDN Host Name> API Key> Security> Token Authentication Key> Storage> Storage Zone Name> Main Storage Region> Add Storage Zone> FTP & API Access> Username> Hostname> Password> Connect Pull Zone> Add Pull Zone> Pull Zone Name> Add Pull Zone> Security> Token Authentication> Url Token Authentication Key.}
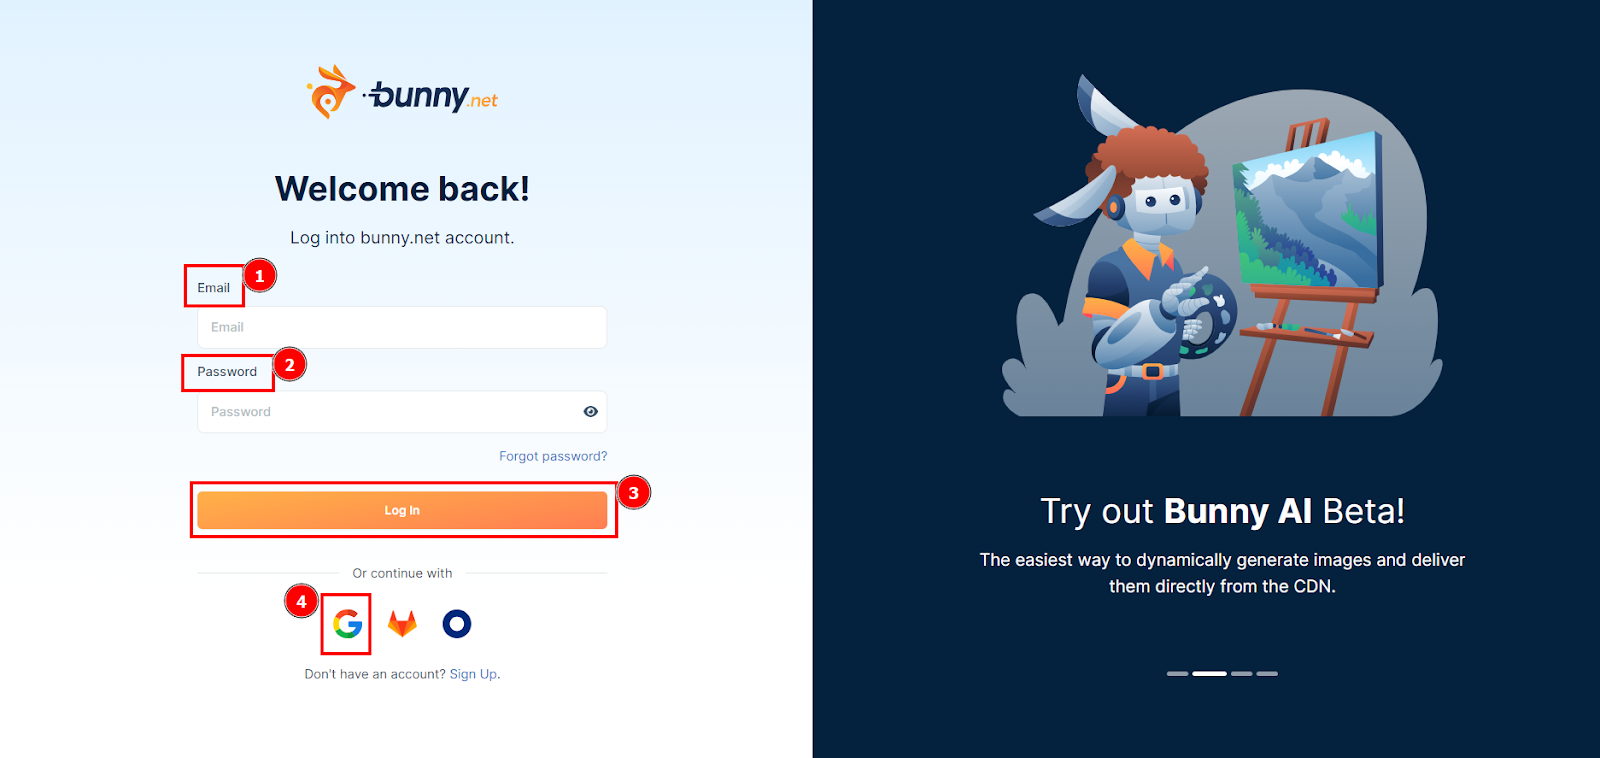
If you following the procedure of Bunny CDN set-up & how to get to generate the authentication key then follow the number of instructions:
1- Email
2- Password
3- Log In
4- The user can choose Gmail, Gitlab or Okta
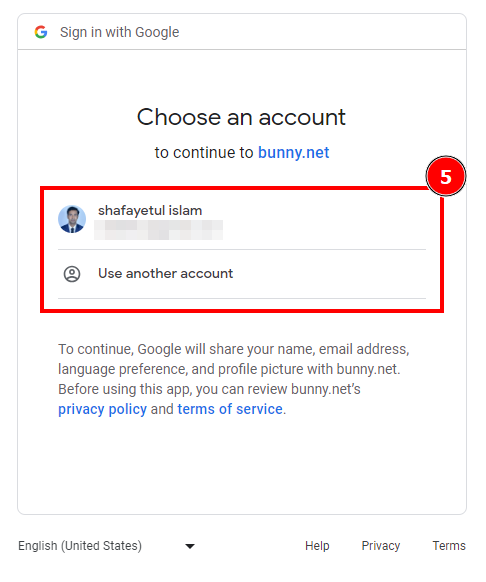
5- Choose an Account for Bunny Storage
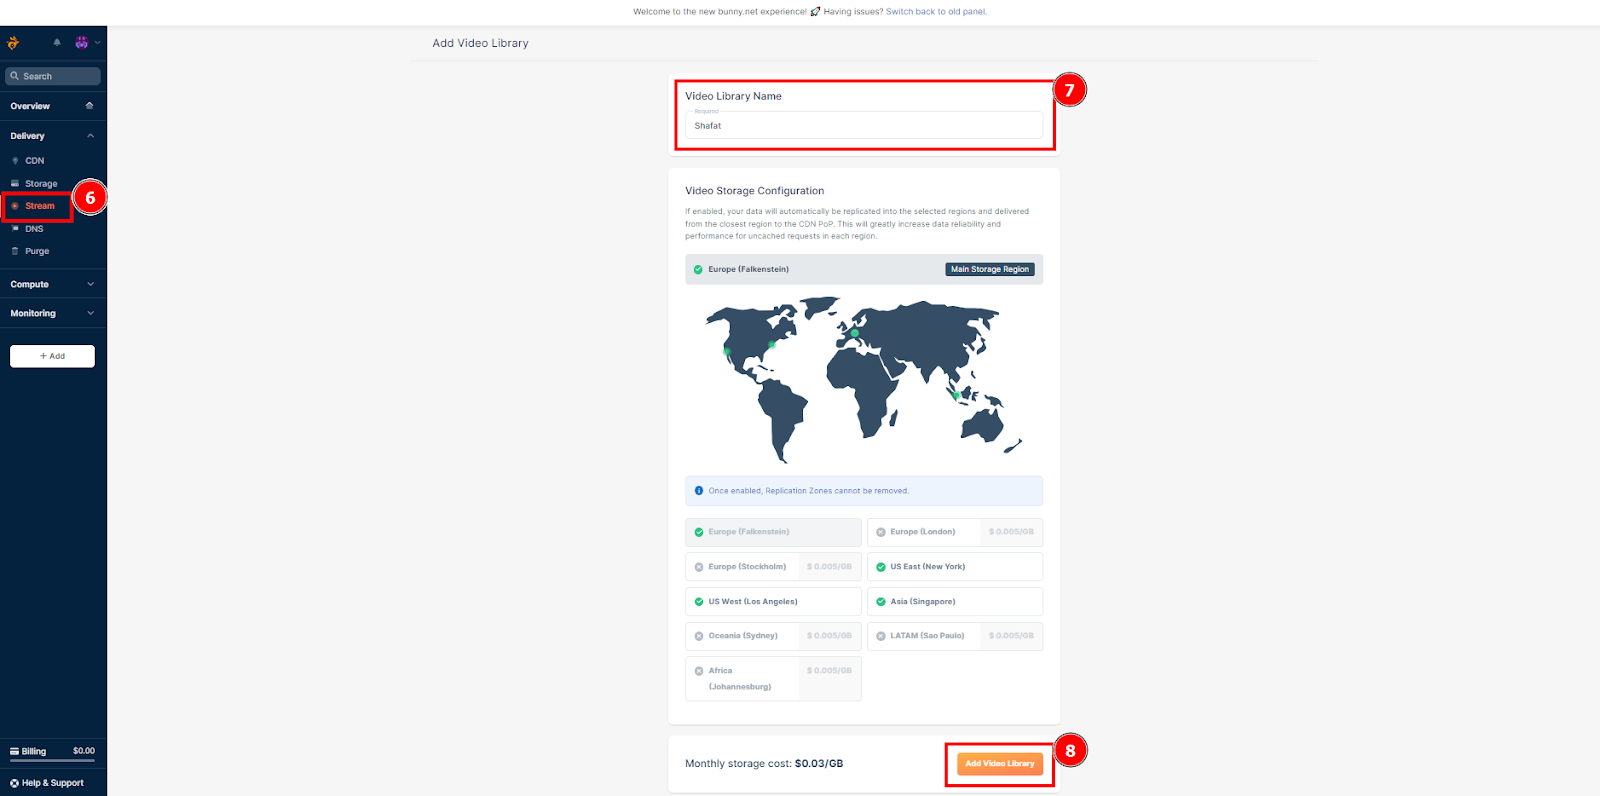
6- Stream
7- Video Library Name
8- Add Video Library
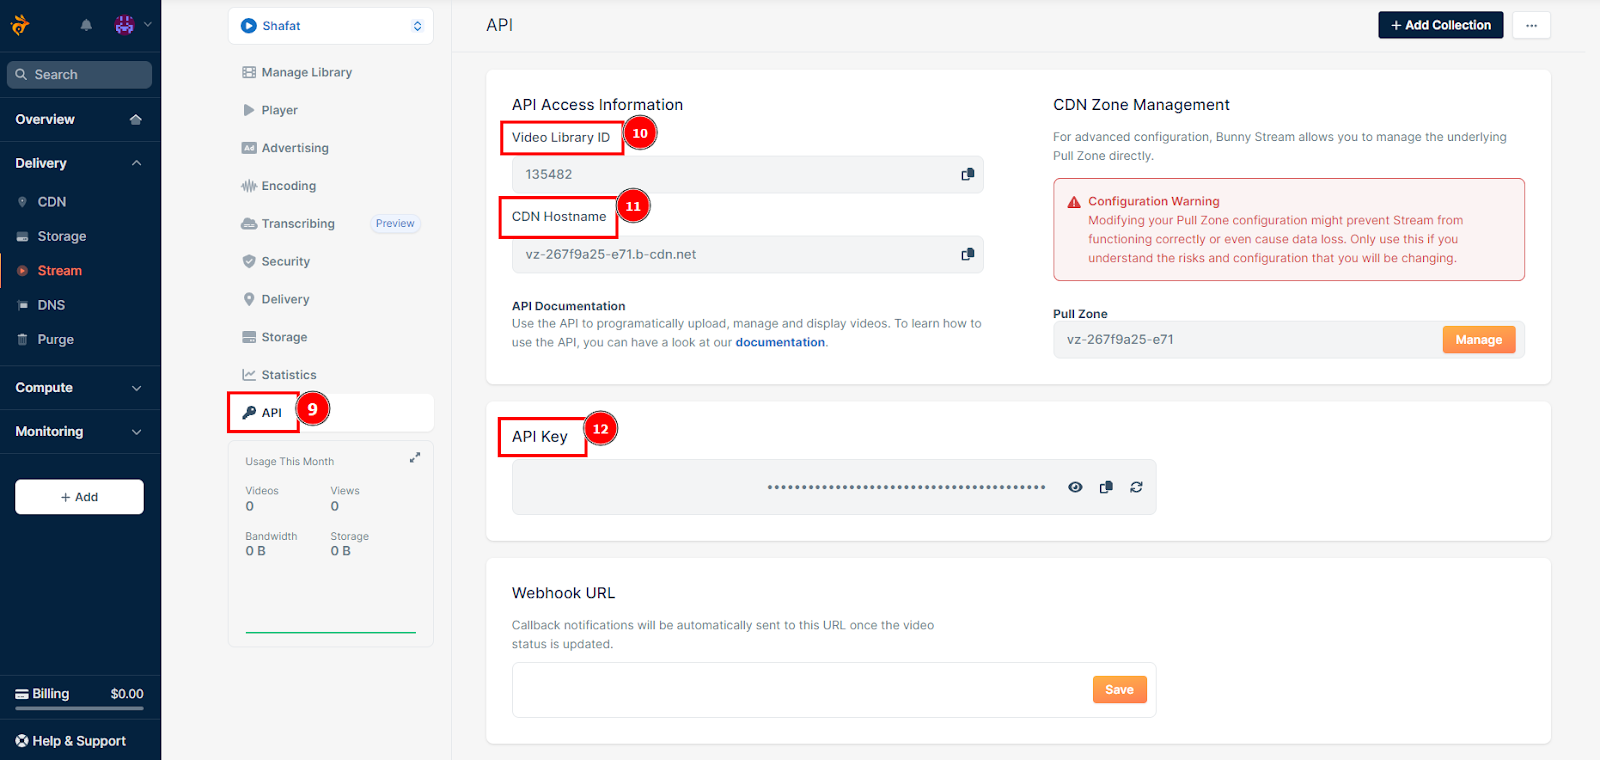
9- API
10- Video Library ID
11- CDN Host Name
12- API Key
13- Security
14- Token Authentication Key for streaming
15- Storage
16- Storage Zone Name
17- Main Storage Region
18- Add Storage Zone
19- FTP & API Access
20- The username must be the same name as the project name.
21- Hostname must be selected only for the first two letters.
22- The password is the storage API key.
23- Connect Pull Zone
24- Add Pull Zone
25- Pull Zone Name
26- Add Pull Zone
27- Security
28- Token Authentication for storage.
29- Url Token Authentication Key.
1.2Choose an Account for Bunny Storage:
Set up an account in 3 simple steps. Create an Account. Enter your email and password, and you're ready to go bunny configuration.
1.3 Add Video Library for Stream:
If you want to set up the stream section with API then follow the picture instructions. A user has to create a Video liberty name, configure the other option on their desire & hit the Add video liberty[8] button.
1.4 Stream API Access Information:
Here a user can find the API key to set up on InfixLMS bunny configuration section. Collect the Video library ID, CDN Hostname & API Key. This all information will be replaced on your InfixLMS server site.
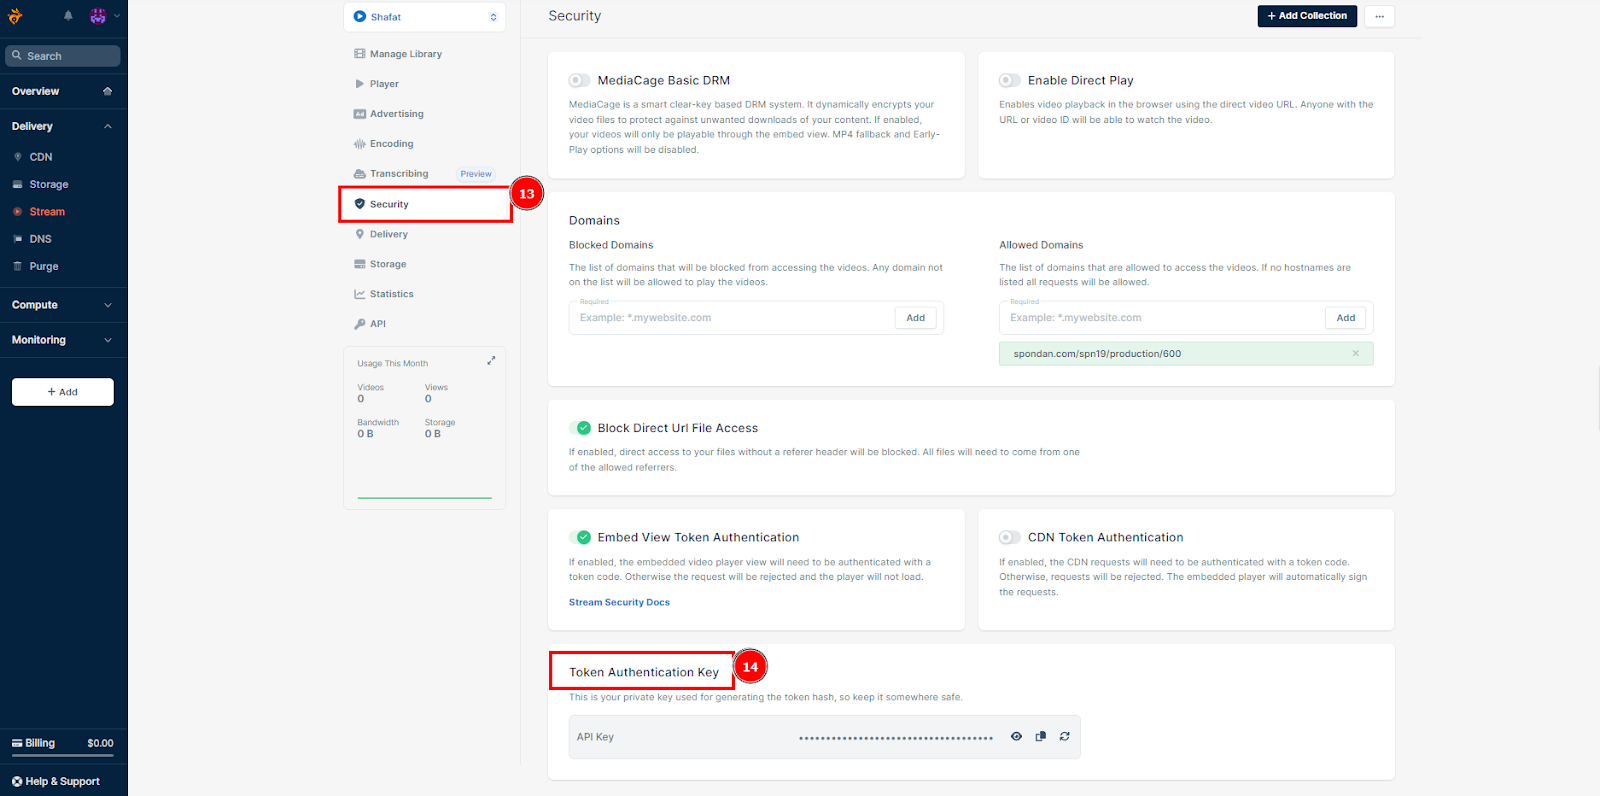
1.5 Token Authentication Key for Streaming:
If you want to find the token authentication key[8] then click on the security option & scroll down, a user will find this key in the last section. It can be seen as an electronic key that enables a user to authenticate and prove his identity by storing some sort of personal information.
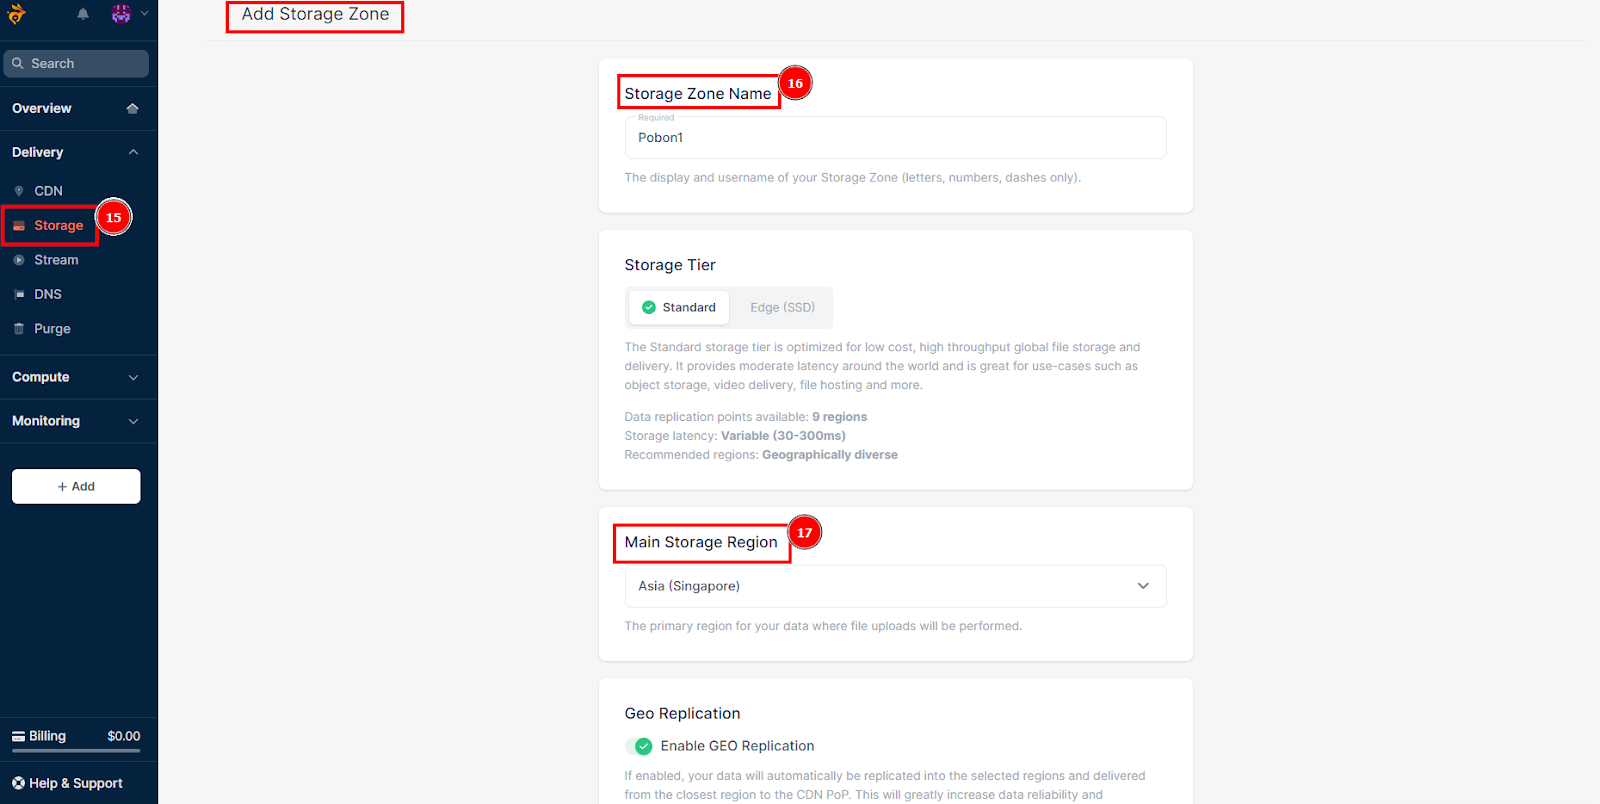
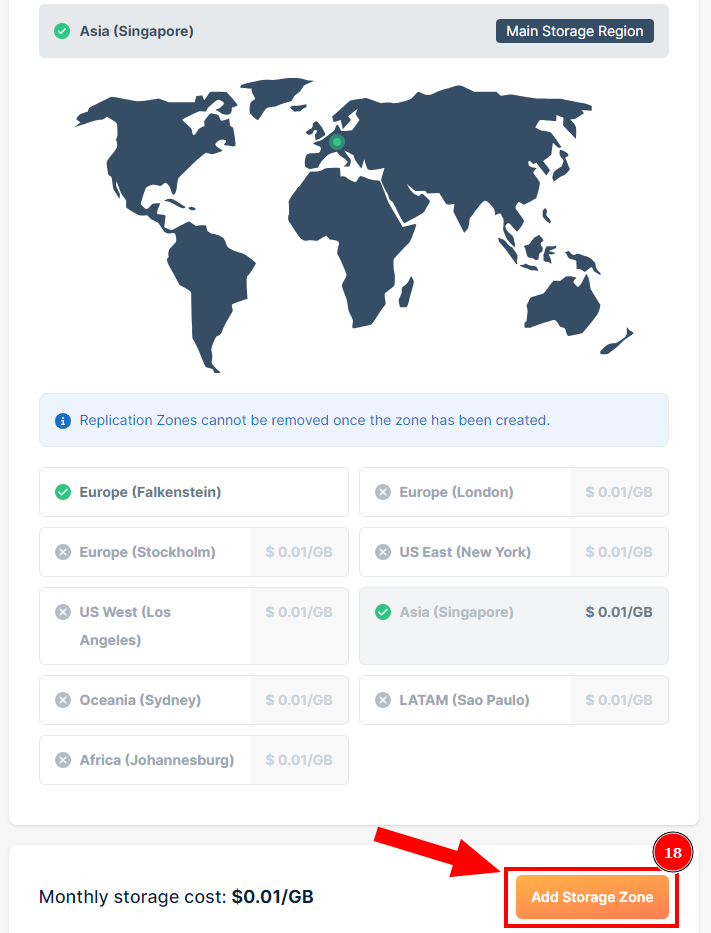
2.1 Add Storage Zone Name:
It also follows the similarity of the streaming section as long as create the storage zone name, choose the main storage region & scroll down below and click on the add storage zone[18].
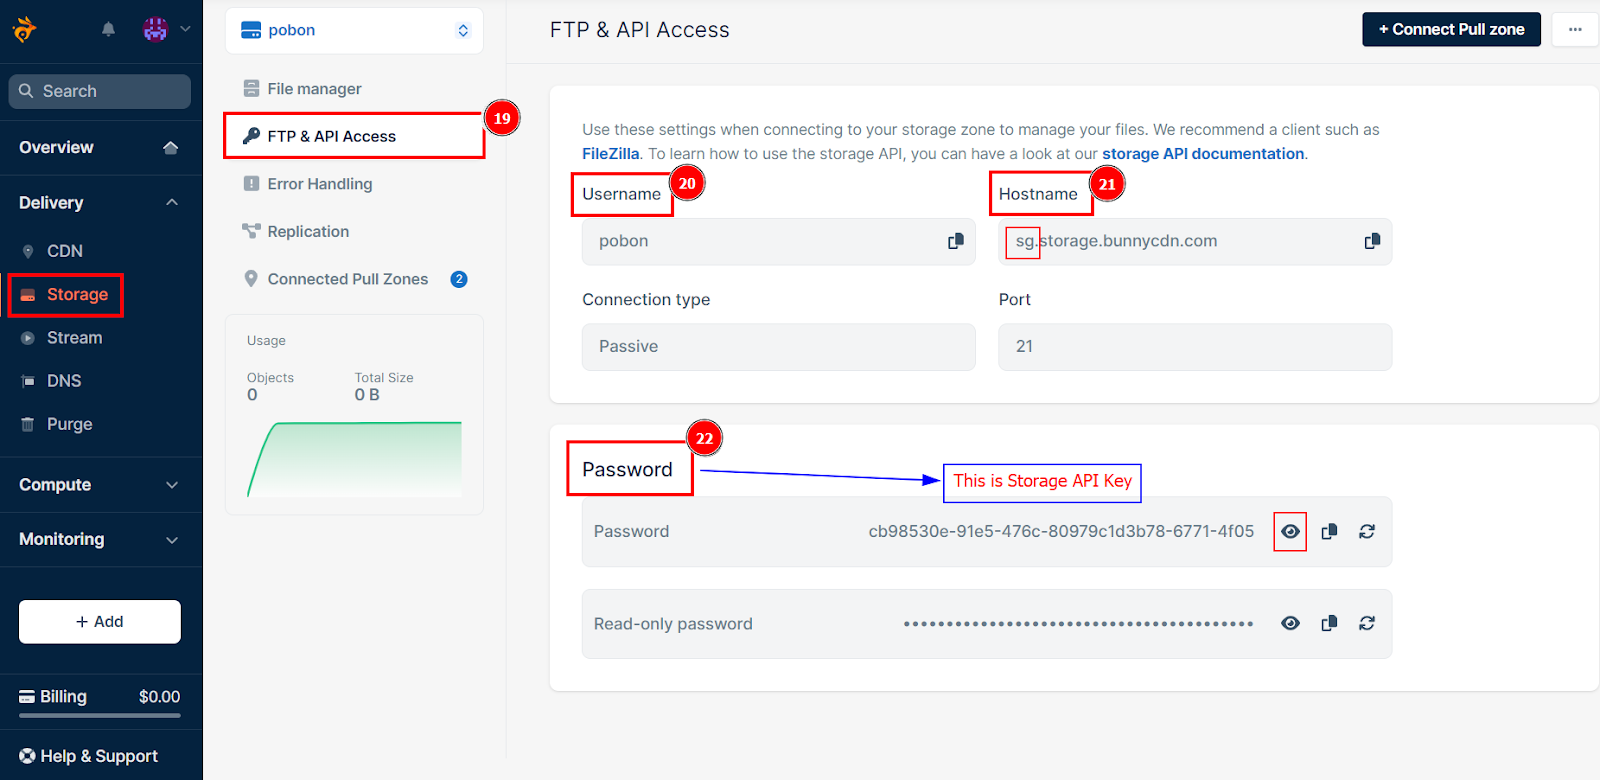
2.2 FTP & API Access for Storage:
Bunny Storage platform offers direct FTP & API access connectivity into the storage zone, allowing the ease of management of files hosted in the InfixLMS server. Click on the FTP & API Access. You will then be presented with the User name must be the same name as the storage zone name, Hostname select the first two letters, and password as API key information that you can use to connect to your Infix LMS server site.
2.3 Token Authentication Key for Storage:
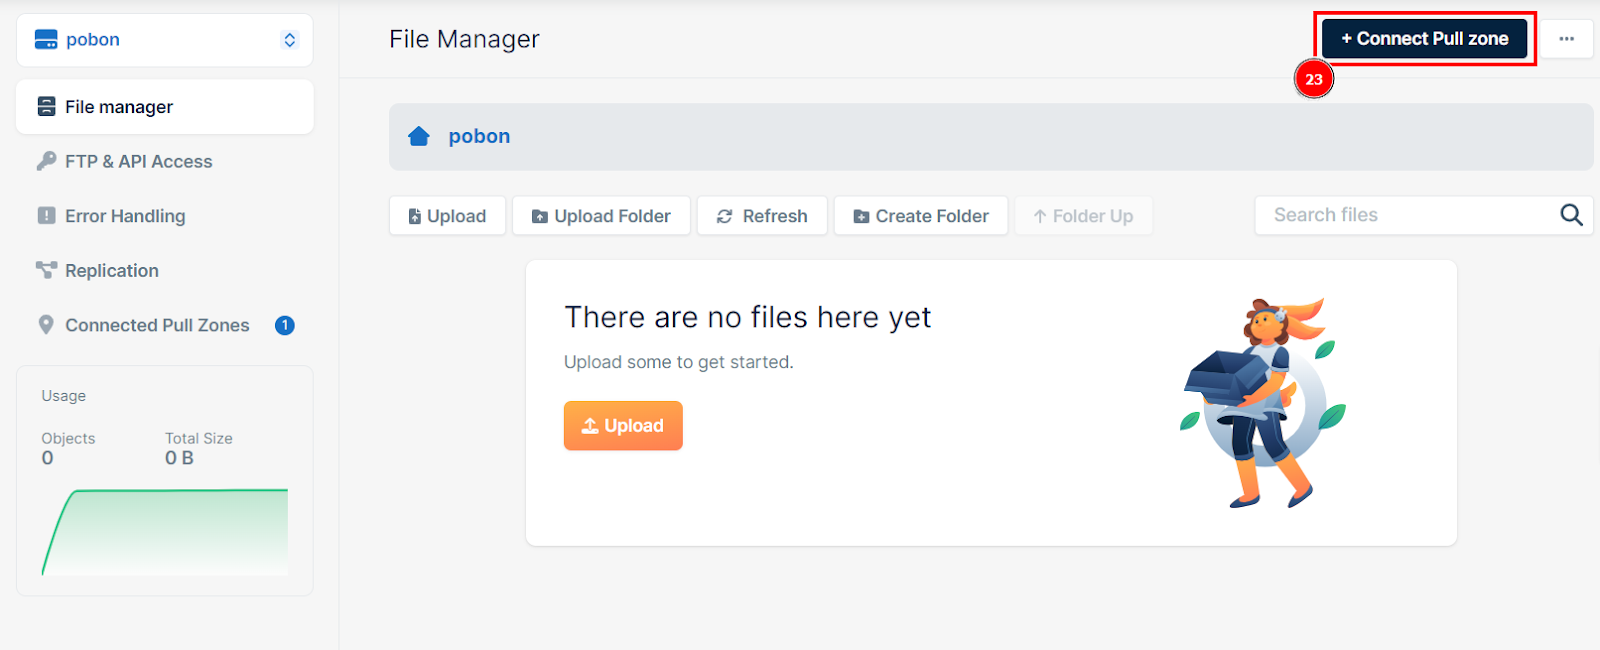
If you want to get the storage token authentication key then first connect the pull zone.
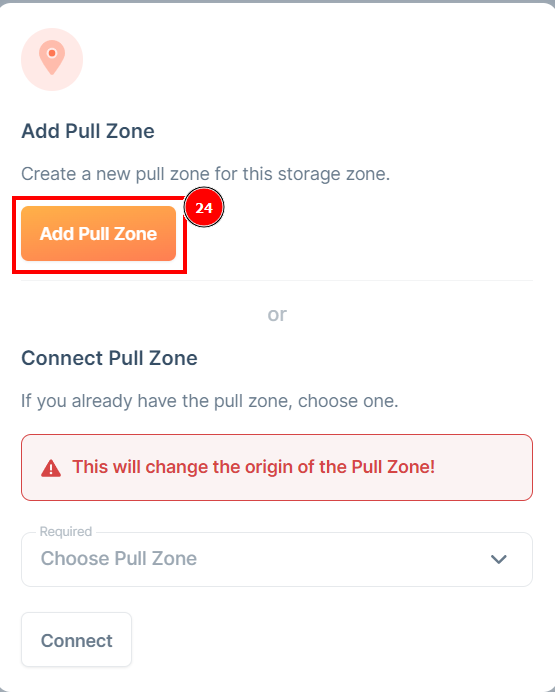
2.4 Click on the add pull zone:
Just simply click on the add pull zone.
2.5 Pull Zone Name & Add Pull Zone:
The pull zone will be the same name as the storage name.
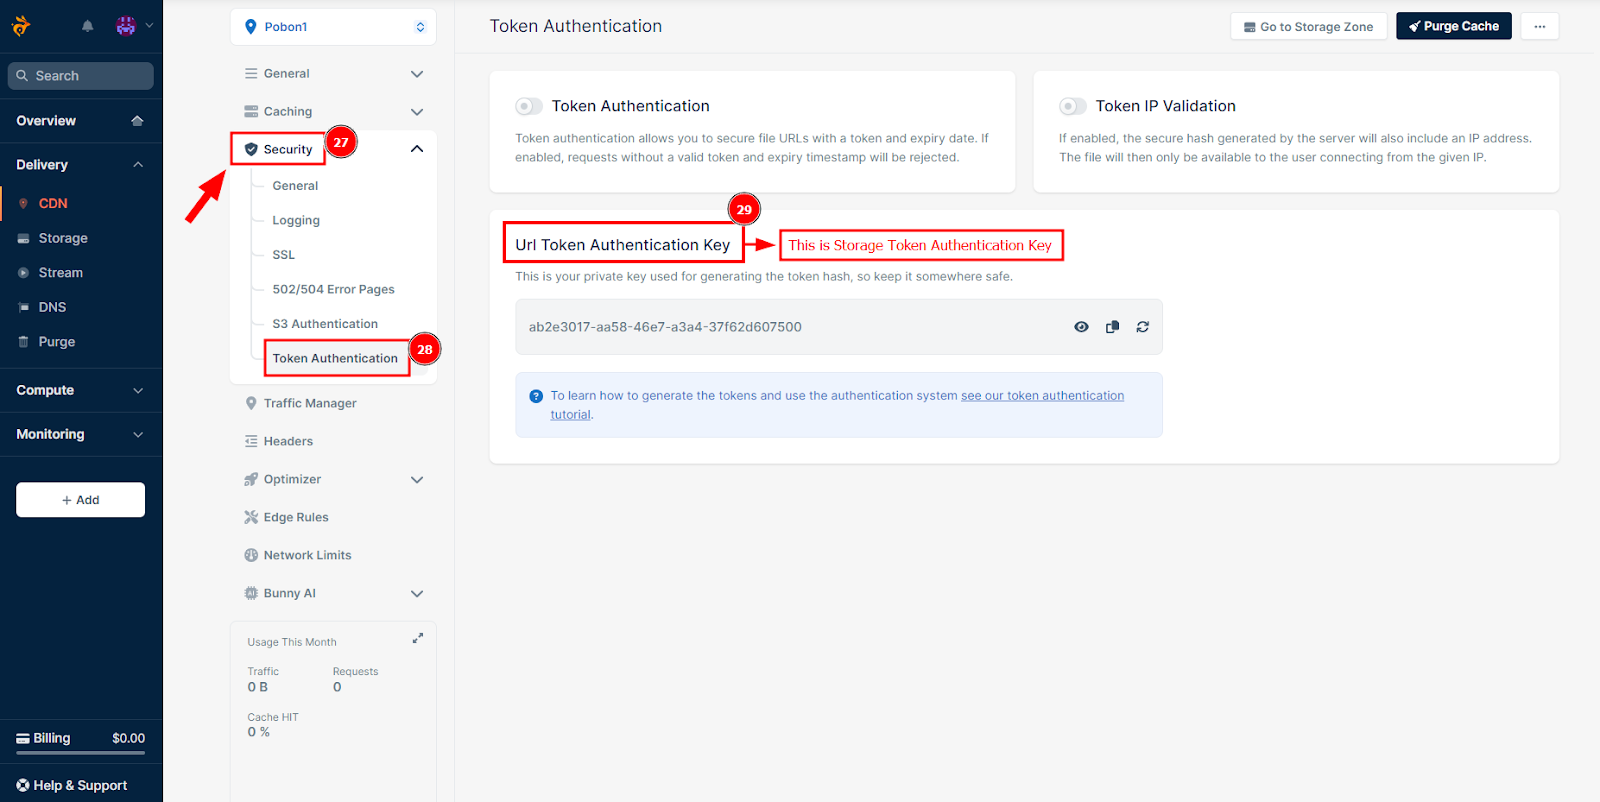
2.6 This is Storage Token Authentication Key:
Url Token authentication is the storage key. If you want to view from this key then click on the icon button. This token key will be replaced on your InfixLMS server site.
Note: If you are seeking for an instructional video on how to set up BunnyCDN using API credentials, please see the link below.