Often called an LMS for short, a learning management system's main thing is a course that provides the framework that handles all aspects of the learning process. Since most learning has shifted online and adopted a remote learning model, an online course can assist the student in understanding it properly. It can be used to support traditional face-to-face instruction, as well as blended/hybrid and distance learning environments.
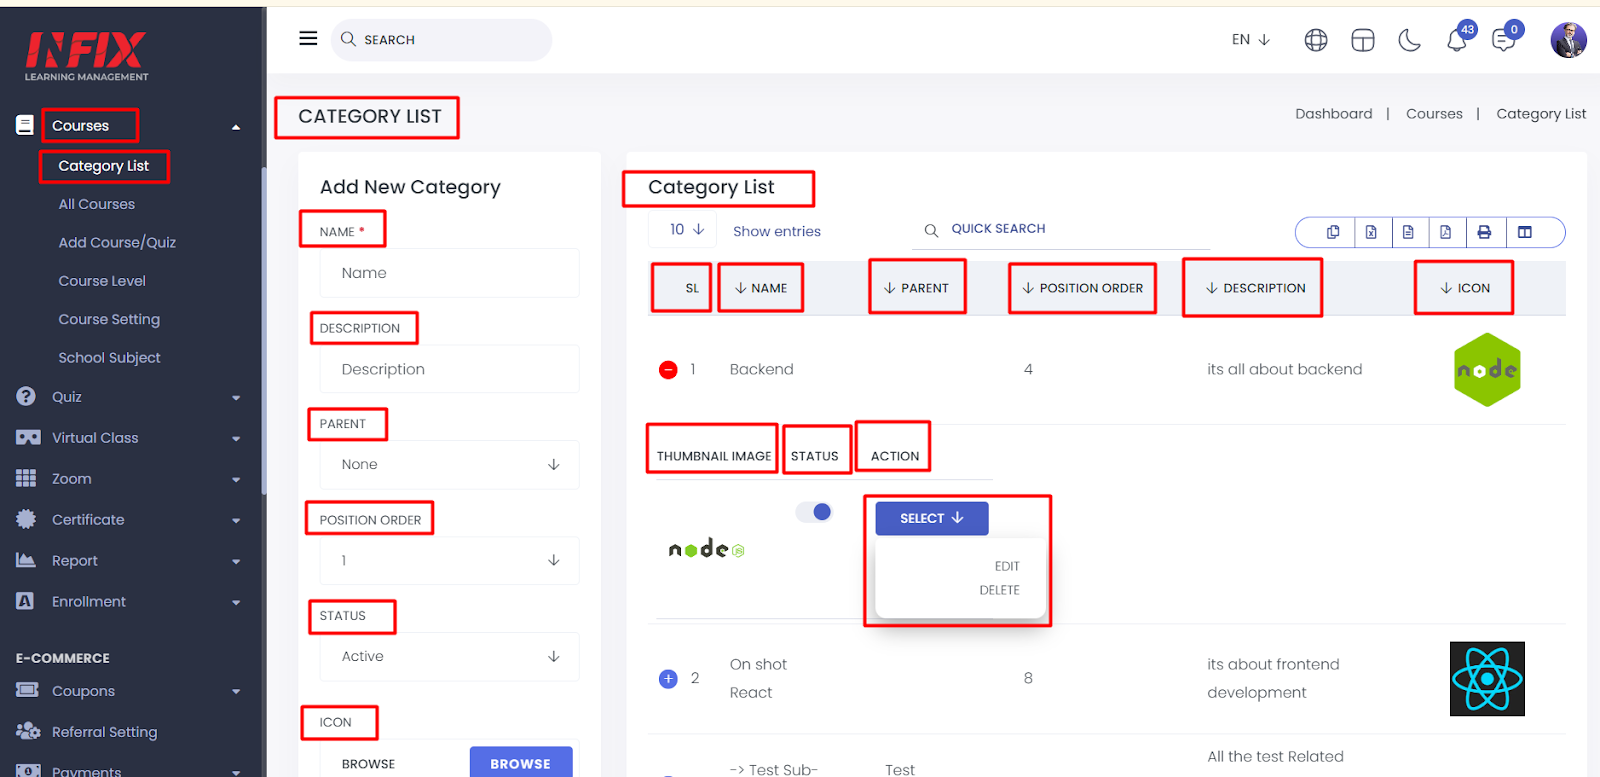
Category List:
Categories act as containers for courses. They can have subcategories, which can have sub-subcategories, and so on. The arrangement is similar to that of files and folders on a disk drive, where courses are like files and categories are like folders.
Short Direction: {InfixLMS> Dashboard> Category List> Add New Category> Name> Description> Parent> Position Order> Status> Icon> Thumbnail Image> Save> Category List> SL> Name> Parent> Position ID> Description> Icon> Thumbnail Image> Status> Plus> Select.}
Categories are an important part of Tutor LMS' content management hierarchy, especially if you are creating a course marketplace with different instructors.
1- Category List
2- Add New Category
3- Name
4- Description
5- Parent
6- Position Order
7- Status
8- Icon
9- Thumbnail Image
10- Save
11- Category List
12- SL means Serial Number
13- Name
14- Parent
15- Position ID
16- Description
17- Icon
18- Thumbnail Image
19- Status
20- Plus
21- Select for Edit & Delete.
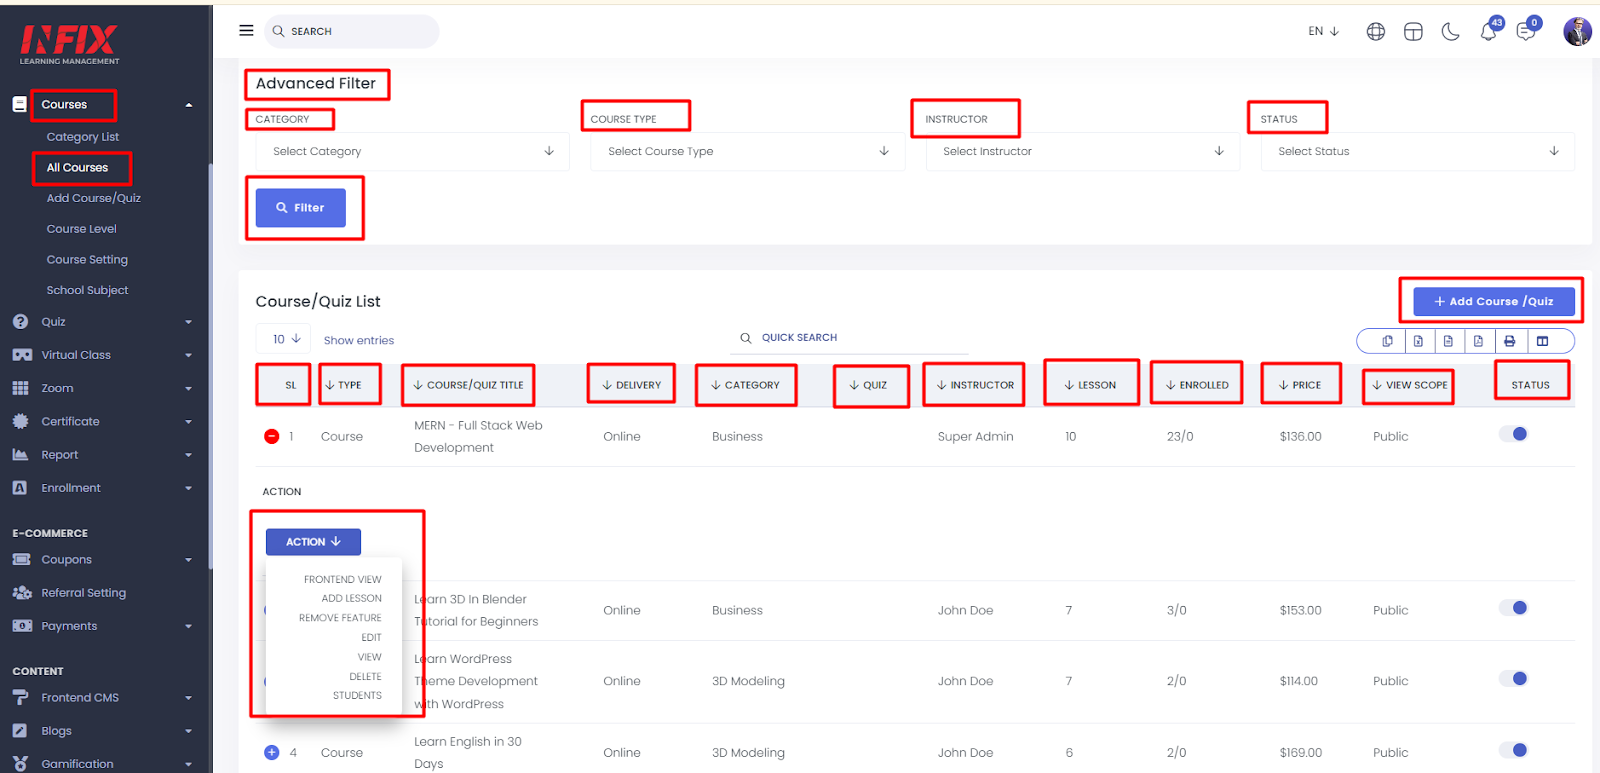
All Courses:
If you are still struggling to decide whether to further your studies or continue working, this guide aims to help you identify whether studying is the right step you should take in order to achieve your objectives. Furthermore, by the end of these steps, you should be able to decide on 2-3 courses that you would like to study eventually or furthermore operate on the end user.
Short Direction: {InfixLMS> Dashboard> All Course> Advanced Filter> Category> Course Type> Instructor> Status> Filter> Add Course/ Quiz> SL> Type> Course/ Quiz Title> Delivery> Category> Quiz> Instructor> Lesson> Enrolled> Price> View Scope> Status> Action> Lesson> Lesson Name> Duration (In Minute)> Host> Privacy> Description> Save it.}
In order to create a course, log in to your learning management system and select the Courses menu which you can find on the left-hand side of your screen as Add new course.
1- All Course
2- Advanced Filter
3- Category
4- Course Type
5- Instructor
6- Status
7- Filter
8- Add Course/ Quiz
9- SL means the serial number
10- Type
11- Course/ Quiz Title
12- Delivery
13- Category
14- Quiz
15- Instructor
16- Lesson
17- Enrolled
18- Price
19- View Scope
20- Status
21- Action for frontend view, add a lesson, make as a feature( A user has to set the infixlms default theme homepage V3 to get this feature) edit, view, delete and students.
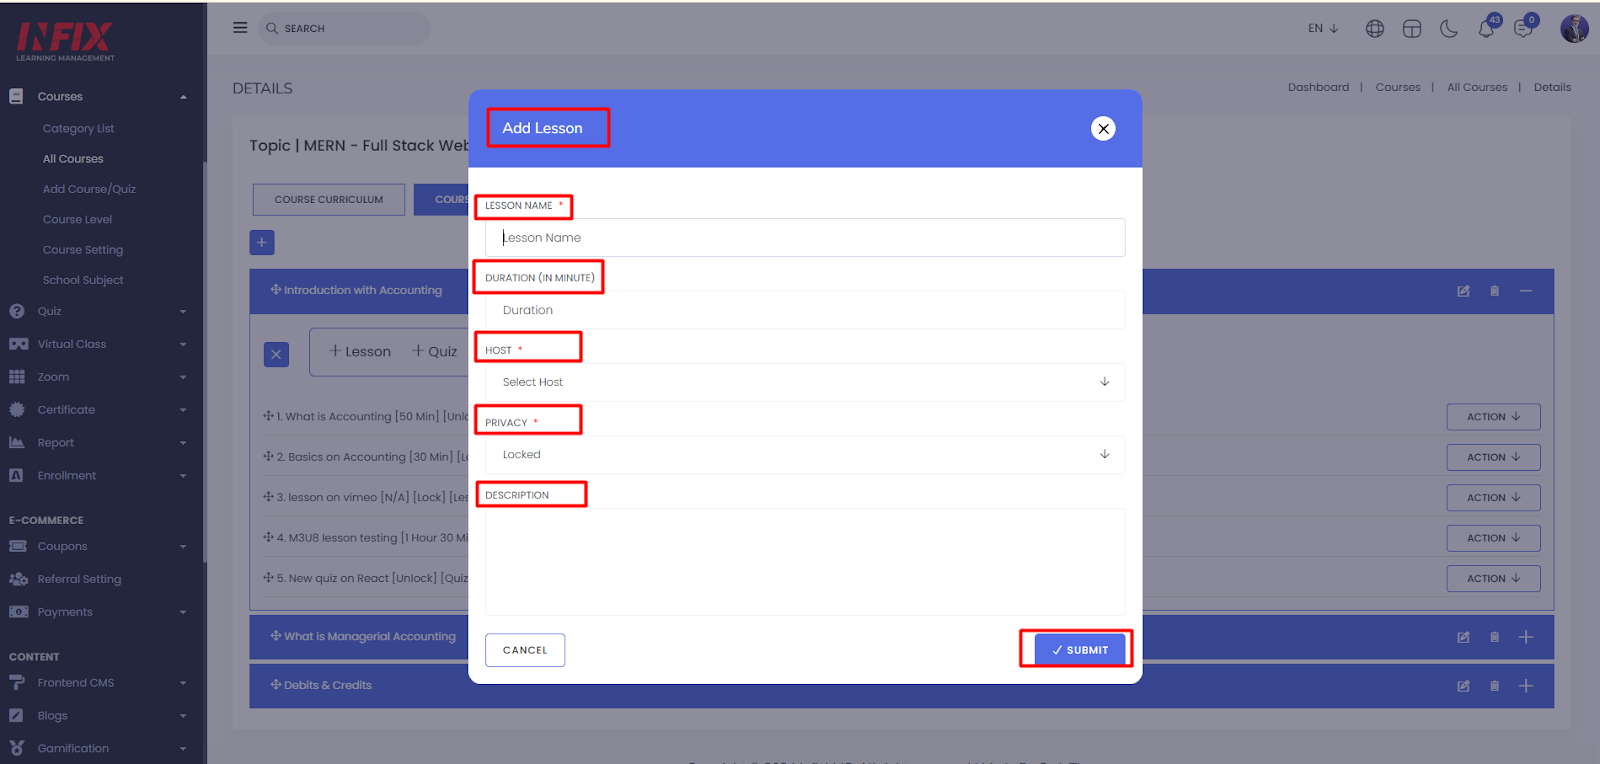
22- Lesson
23- Lesson Name
24- Duration (In Minute)
25- Host several options like YouTube, Vimeo, Google Drive or bunny storage.
26- Privacy can be locked or unlocked.
27- Description
28- Save it.
Add New Lesson in Course Section:
If you want to add a new lesson in the course section that you created, so at first you have to find the all-course list from the right-side corner action option below select option, and you will find the course section which includes frontend view, add a lesson, make as feature, edit, view, delete & student. Just click on the add lesson option.
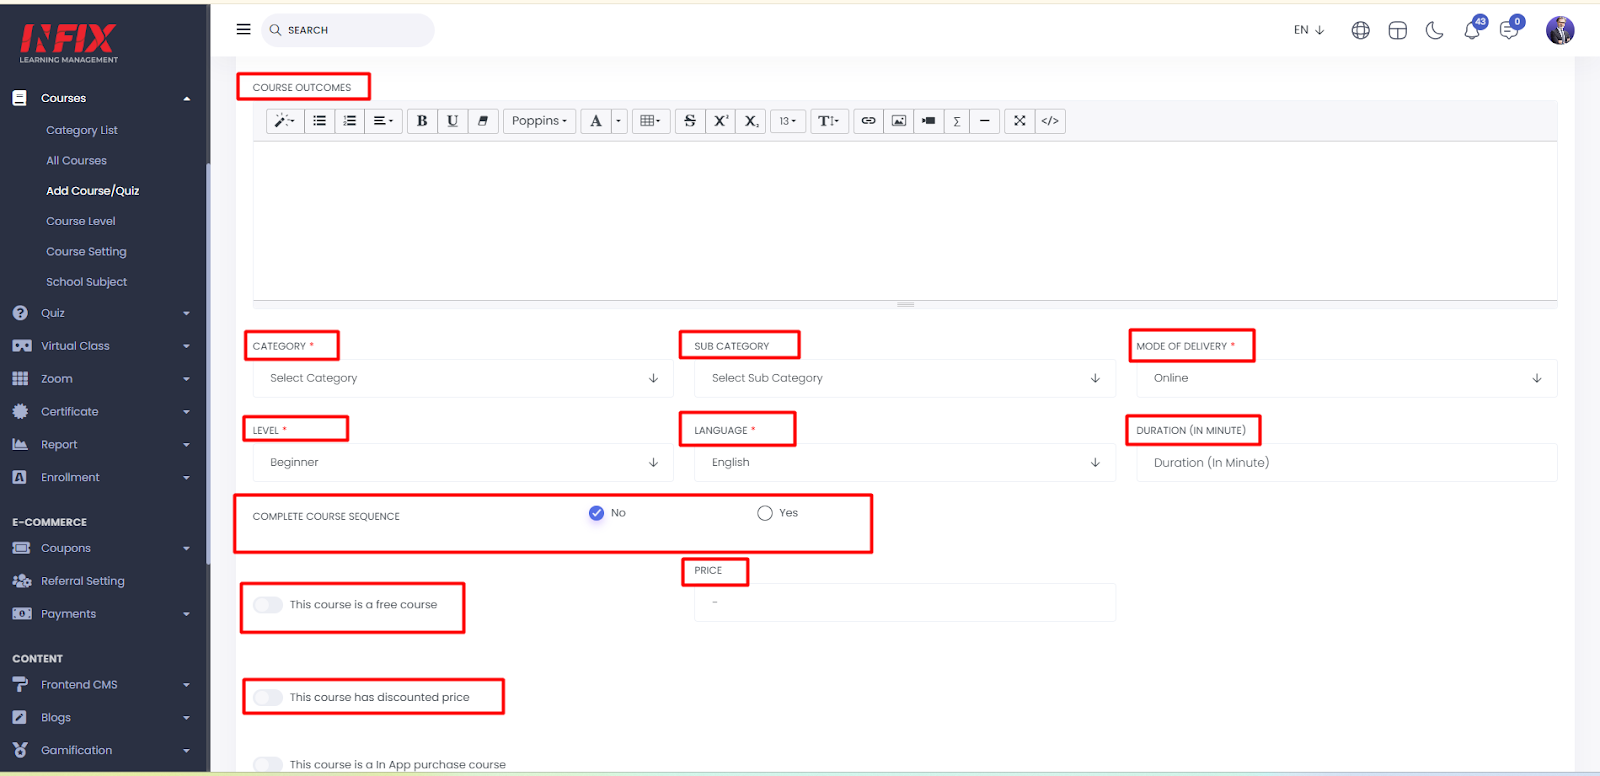
Add New Course:
This is one of the most common ways to organize information within an Infix LMS. Simply click on the Add new course that contains the information you'll be discussing in each lesson, and decide how many weeks you'd like to include in each course.
Short Direction: {InfixLMS> Dashboard> All Courses> Add New Course> Add New Topic> Course Type> Drip Content> Assign Instructor> Assistant Instructor> Topic Title> Course Requirements> Course Description> Course Outcomes> Select Category> Select sub-Category> Online> Select Level> English> Duration (In Minute)> Complete Course Sequence> Price> This course is a free course> This course has discounted price> This course is a in App purchase course> Show Overview video> View Scope> Course Thumbnail (Max Image Size 1MB)> Meta Keyword> Meta Description> Add Course.}
Creating an online course requires a lot of hard work and effort on your part, so running a test before you begin will allow you to validate this online business idea as one that will pay itself off down the line. In order to test your idea, use a landing page builder to create a page for your upcoming online course.
1- All Courses
2- Add New Topic
3- Course Type
4- Drip Content is a method of releasing content to your site that helps users to come back because it allows them to consume small pieces of information simultaneously instead of reading everything all at once. Drip content is where you gradually release posts, pages, videos, and other content instead of giving it away all at once. This makes it easier for people to absorb the information they need without feeling overwhelmed by all the information on the page or website.
5- Assign Instructor
6- Assistant Instructor
7- Topic Title
8- Course Requirements
9- Course Description
10- Course Outcomes
11- Select the Category
12- Select a sub-category
13- Online
14- Select Level
15- English
16- Duration (In Minutes)
17- Complete Course Sequence is the
When creating or editing an item, you add some online content which has the order to be followed. However, when the user starts the course, he/she can complete the online content in any chronology. If you want to force sequential completion of an item's content in InfixLMS then you have to mark it as ‘Yes’ or either ignore it.
18- Price
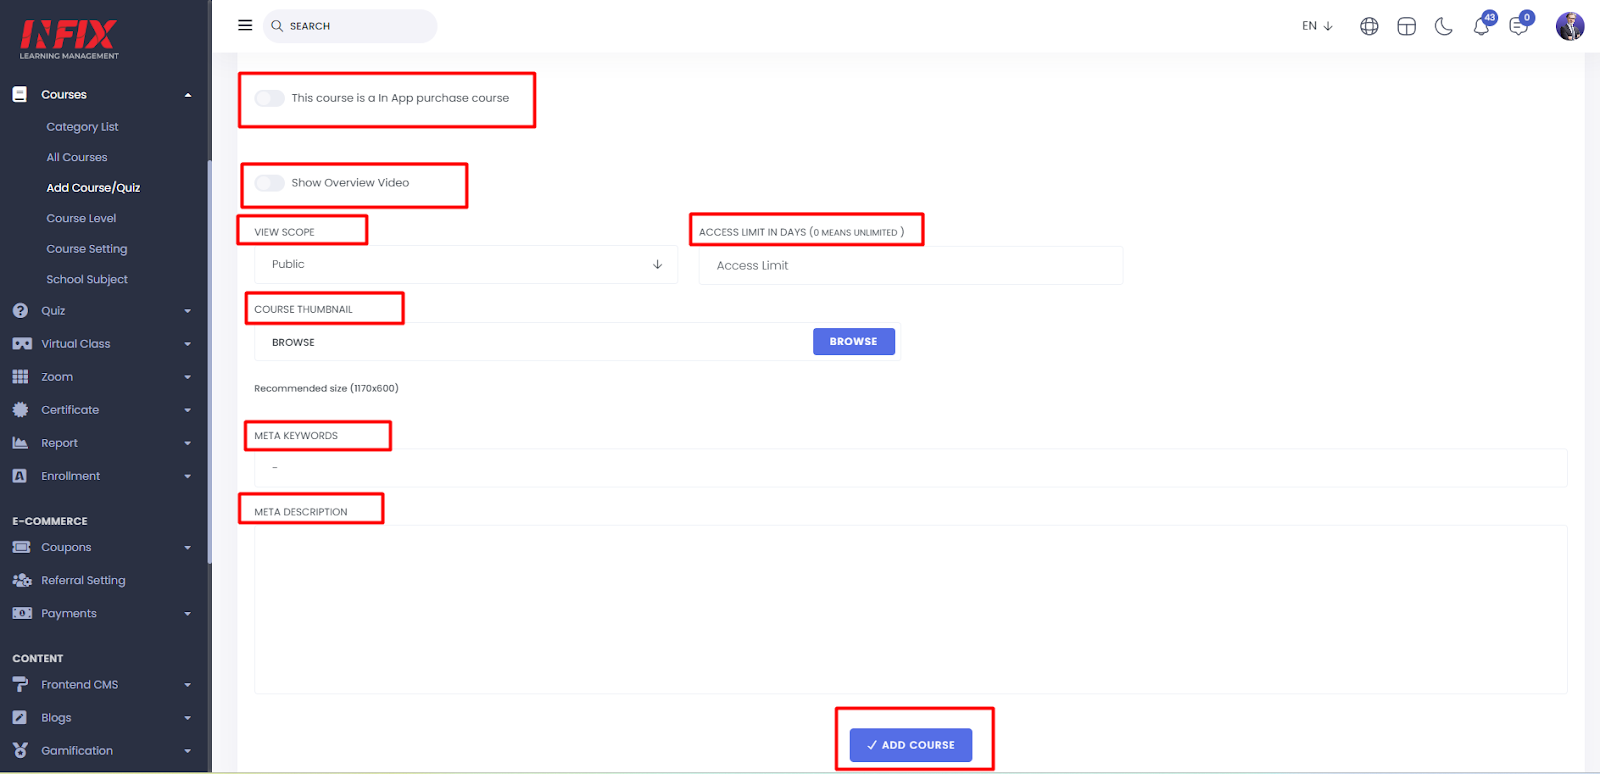
19- This course is a free course
20- This course has a discounted price
21- This course is an in-app purchase course
22- Show Overview video
23- View Scope
24- Course Thumbnail (Max Image Size 1MB)
25- Meta Keyword
26- Meta Description
27- Add Course
Course Level:
Any informational material that is required for participation or understanding course-level content such as assigned readings, video recordings, exams, and any other material needed for learning.
Short Direction: {InfixLMS> Dashboard> Course Level> Add New Level> Title> Save> Level List> SL> Title> Status> Action> Select.}
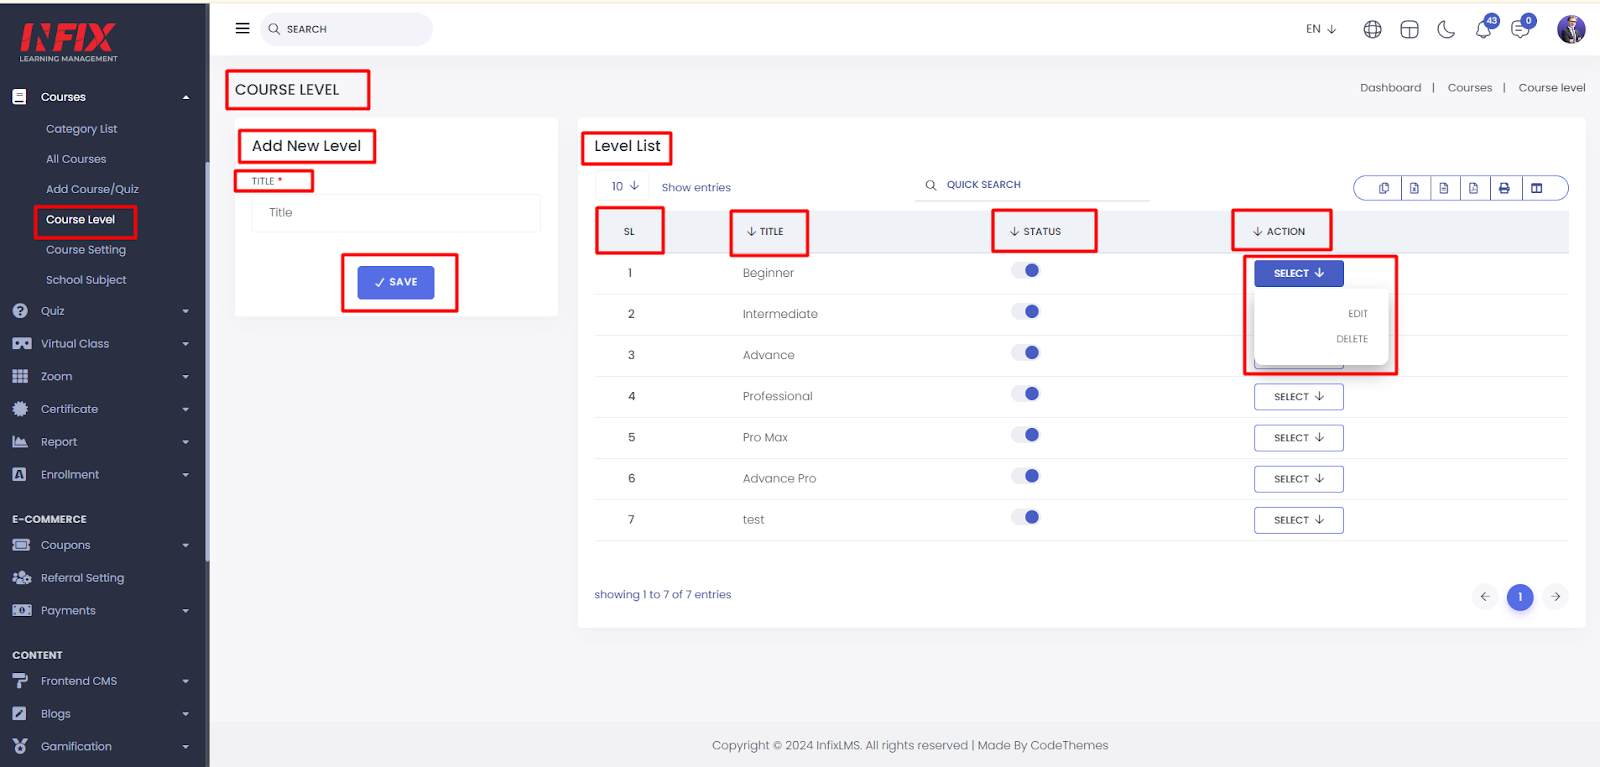
If you want to add a new level of a course then go to the infix LMS dashboard to find the course level, This level can identify the course of beginner, intermediate, advanced or pro.
1- Course Level
2- Add New Level
3- Title
4- Save
5- Level List
6- SL means serial number.
7- Title
8- Status
9- Action
10- Select to edit & delete it.
Course Setting:
Course Settings refers to the settings that you can define for each course. This section covers the settings for self-paced courses, blended learning courses and e-materials.
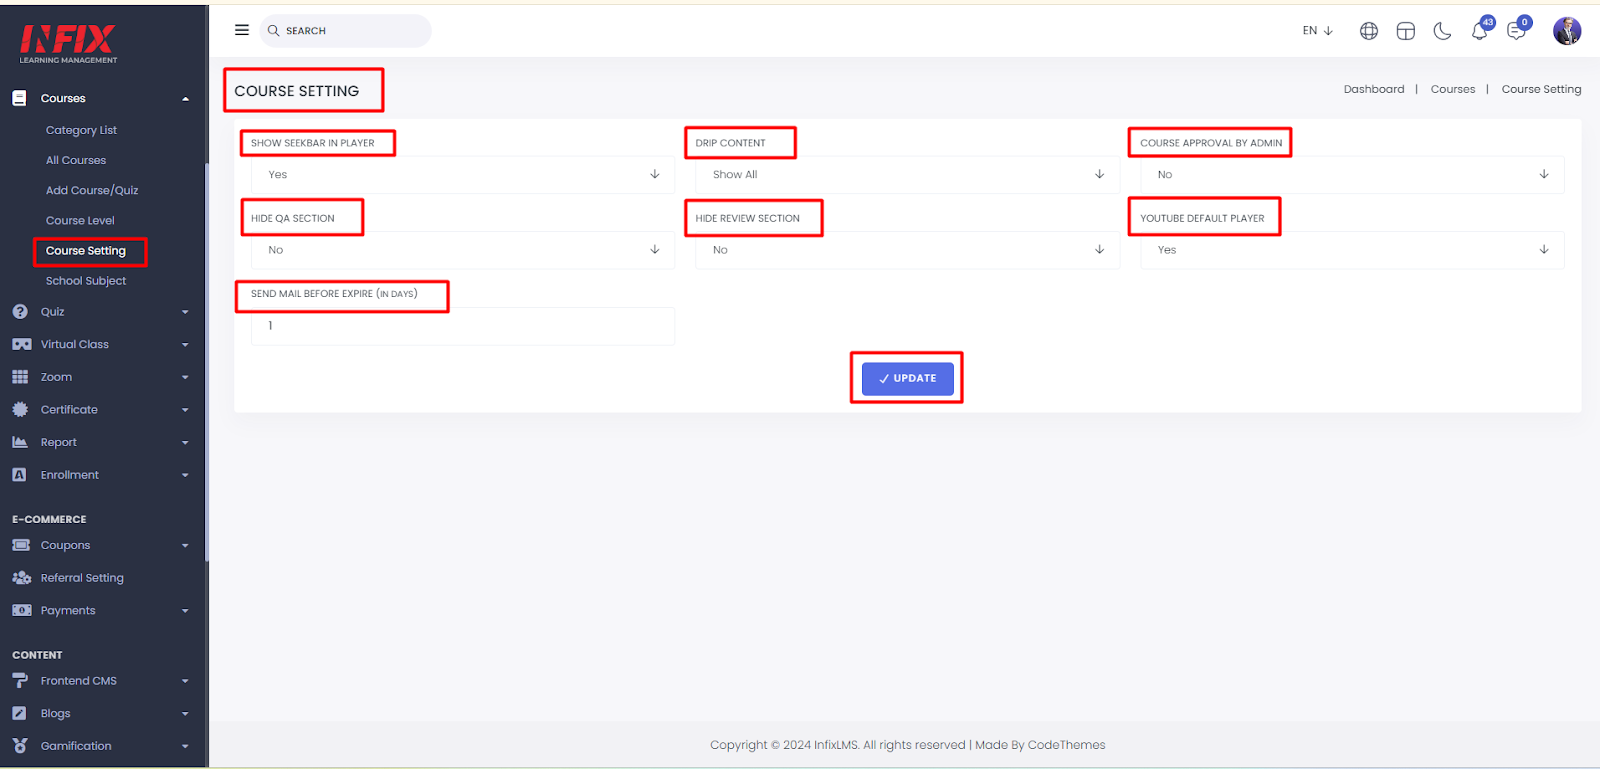
Short Direction: {InfixLMS> Dashboard> Course Setting> Show Seekbar In Player> Drip Content> Course Approval By Admin> Hide QA Section> Hide Review Section> Update.}
The first common step is to create a new course setting for LMS purposes. The course setting is the decisive evaluation of the goal of ski racing.
1- Course Setting
2- Show Seekbar In Player
3- Drip Content
4- Course Approval By Admin
5- Hide QA Section
6- Hide Review Section
7- Update