The InfixLMS notifies people when an event occurs that they need to know about. For example, instructors, users, and facility contacts need to know when a scheduled offering is cancelled so that they can adjust their schedules.
Notification Setup:
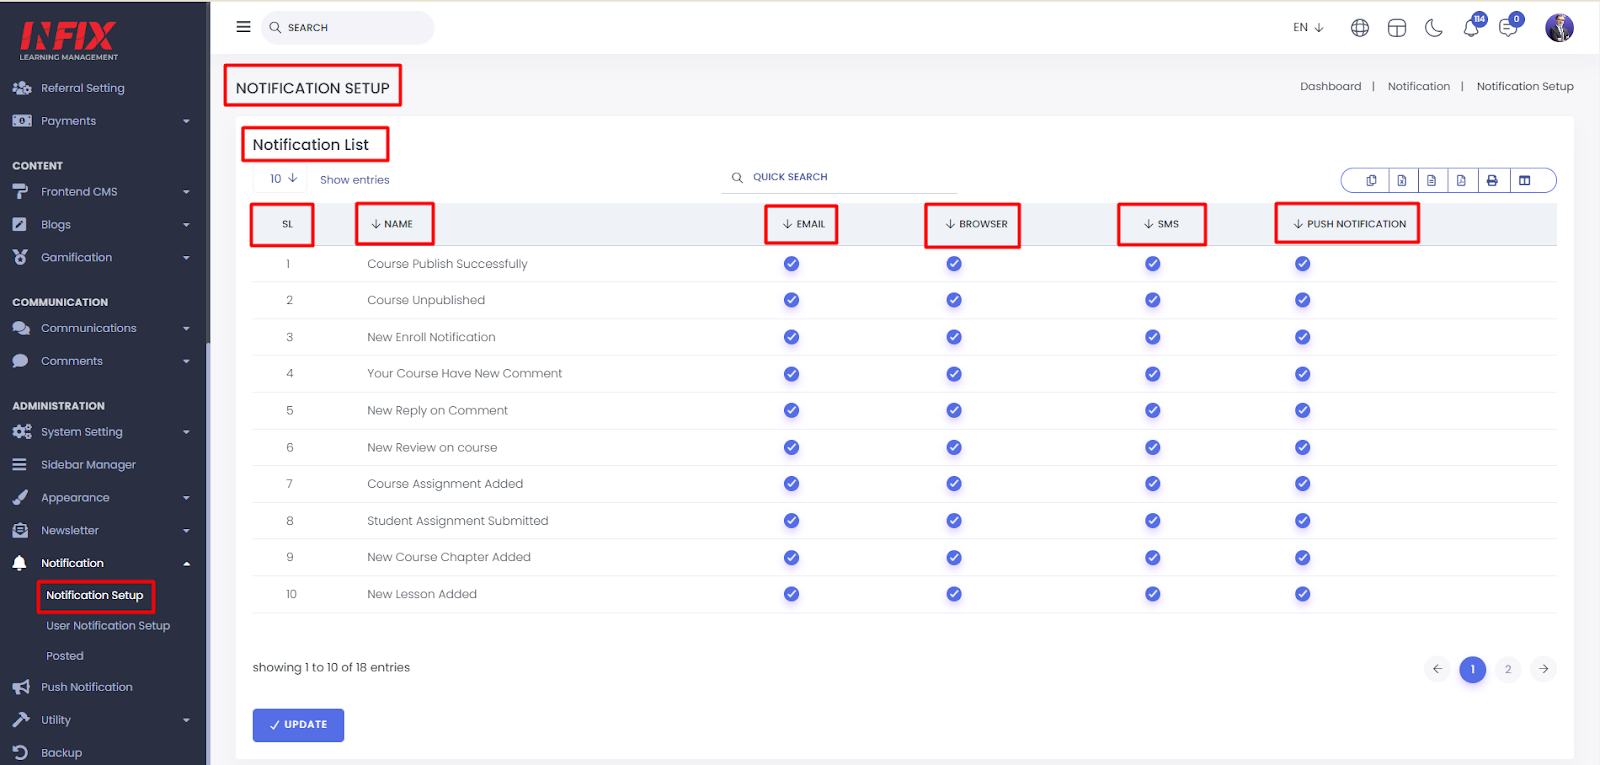
An email notification is an email sent to inform your subscribers about changes or updates to a website or service, like new products, features, scheduled website maintenance, etc.
Short Direction: {InfixLMS> Dashboard> Notification> Notification Setup> Notification List> Name> Email> Browser> Push Notification> Update.}
If you want to manually set the status of the notification section as course chapter, lesson, quiz or new comments reply then go to the infixlms dashboard to find the notification option.
1- Notification Setup
2- Notification List
3- Name
4- Email
5- Browser
6- Push Notification
7- Update it.
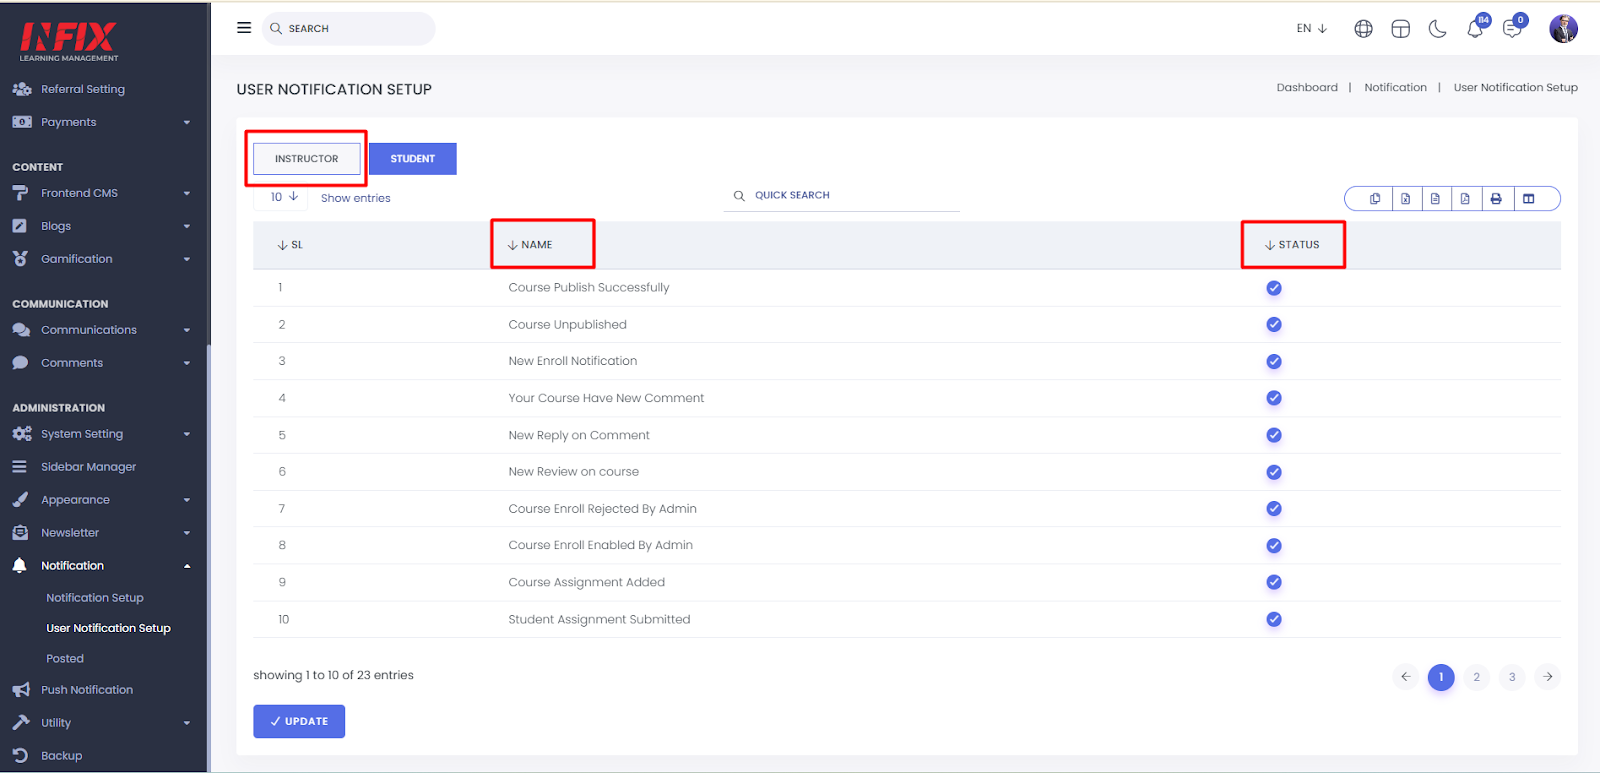
User Notification Setup:
This section is based on the instructor & Student individual notifications that the admin can manually choose which one will be notified on their user notification bar.
Short Direction: {InfixLMS> Dashboard> User Notification Setup> Instructor> Name> Status> Update> Student.}
If you want to mark or unmark the notification section individually then go to the infixlms dashboard to find the user notification setup option.
1- User Notification Setup
2- Instructor
3- Name
4- Status
5- Update
6- Student
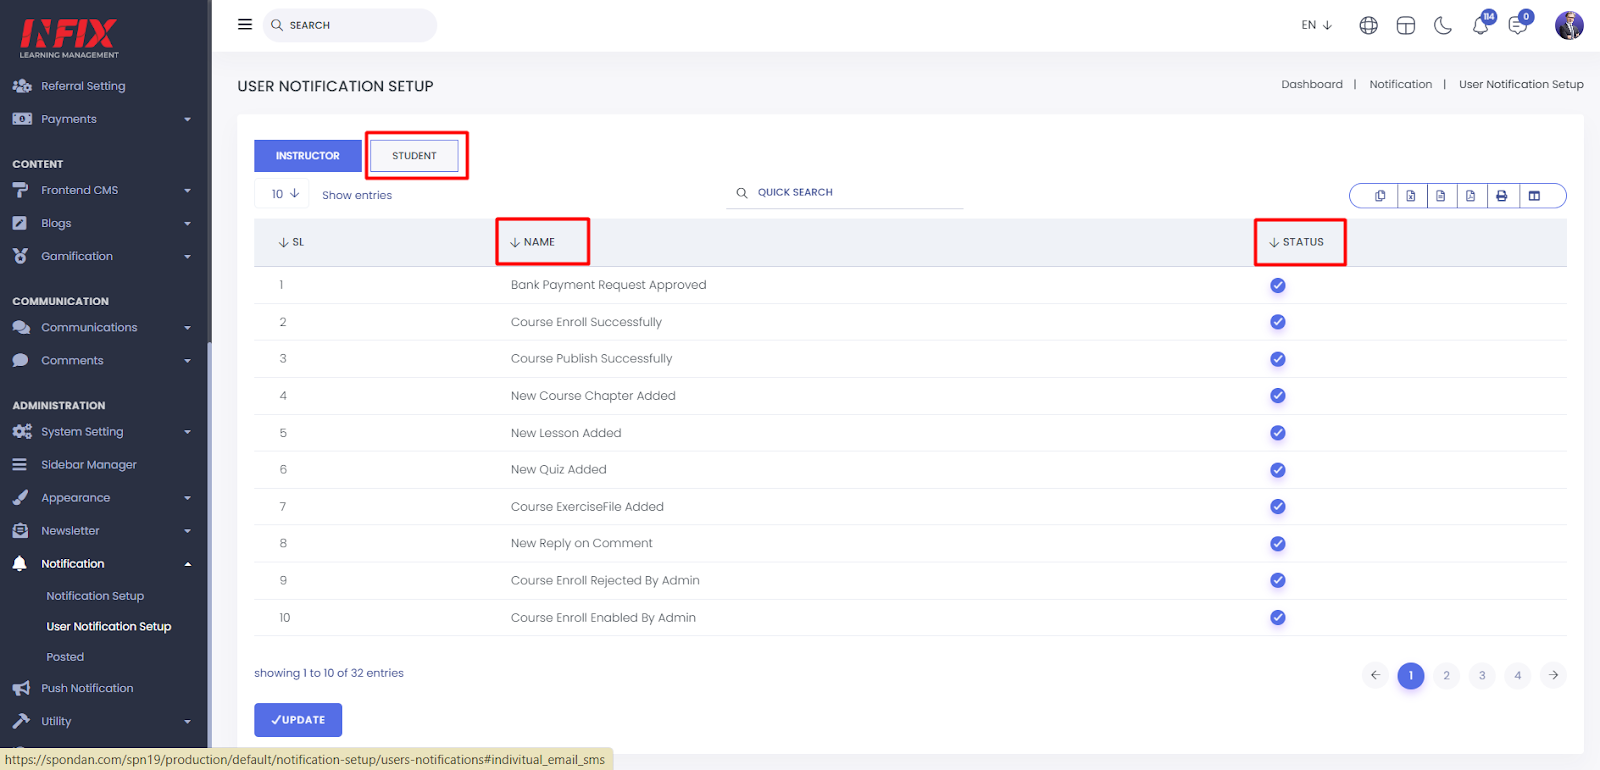
User Notification Setup Student:
This section is the student notification part which categories every single purpose of course enrollment, assignment or any other quiz participation.
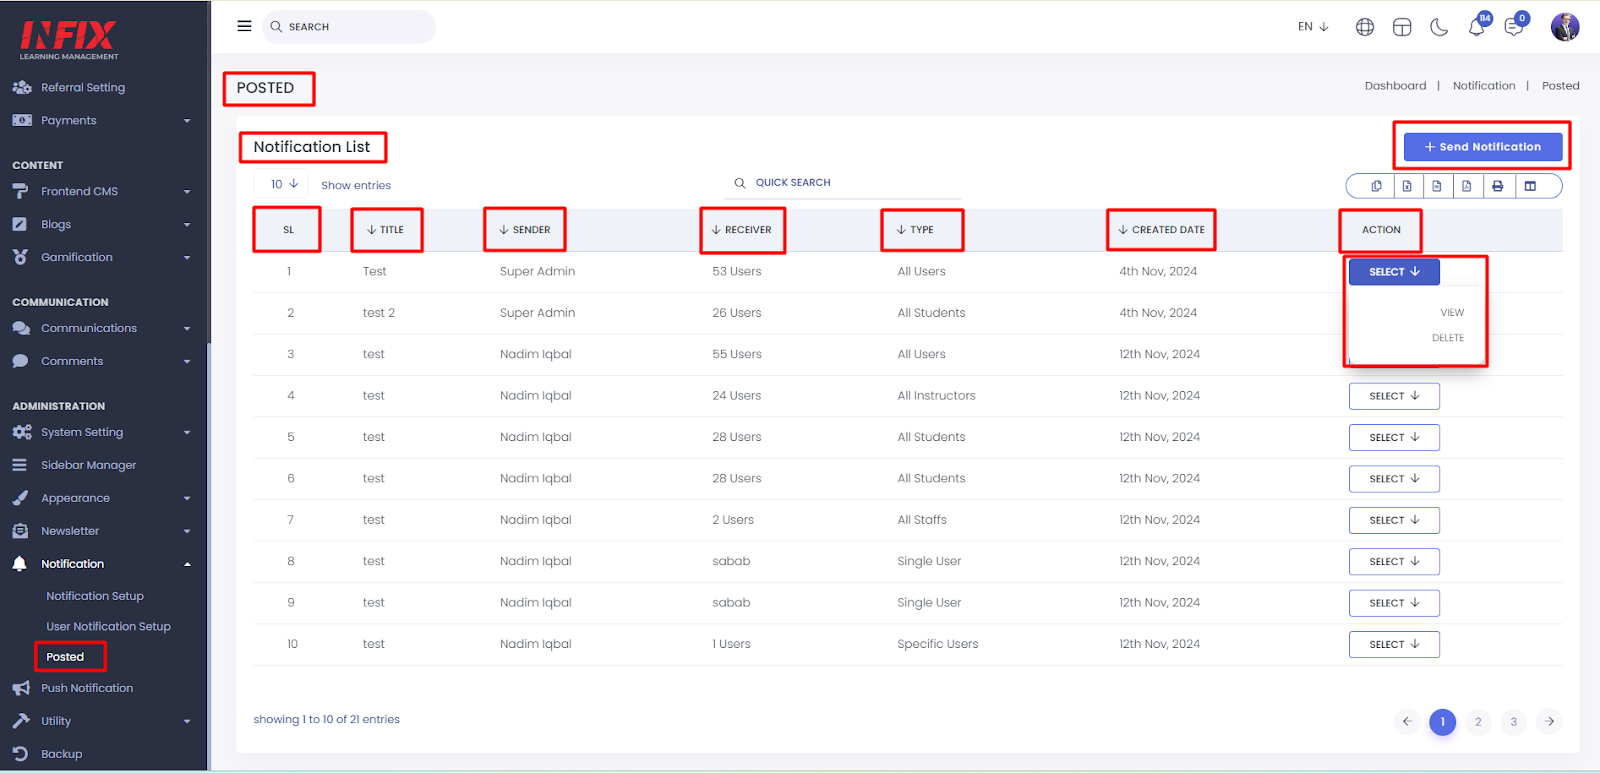
Posted:
This is posted notification section where the admin can send their student to direct message. Here's a simple process for writing for notifications and alerts, understand the context.
Start by understanding the purpose of the notification or alert, Keep it concise. Provide context, Be clear and specific. Use a clear call-to-action, and Test and refine.
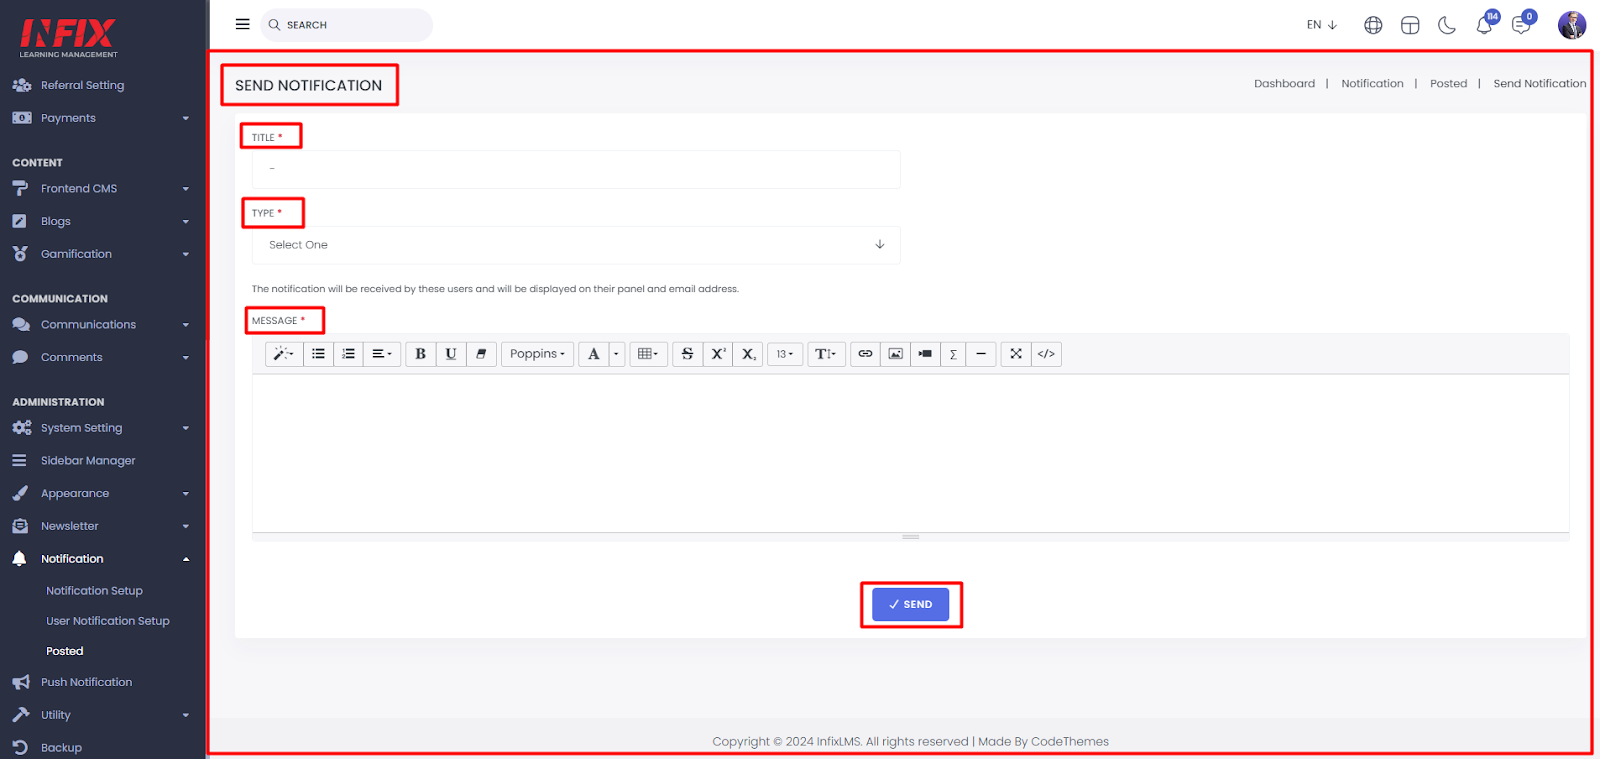
Short Direction: {InfixLMS> Dashboard> Posted> Notification List> Send Notification> SL> Title> Sender> Receiver> Type> Created Date> Select> Title> Type> Message> Send.}
If you want to send a notification on the notification bar then click on the send notification option.
1- Posted
2- Notification List
3- Send Notification
4- SL
5- Title
6- Sender
7- Receiver
8- Type
9- Created Date
10- Select
11- Title
12- Type
13- Message
14- Send
Send Notification:
Write down your message that you want to send to your student notification bar.
Notification bar:
This is the right-top corner notification alert message.