The skills and pathway module provided by infixLMS has functionality primarily to allow the student to manage their skills and professional development. Skill & Pathways is a feature that helps users track and manage their skills and educational progress. It allows learners to identify the skills they want to acquire or improve and then provides them with a structured pathway or curriculum to achieve those skills. This module often includes features for setting learning goals, tracking skill development, and accessing relevant courses or resources to support the learning journey. It's a tool that empowers learners to take a proactive approach to skill development and career advancement within the infixLMS.
Also, Know the Infix Module Installation process
Link: Infix Module Installation process
How to work Skill & Pathway Module in InfixLMS:
InfixLMS should be pre-installed on your server.
Purchase the Skill & Pathway Module.
Download and install this Skill & Pathway Module.
Upload Skill & Pathway module From System Setting> Module Manager.
Setup Skill & Pathway App and configure it.
Opportunity for the Using Skill & Pathway Module:
Admin can create Skill & Pathway for any Student and Instructor.
A user can define a Pathway Name, Description and selected courses or quizzes.
Admin or Instructor can create a Skill for improving student performance.
Badge (create default icon by default, with the option to upload a thumbnail image)
Select an individual course or pathway (can have multiple pathways to achieve a skill)
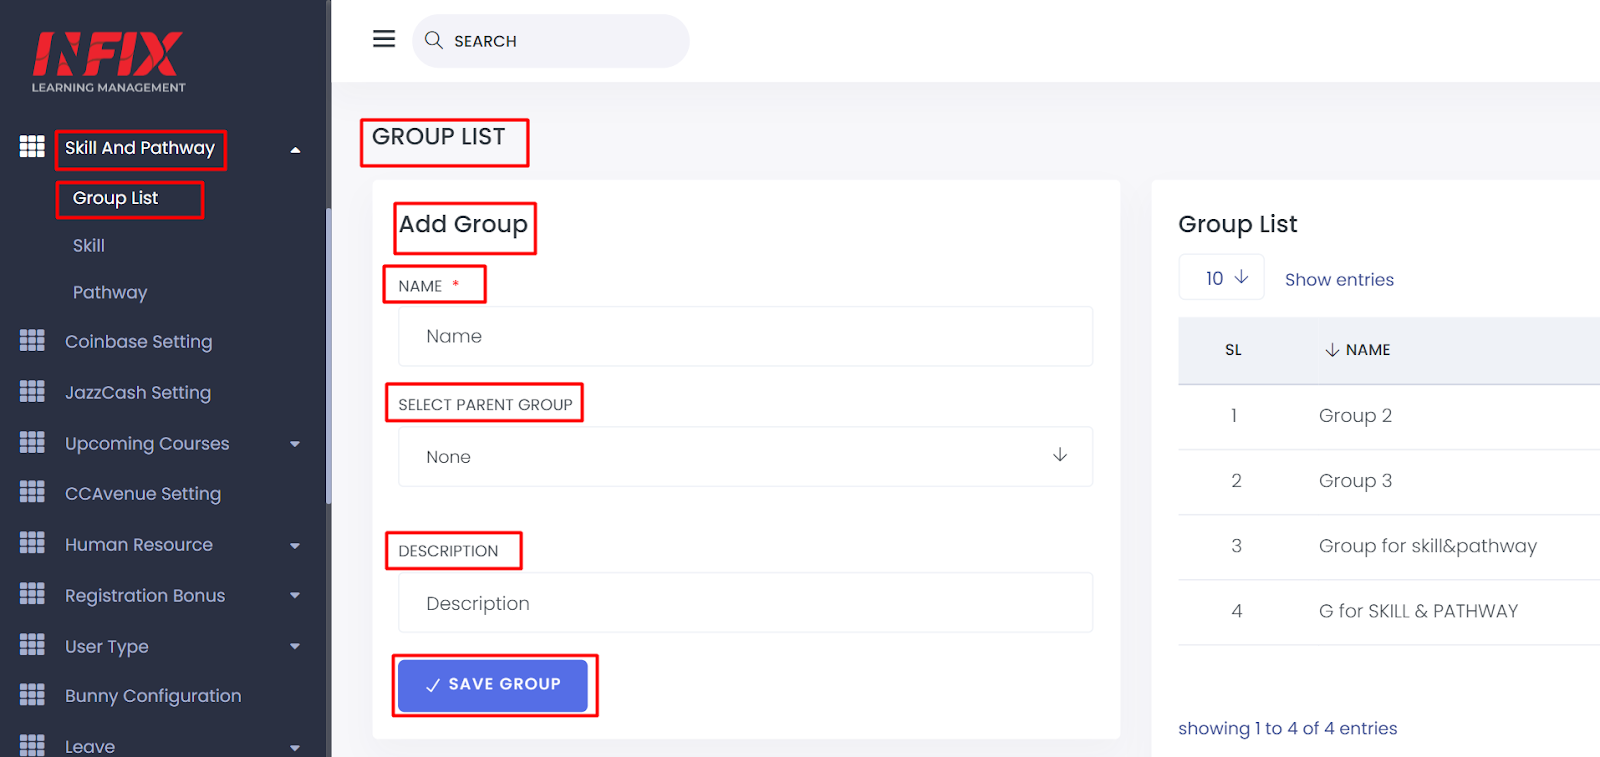
1.1 Create A New Group:
At first, the admin has to create a new group for the parent category, if you have successfully done this by adding a group then follow the picture number of instructions.
1.2 Create Parent Group:
If the admin creates a group then the instructor has to create a parent group by selecting a group that you had been done yet.
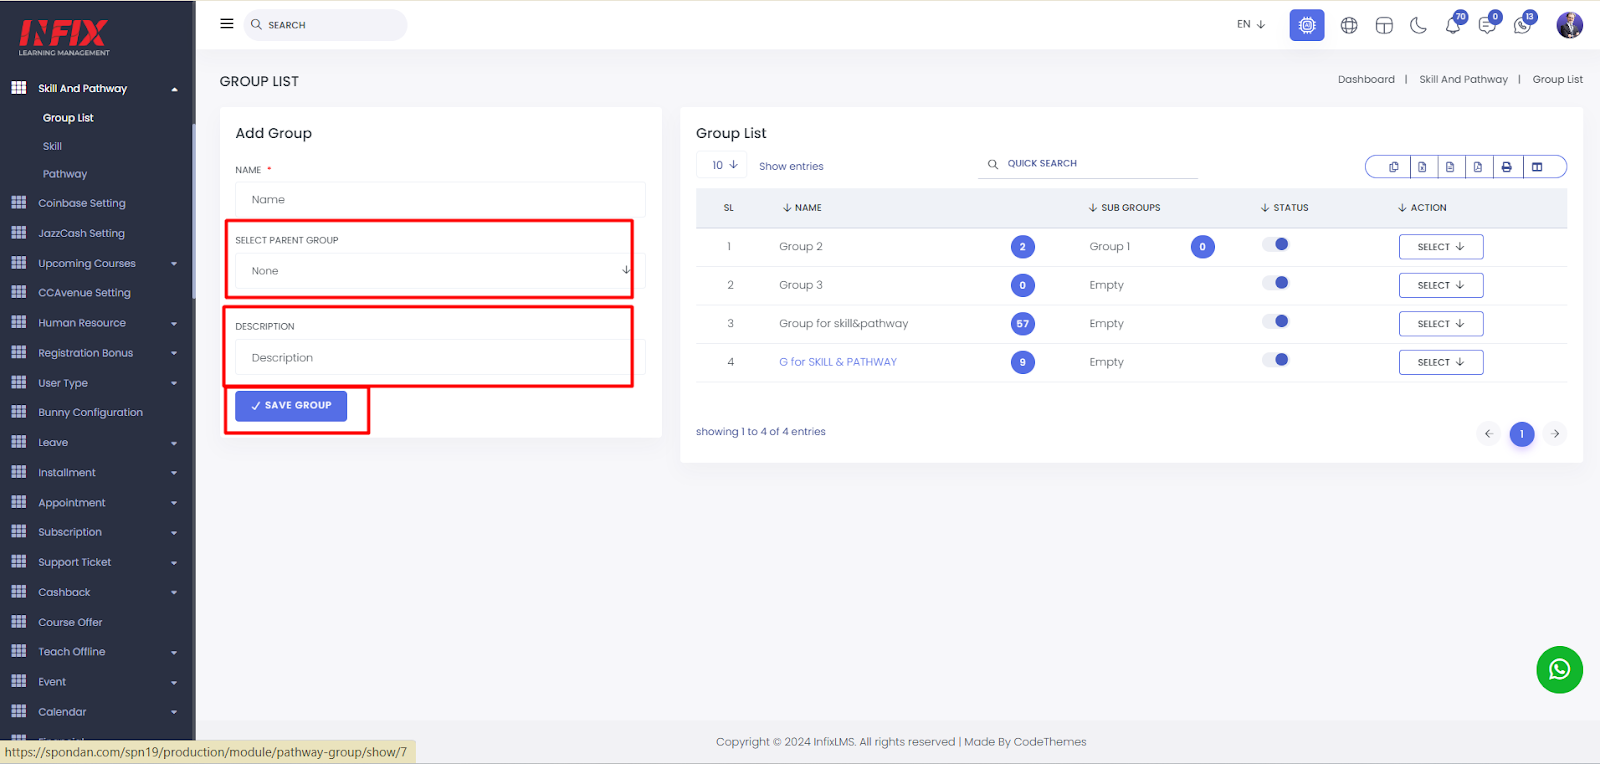
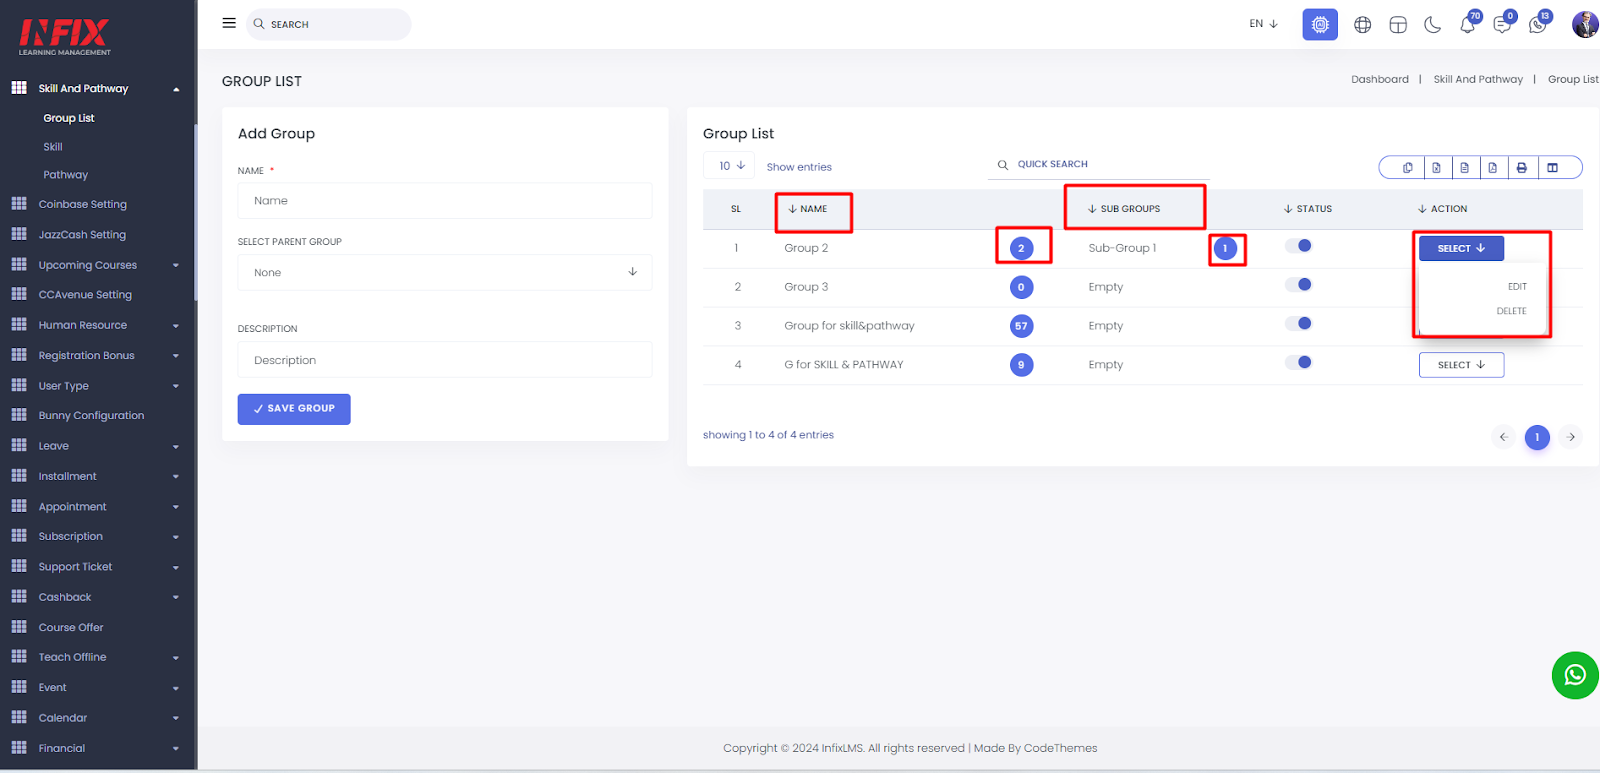
1.3 How To Work Group List:
Here is the group list that the admin had done, if you want to add a parent-student or sub-group student for assigning a new course then follow the number of instructions.
Instructions:
Admin or Instructor can create a new group
A group has the following fields:
Name
Description
Parent group (by selecting a parent group, the group becomes a sub-group of the parent group)
After the group is created, Admin or Instructor can enrol a group in a course or pathway, and all Students in that Group will then be enrolled in the courses. If a Group is enrolled, then the students in that group and in all of the sub-groups will also be enrolled.
The students will receive an email notification that they have been enrolled in the course or pathway.
1.4 Click here to Add Parent Category Student:
If you want to assign a new student to the parent category then click on the Assign a student to add a new student.
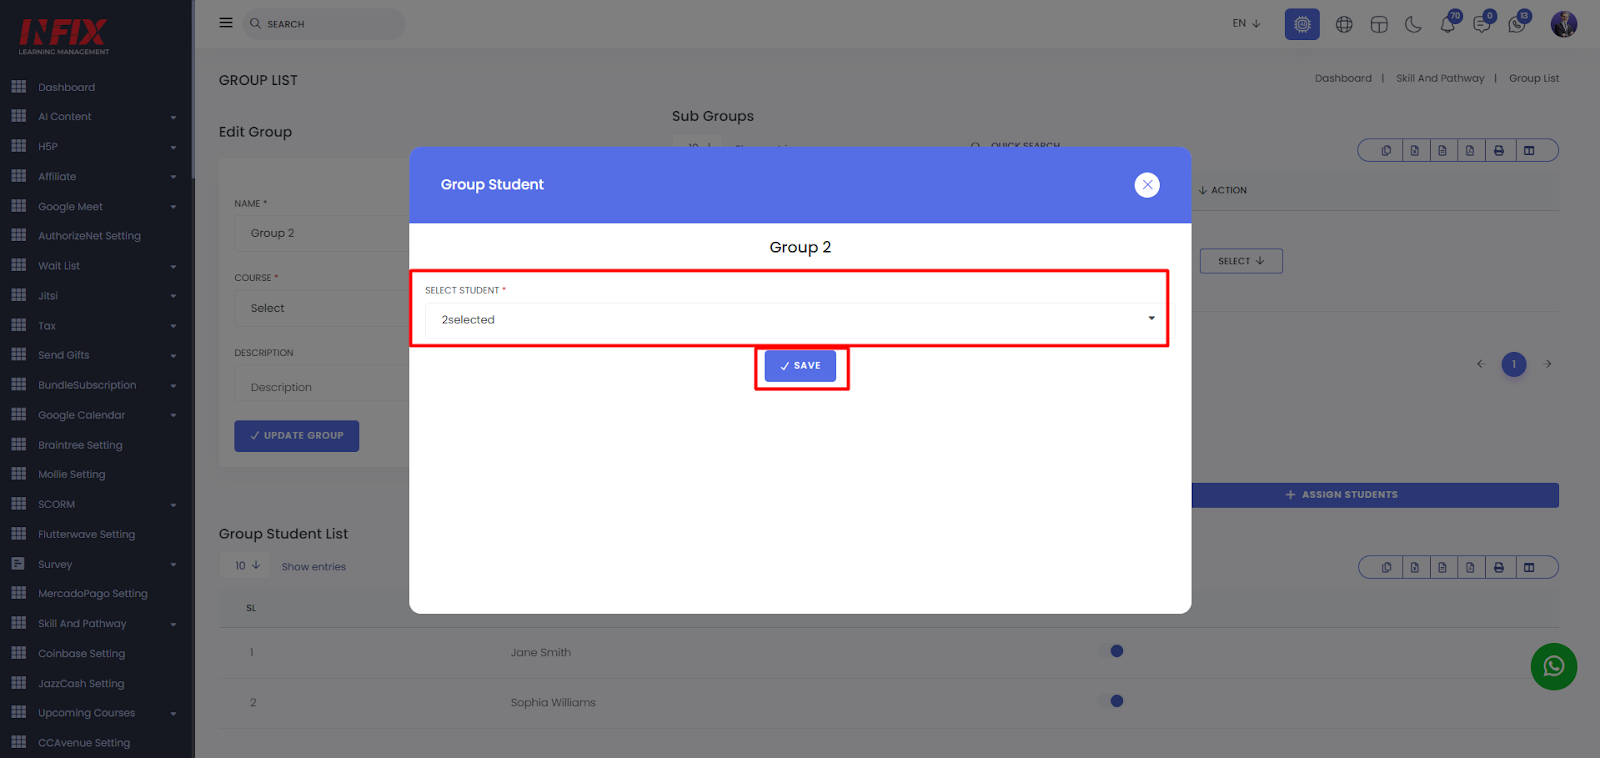
1.5 Select Student for Parent Category:
If you want to individually assign a new student for the parent category then click on the select student & hit the save button.
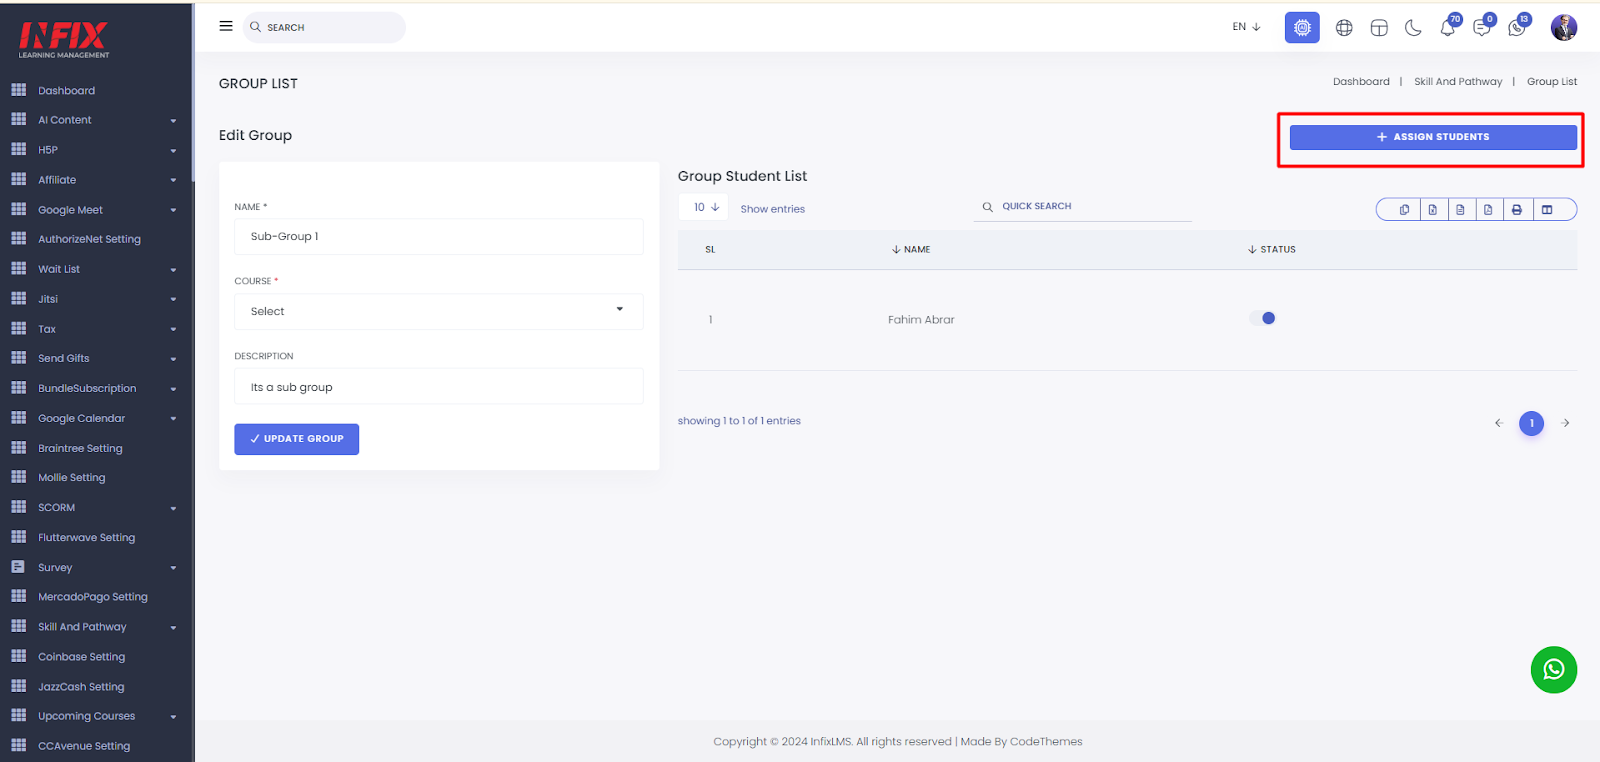
1.6 Click Here To Add Sub Group Student:
If the admin wants to add a new student for a sub-group category then click on the Assign student.
1.7 Select Student For Sub-Group Category:
If the admin wants to assign a student to a Sub-group individually then select student & hit the save button.
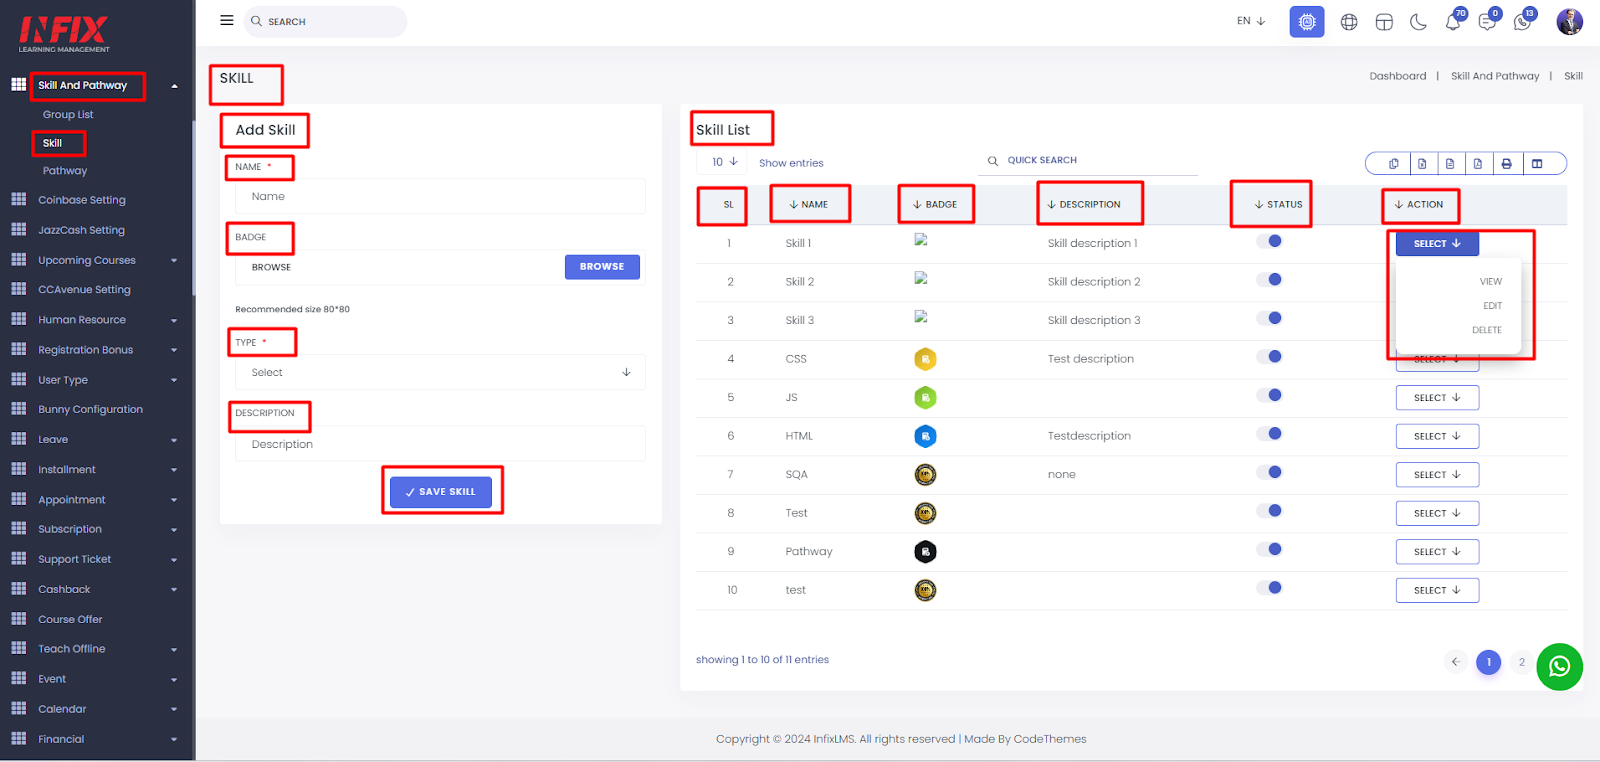
2.1 How To Add A New Skill Badge:
Here is the important section of skill where the admin can select the combined package of pathway skills or they can select the individual course or quiz to gain their skill development. Although the admin can upload the skill badge picture & the type of course should be set manually.
Short Direction: {InfixLMS> Dashboard> Skill> Add Skill> Name> Badge> Type> Description> Save Skill> Skill List> Status> Select for view, edit & delete.}
If you want to set the skill badge & pathway combined course on the skill & pathway add-ons then go to the InfixLMS dashboard to find the skill option.
2.2 How To Add Pathway for Student & Group Selection:
After a pathway is created, the admin or instructor can enrol students, groups or subgroups into the path, and they will then automatically be enrolled in the way (and the student will receive an email notification). When a student meets the requirements of a Skill, that skill is achieved and will appear on their profile.
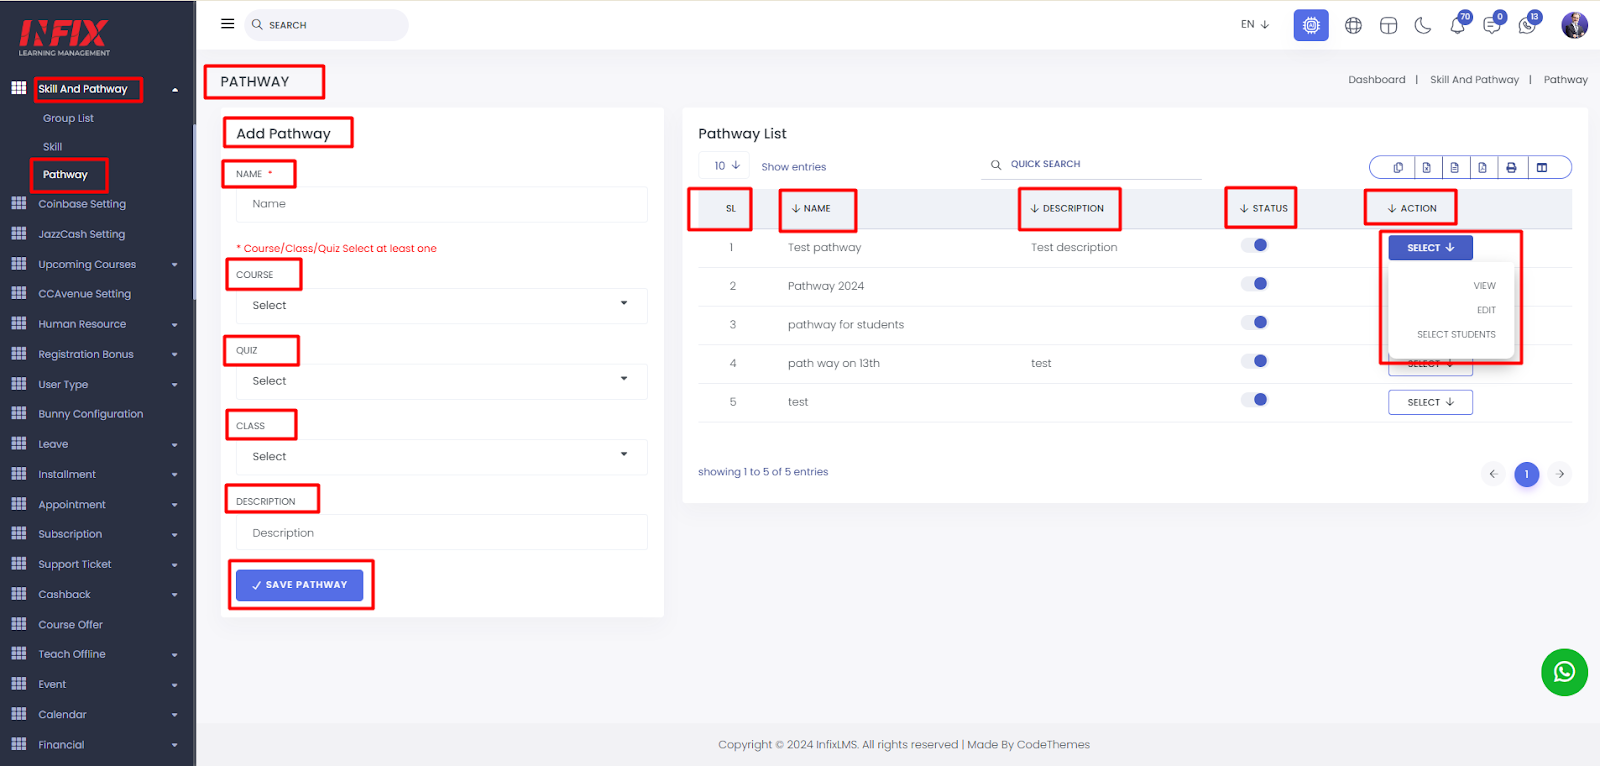
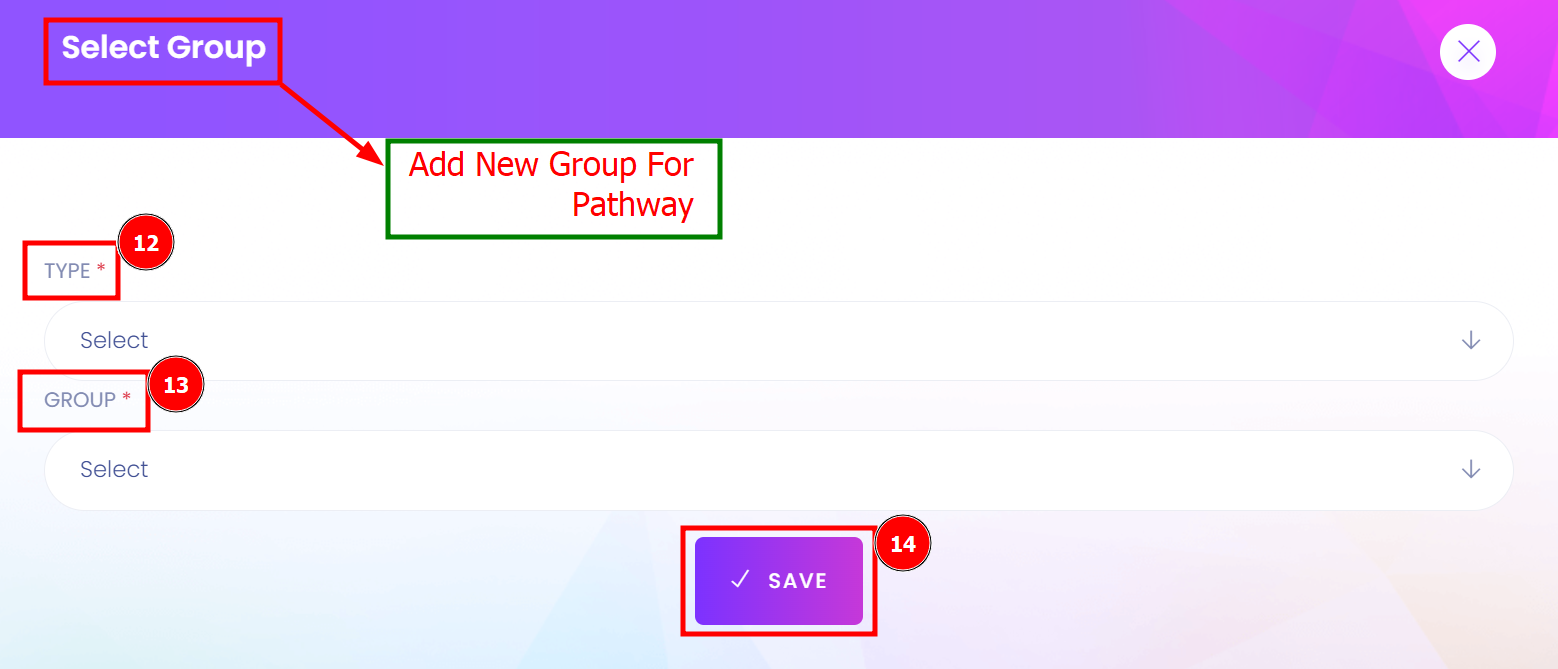
2.3 Add a New Group For Pathway:
This is the pathway function to create the mixed course for skill development, if a user would be completed the pathway courses then they can see or gain the skill badge. If you want to select a group or student to assign a course specifically to the pathway system then go to the InfixLMS dashboard to find the Skill & Pathway module to click on the Pathway option.
Important Instructions:
Admin or Instructor can create a Skill:
Skill name
Description
Badge (create default icon by default, with an option to upload a thumbnail image)
Select an individual course or pathway (can have multiple pathways to achieve a skill)
Admin or Instructor can create a Pathway:
Pathway name
Description
Select courses in the pathway
After a pathway is created, the admin or instructor can enrol students, groups or sub-groups into the pathway, and they will then automatically be enrolled in the pathway (and the student will receive an email notification).
When a student meets the requirements of a Skill, that skill is achieved and will appear on their profile.
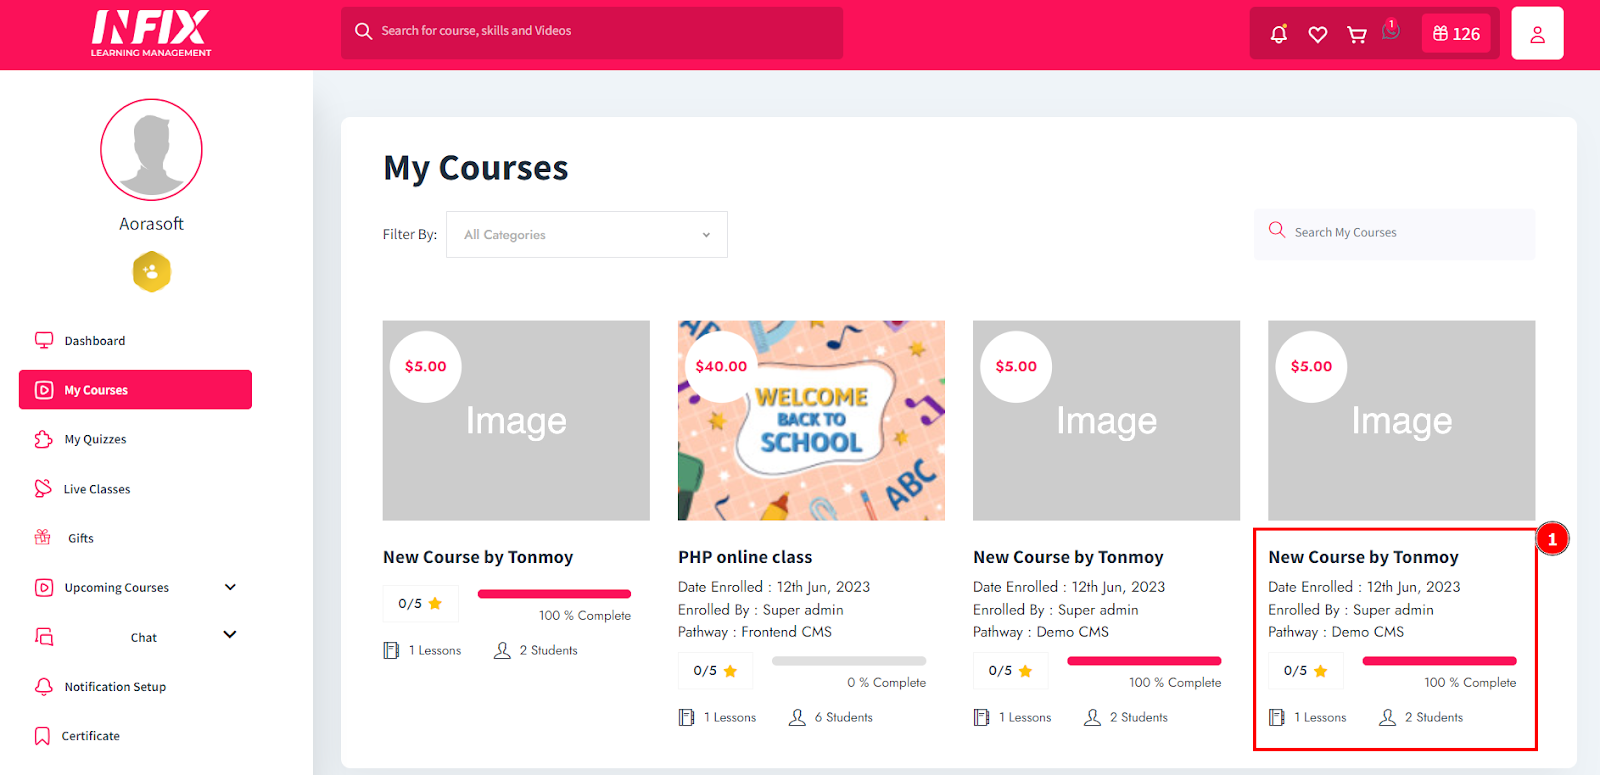
3.1 Student Dashboard:
If you have to set the course of pathway it will show the student dashboard to find the course easily. This is the student dashboard to a user can find the skill of the badge & the update of quiz status.
Short Direction: {InfixLMS> Dashboard> New Course for student dashboard> Enrol To Pathway> Student Dashboard My Skill.}
If you want to check the skill badge of all status of course or quiz system functionality then go to the student dashboard to find the last option My Skill.
1- New Course for student dashboard
2- Enrol In Pathway
3- Student Dashboard My Skill.
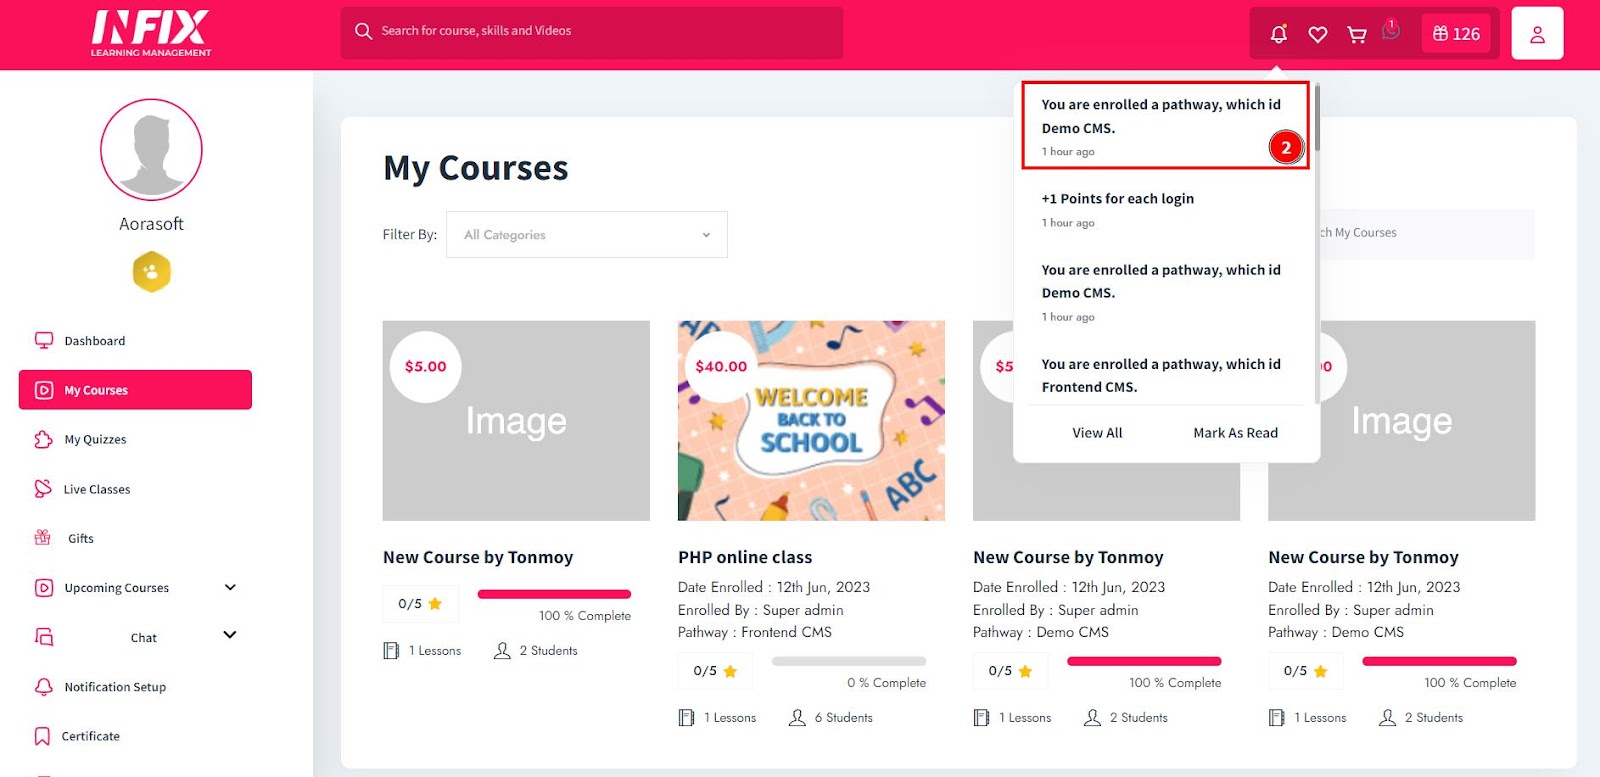
3.2 Enrol In Pathway:
The course list of courses the student is enrolled in will appear here. Includes information on how they were enrolled. if an instructor enrolled the student’s group in a pathway, that would appear here.
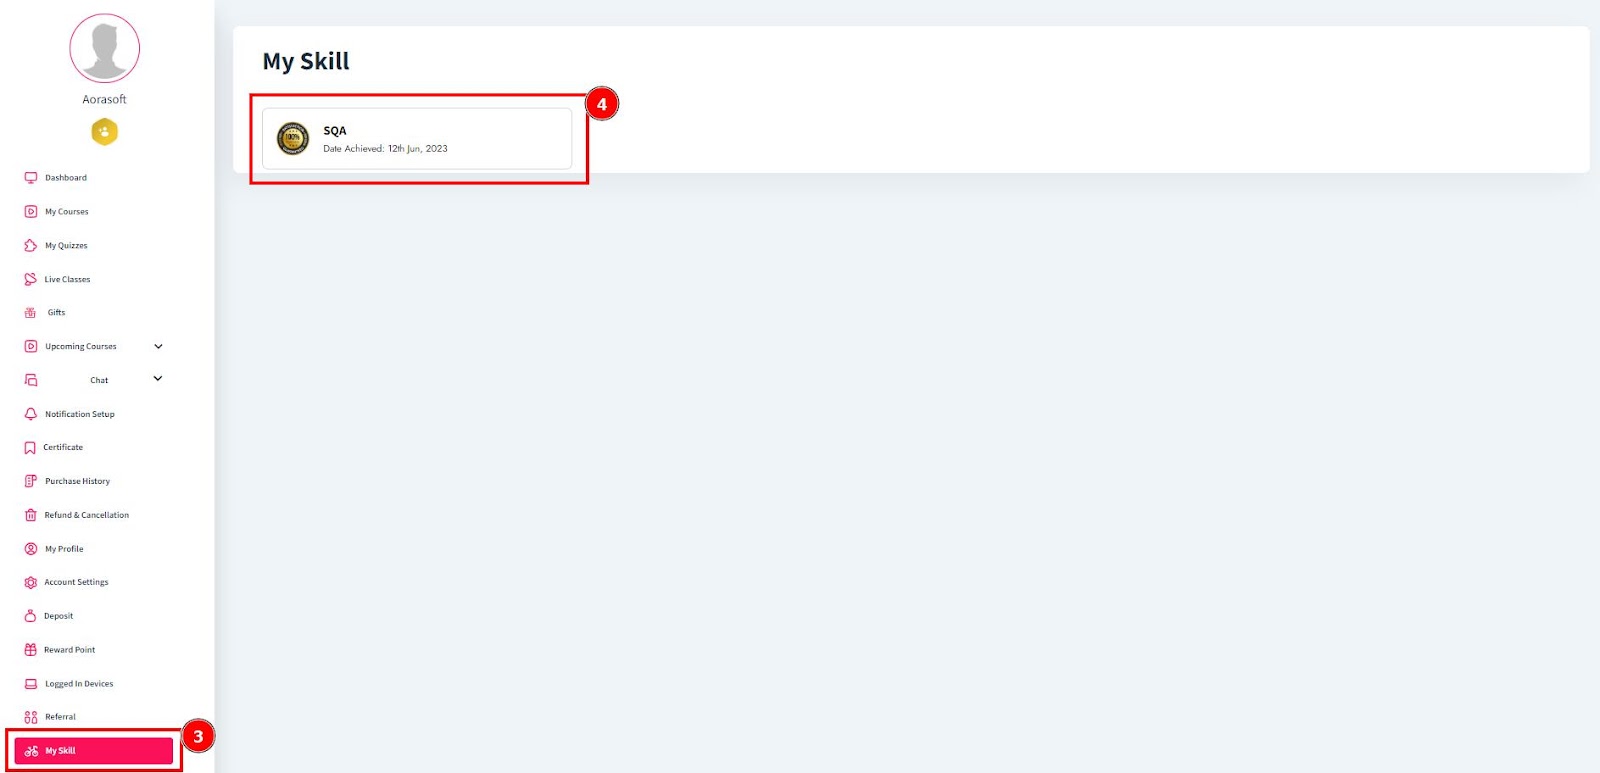
3.3 Student Dashboard My Skill:
This section is used so the user can see all skill badges. These badges serve as a visual representation of a learner's accomplishments and can be shared on profiles or resumes. Skill badges help learners showcase their expertise and can motivate them to engage in continuous learning and skill development within the LMS. They provide a way for both learners and employers to recognize and verify acquired skills.