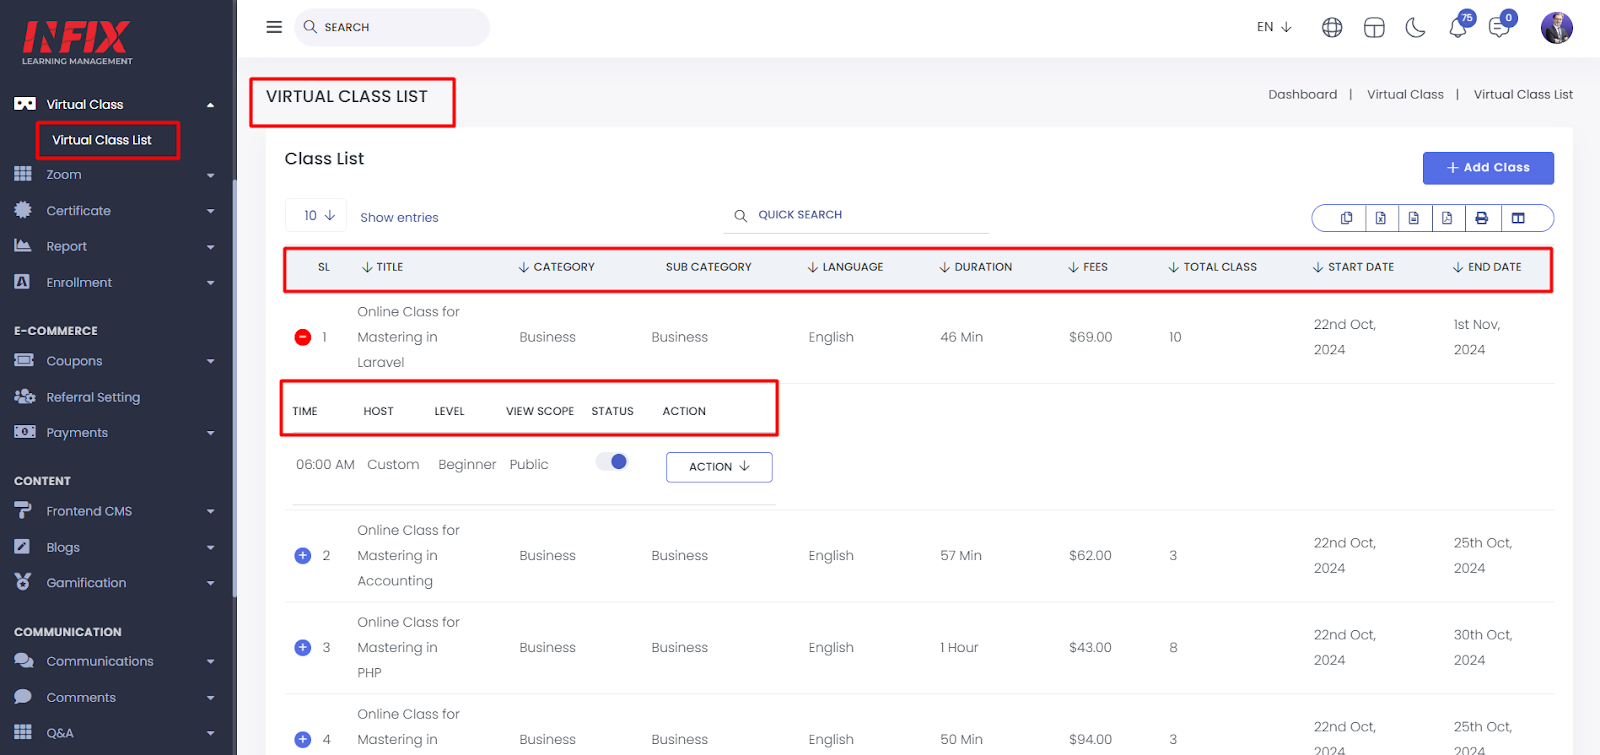
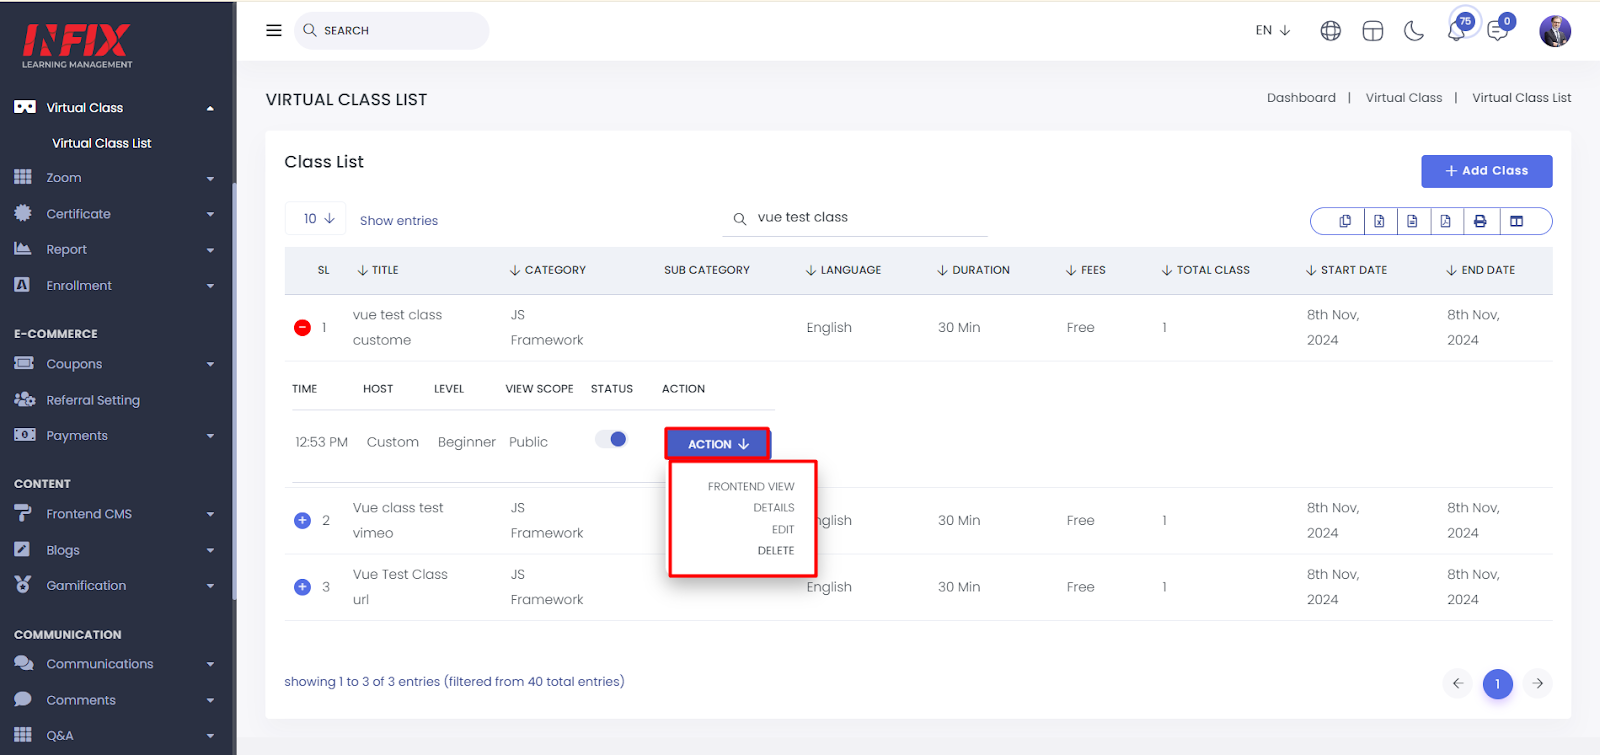
Virtual Class: Here, you can view all the details of virtual classes at a glance. This includes serial number (SL), class title, category, subcategory, language, class duration, fees, total number of classes, start date, end date, time, host, level, view scope, status, and available actions.
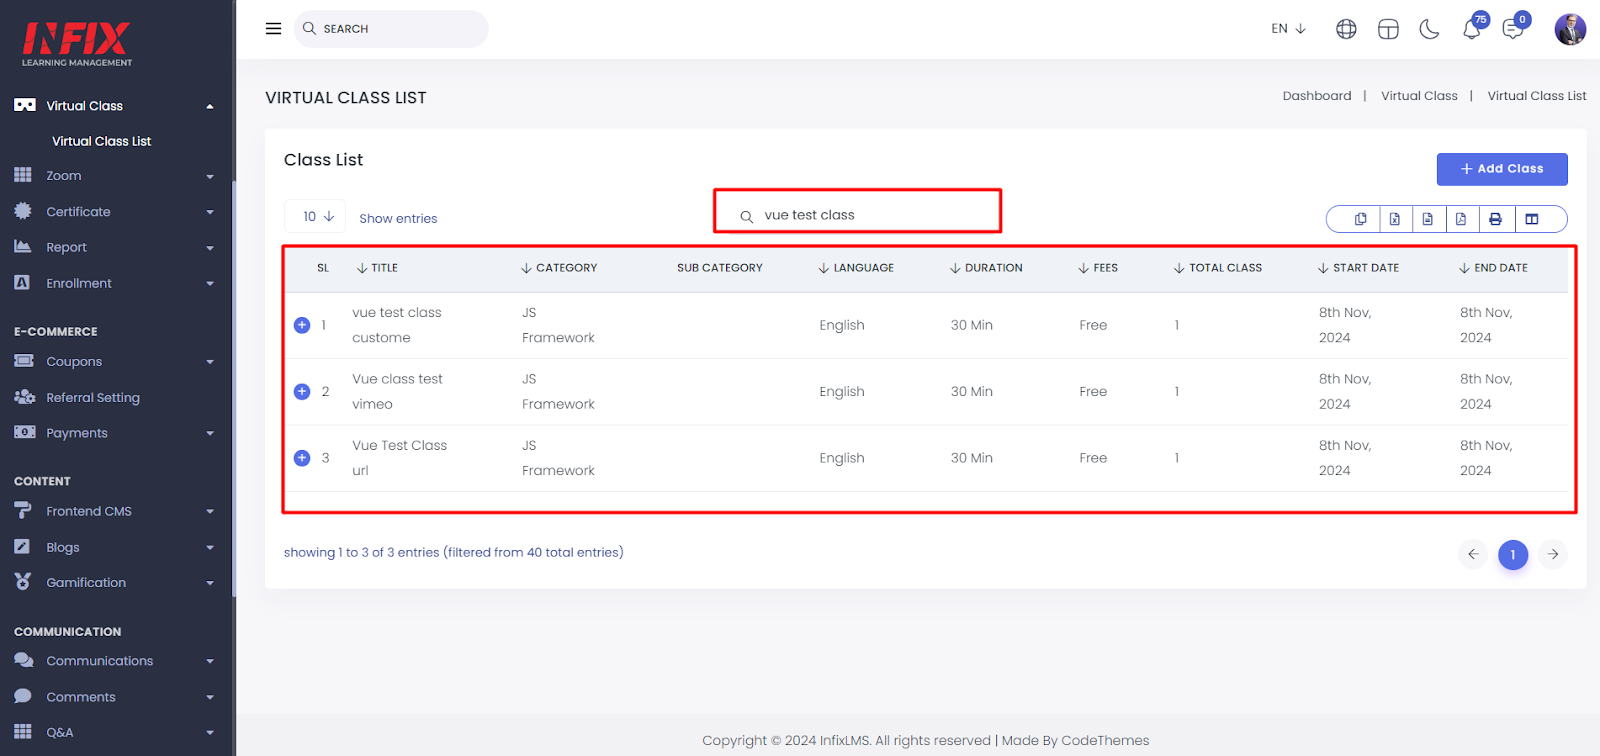
You can easily find a specific class using the search functionality.
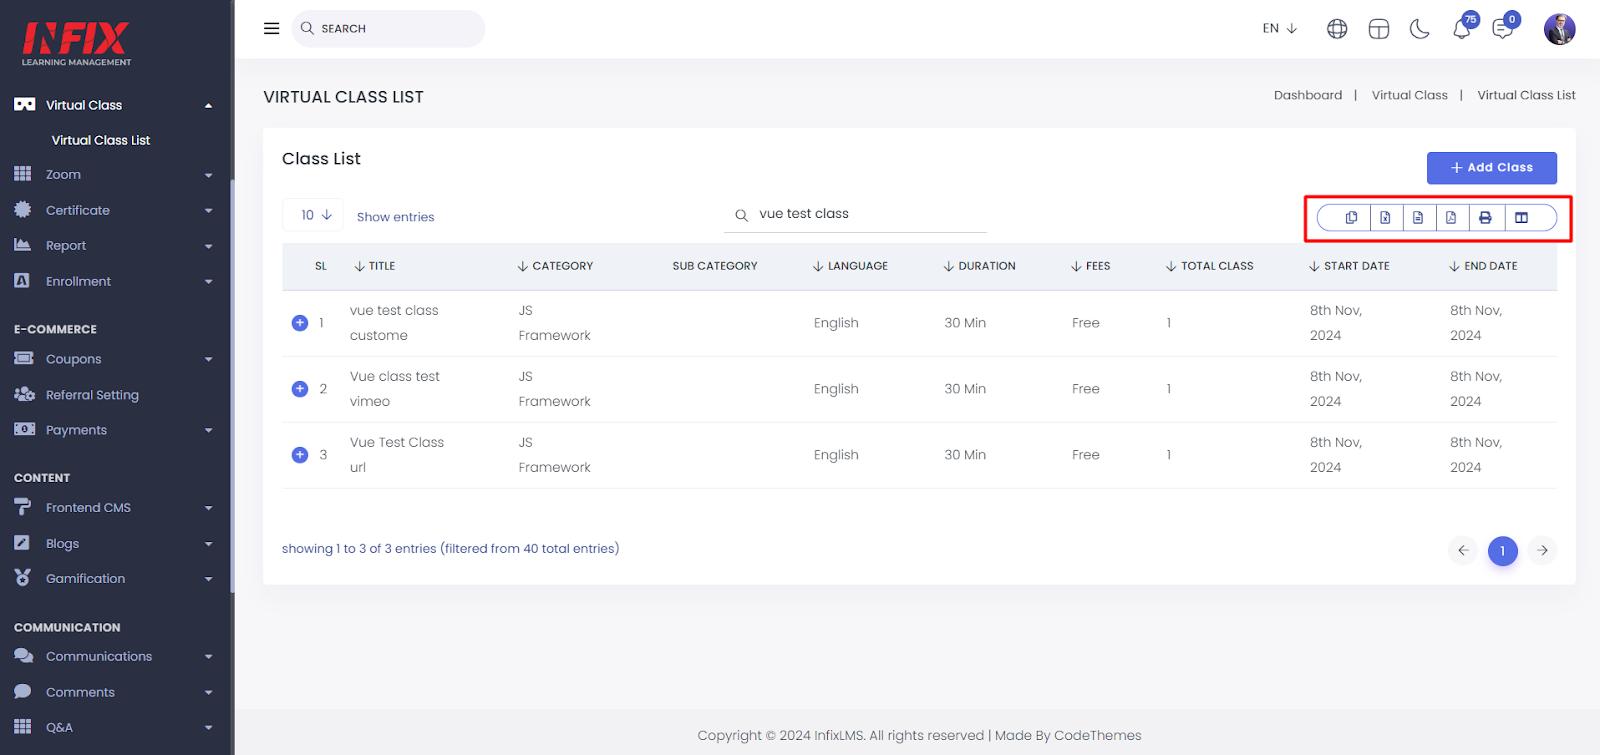
You can export data from here.
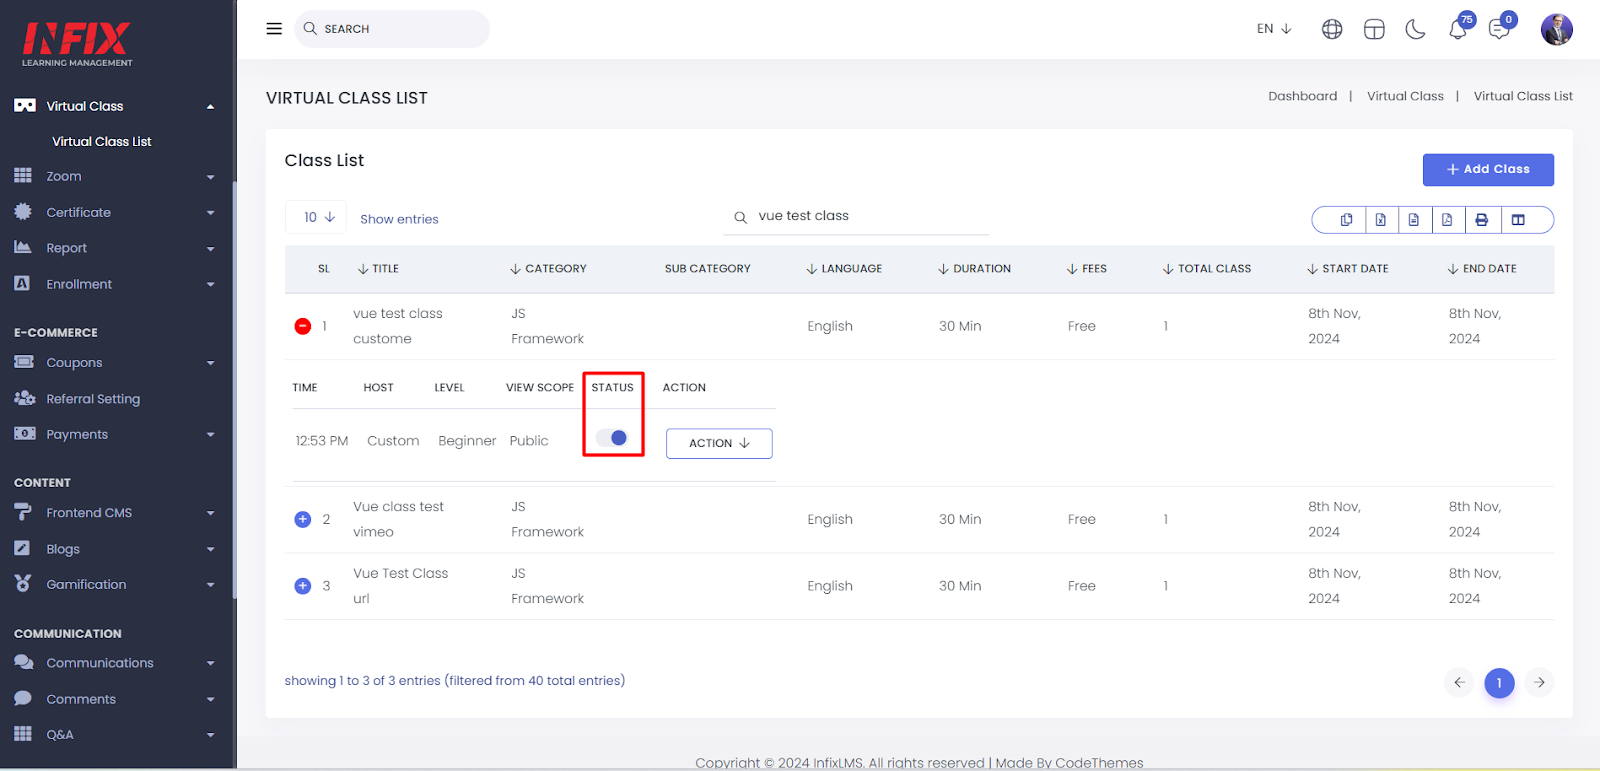
You can control whether a class is visible on the frontend by using the status toggle button.
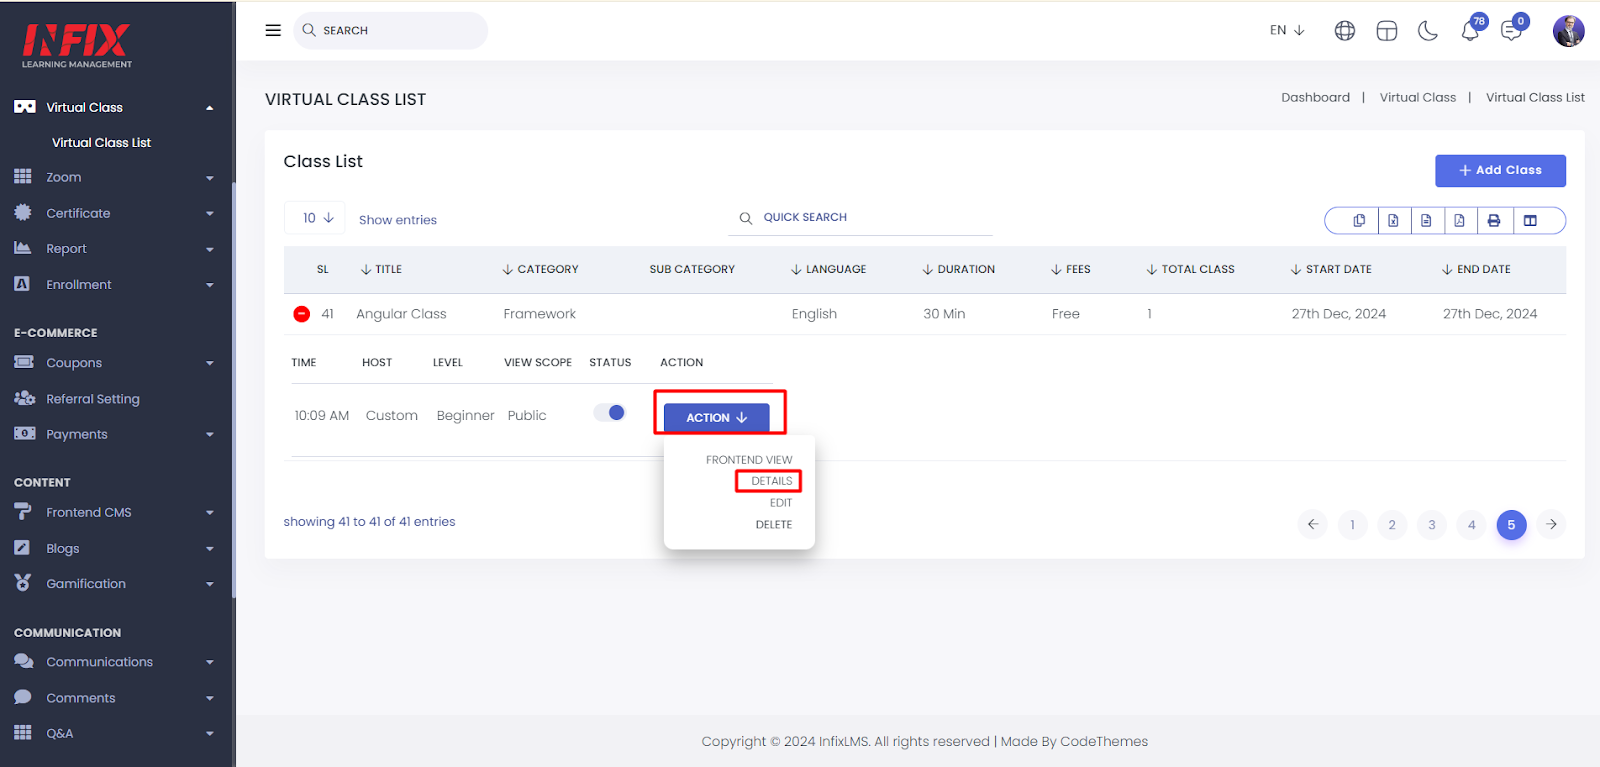
By clicking the action button, you can view the course on the frontend, access its details, and even edit or delete the course.
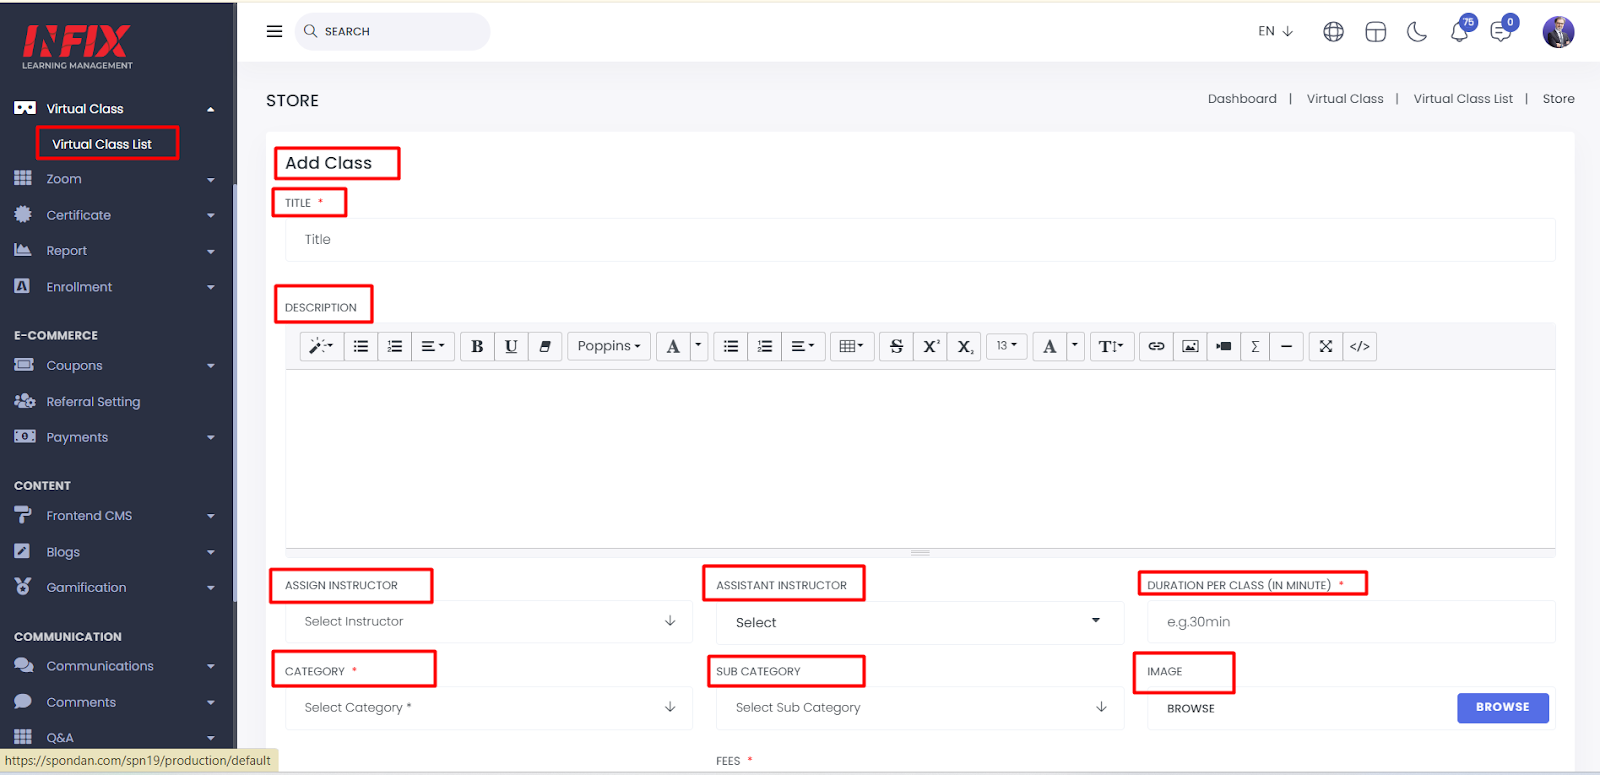
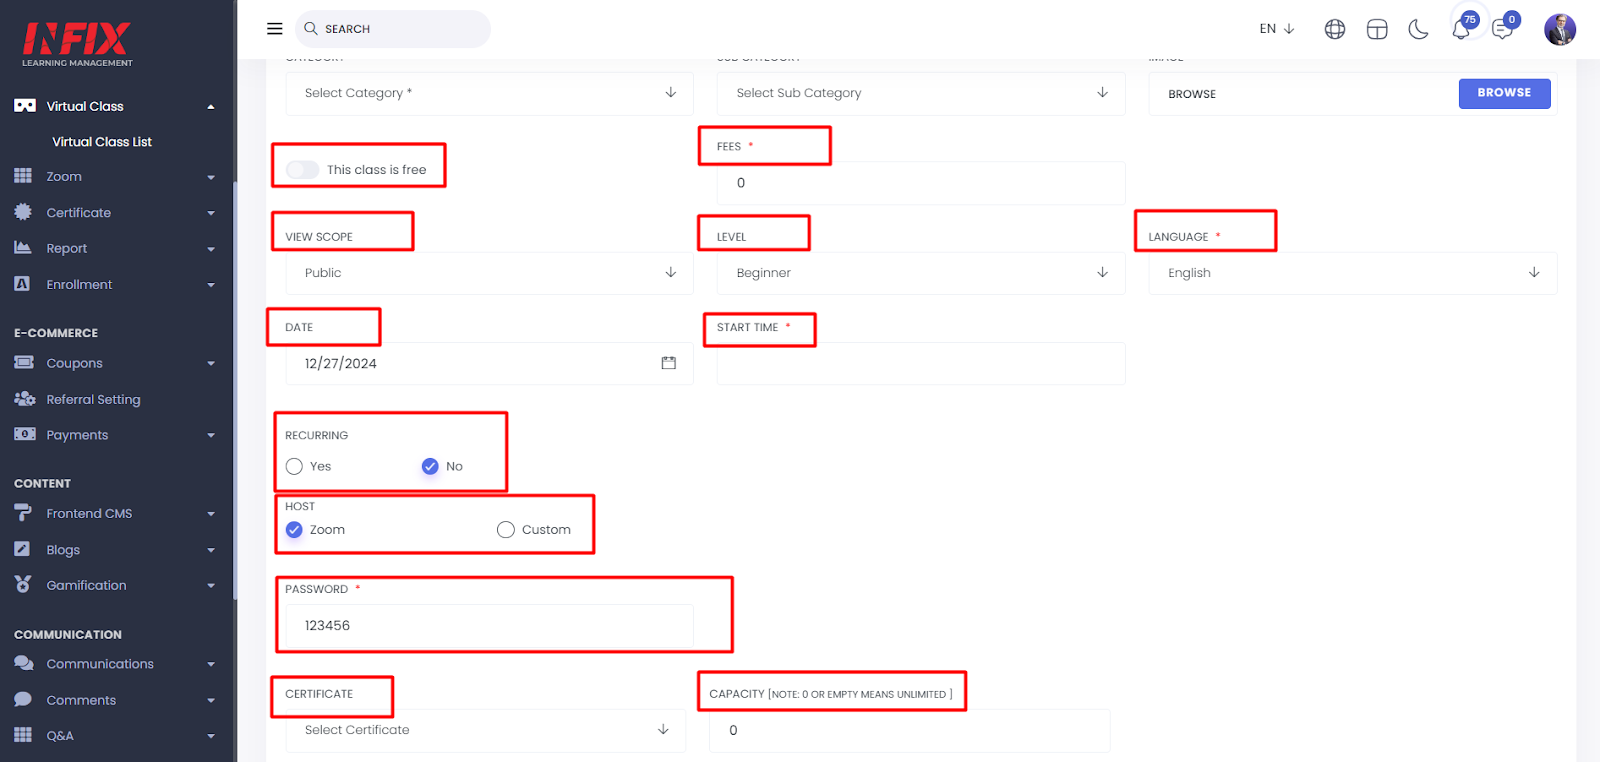
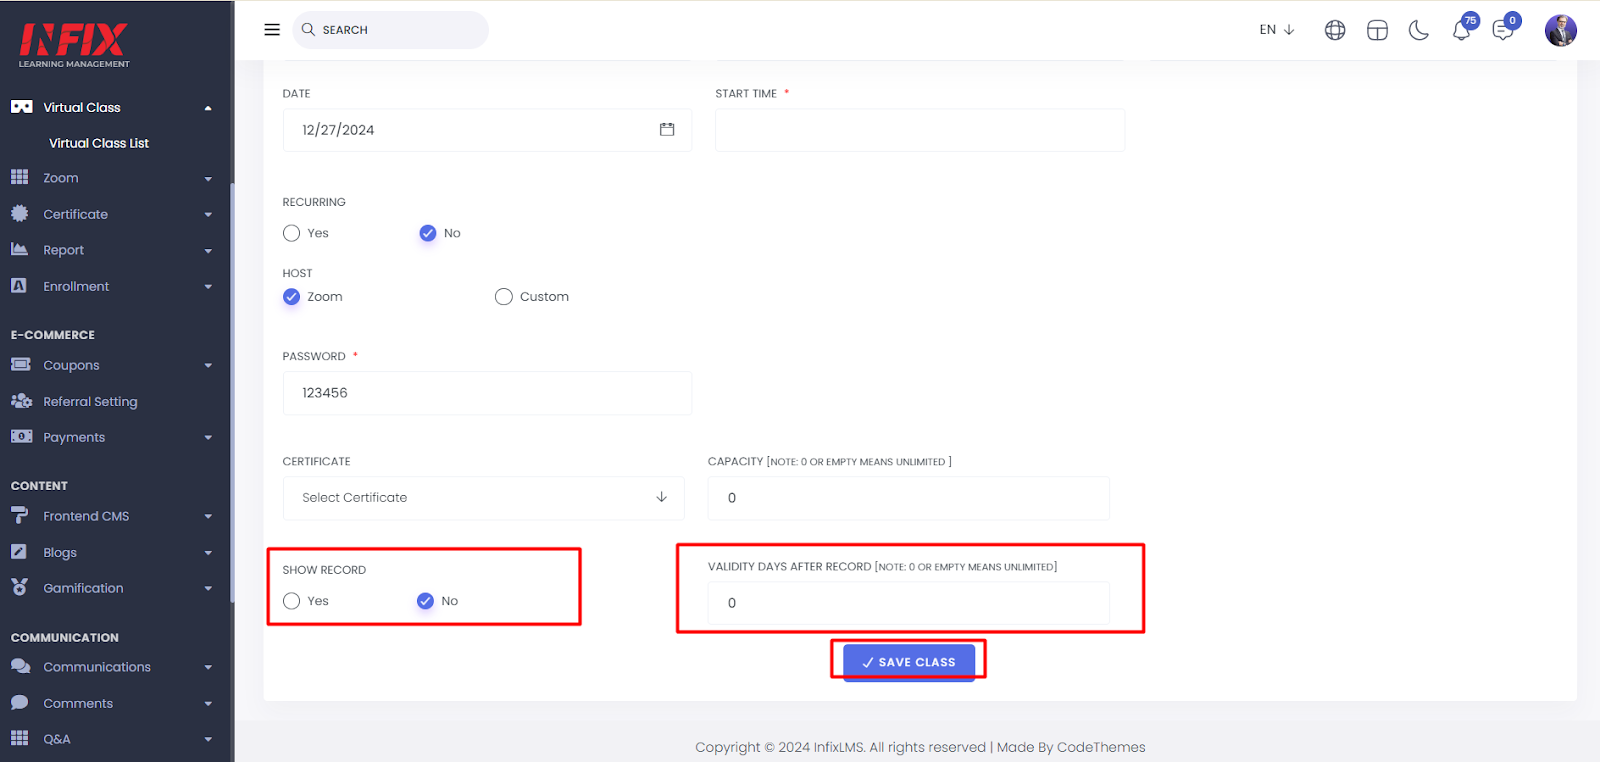
Add Class:To add a new class, click the “Add Class” button and fill in the details like title, description, instructor, category, duration, and start time. You can upload an image, set the price (if not free), choose the language, level, and view scope, and decide if the class is recurring. For Zoom classes, add a password. You can also assign a certificate, set capacity, enable recording, and define validity. Click "Save" to create the class.
Zoom Class: You can host a class on Zoom. To set it up, select "Zoom" as the host and set a password in the "Add Class" section. Click "Save" to successfully create the Zoom class.
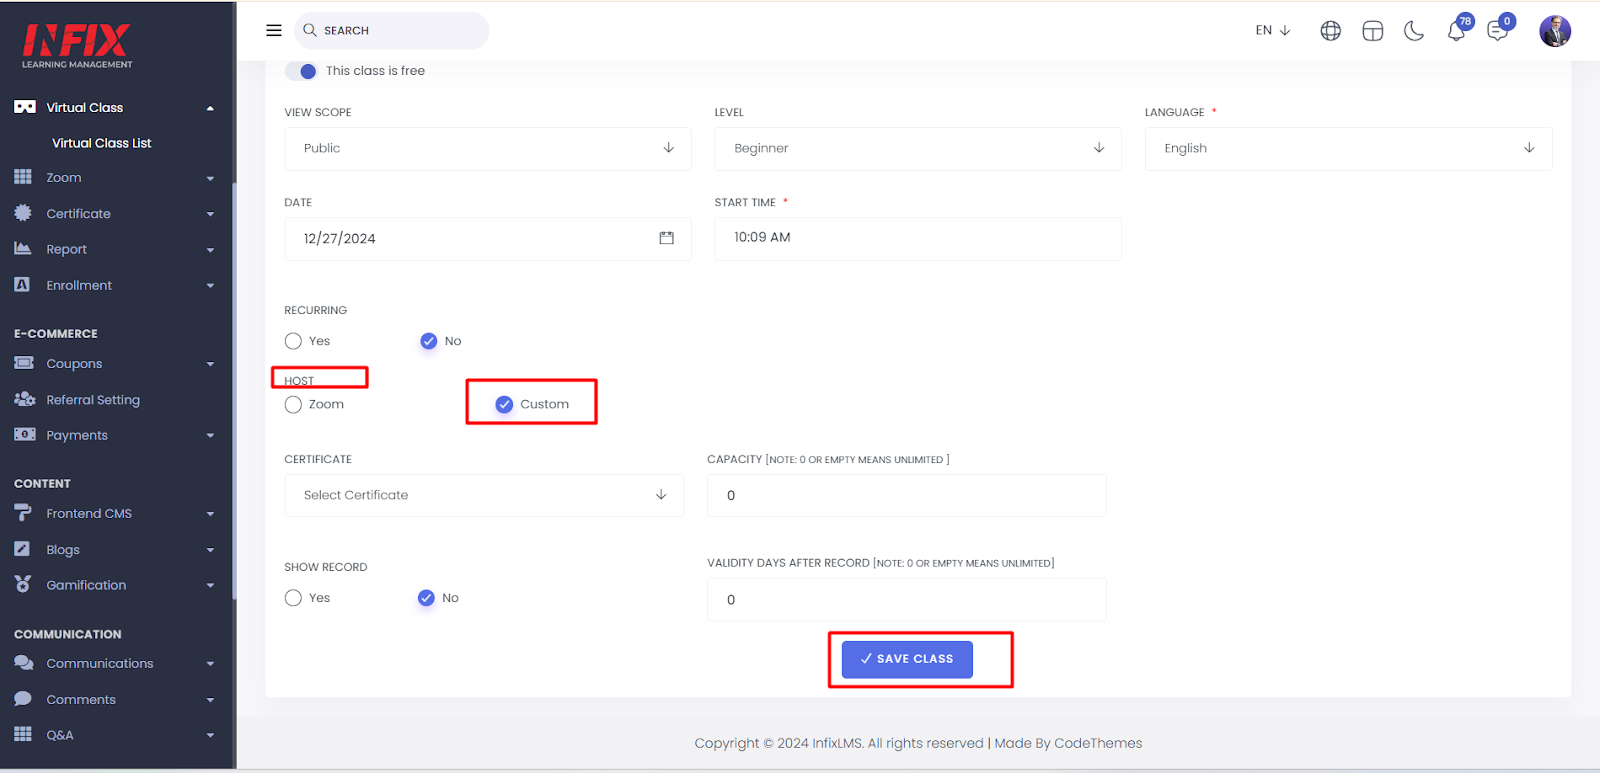
Custom Class: You can also add a custom host. To set that you have set custom as host. Then click on save.
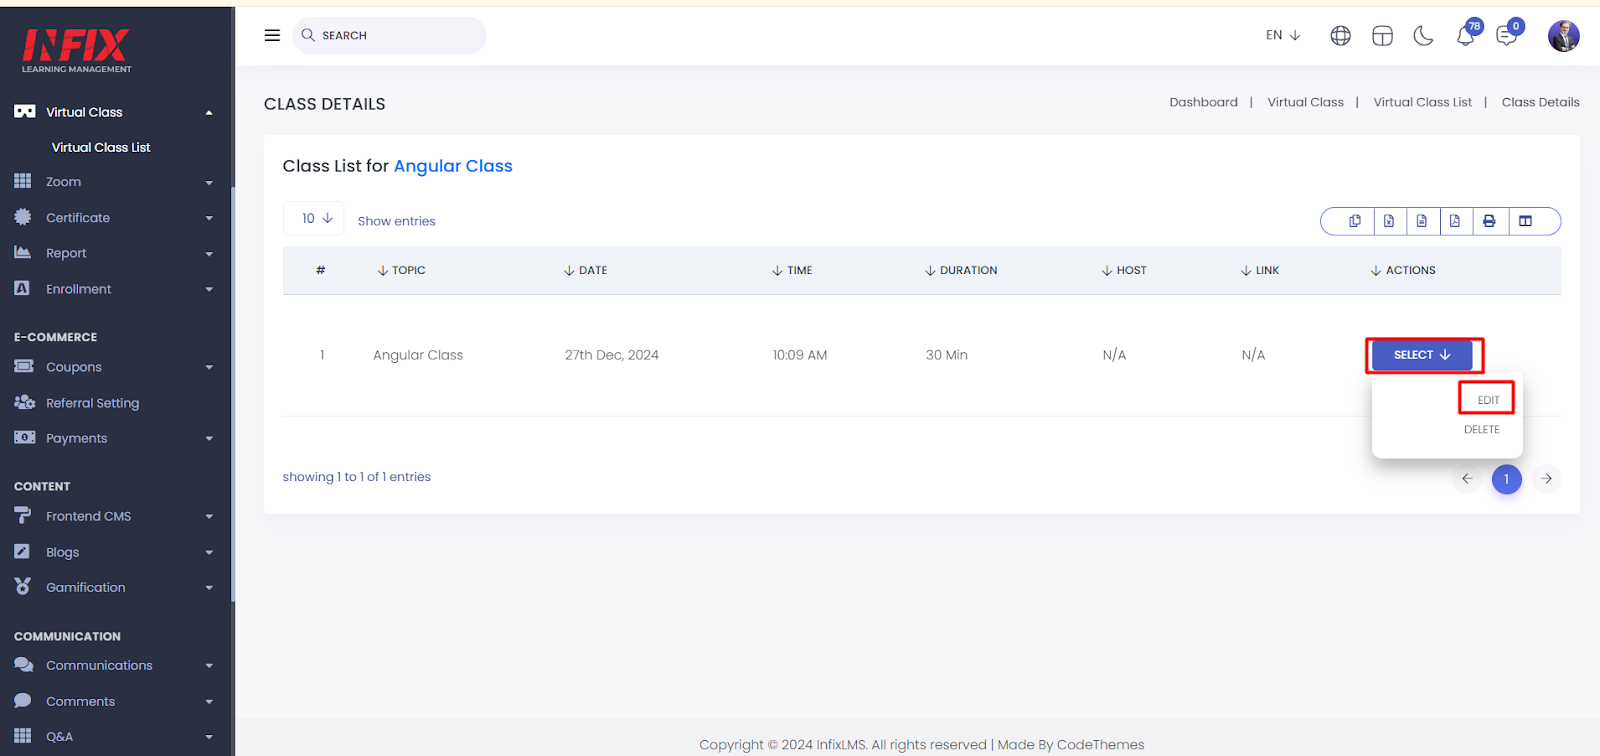
You can set various custom hosts, such as YouTube, Vimeo, Storage, and URL. To set a host, click on the "Action" button, then select "Detail." From the new class list, click "Select" and then "Edit." Here, you can choose and set different types of hosts.
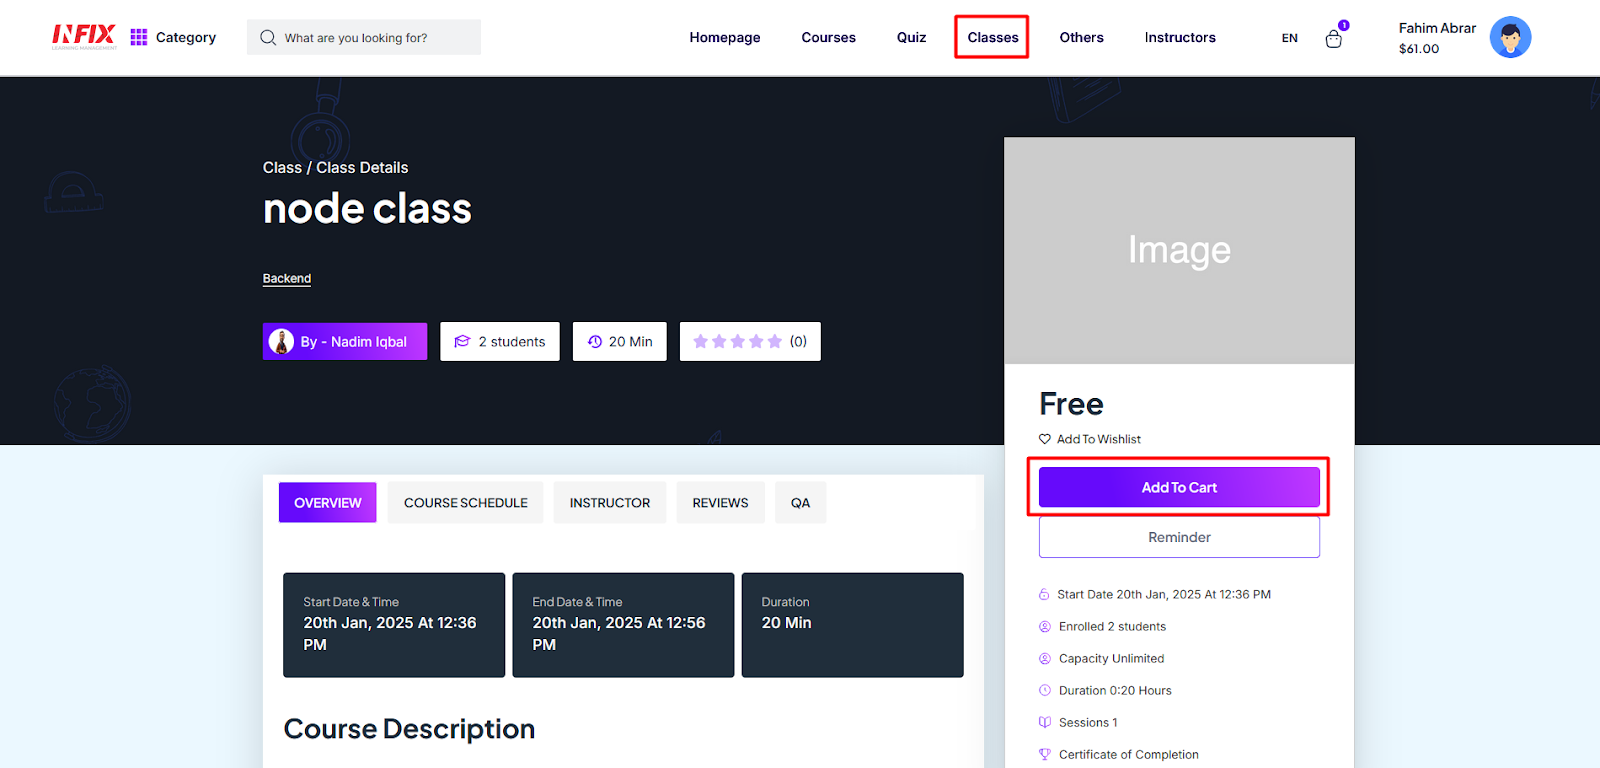
You can see and purchase the class from the front end. To do that go to the student panel then click on class and then just select the class and purchase by clicking the add to cart button.