Zoom is a high-quality video and audio online conferencing tool. Staff can enable Zoom and manage online collaboration with students directly from their InfixLMS subject. LMS for Zoom provides Learning Management System functionalities to Zoom users. Individual instructors can use this free App to put their classes online or create online training courses.
If you want to know how to set up Zoom Credintiallity then click on the link below:
Link: https://developers.zoom.us/docs/integrations/create
Zoom Setting:
The administrator for a Zoom account must enable the view and edit permissions for Server-to-Server OAuth apps to the developer, as well as the appropriate permissions to add specific scopes to the app.
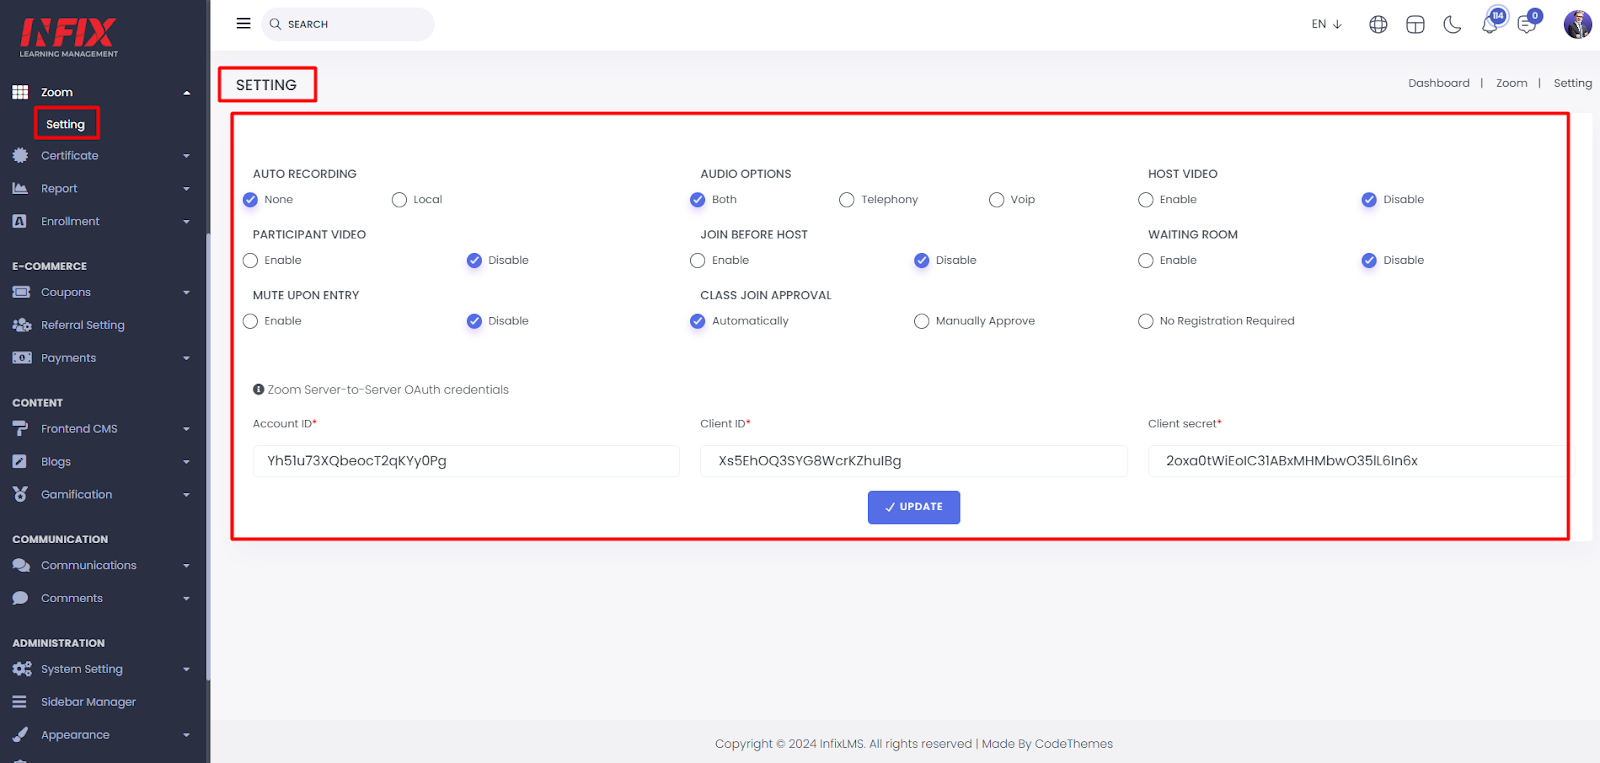
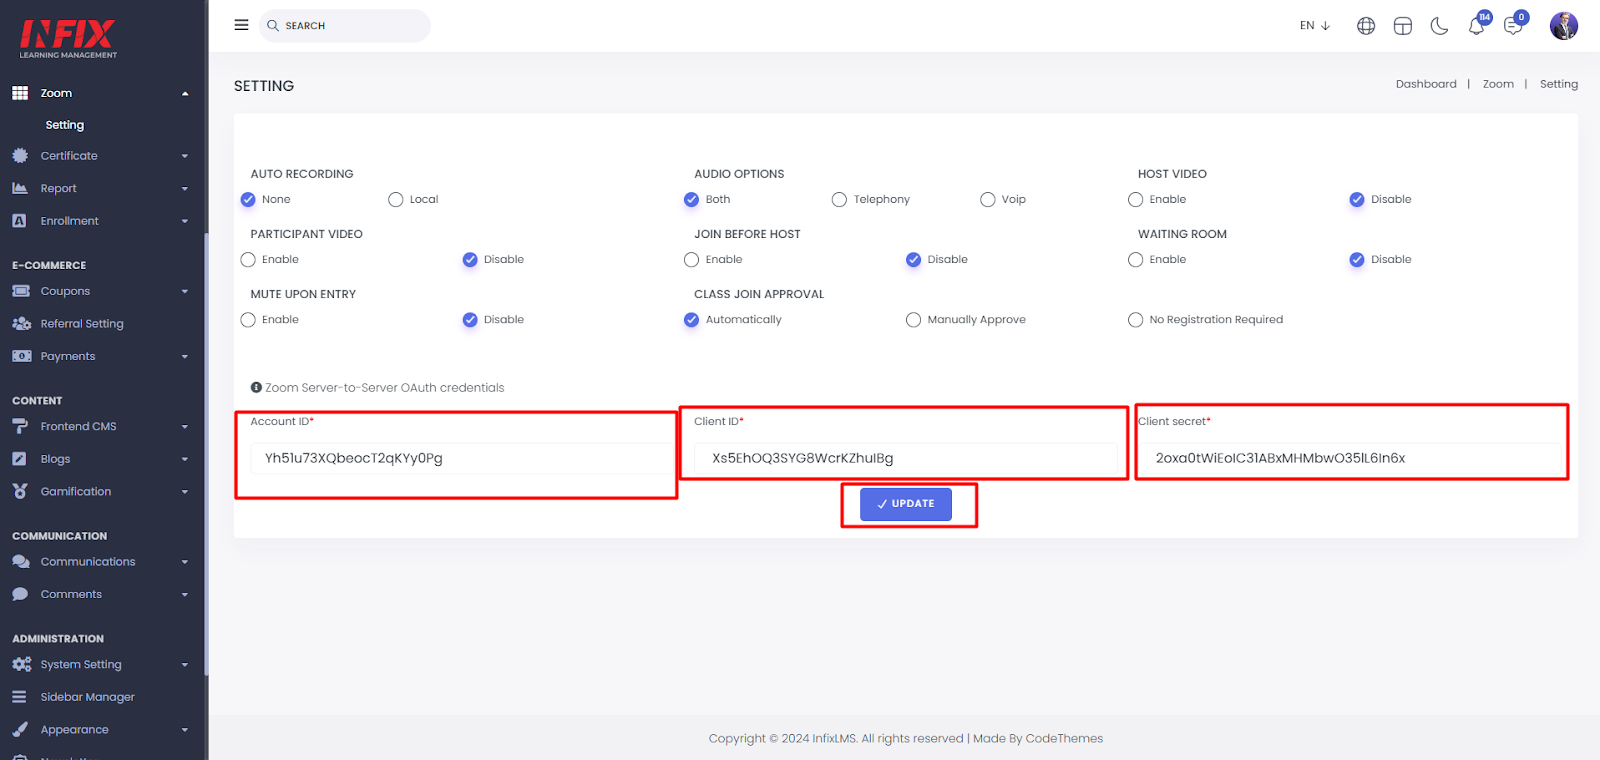
Short Direction: {InfixLMS> Dashboard> Zoom> Setting> Class Join Approval> Host Video> Auto Recording (For Paid Package)> Participant Video> Audio Options> Join Before Host> Package> Waiting Room> Mute Upon Entry> Zoom Server to Server OAuth credentials> Account ID> Client ID> Client Secret> Update.}
If you want to connect to the Zoom virtual class section then go to the InfixLMS dashboard to find the Zoom module to click on the setting option.
1- Setting
2- Class Join Approval can be automatically, or manually approved or no registration is required.
3- Hosting a Video can be enabled or disabled.
4- Auto Recording (For Paid Package) can be none, local or cloud.
5- Participant Video can be enabled or disabled.
6- Audio Options can be both, telephone or VoIP.
7- Join Before Host can be enabled or disabled.
8- The package can be basic (free), pro, business or enterprise.
9- The waiting Room can be enabled or disabled.
10- Mute Upon Entry can be enabled or disabled.
11- Zoom Server to Server OAuth credentials
12- Account ID
13- Client ID
14- Client Secret
15- Update it.
Enable the Server-to-Server OAuth role:
A Server-to-Server OAuth app enables you to securely integrate with Zoom APIs and get your account owner access token without user interaction. This is different from the OAuth app type, which requires user authentication.
Short Direction: {Search on google> Zoom Development Platform> Create An App> Develop> Build App> Server-to-Server OAuth> App Name> Create or Cancel> Continue> App Name> Company Name> Name> Email Address> Continue> Continue> Add Scopes> Meeting> View All User Meeting> View and Manage All Users Meetings> Done> Continue> Activated or Deactivated.}
If you want to set up Zoom credentials then follow the number picturization instruction.
1- Create An App
2- Develop
3- Build an App
4- Server-to-Server OAuth
5- App Name
6- Create or Cancel
7- Continue
8- App Name
9- Company Name
10- Name
11- Email Address
12- Continue
13- Continue
14- Add Scopes
15- Meeting
16- View All User Meeting
17- View and Manage All Users Meetings
18- Done
19- Continue
20- Activated or Deactivated
21- App Credentials
22- Account ID for copying it.
23- Client ID for copying it.
24- Client Secret for copying it.
25- Account ID to paste it.
26- Client ID to paste it.
27- Client secret to paste it.
28- Update it
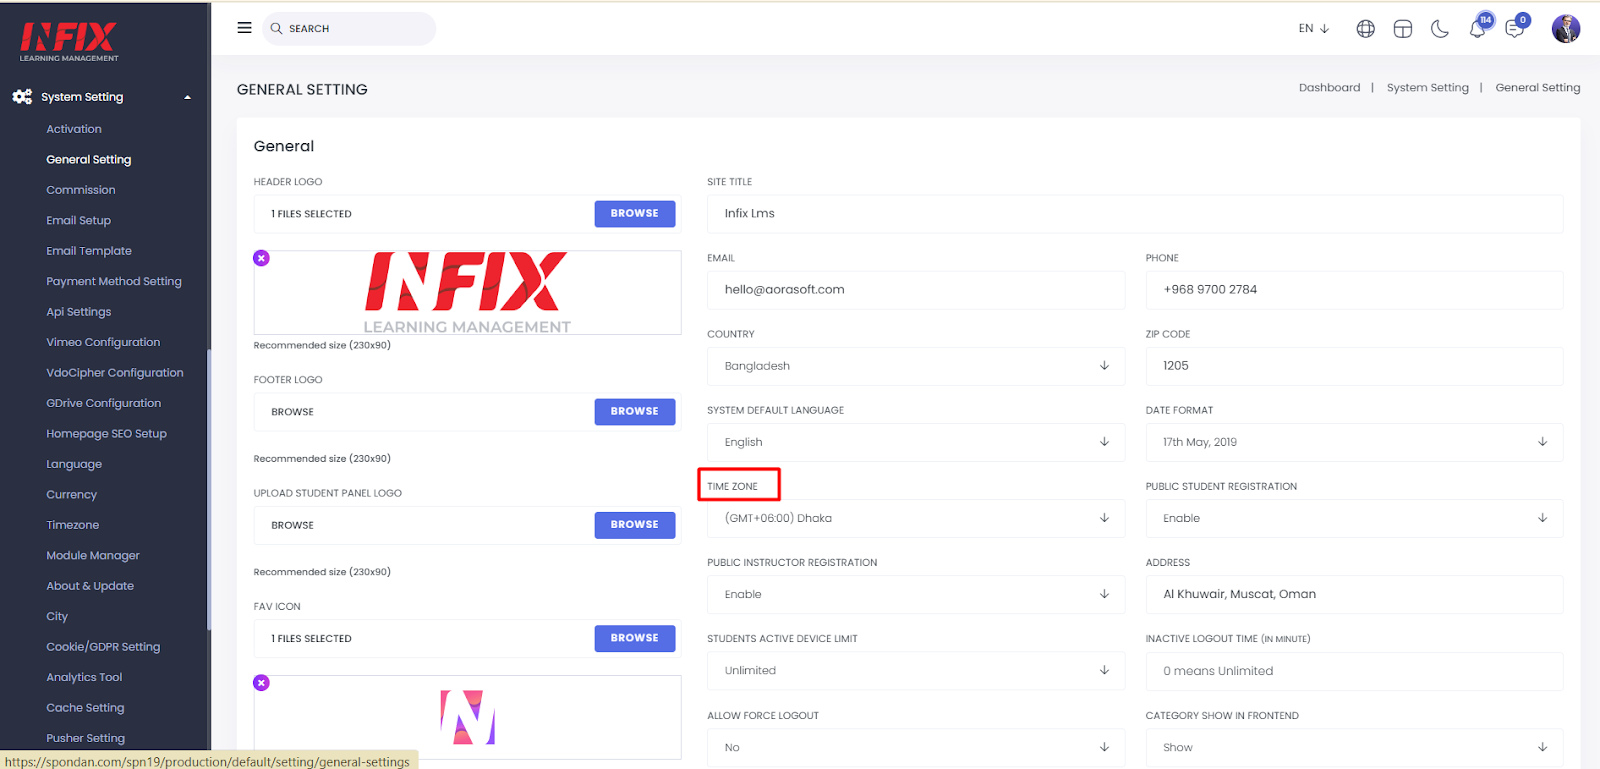
29- System Setting
30- General Setting
31- Select your Time zone
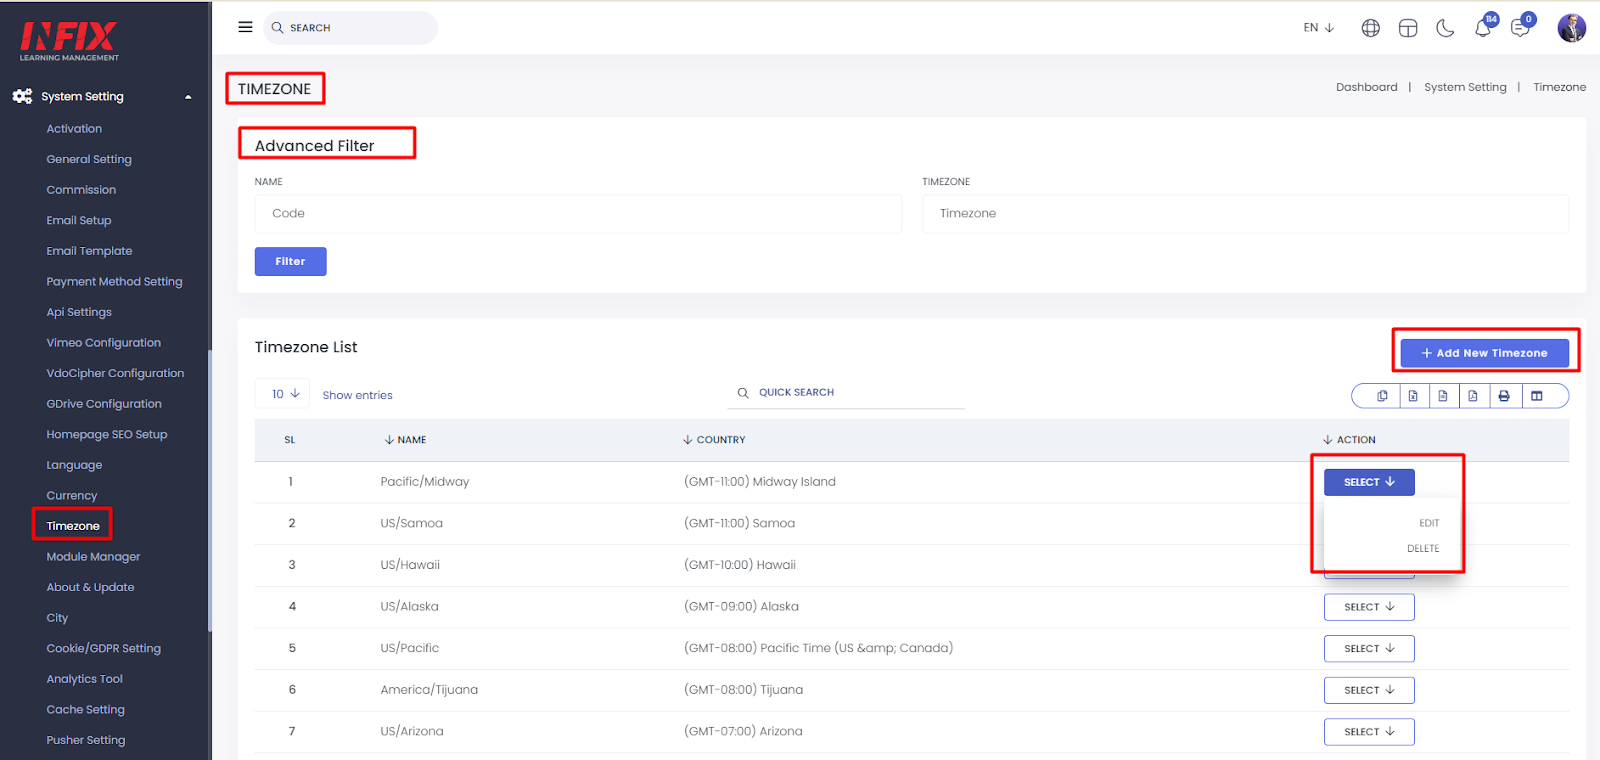
32- Time Zone
33- Add New Time Zone
34- Select for edit or Delete.
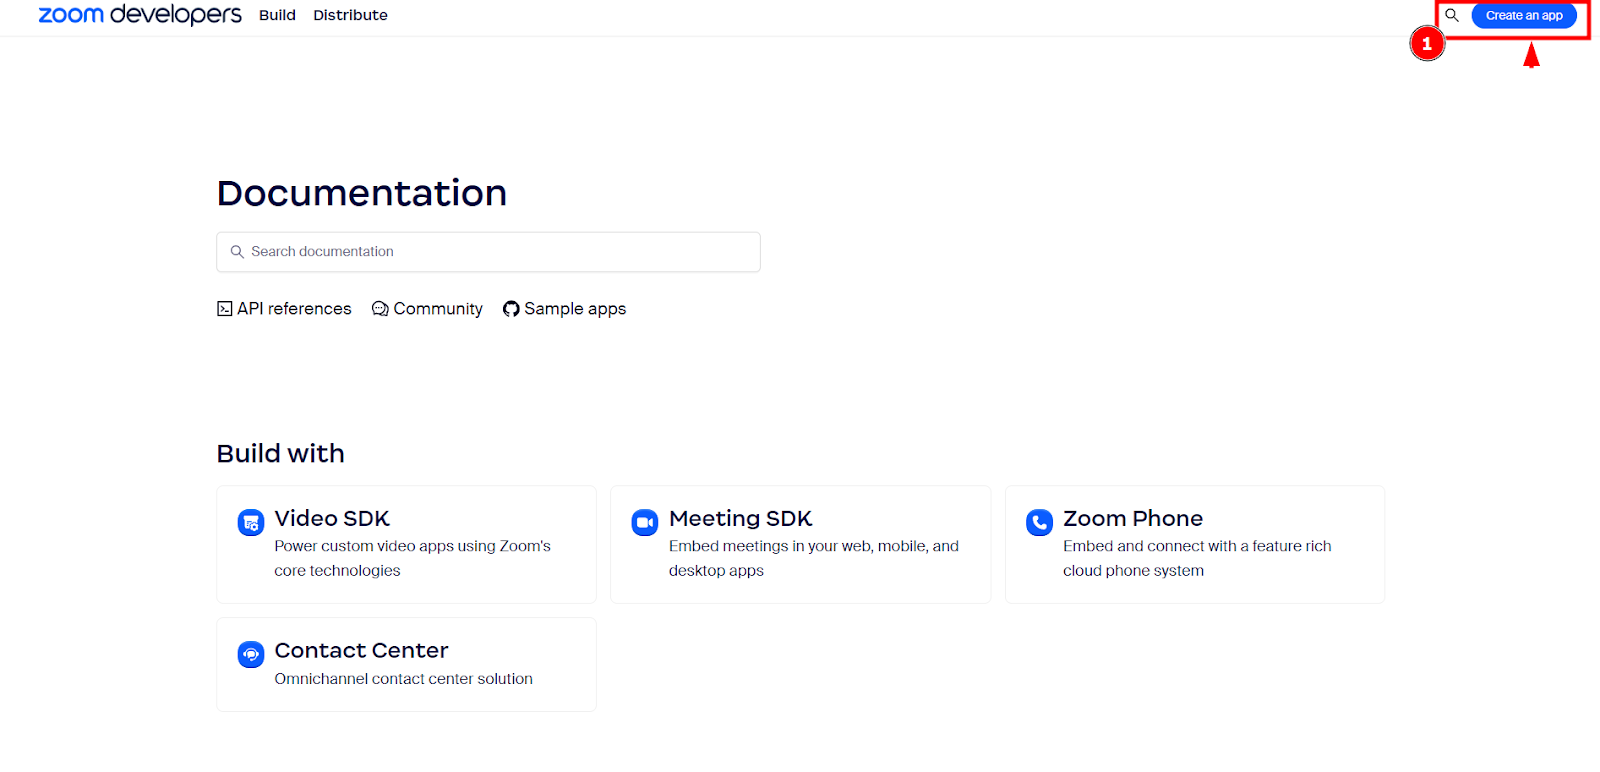
Create An App:
If you want to create Zoom credentials then search on Google to write down the ‘Zoom development platform’ & click on create an app.
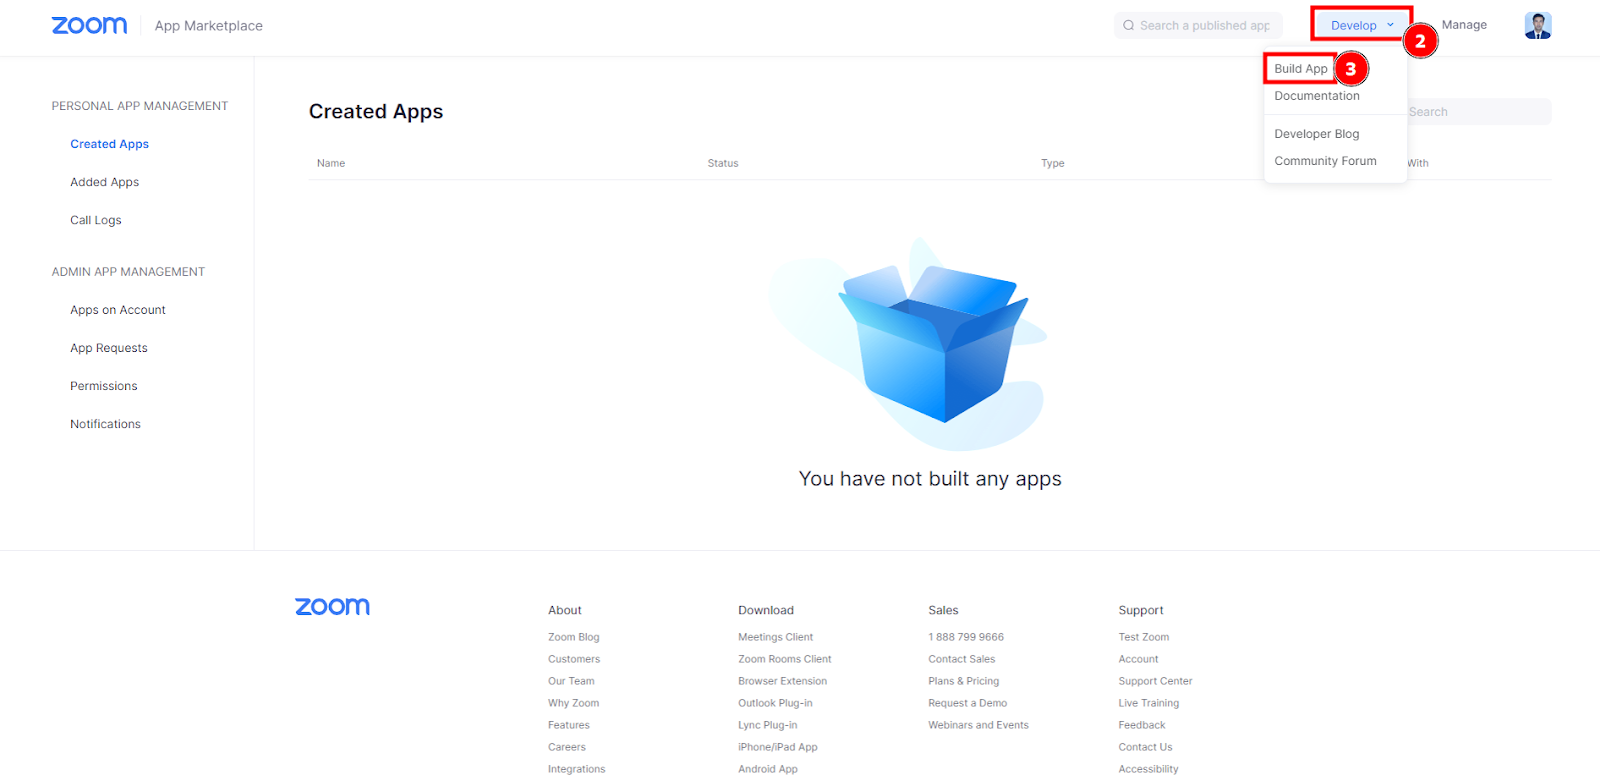
Build App:
When you find to create an App then you will see the new interface about Develop option to click on the Build App.
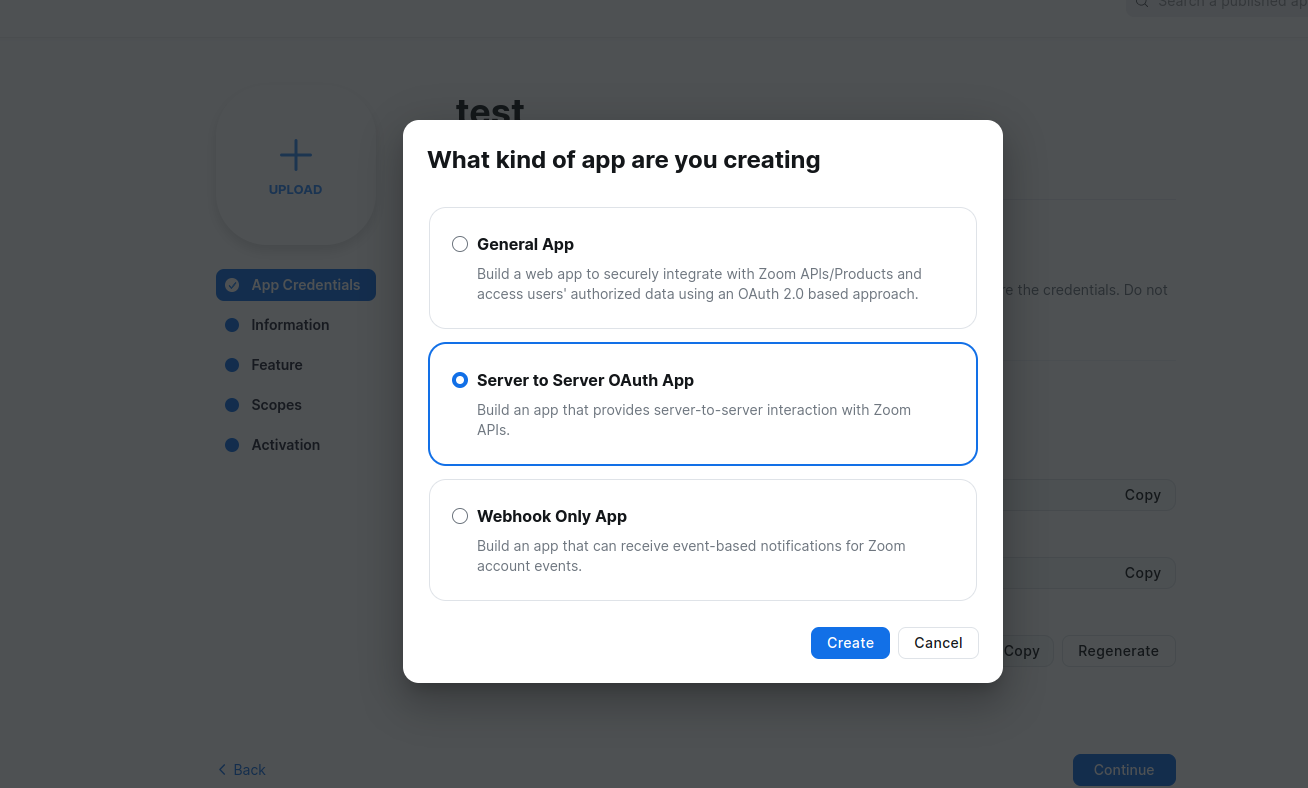
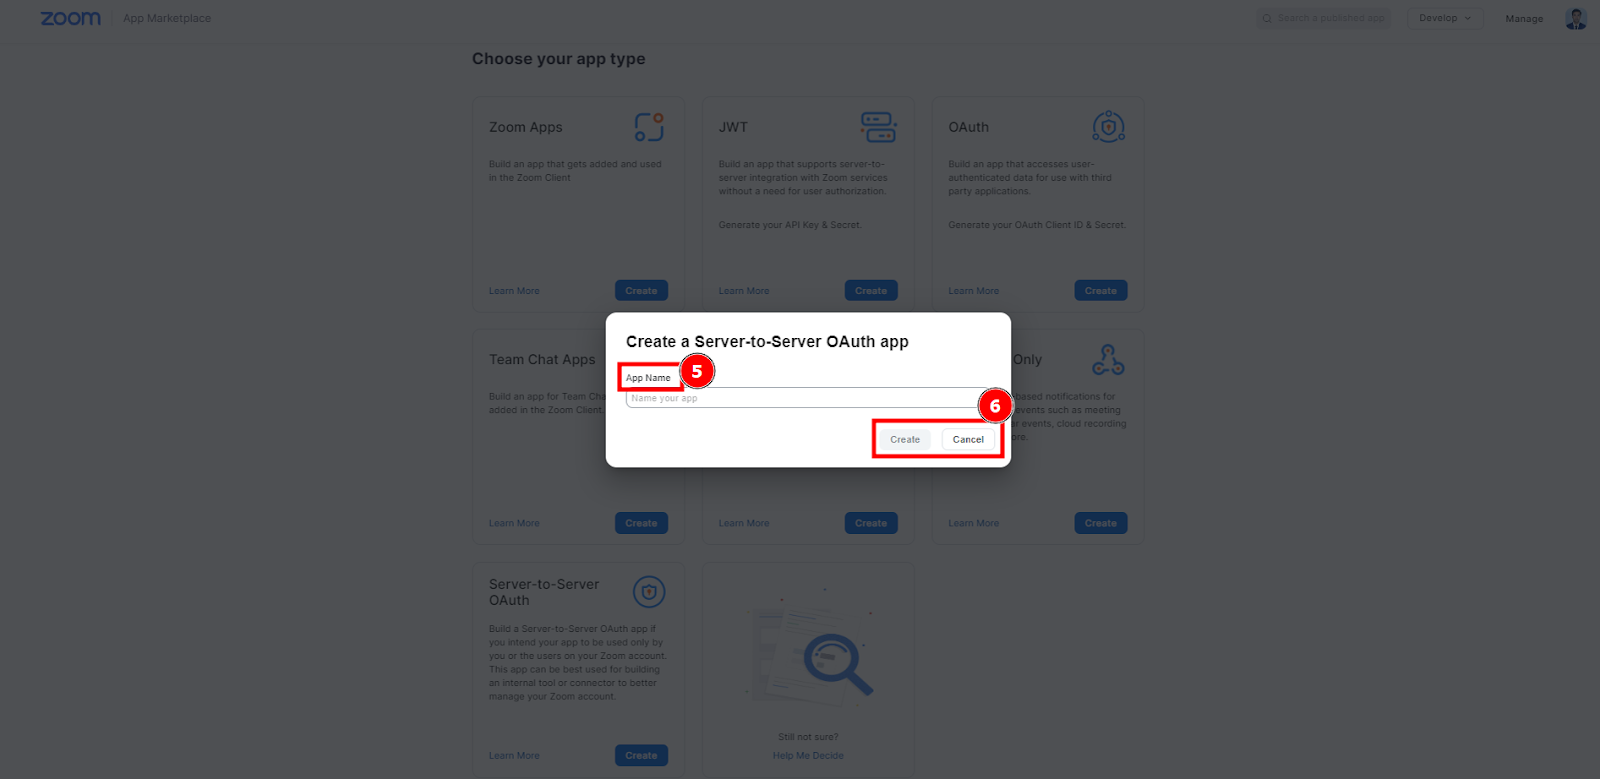
Server-to-Server OAuth:
Follow the steps below to create a Server-to-Server OAuth app to use with account credentials. Choose the Server-to-Server OAuth app type.
Add App Name:
Add a name for your app. Also, you can create or cancel it.
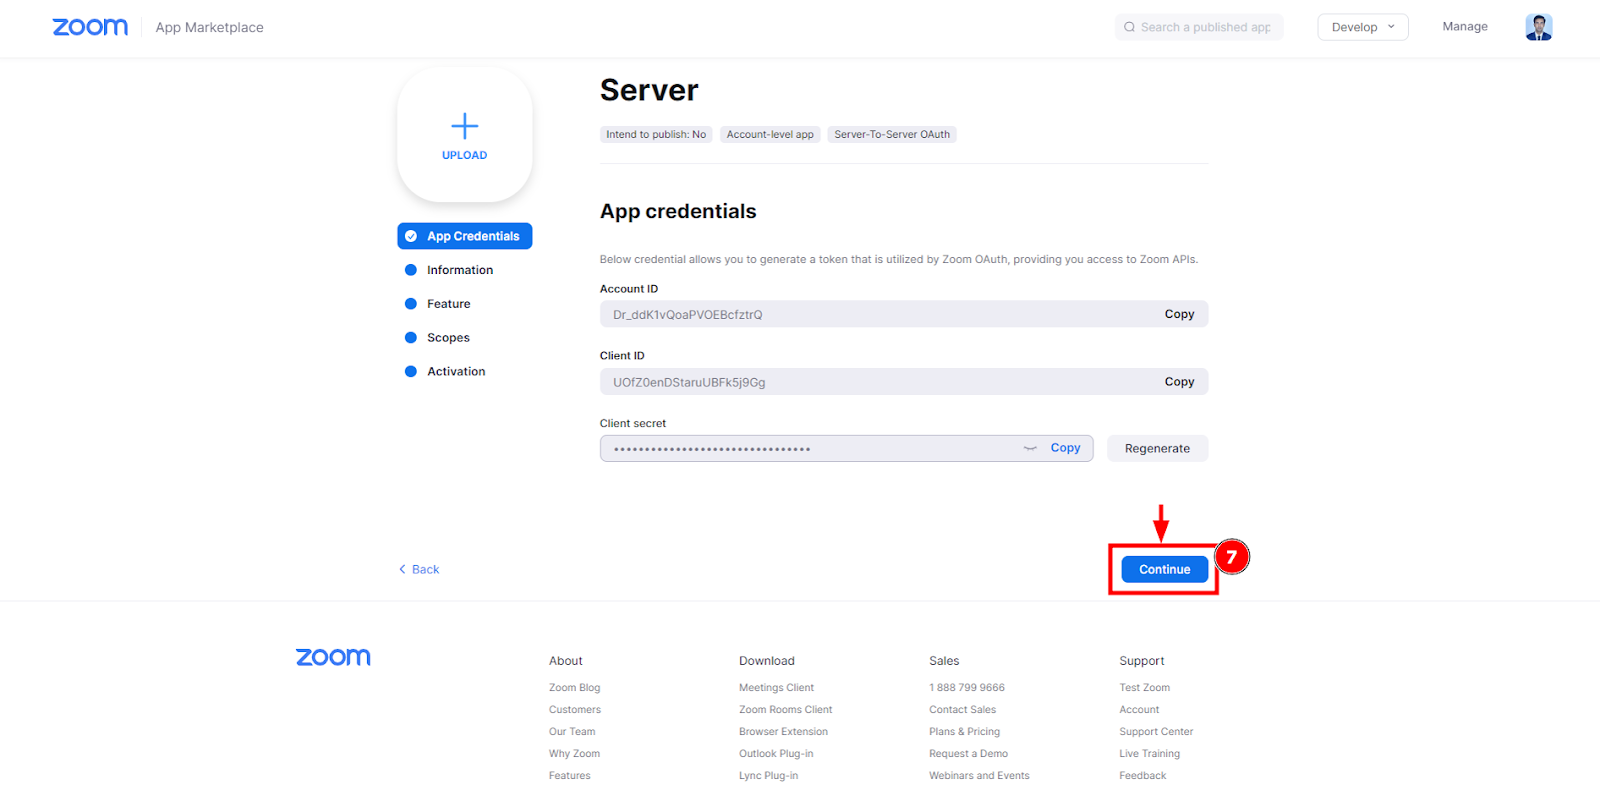
App Credentials:
This interface is so important because after completing your credentials process then you will see the account ID, Client ID & Client Serect. Now just click on the continue option to follow the picturization instruction.
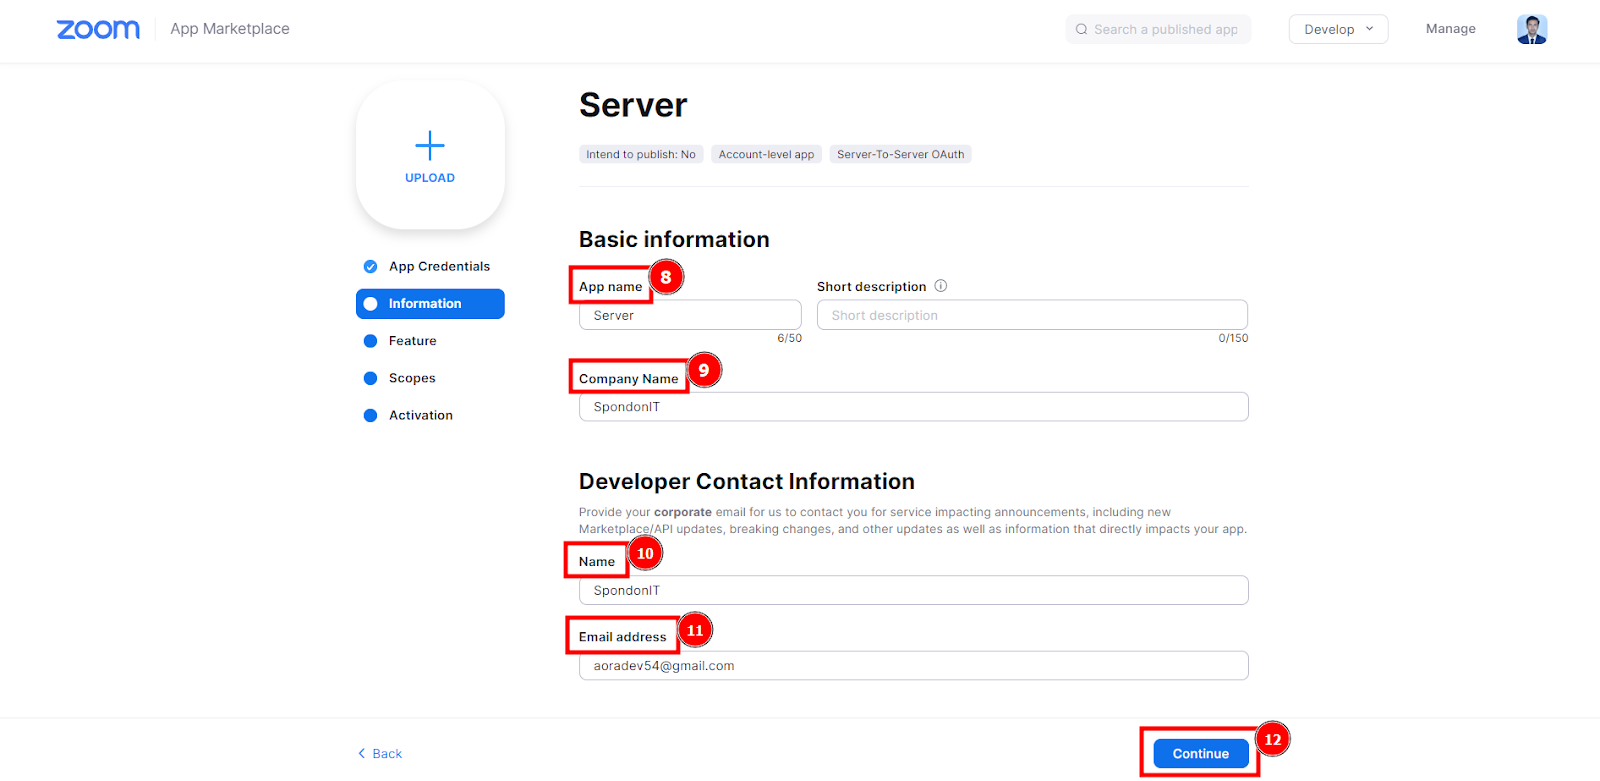
Information:
Your requirement is to fill in the app name, company name, and developer contact information as well as the name & email address that you want, then click on the continue button.
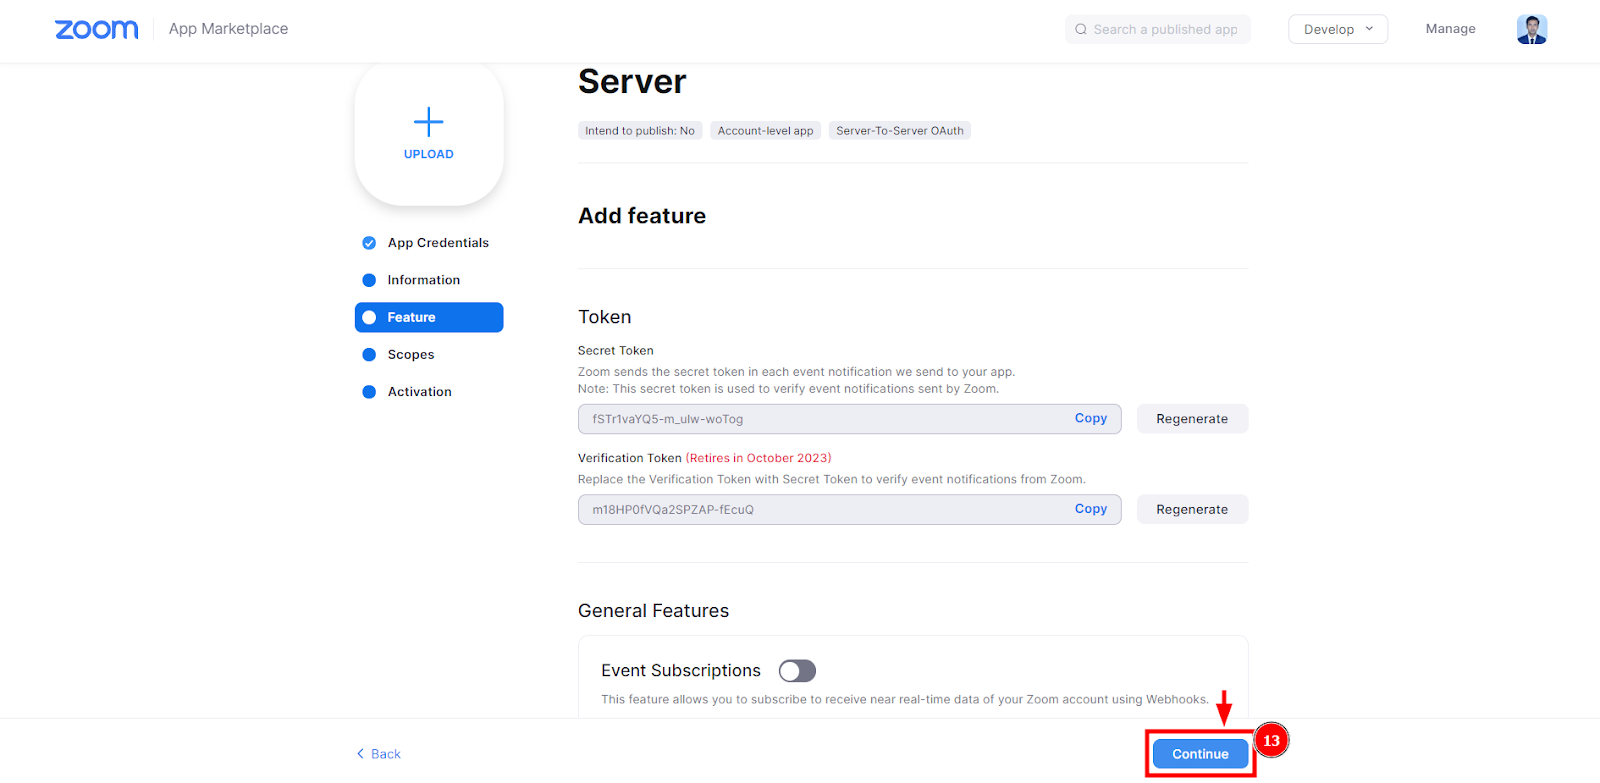
Feature:
Following the instructions in the feature section, click on the continue button.
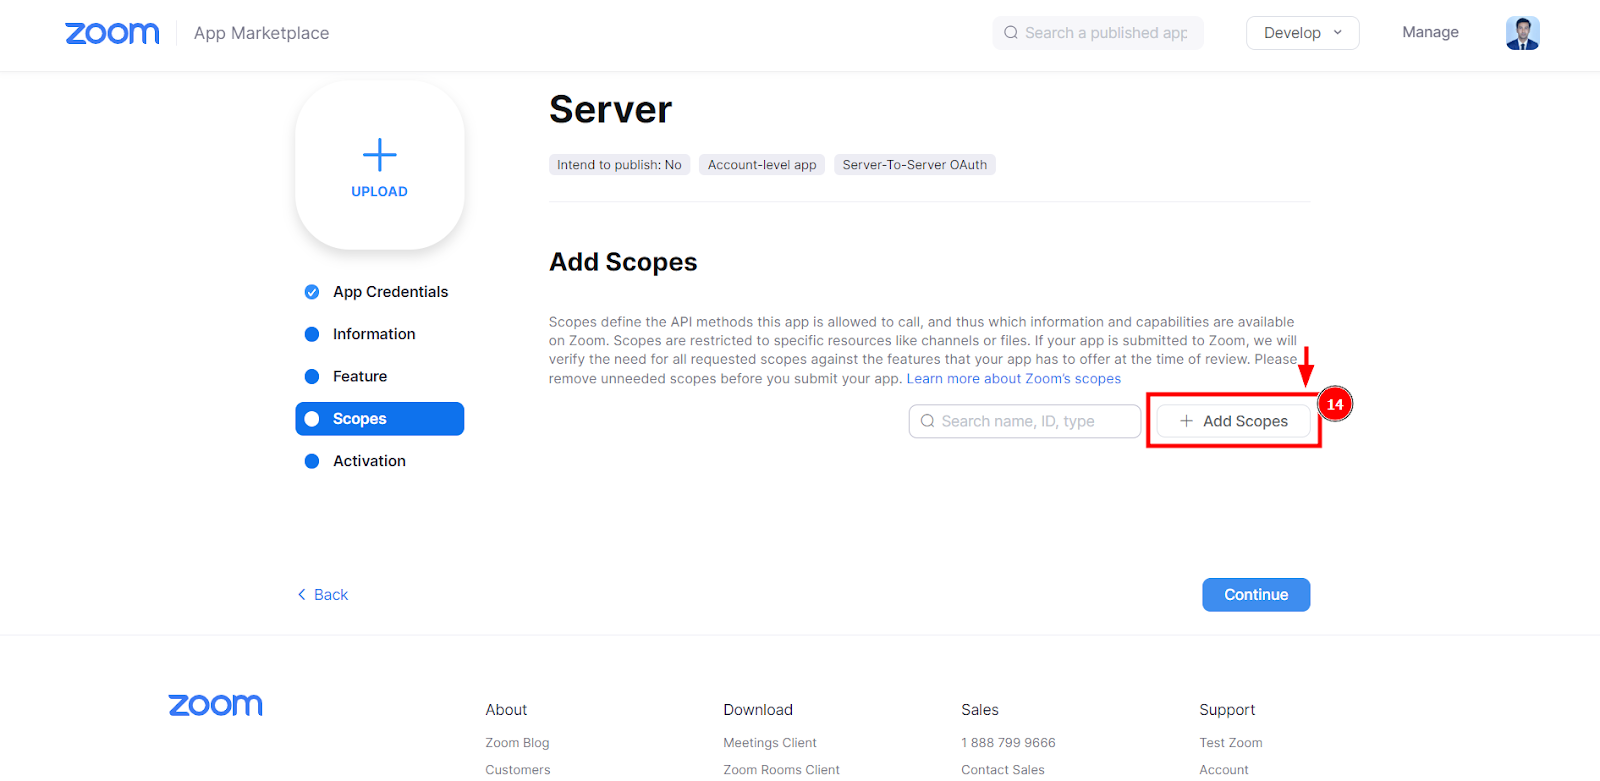
Scopes:
Add scopes for your requirement as you want to click on Add Scopes, & you will see the new popup.
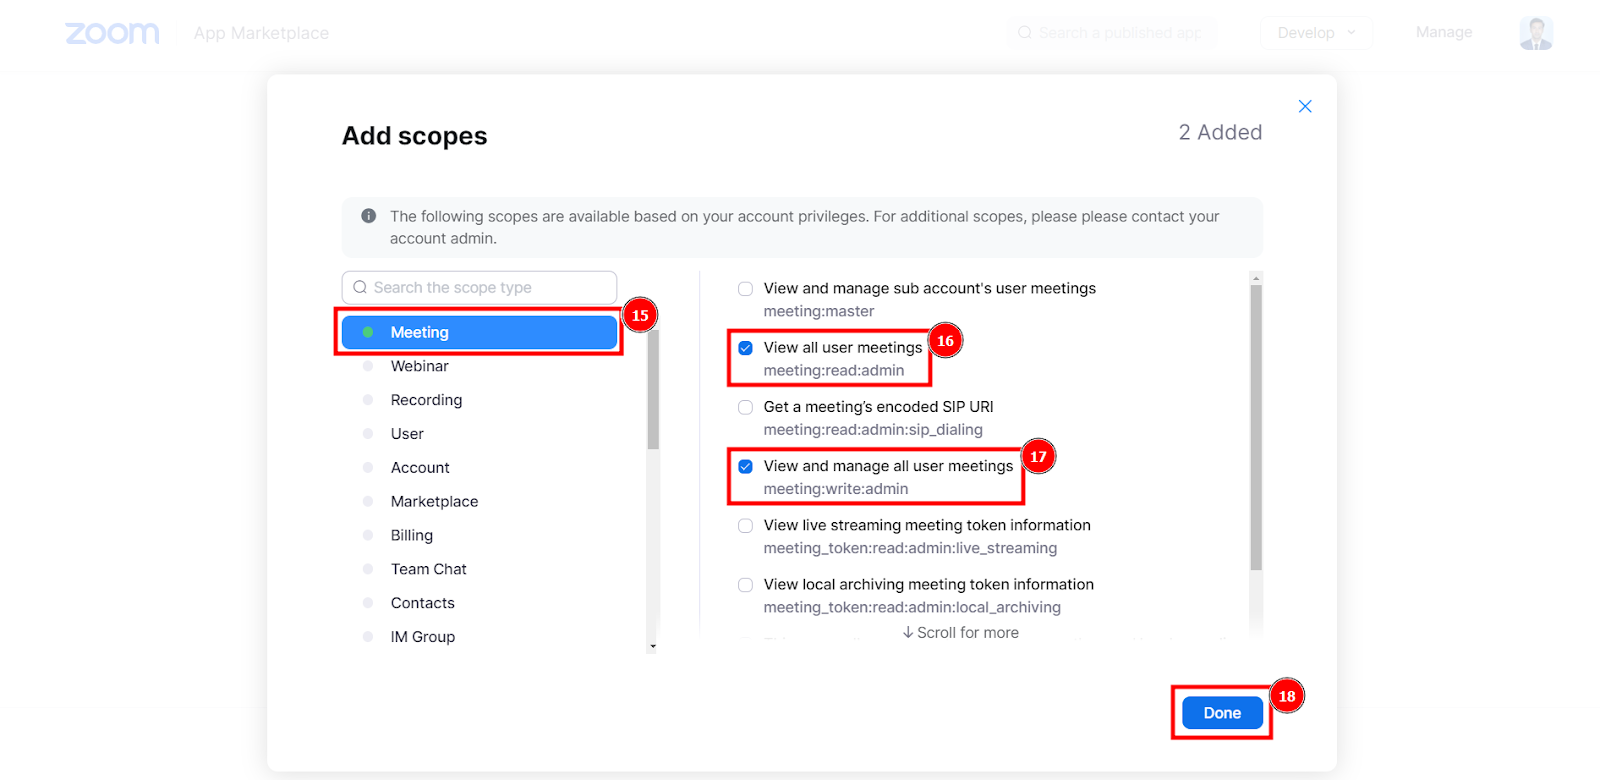
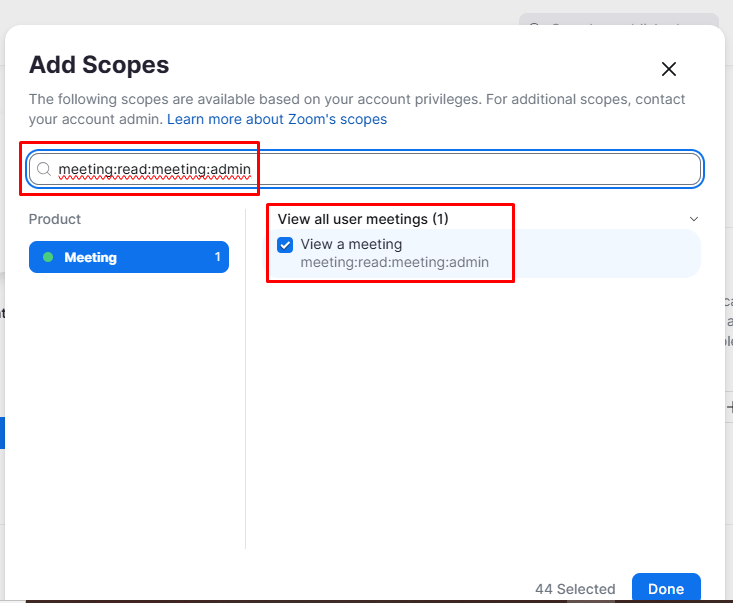
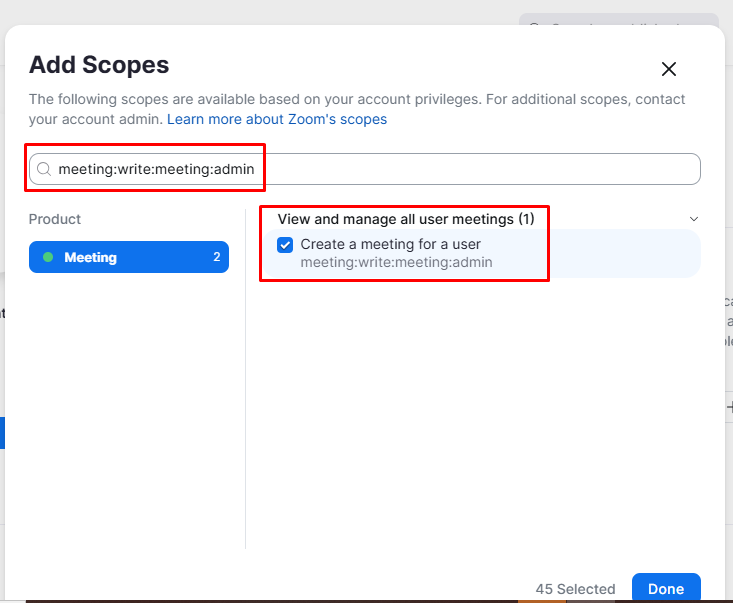
Add Scopes:
If you want to manually set the scopes, then click on the meeting option to mark the view all user meetings & view and manage all user meetings. Although you can operate on your requirements as you want,
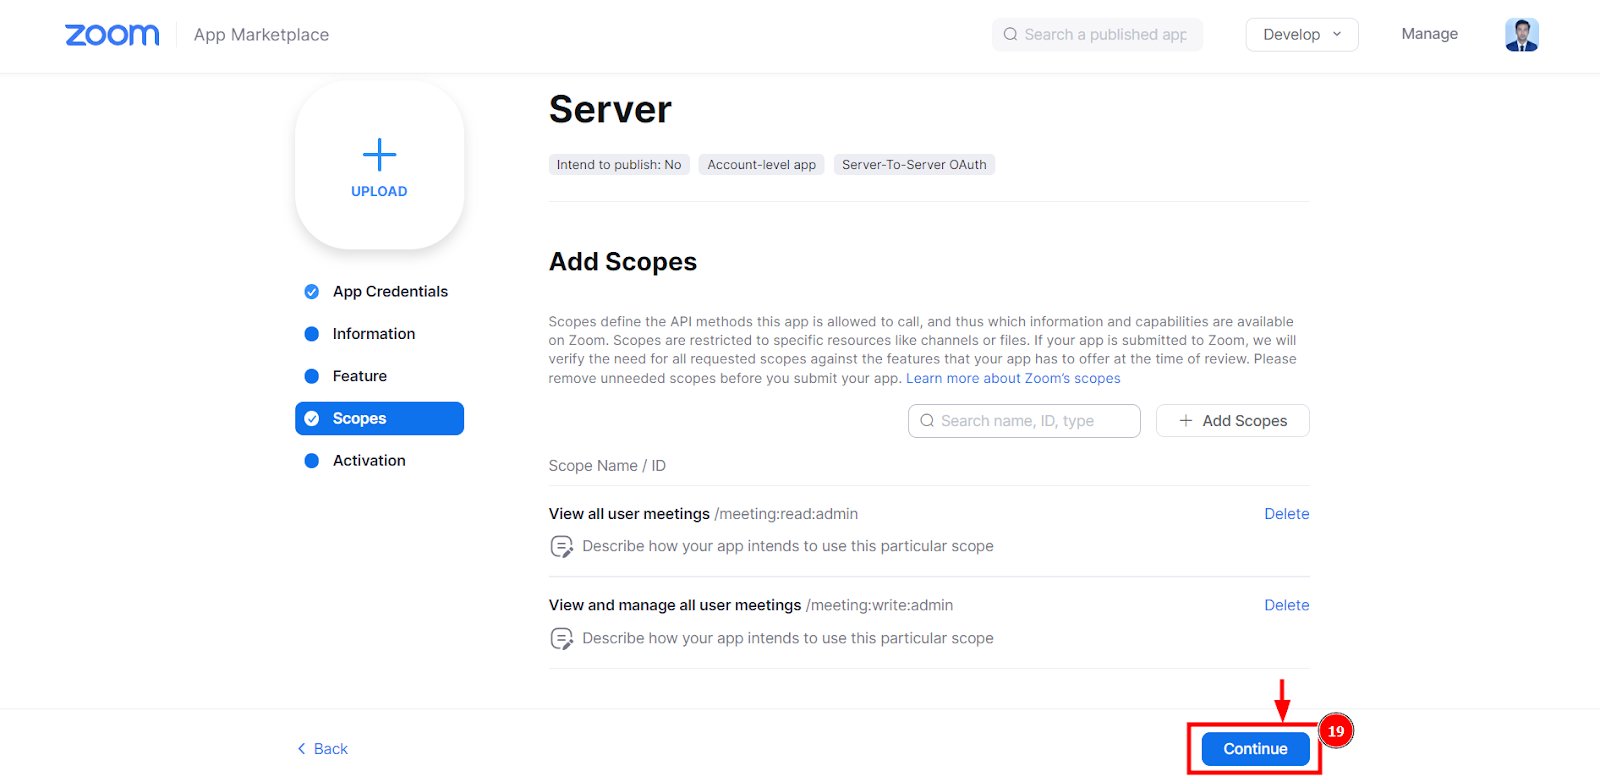
Scopes List:
This scopes list shows you that you already created them in your setup, and you can also delete any of the scopes you included.
Now, zoom is updated it's feature if not found the scope please search for the scope in the search bar usinig - meeting:read:meeting:admin & meeting:write:meeting:admin for these 2 scope and if needed any extra scope you can add it.
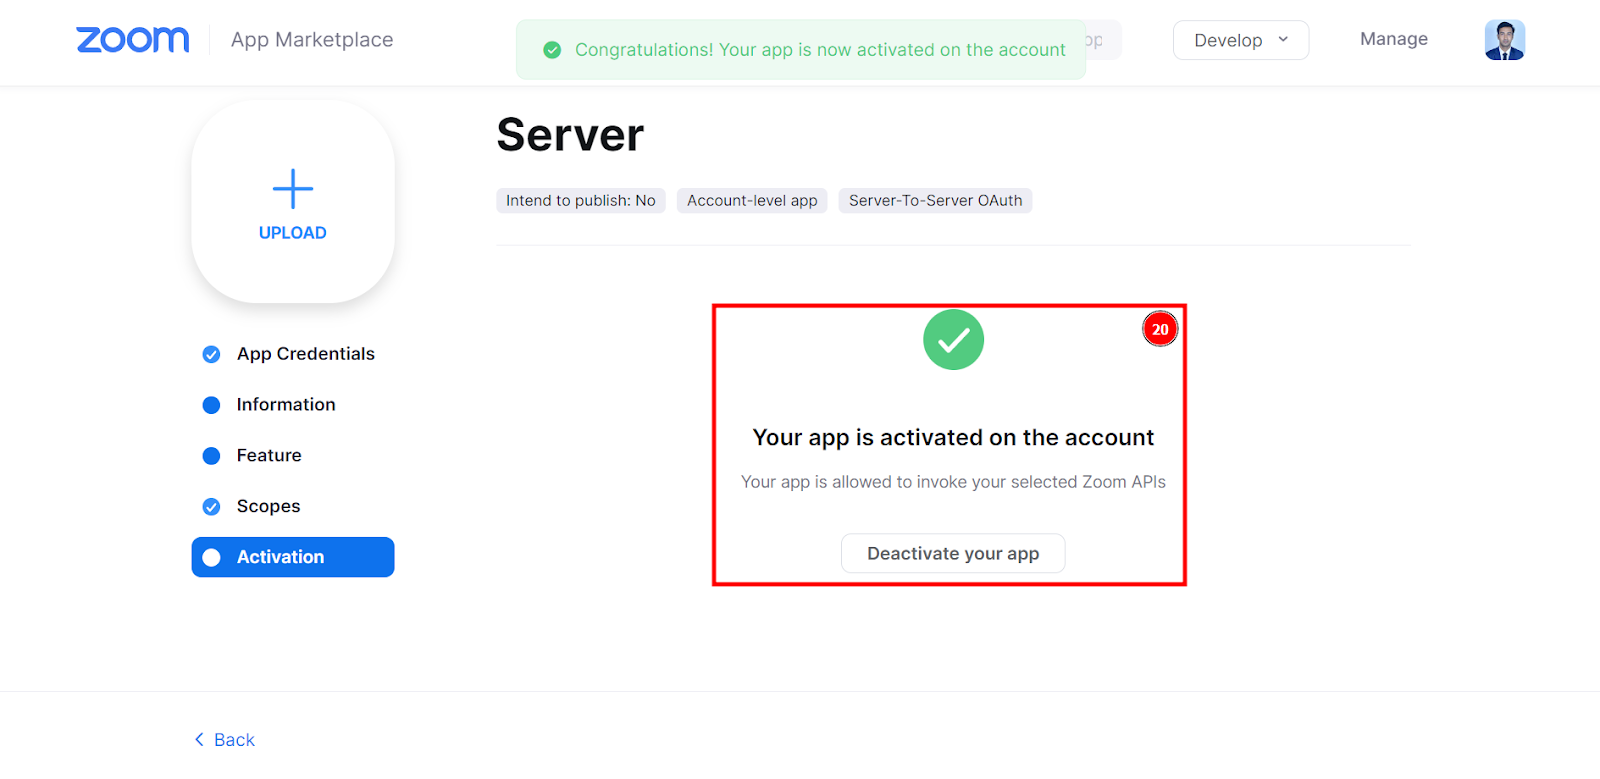
Activation:
There are two options Activated or inactivated function, as long as you can activate it or inactive it.
Account, Client & Secret ID:
On this page, you will find the App Credentials Account ID, Client ID & Client Secrt for Copy all of them to paste on the InfixLMS Zoom setting section.
Time Zone:
If you want to set up the Zoom configuration then you have to fix your time zone which is related to the zoom section, either zoom will not be operating without a time zone. Although you can manually add your time zone in your system and your location. To set the time zone go to System Setting>>General setting> Time Zone Or you can add a time zone for go to the Time zone> Add new time zone> Select for edit or delete it.