Settings
Settings refers to the area in a system, application, or software where you can manage and adjust various options to control how the system behaves. This includes customizing features, changing preferences, managing user accounts, security options, notifications, and other configurations to suit your needs. Essentially, it allows you to personalize and optimize the system for better use.
From here you can configure the settings according to your need. Such as:
Activation: From here you can allow and configure the activation according to your preferences. Such as:
Email Verification: Enable or disable email verification during login.
Google Captcha: Enable or disable Google Captcha for security.
Mail Notification: Turn on or off email notifications from the system.
System Notification: Enable or disable in-system notifications.
System Registration: Manage whether new users can register on the system.

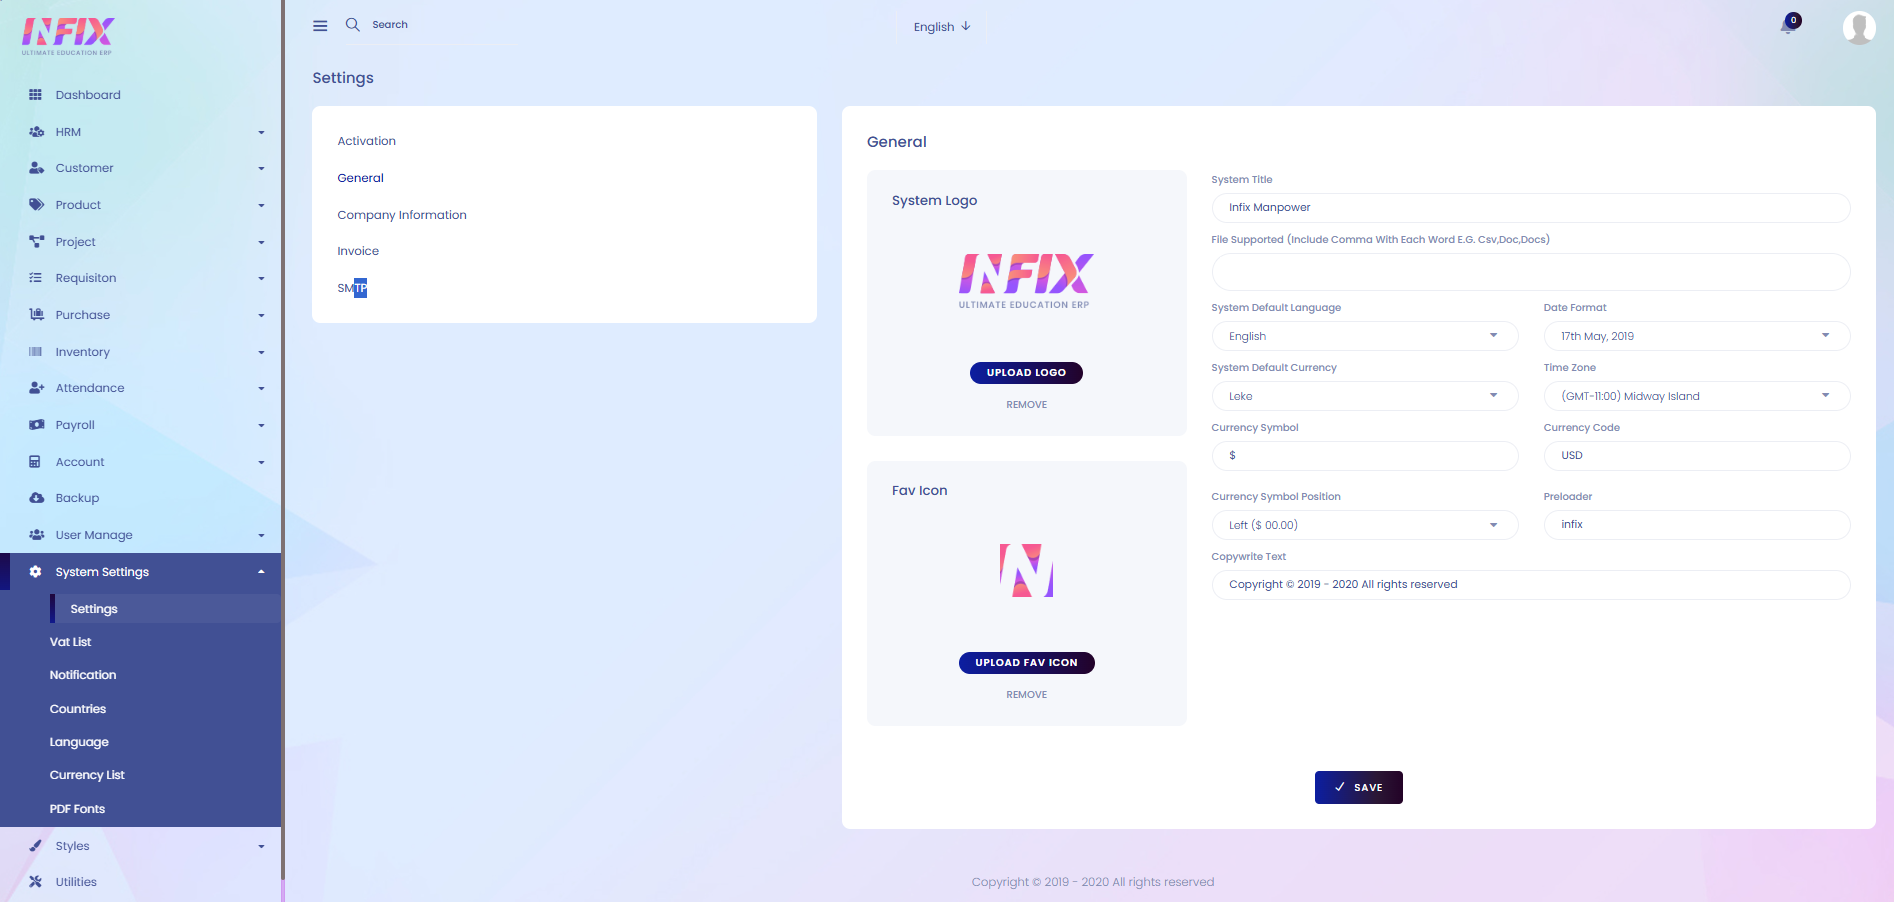
General Settings: From here you can configure the general settings according to your need. Such as:
System Logo: You can upload the system logo.
Fav Icon: You can upload the fav icon from here.
Remove: You can remove the system logo or fav icon if needed.
System Title: You can set the system title from here.
File Supported: You can upload the supported file.
System Default Language: Set the system default language.
Date Format: Set the date format of the site.
System Default Currency: Set the system default currency.
Time Zone: Set the time zone for the site.
Currency Symbol: Set the currency symbol.
Currency Code: Set the currency Code.
Currency Symbol Position: Set the currency symbol position.
Preloader: Set the preloader from here.
Copyright Text: Set the copyright text from here.
Save: Click to save the general settings.
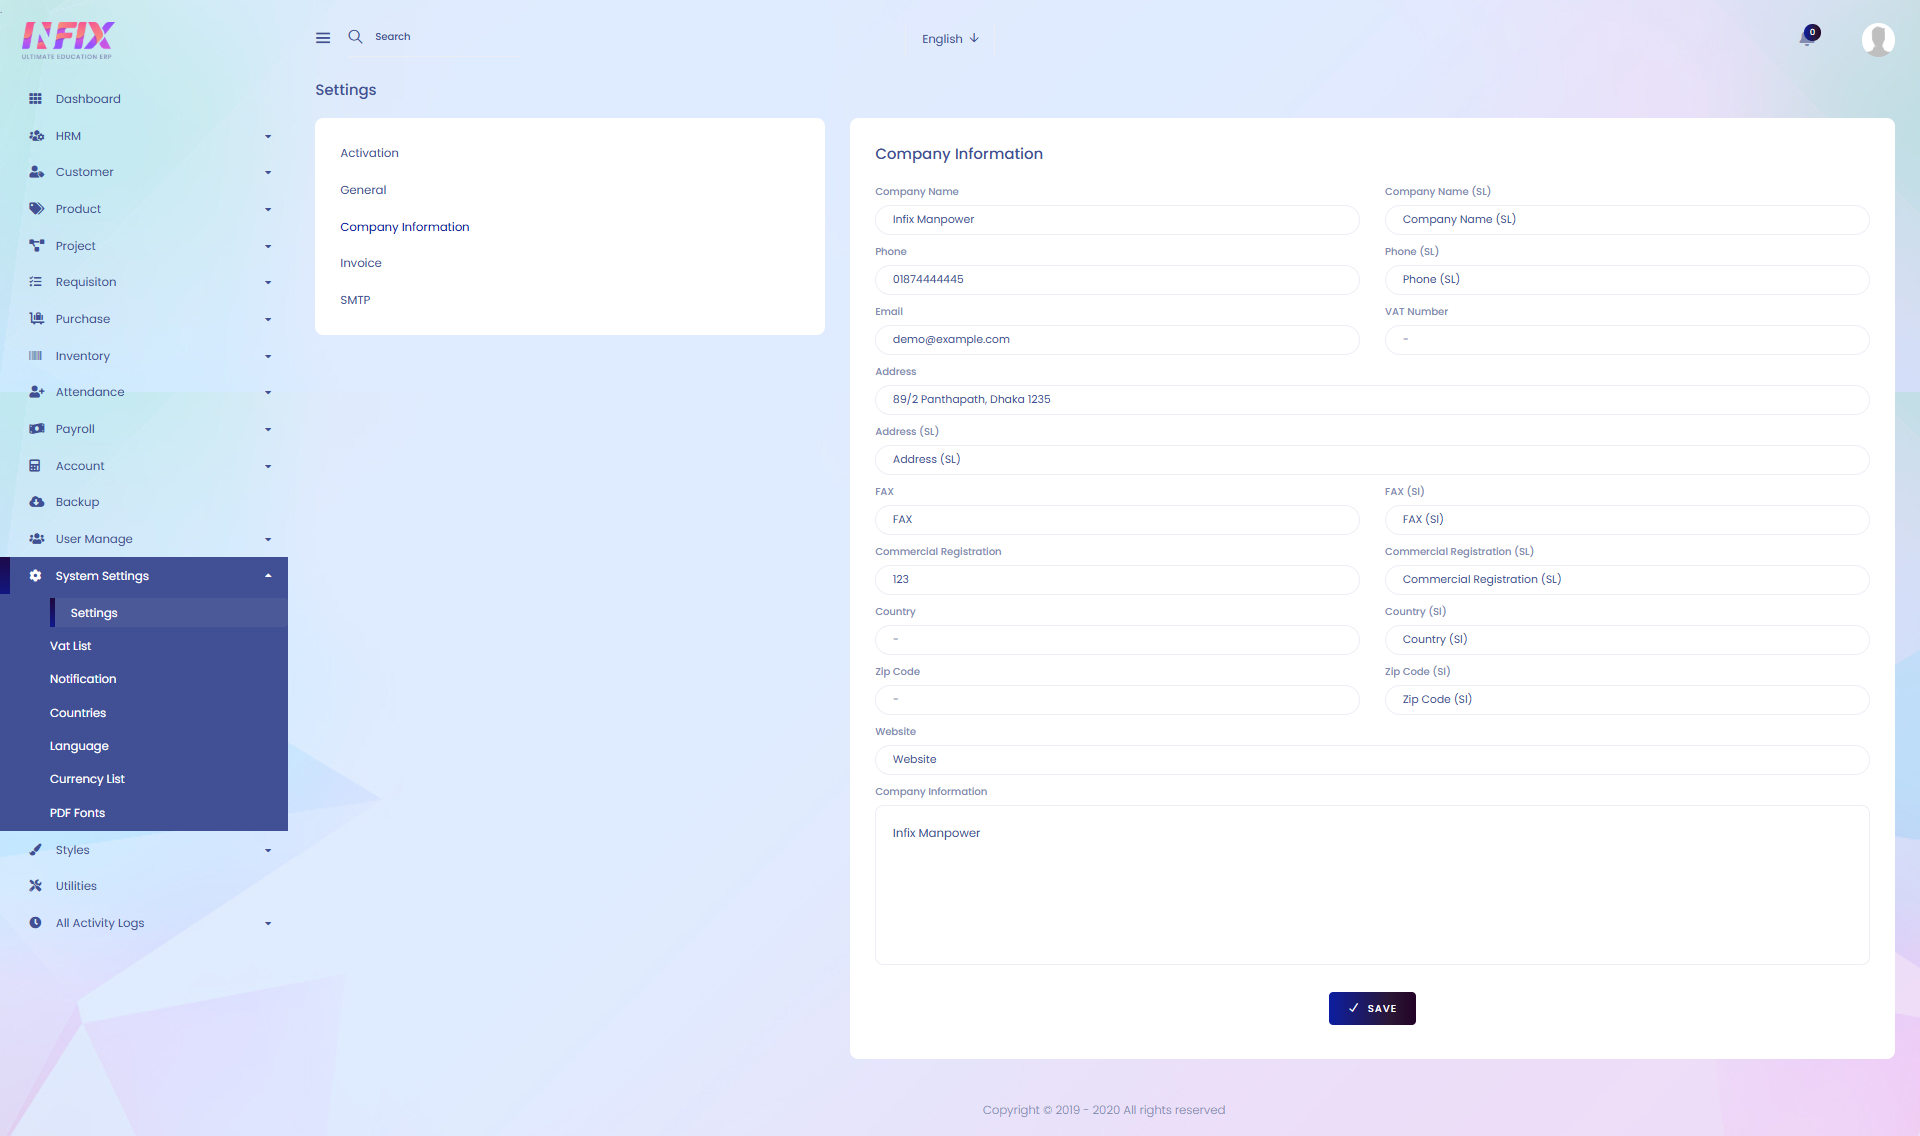
Company Information: From here you can set up the company information. Such as:
Company Name: Enter the official company name.
Company Name (SL): Enter the company name in a secondary language or script.
Phone: Provide the company phone number.
Phone (SL): Provide the phone number in a secondary language or script, if needed.
Email: Enter the official company email address.
VAT Number: Enter the VAT registration number.
Address: Provide the company’s full address.
Address (SL): Enter the address in a secondary language or script.
FAX: Enter the fax number.
FAX (SL): Enter the fax number in a secondary language or script.
Commercial Registration: Enter the commercial registration number.
Commercial Registration (SL): Enter the registration number in a secondary language or script.
Country: Select the country of the company.
Country (SL): Select the country name in a secondary language or script.
ZIP Code: Enter the postal code.
ZIP Code (SL): Enter the postal code in a secondary language or script.
Website: Provide the company’s website URL.
Company Information: Enter any additional details about the company.
Save: Click to save the information.
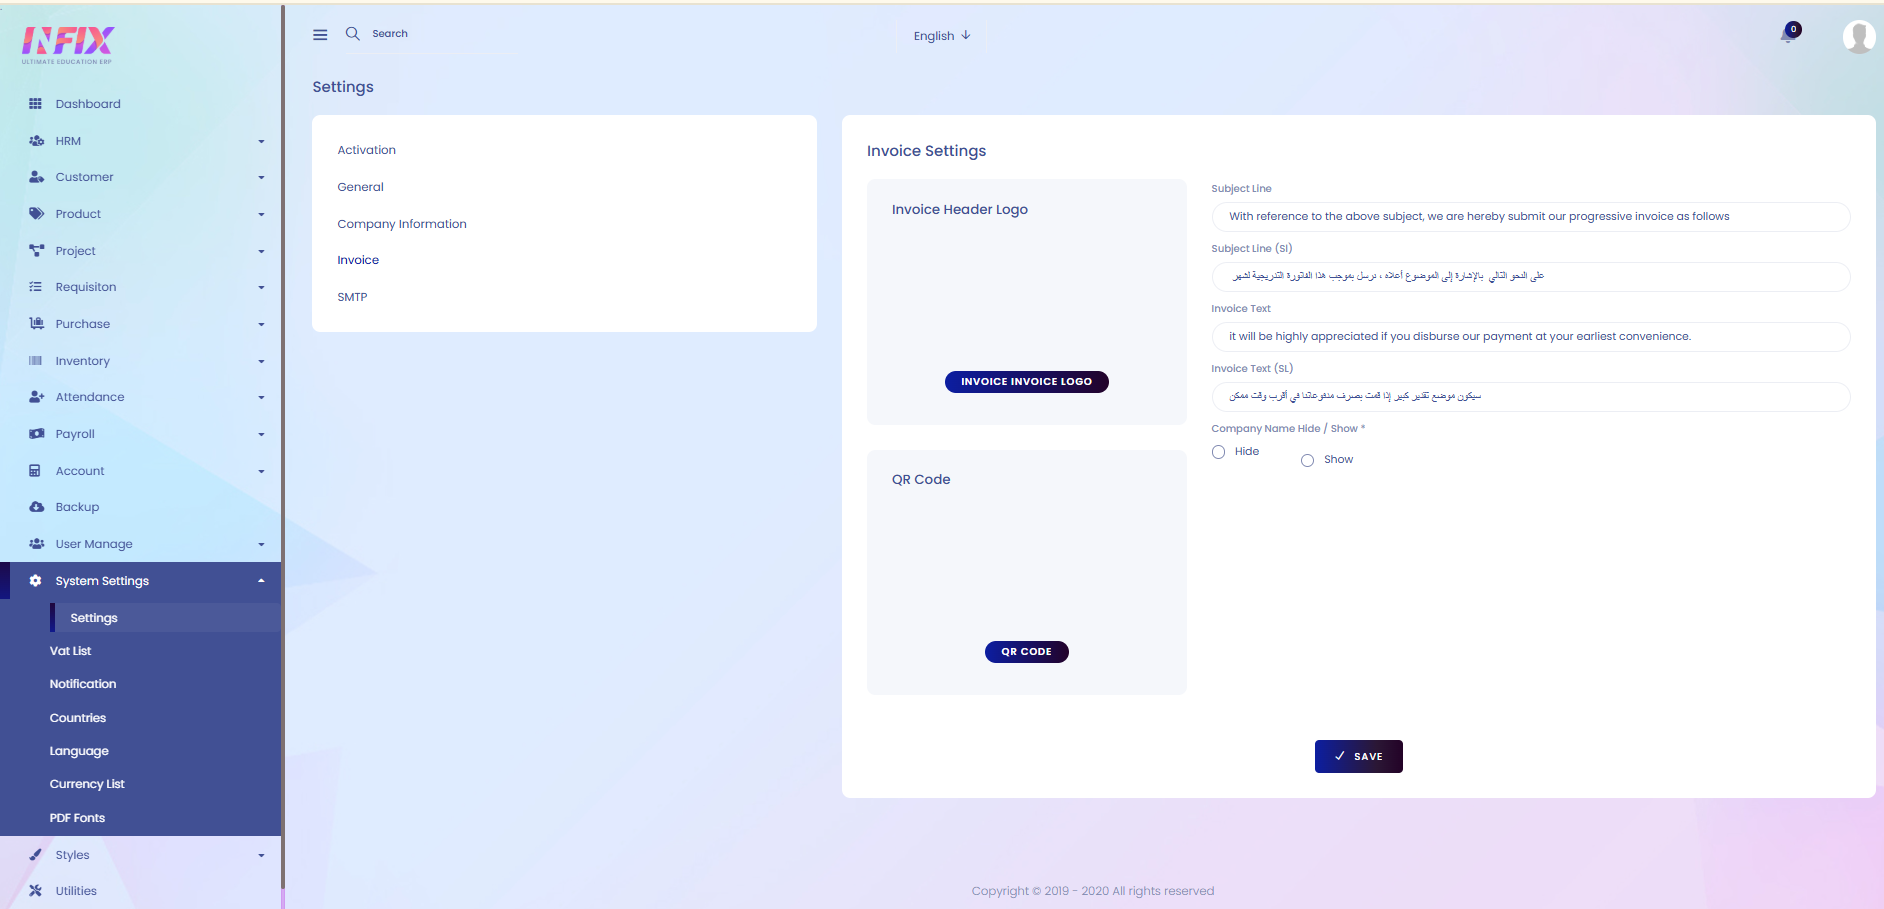
Invoice: From here you can set up the invoice settings. Such as:
Invoice Header Logo: Upload or set the logo to appear on the invoice header.
QR Code: Enable or disable the QR code display on the invoice.
Subject Line: Enter the subject line for the invoice.
Subject Line (SL): Enter the subject line in a secondary language or script.
Invoice Text: Add custom text to display on the invoice.
Invoice Text (SL): Add custom text in a secondary language or script.
Company Name Hide/Show: Choose whether to display or hide the company name on the invoice.
Save: Click to save the invoice.
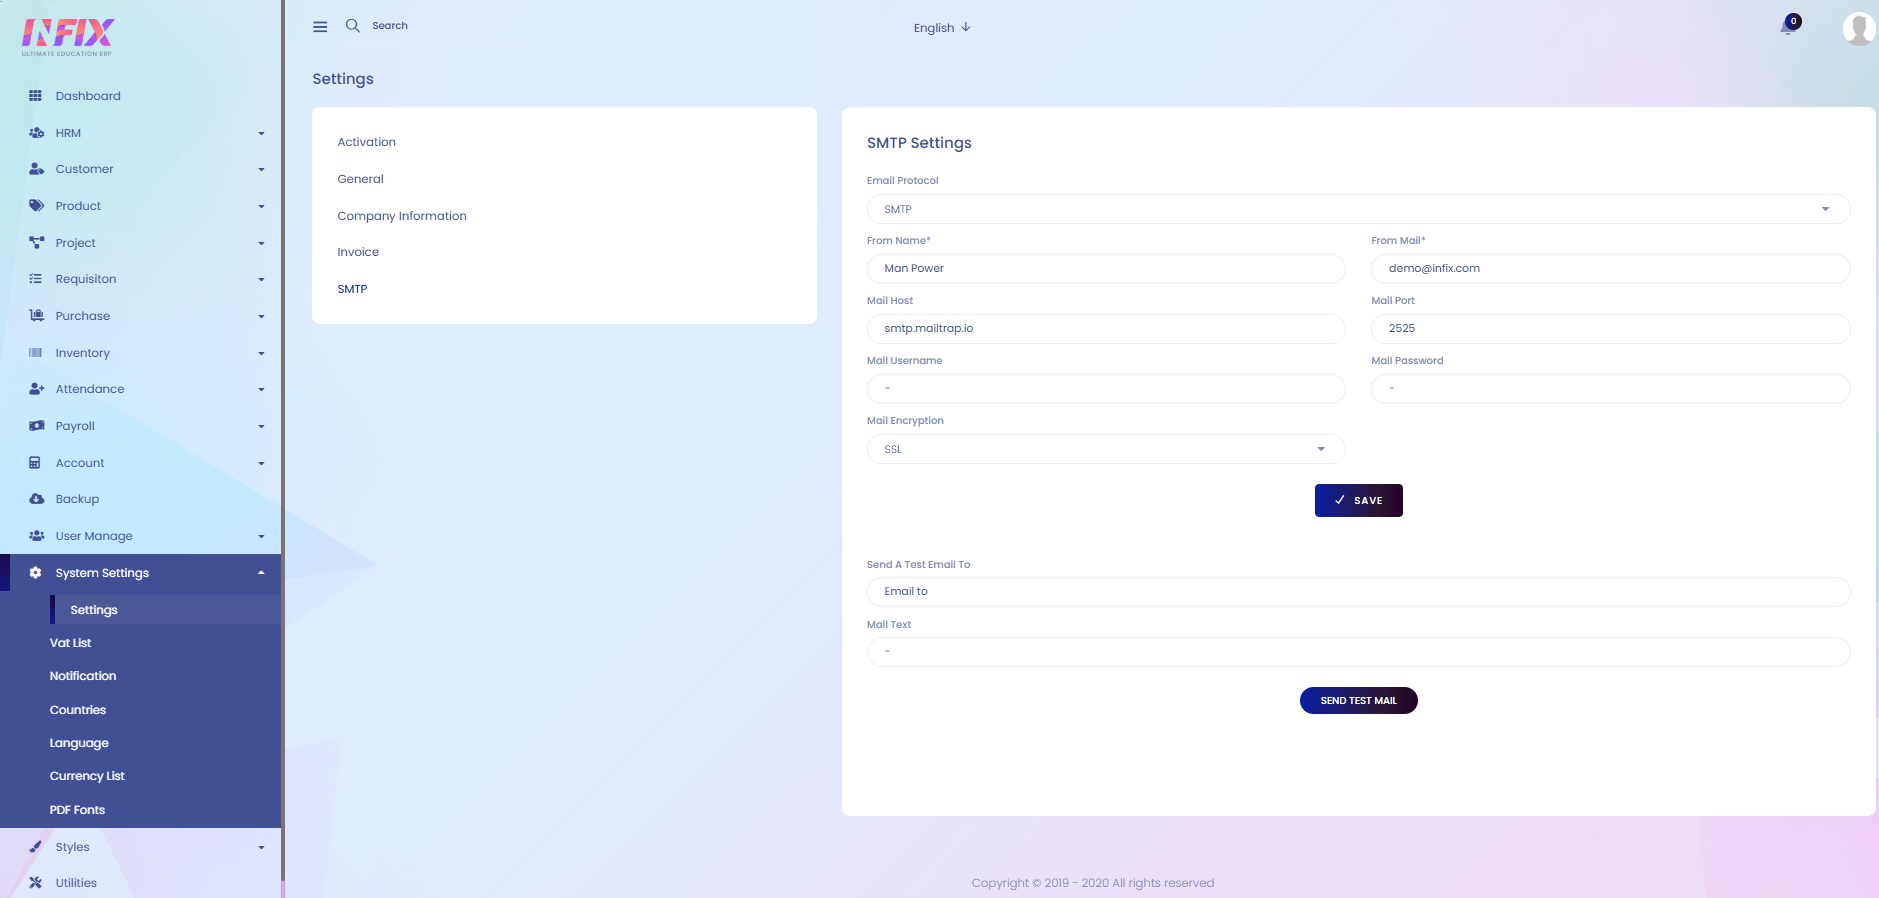
SMTP: From here you can set up the SMTP protocol. Such as:
Email Protocol: Select the email protocol to be used.
From Name: Enter the sender’s display name.
From Mail: Provide the sender’s email address.
Mail Host: Enter the mail server host.
Mail Port: Specify the mail server port.
Mail Username: Enter the username for authentication.
Mail Password: Enter the password for authentication.
Mail Encryption: Select the encryption method (e.g., SSL/TLS).
Save: Click to save the SMTP.
From here you can send a test email. To do that just follow the below steps:
Send a Test Email To: Enter the recipient’s email address.
Email Text: Write the content of the test email.