How to Configure Cpanel
cPanel was developed for graphically controlling hosting services. It also provides many tools for simplifying the website hosting process for the "end user". If you are the owner of a website, That means you're the admin of that website.
To configure your cPanel, log into your cPanel as an admin.
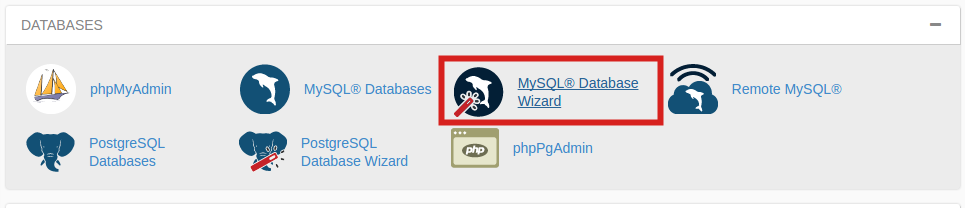
A database is a collection of structured information, or data, typically stored in a server system, and MySQL is a database management system. You can configure the database using the MySQL database wizard.
Click on the MySQL Database Wizard under the Databases heading.
Bellow the New Database[1], enter your database name, and click Next Step[2].
Go to “MySQL Databases” and create a database according to the following screenshot: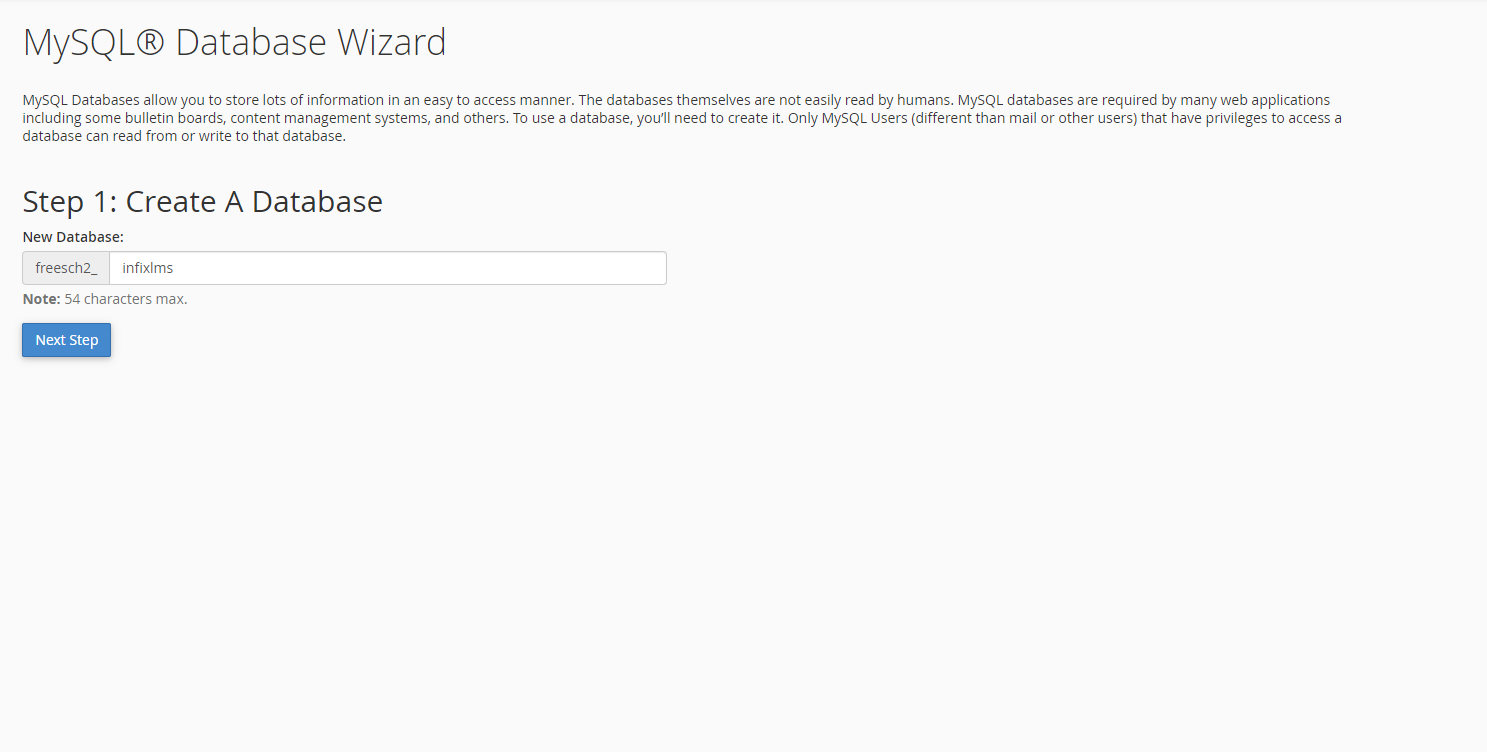
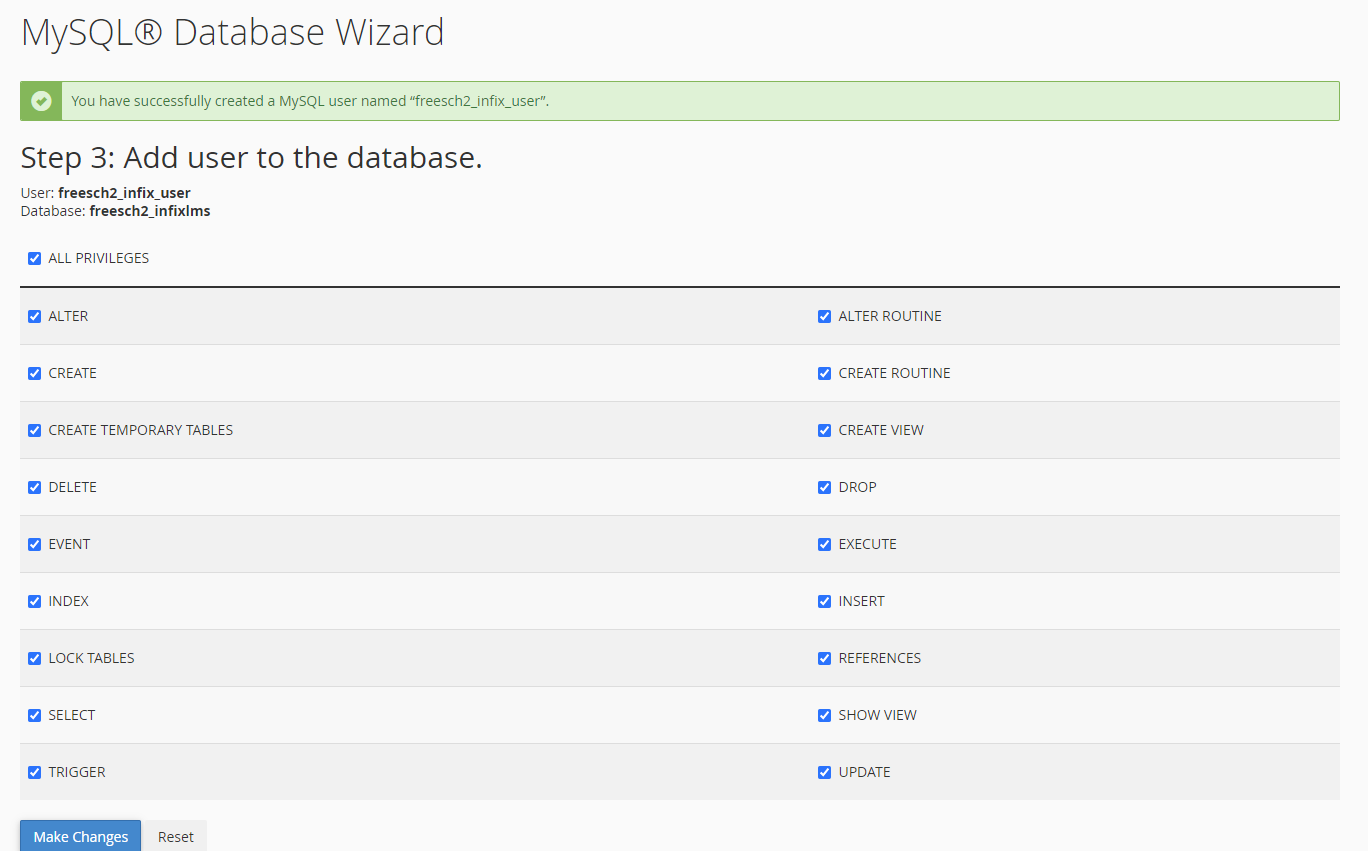
After that create a MySQL user on the same page and keep the password.
Now you should assign the user to the create database. Select the created database and the related user and click on the “Add” button. This process might be done automatically on some control panels such as “Direct Admin”.
On the next page, you can assign privileges for a user so that the user has proper privileges for accessing, reading, editing, and deleting the database.
To assign users all privileges Click on the box you see before All Privileges[1] and then click Next Step[2].
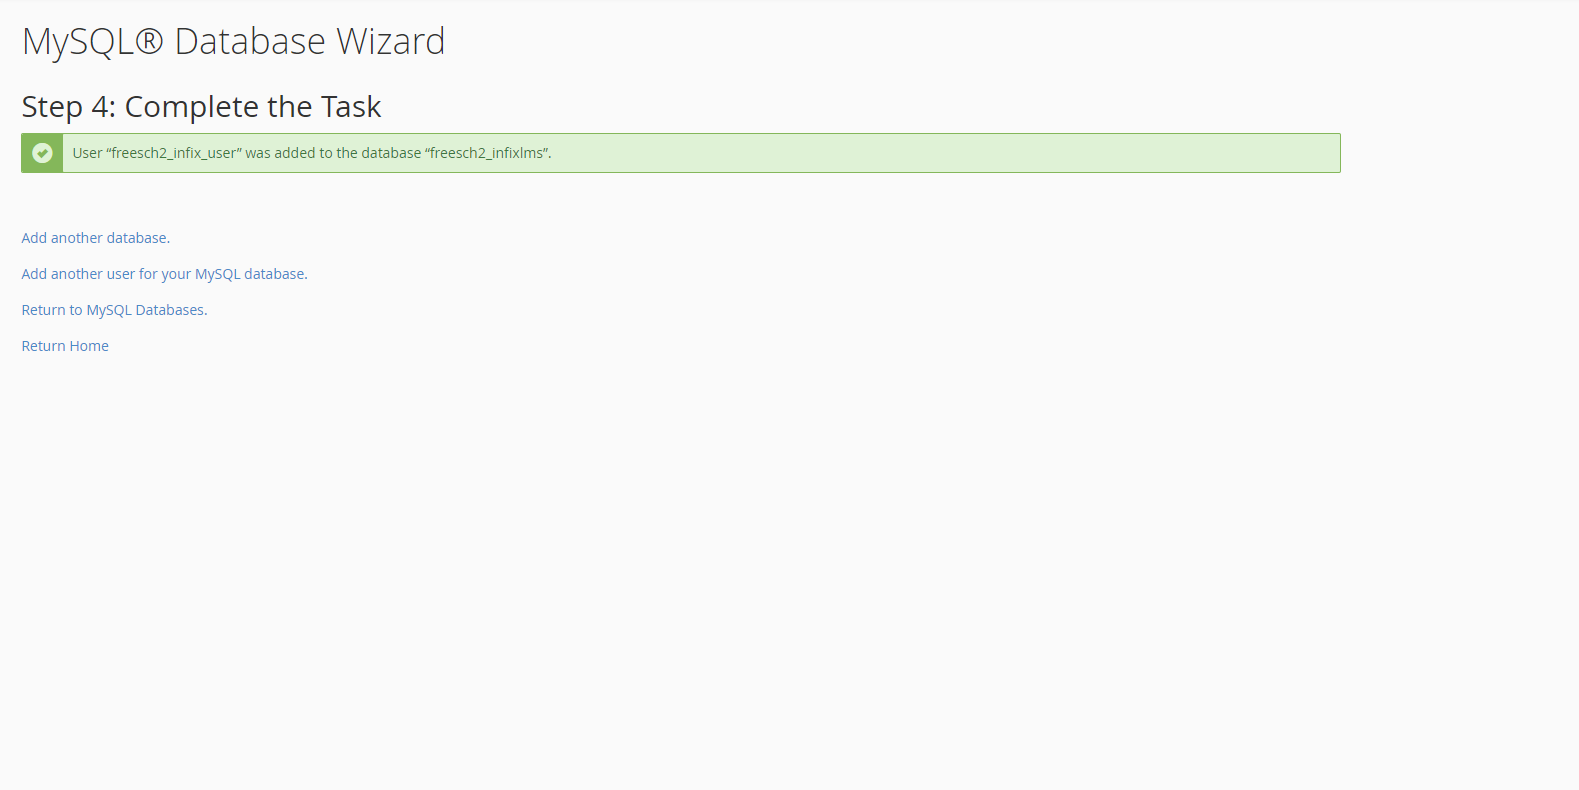
If you have already done all of your tasks then step 4 will be completed.
Server Requirements:
PHP 8.3x
Operating System: Linux or Windows
Shared, VPS or Dedicated Server
MySql: 5.7+
Required Upgrades:
Enabling of allow_url_fopen
Increasing of max_execution_time
Increasing of max_input_time
Increasing of post_max_size
Increasing of memory_limit
Increasing of upload_max_filesize
There are six steps that a user has to complete in this section for the MarifaLMS installation process.
Step- 1
Use your browser to install the MarifaLMS school management system. Type your application location followed by /install example (https://yourdomainname/install) in the browser. Click on GET STARTED.
Hit your domain address & just click on get started. 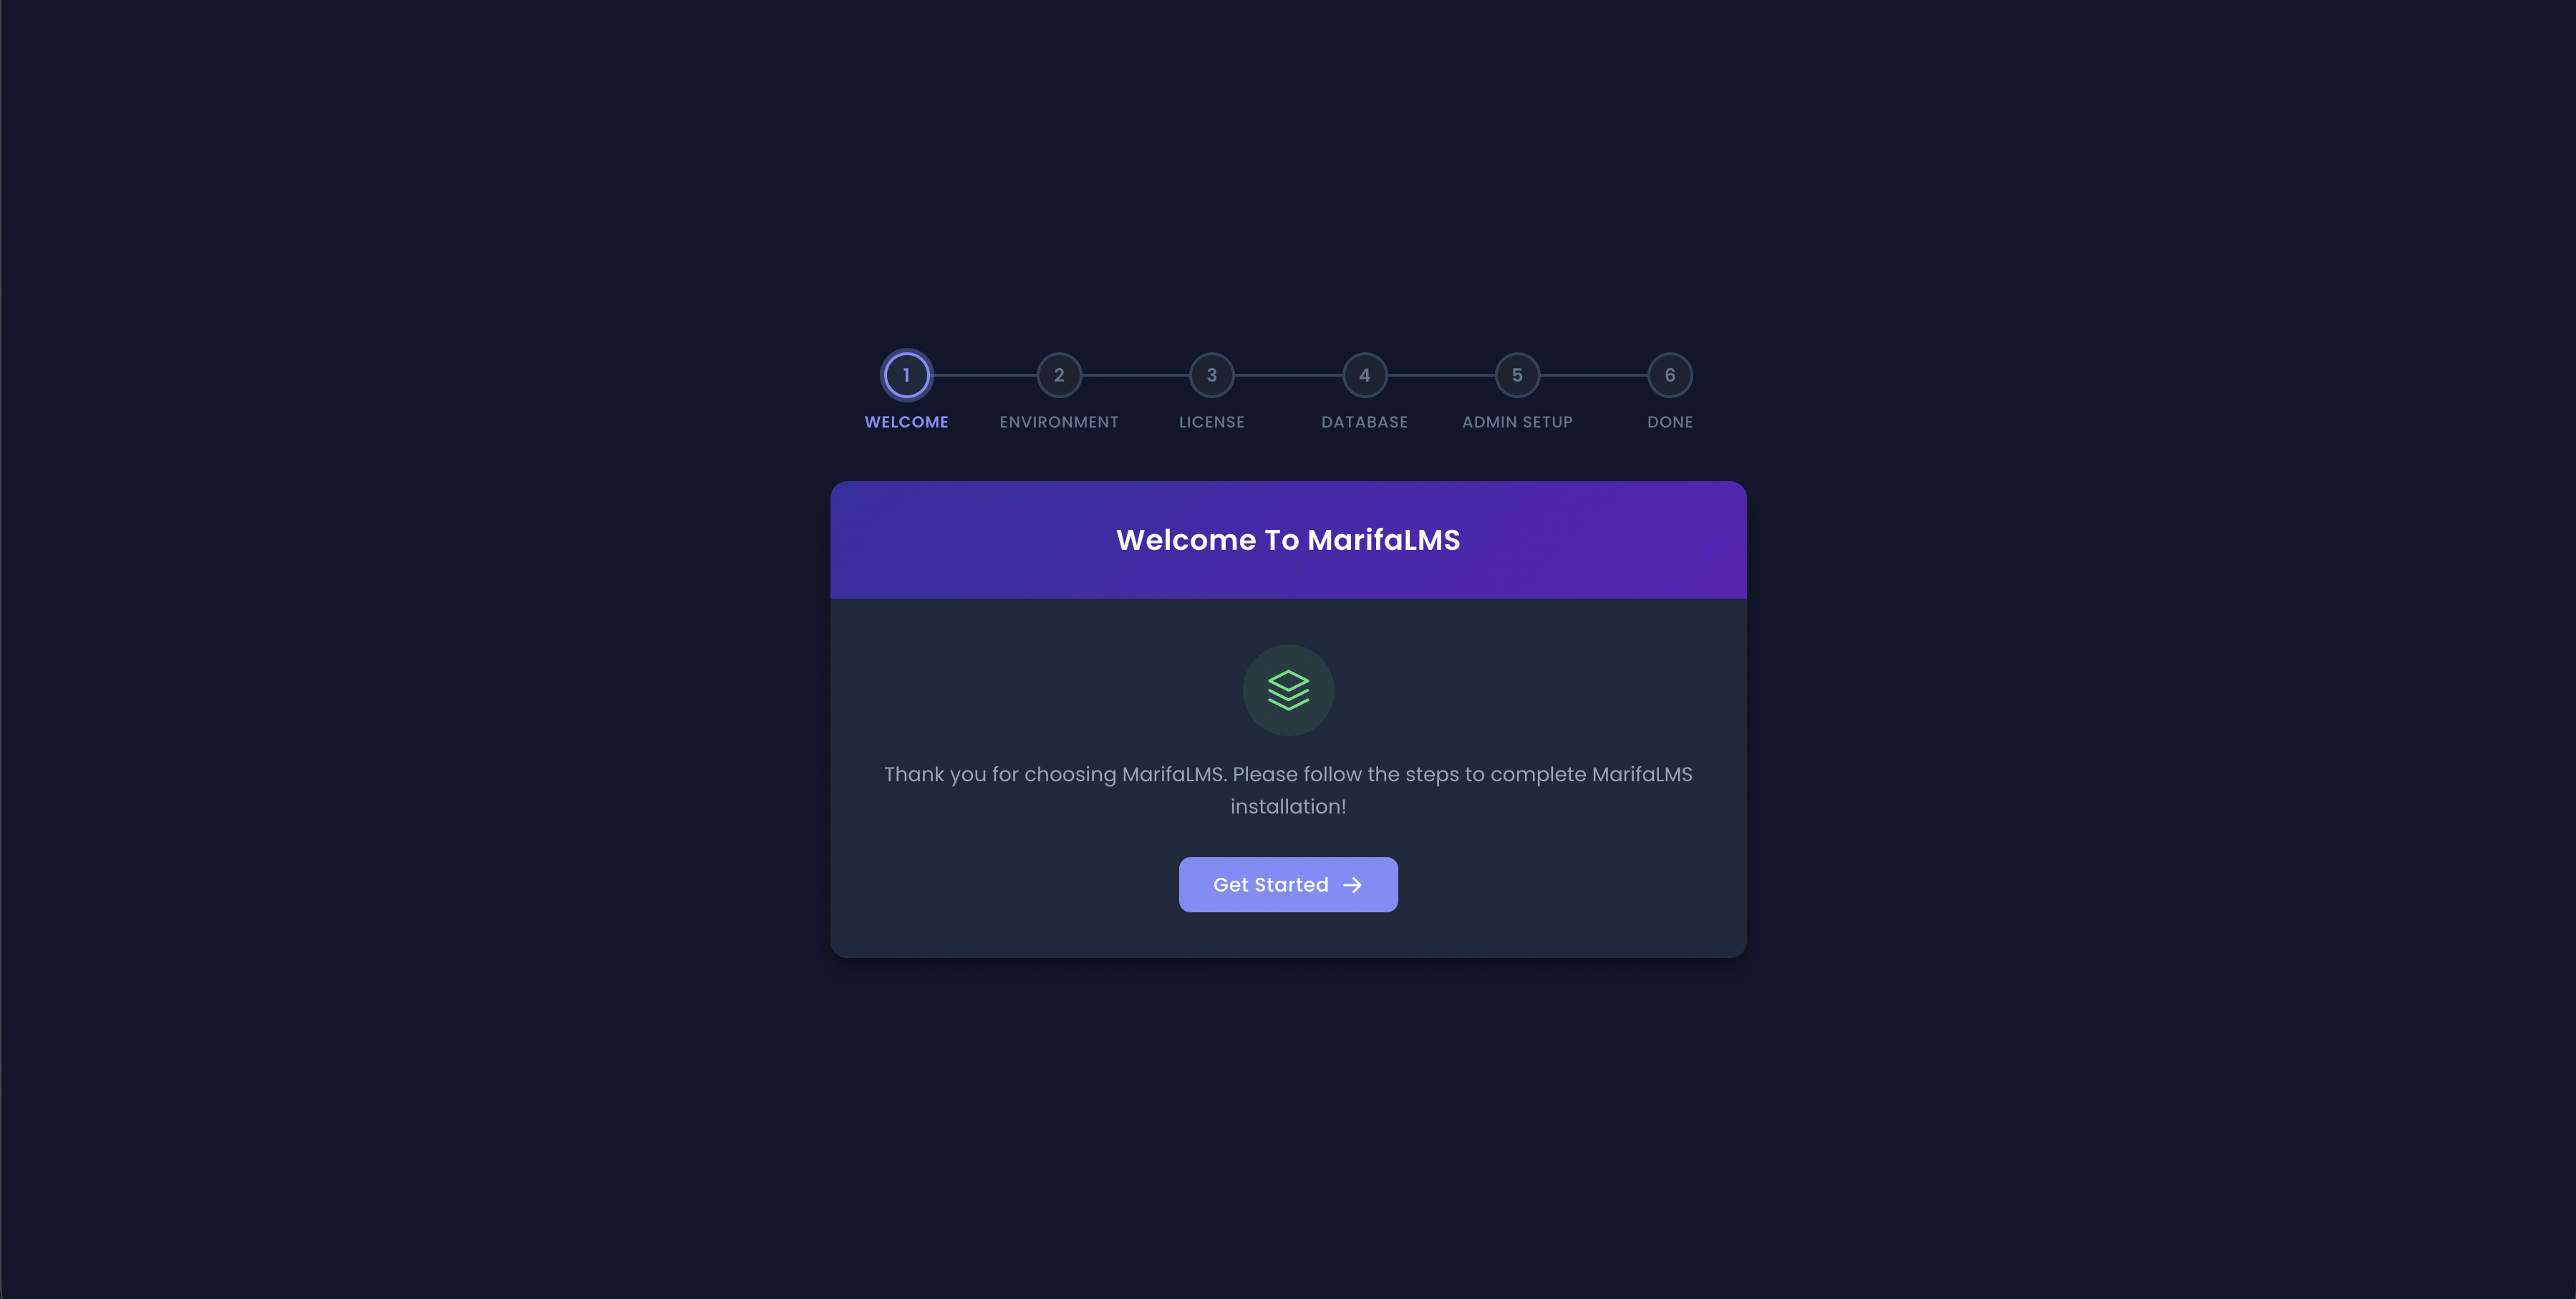
Note: If you are facing this issue about 777 errors then you have to follow this link below.
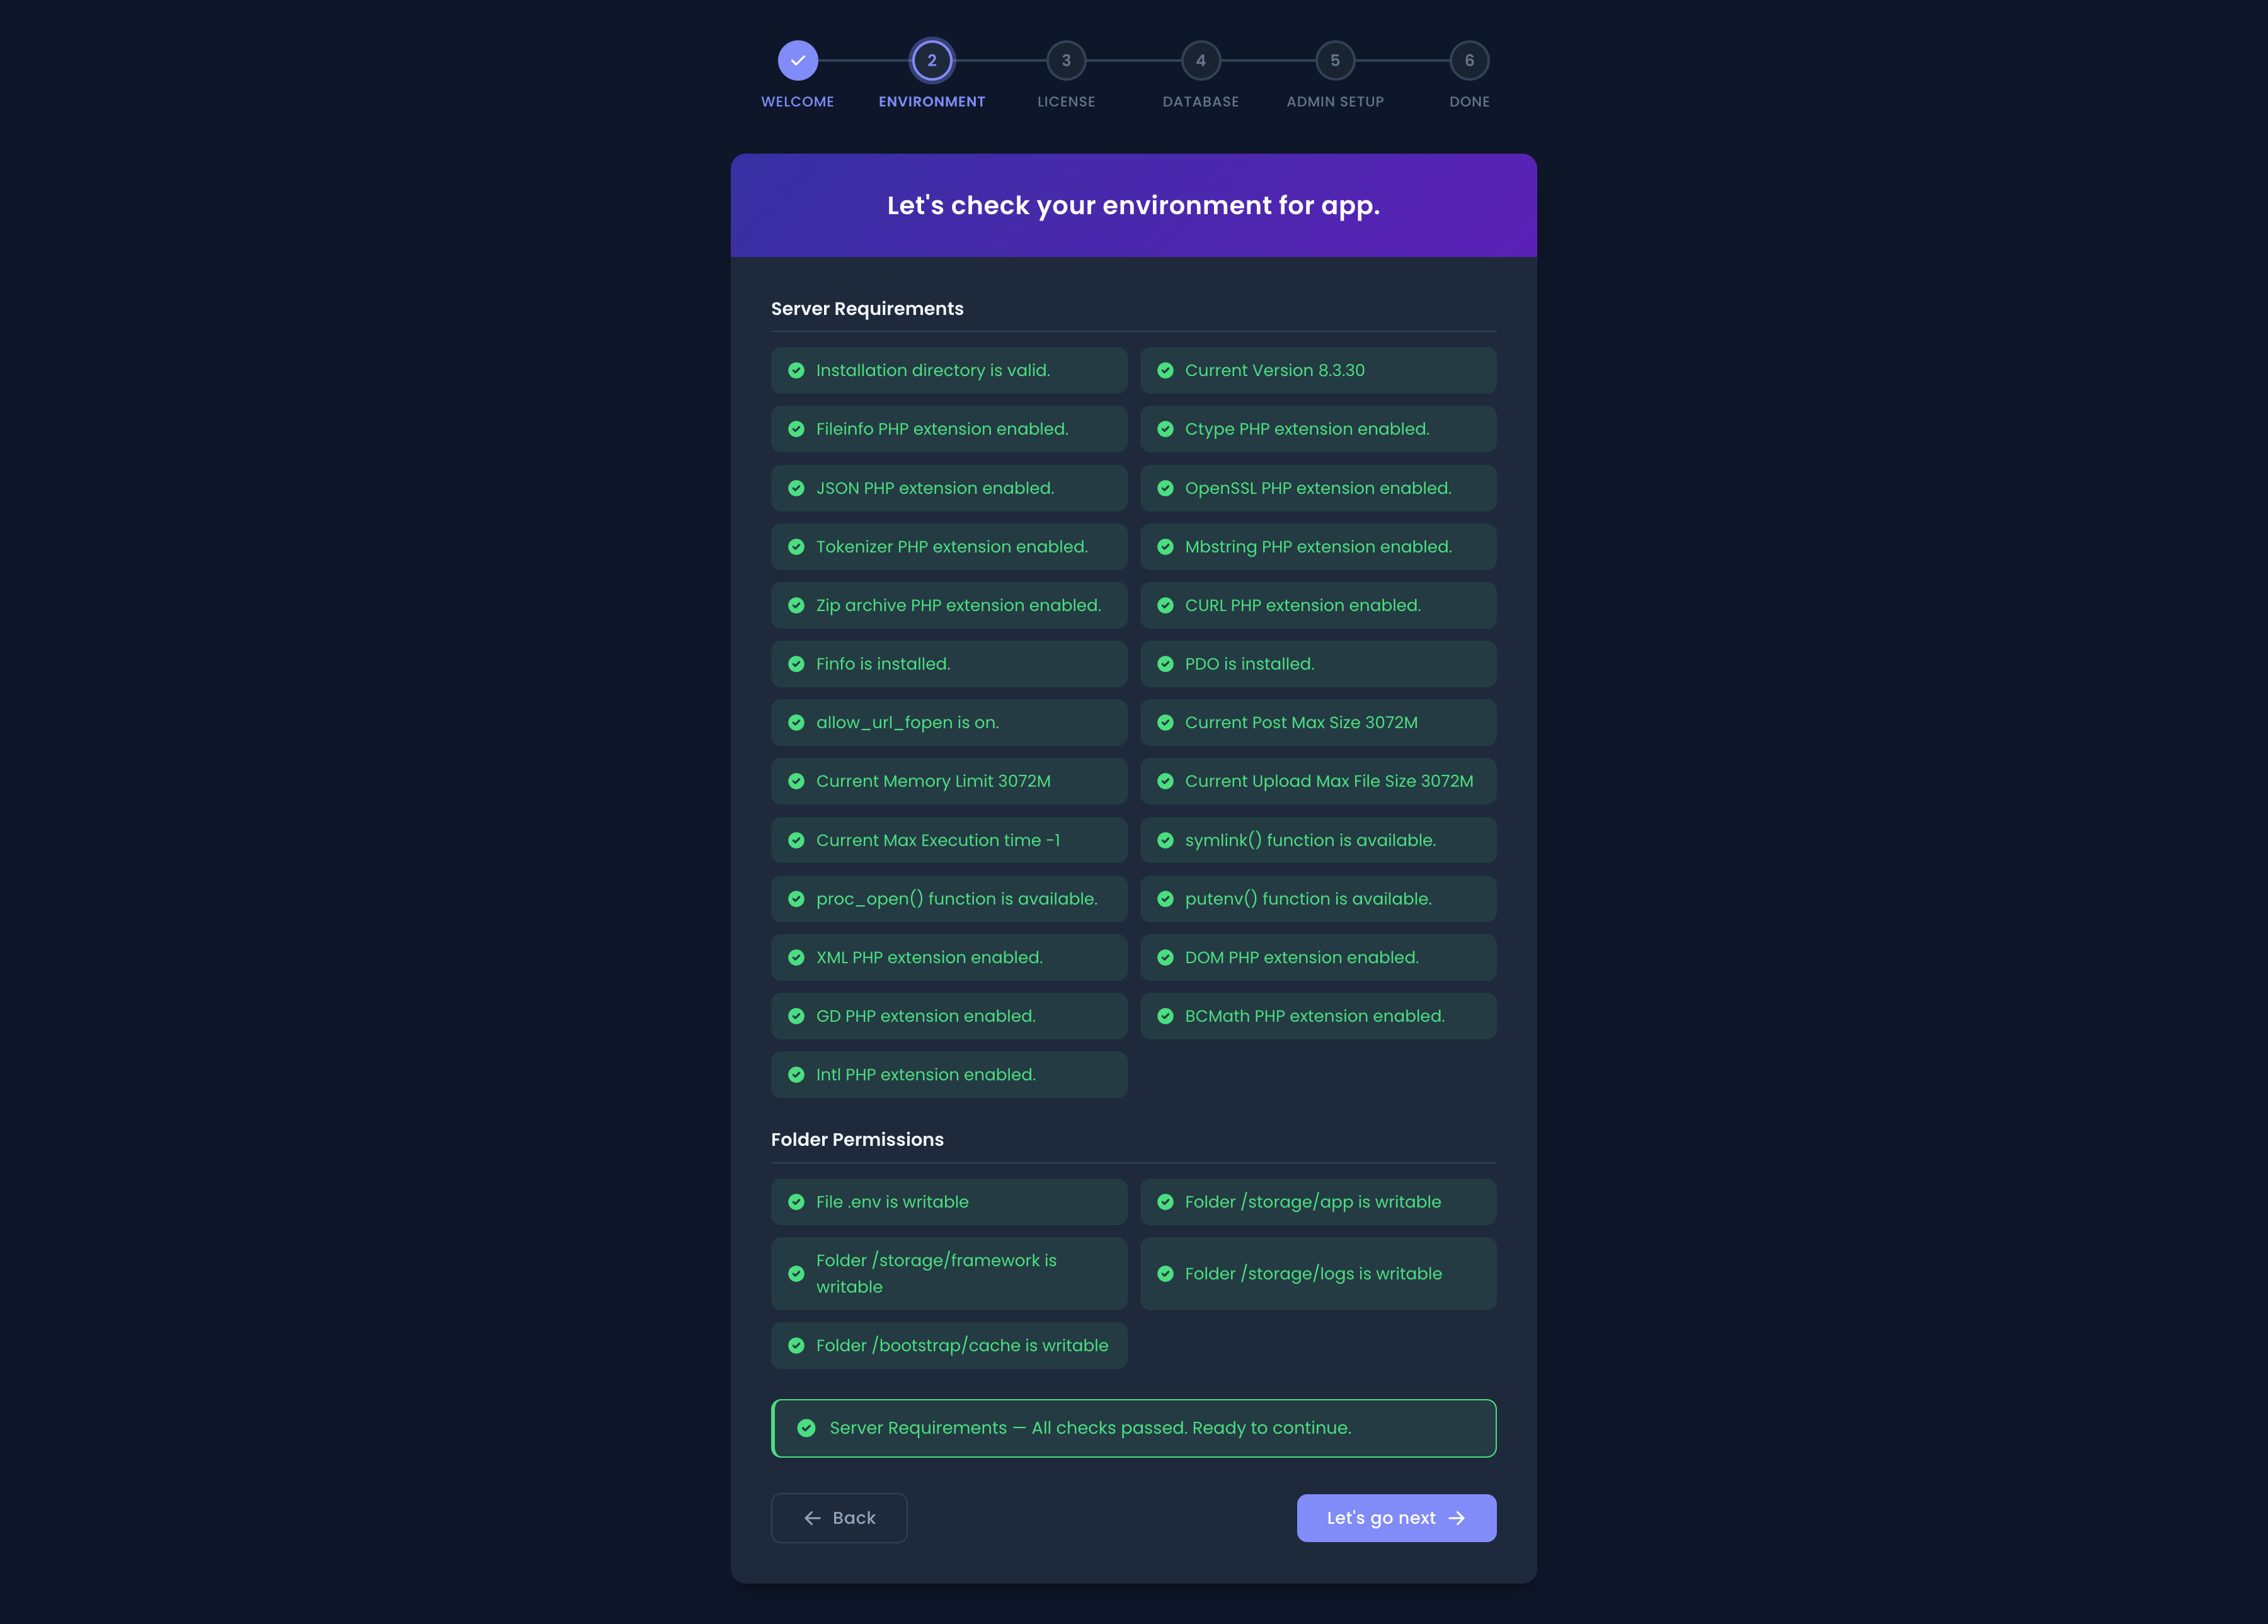
Step- 2
Let's check your environment for your MarifaLMS application. Then click on the lest’s go next.
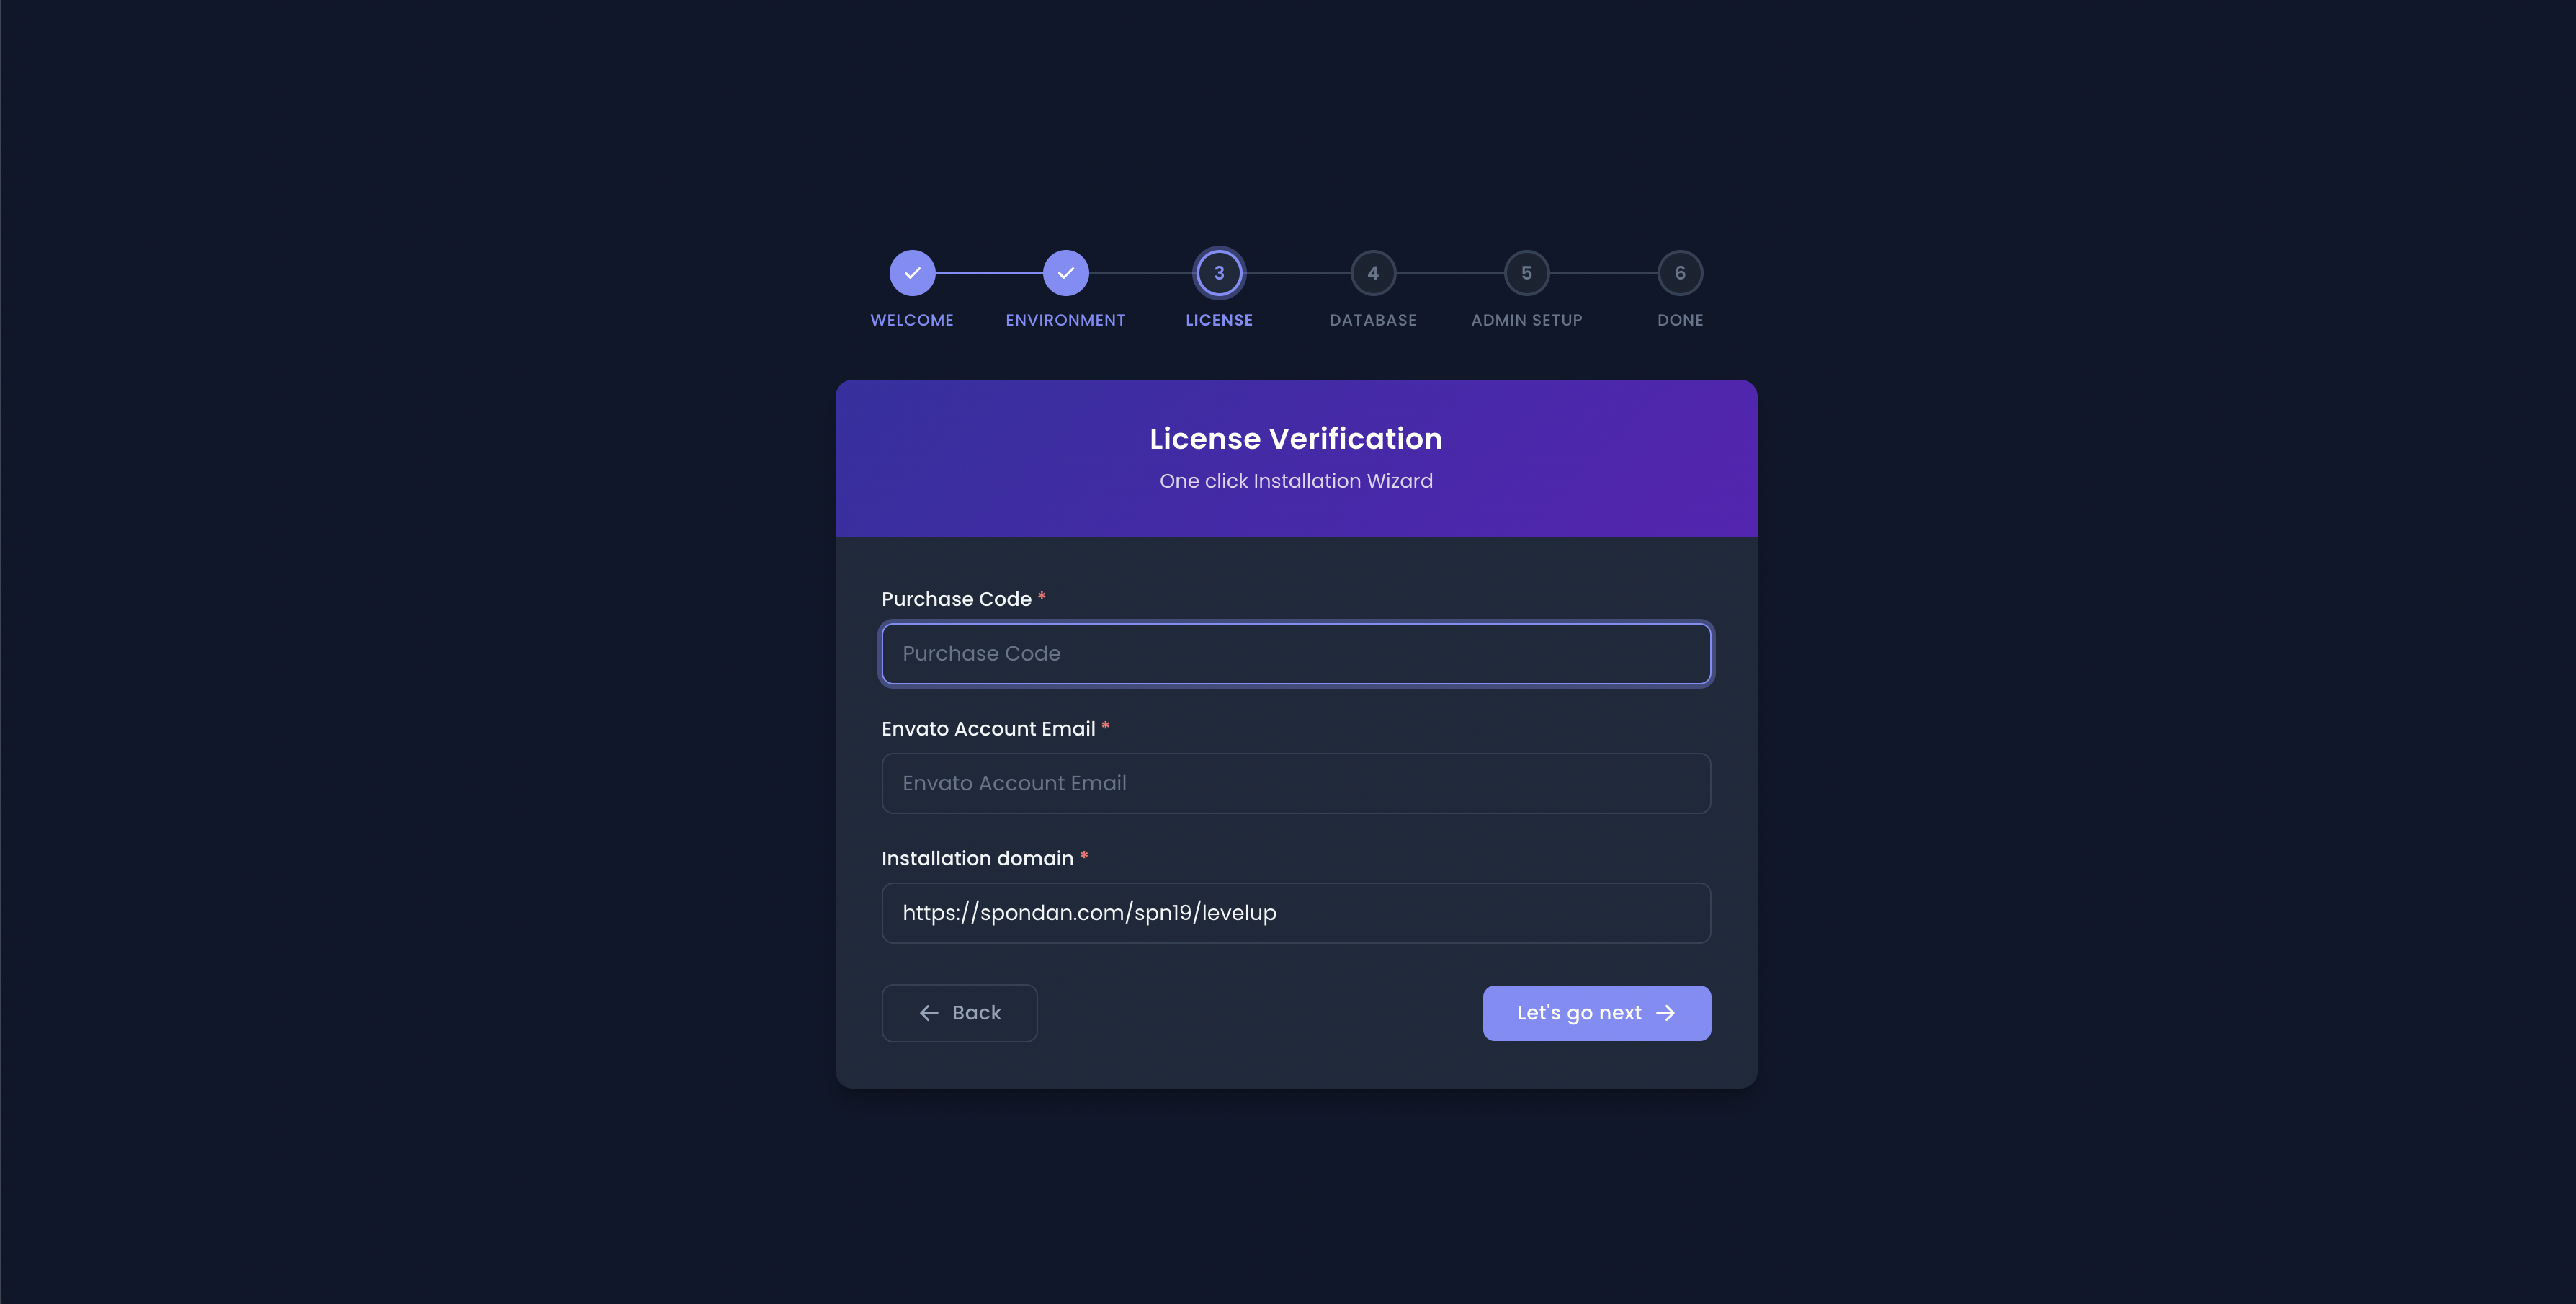
Step- 3
This section for purchase code & Envato account email address has to be put on here.
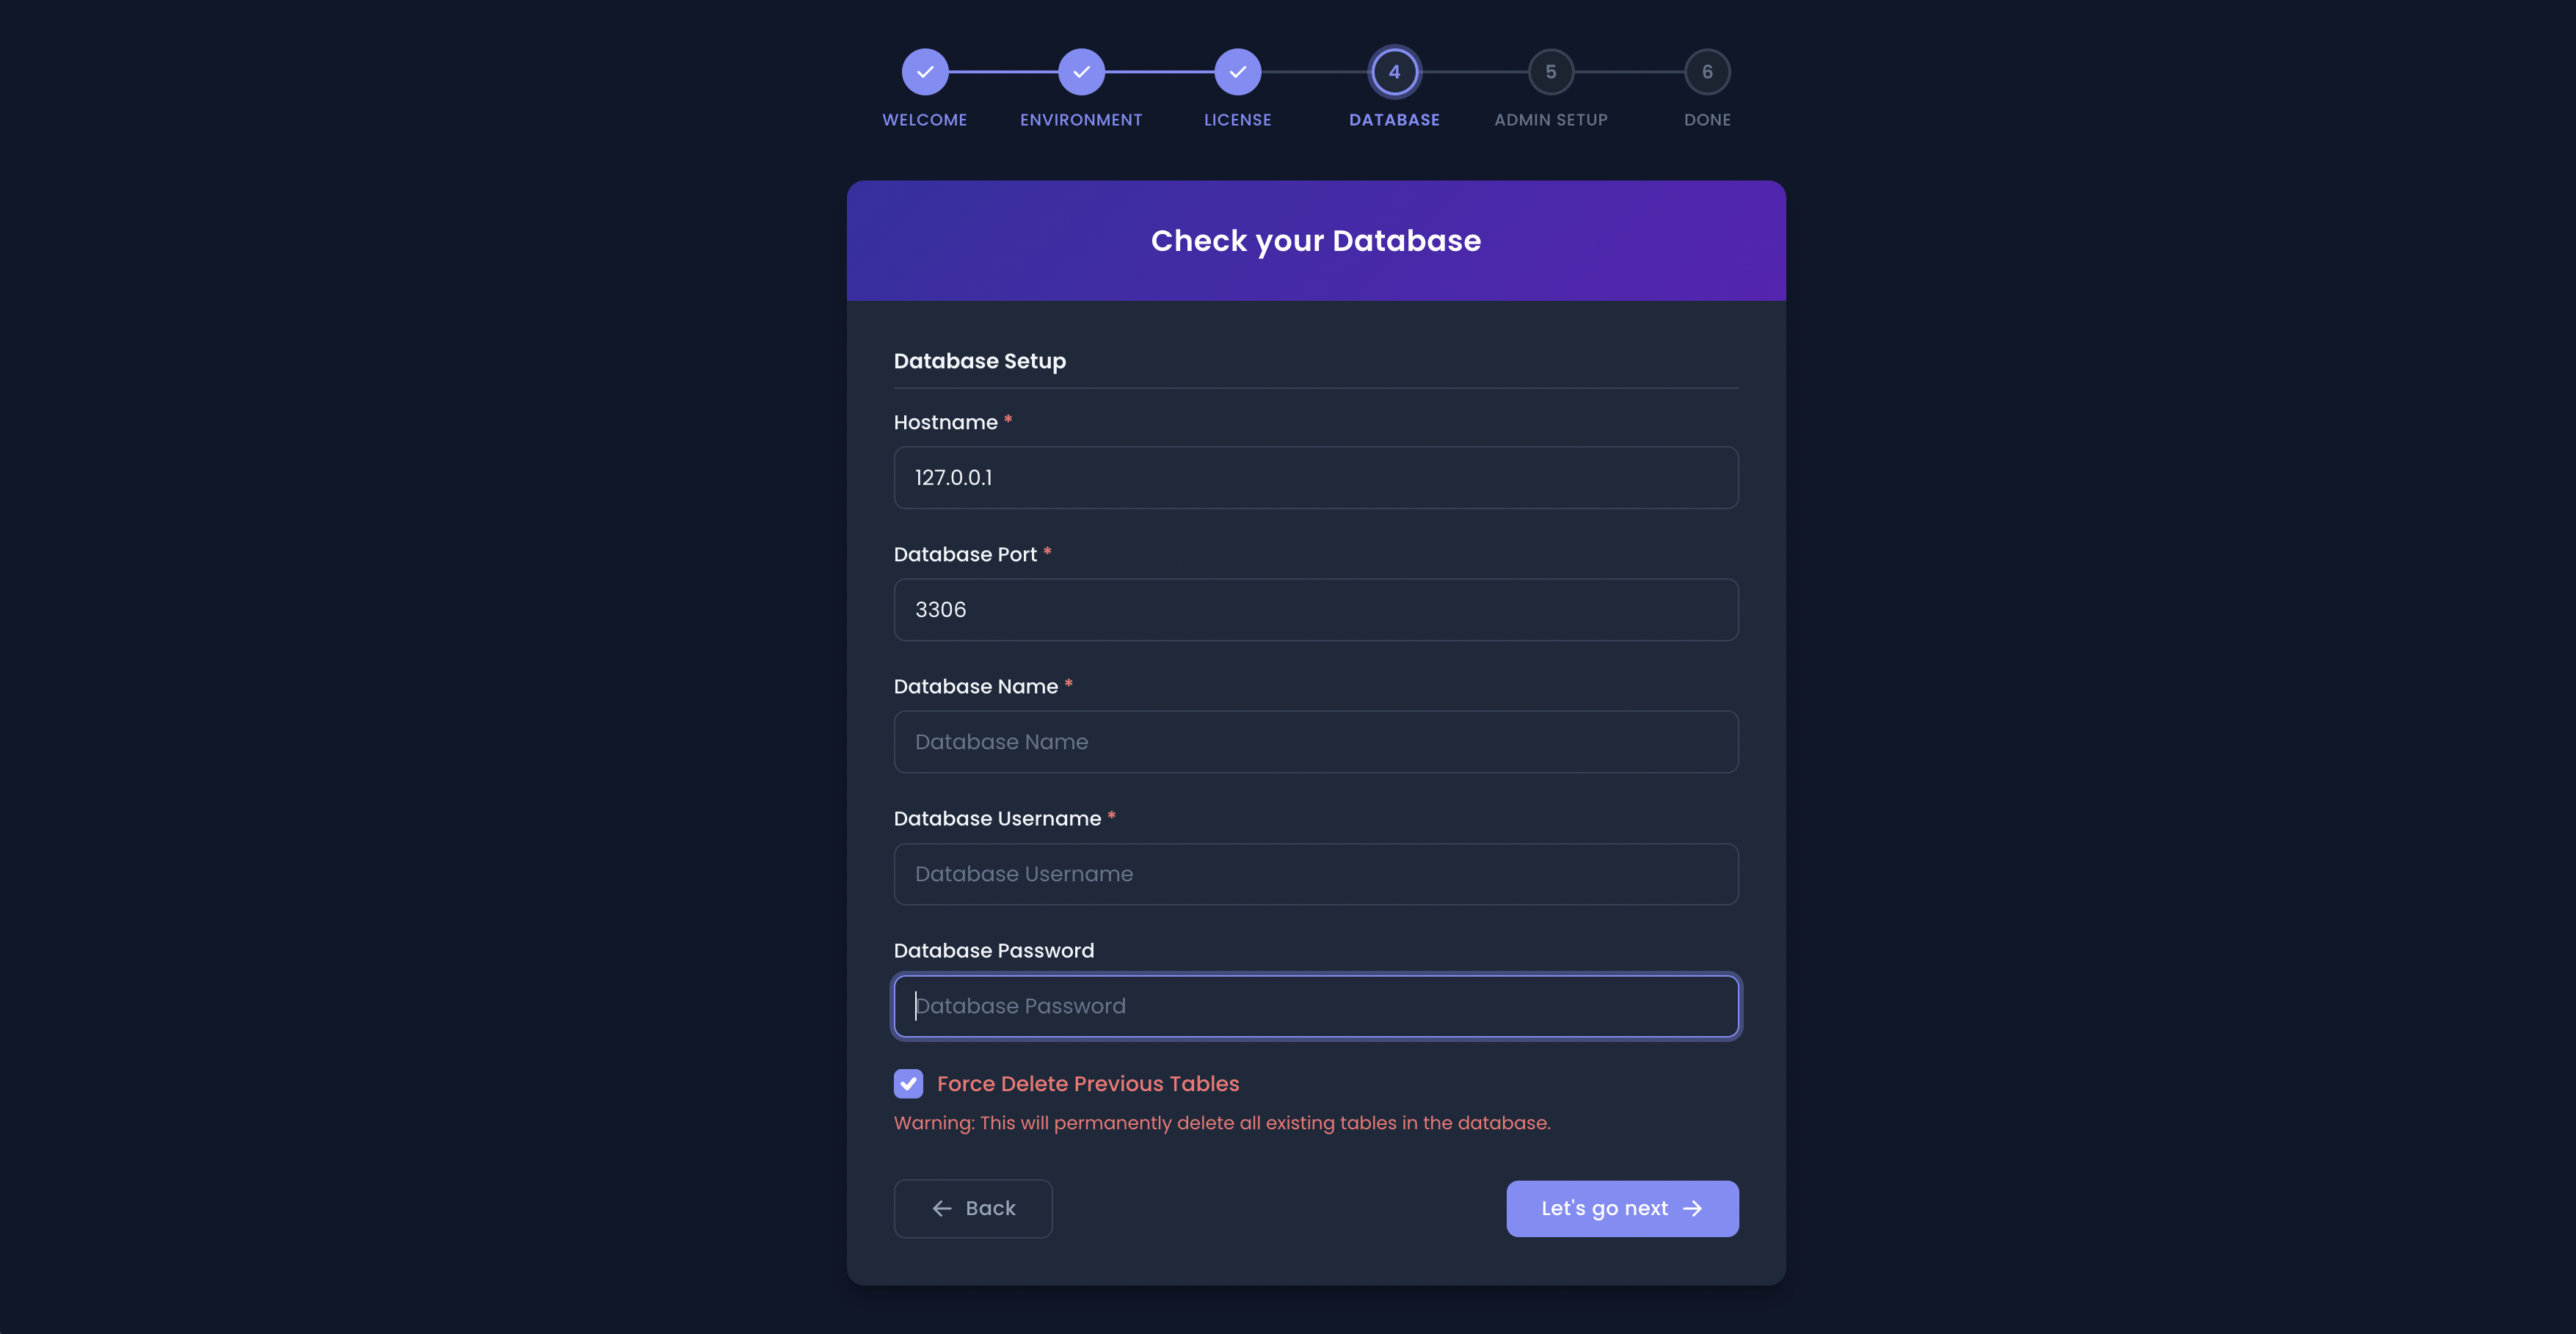
Step- 4
This section here about two database setup options from MySQL & PostgreSQL, so users can choose their requirements. This section has the option to force delete the previous table means if you want to delete earlier data then click to mark on that.
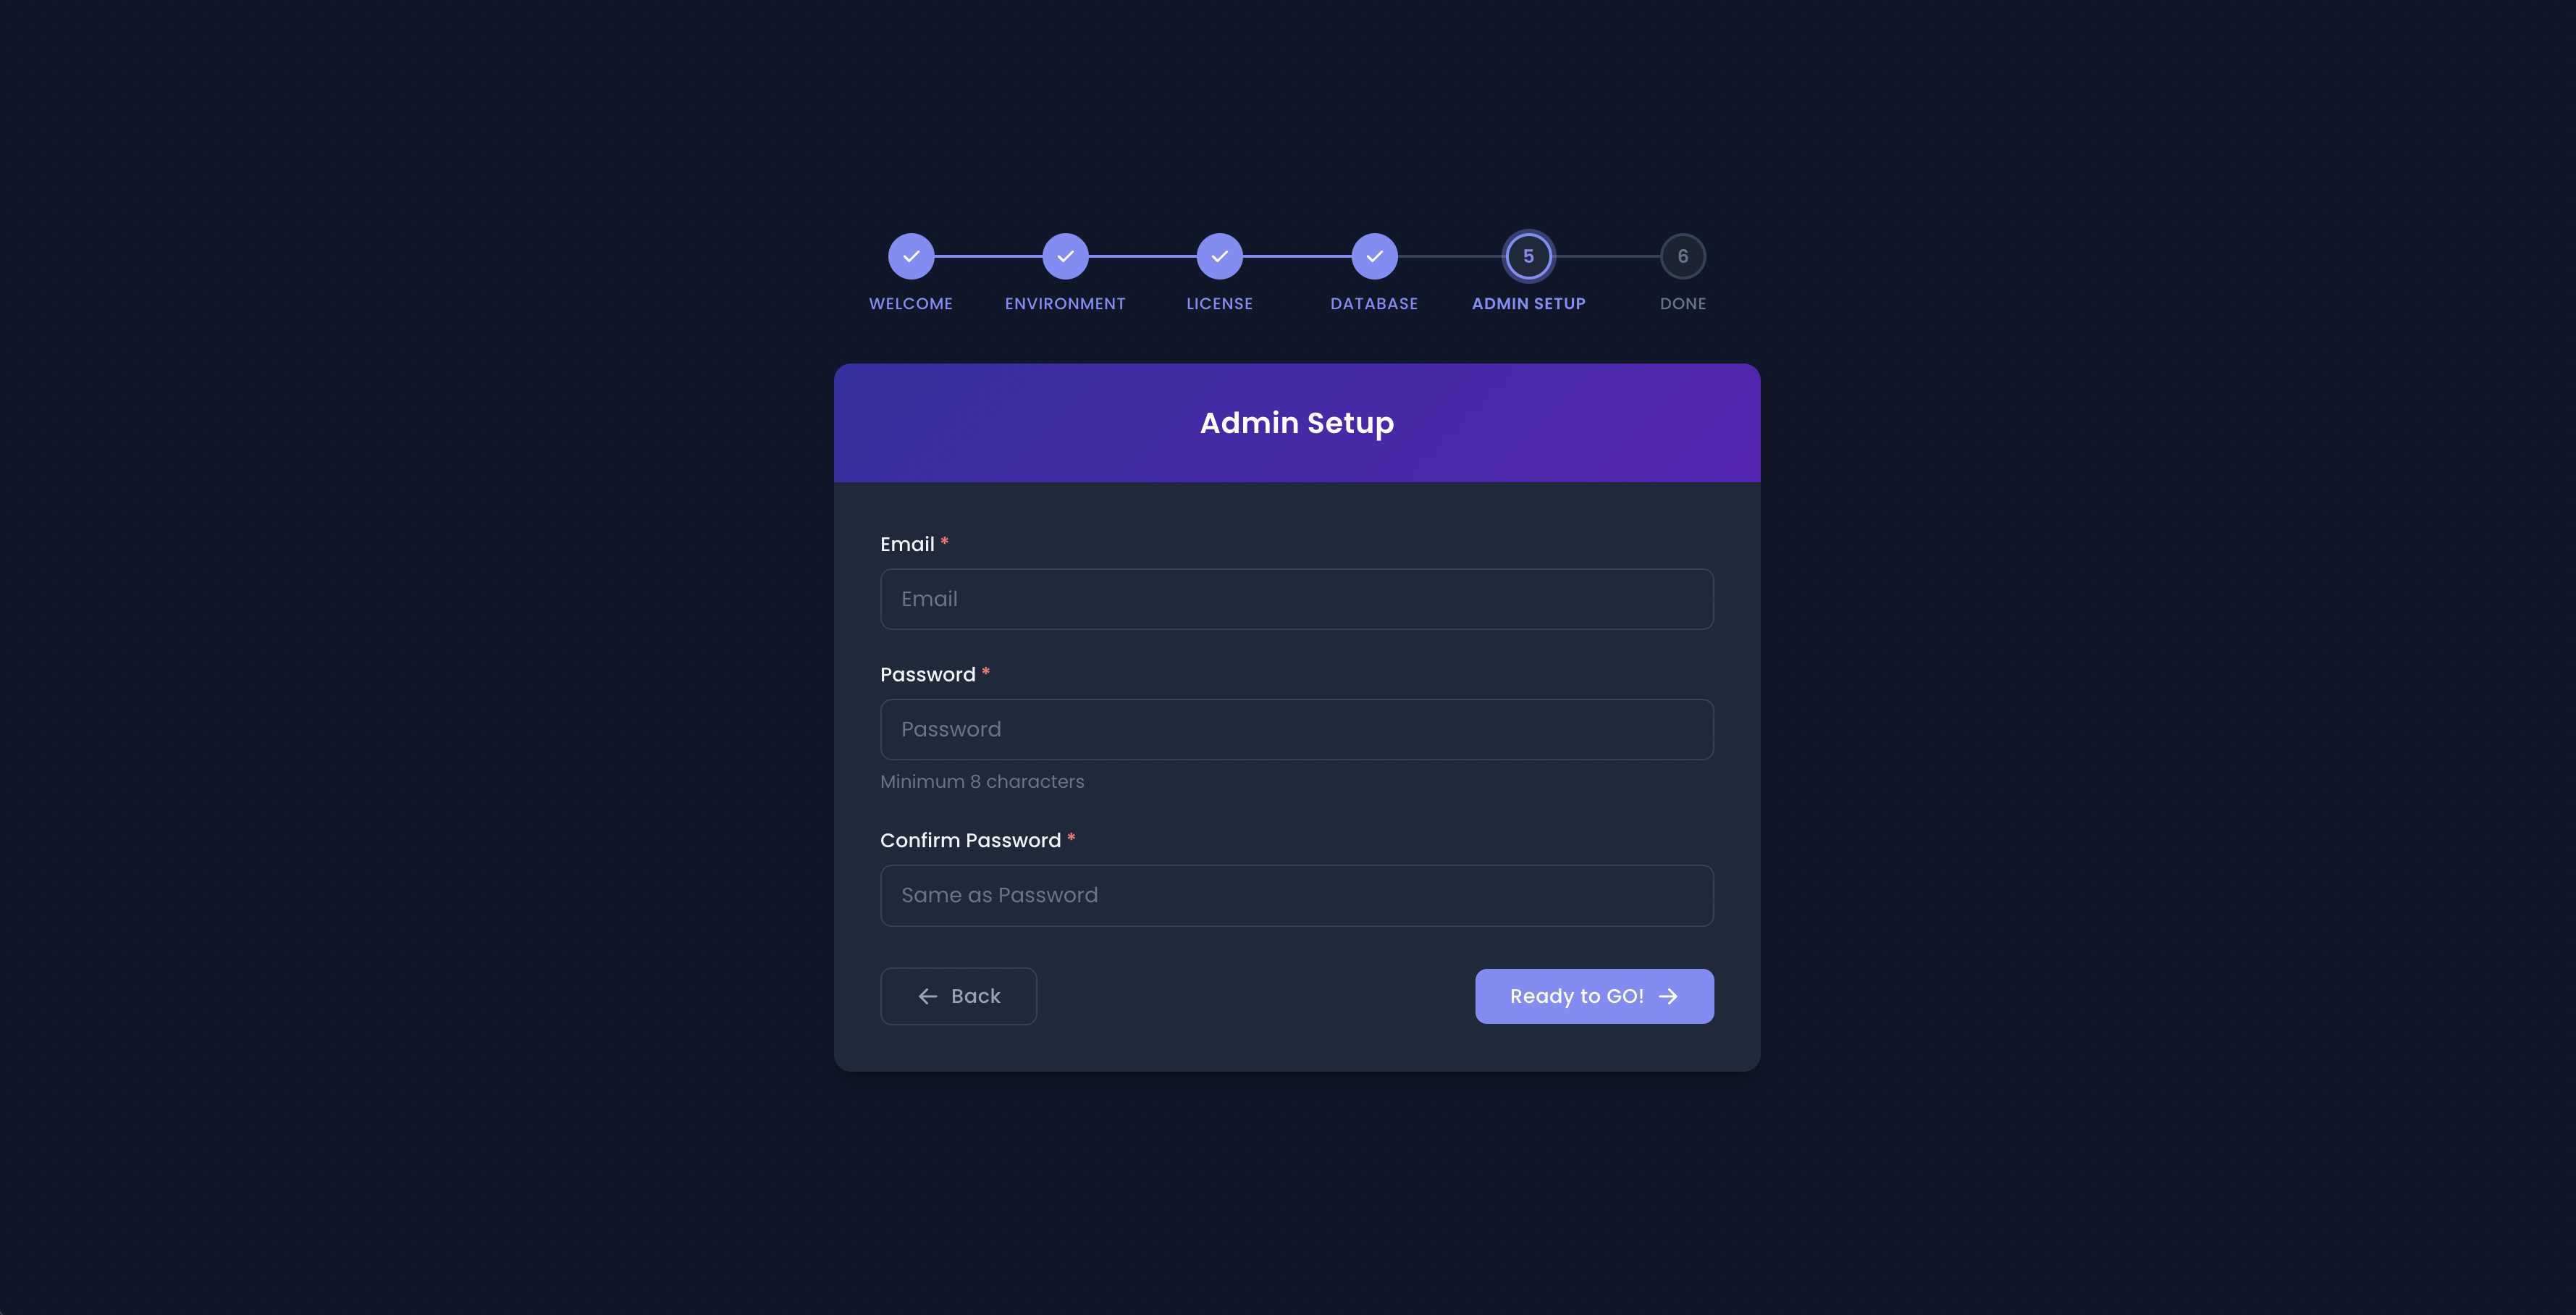
This is the admin setup from here to fill on the email, and password & ensure the confirmed password. Then click on the ready-to-go option.
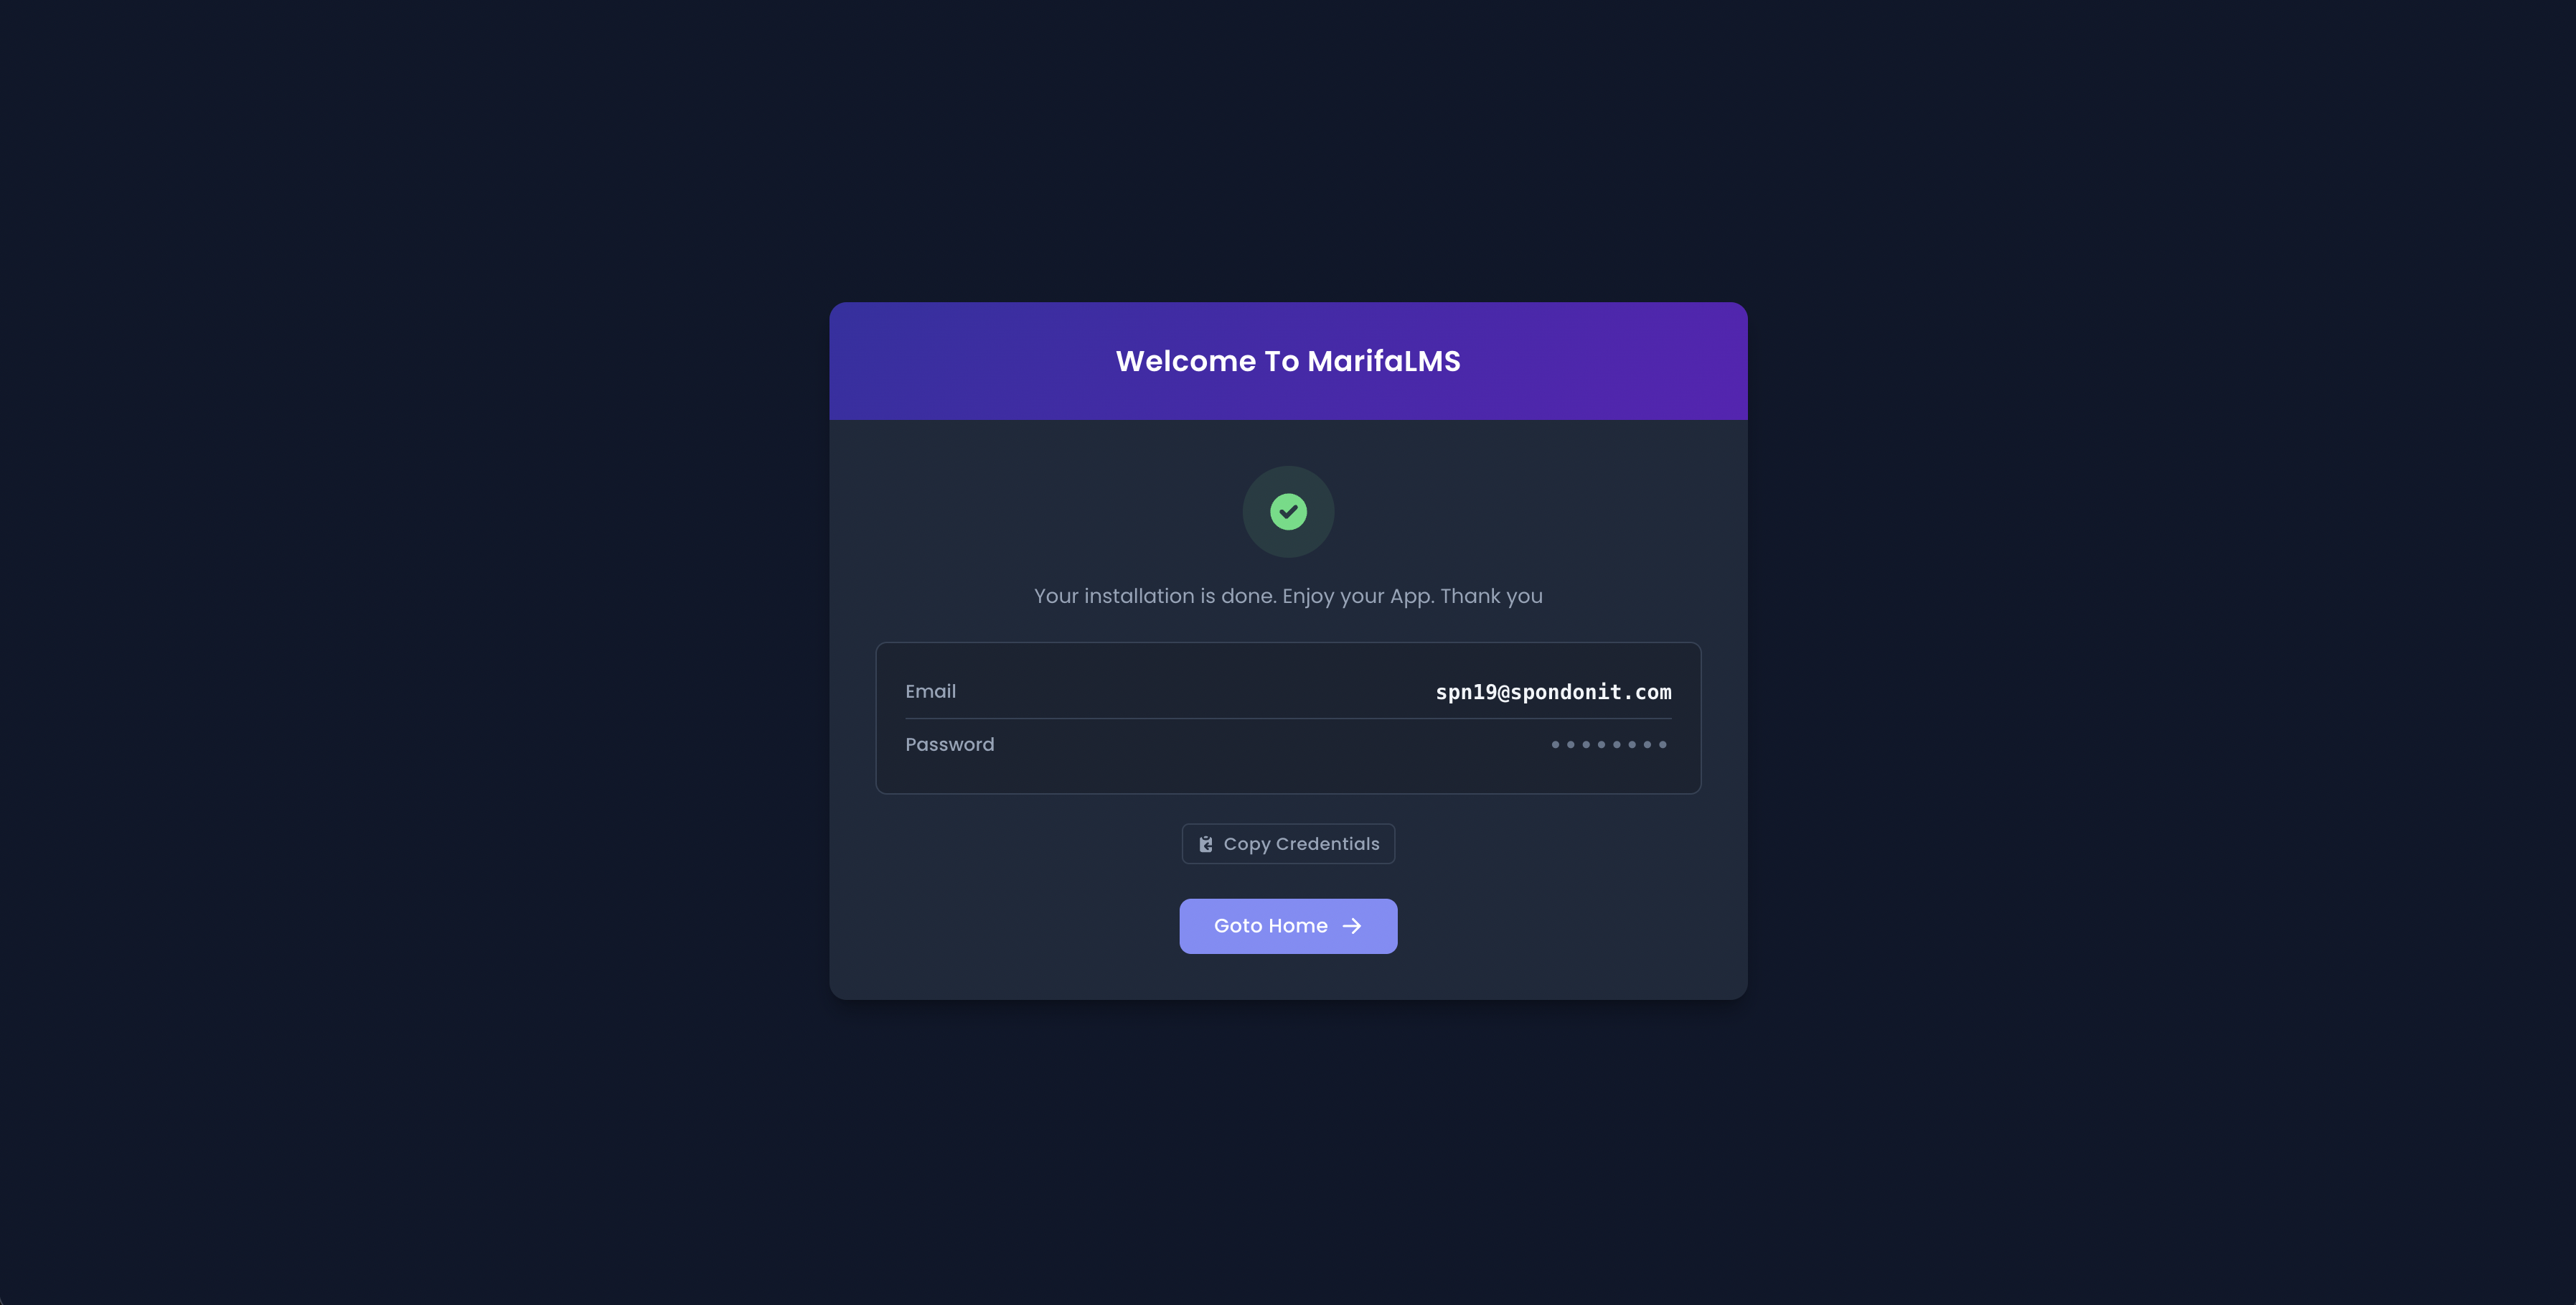
Step- 6
If you did successfully complete the installation process then you will see the go-to-home option.
Homepage:
This is the homepage of MarifaLMS, where users can see the demo function.

Note: You must fill up the form with the correct information. Please input the purchase code and Envato email.


