In this option, you can create personalized plans. You can activate and deactivate your configured plans, and you can also view, edit or delete your custom plans
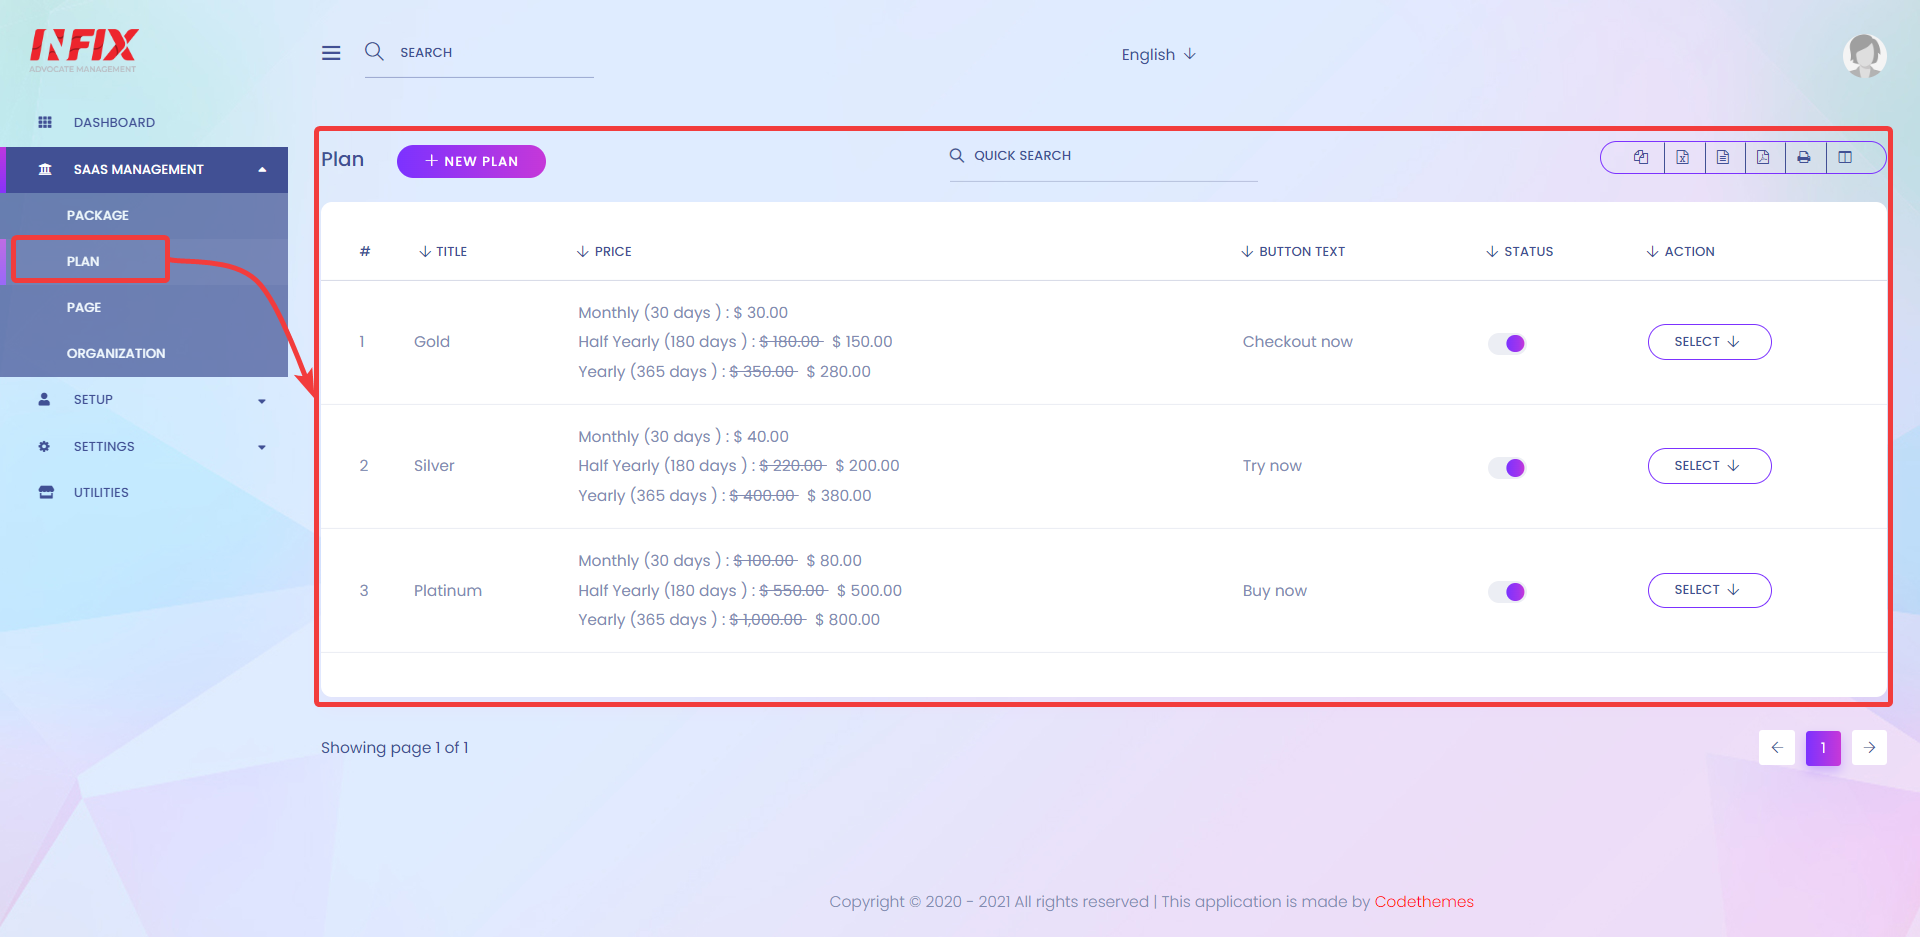
As you can see in this demo, there are 3 plans offered here - Gold[1], Silver[2], and Platinum[3] but you may not see anything added here, but You can easily add new plans.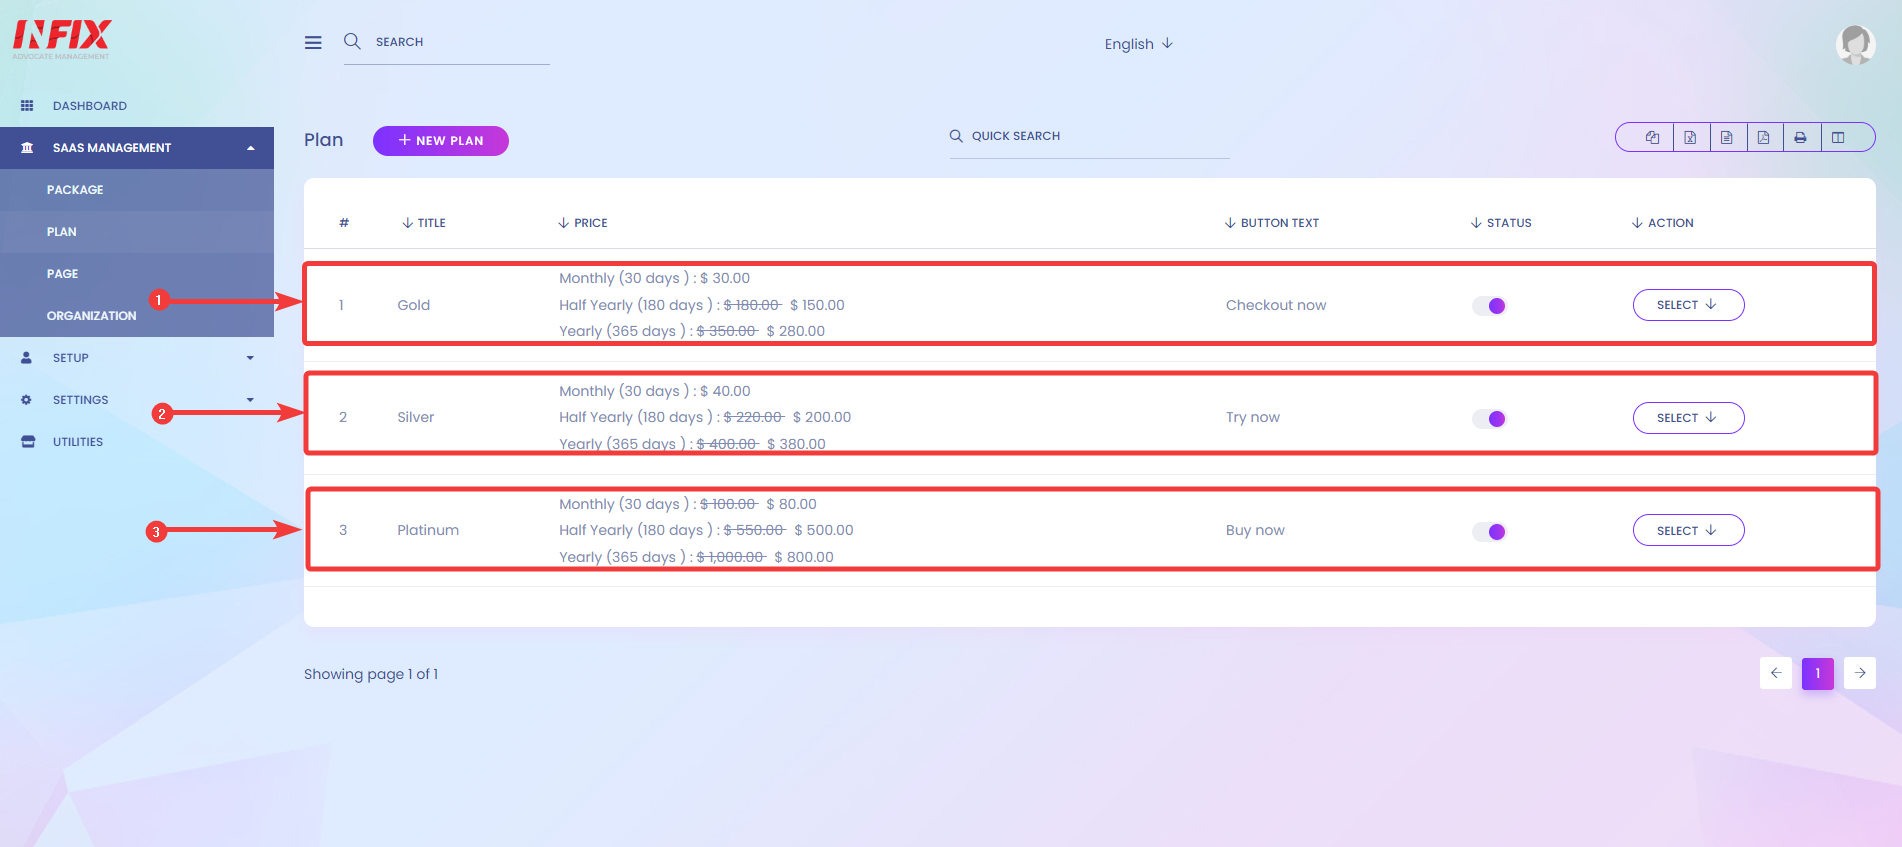
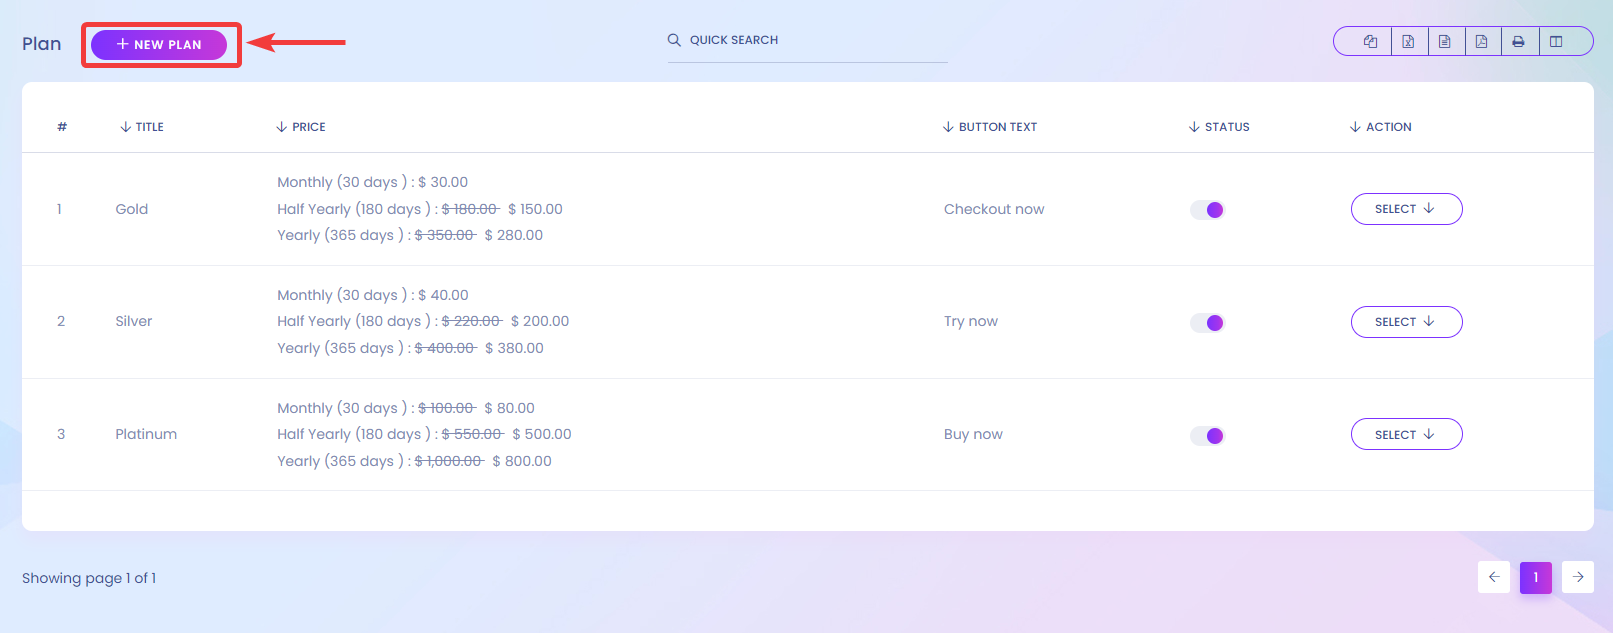
To create your own personalized plans, click on the NEW PLAN button.
After clicking on NEW PLAN, you will forward to another page where you can configure your plans with information like TITLE[1], BUTTON TEXT[2], You configure the Package name from PACKAGE and define PRICE[3], and DISCOUNT PRICE[4]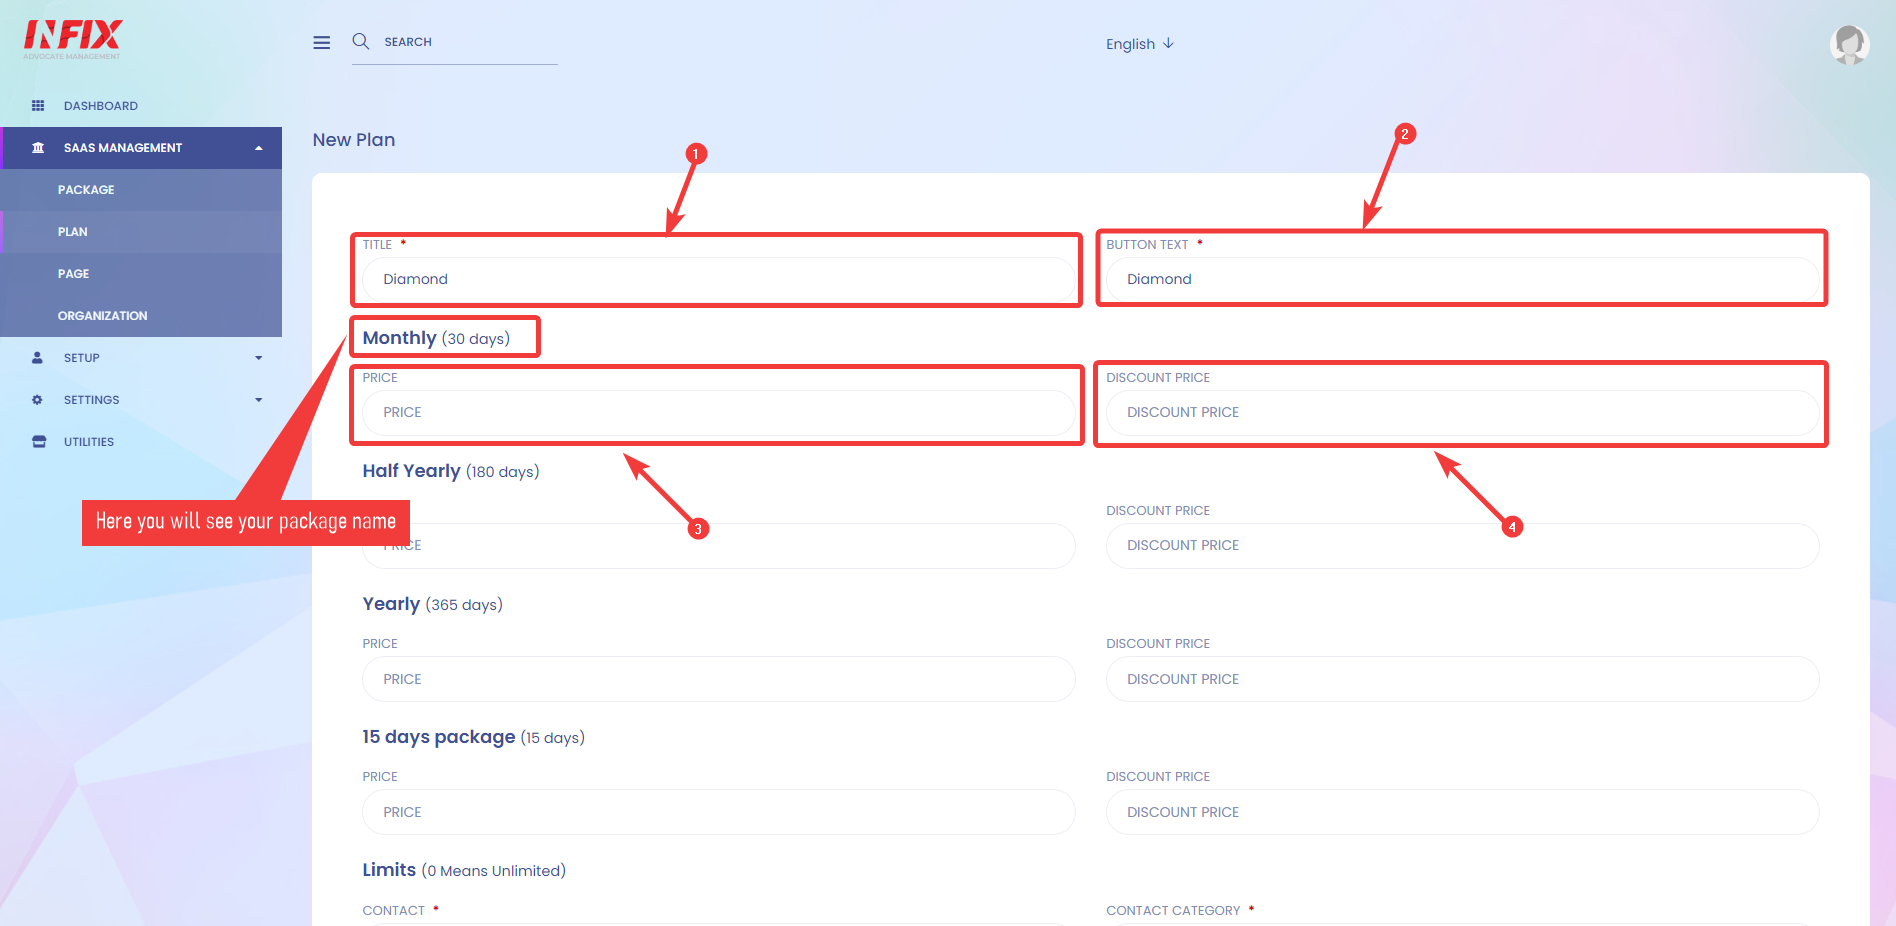
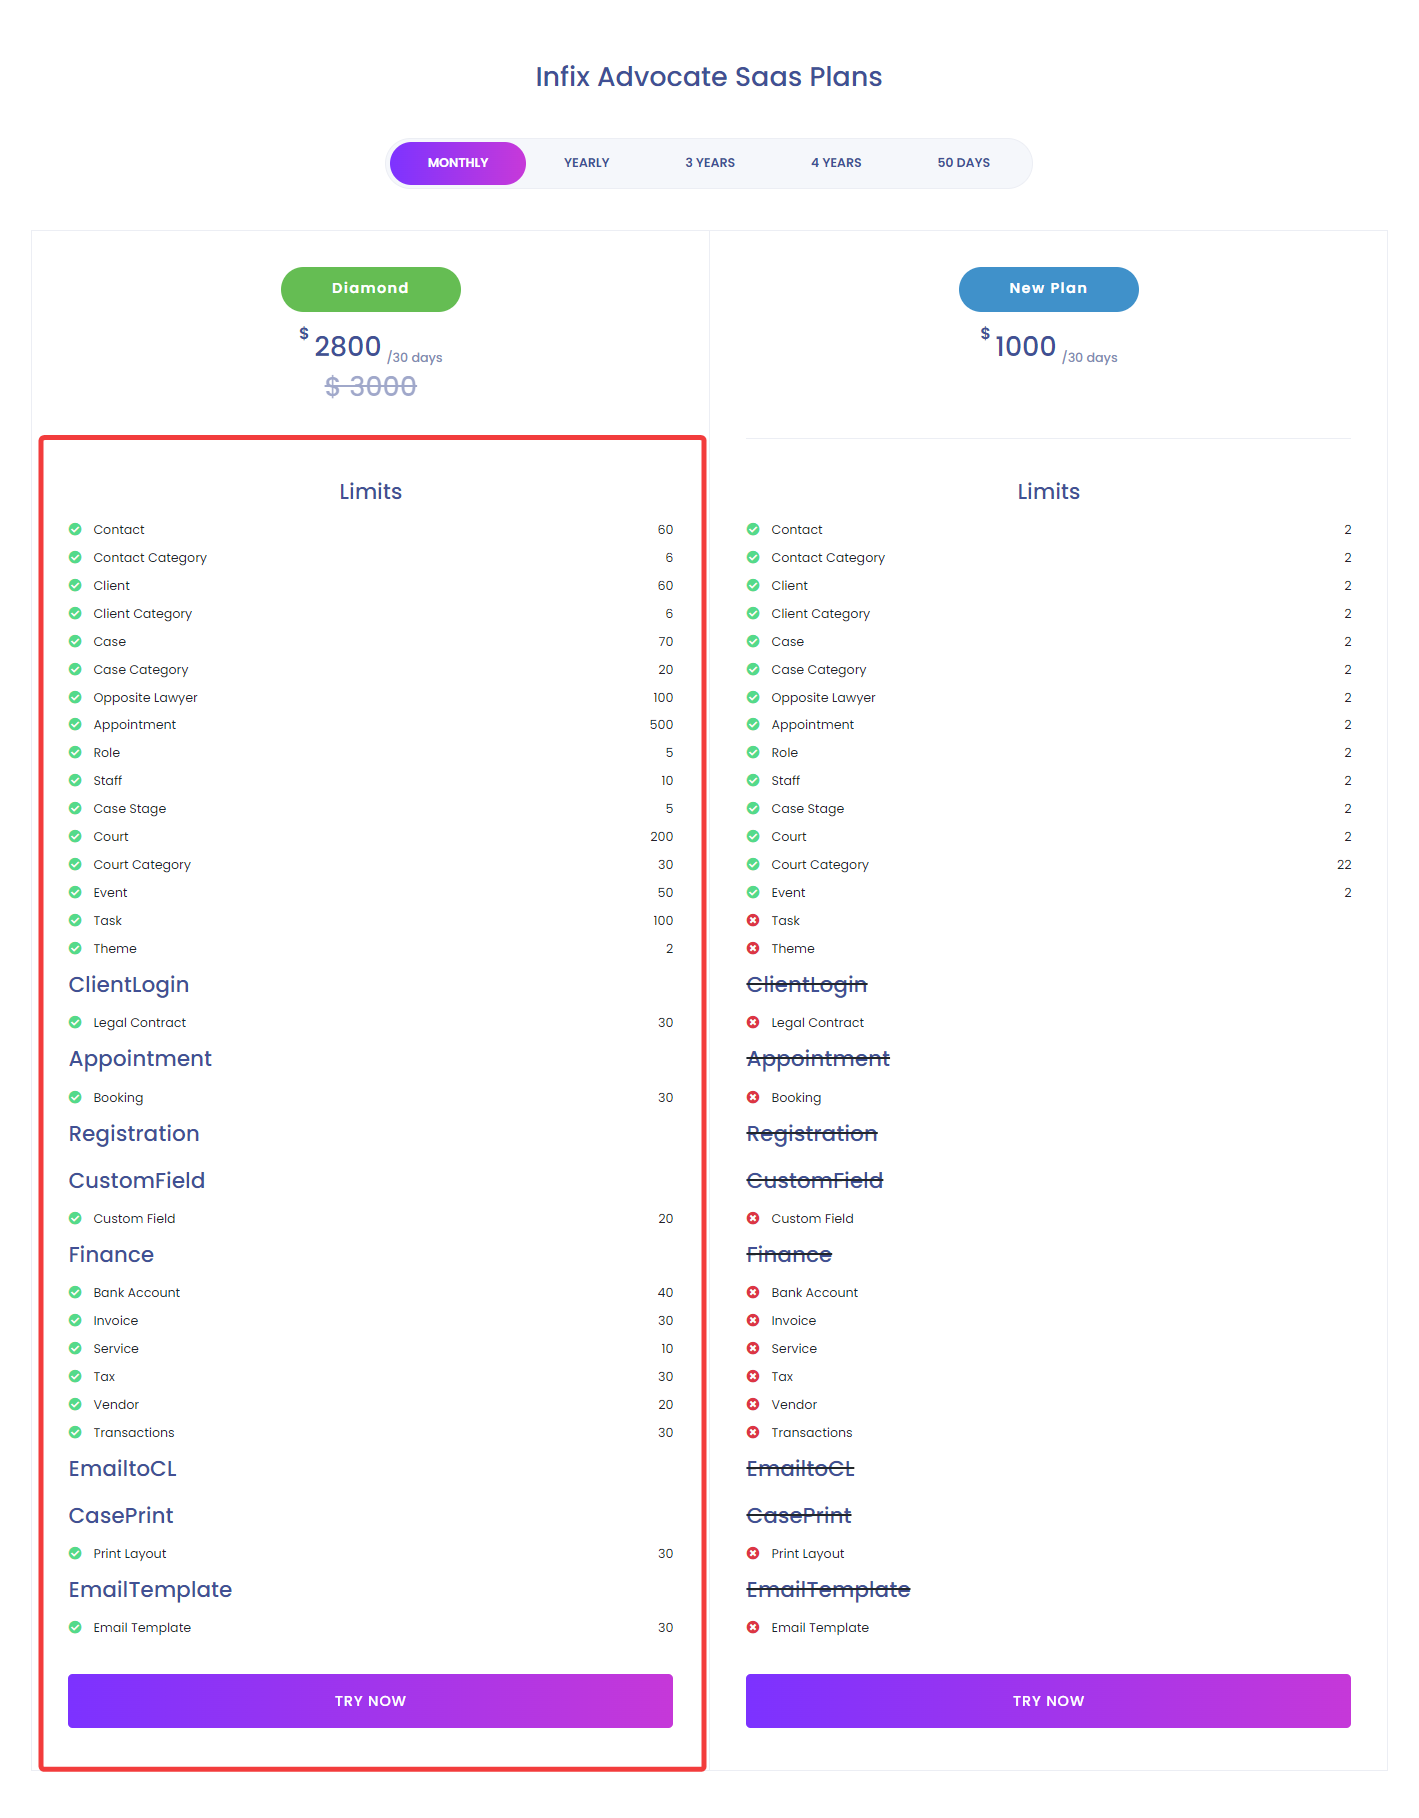
You can set limits on your plans in this section.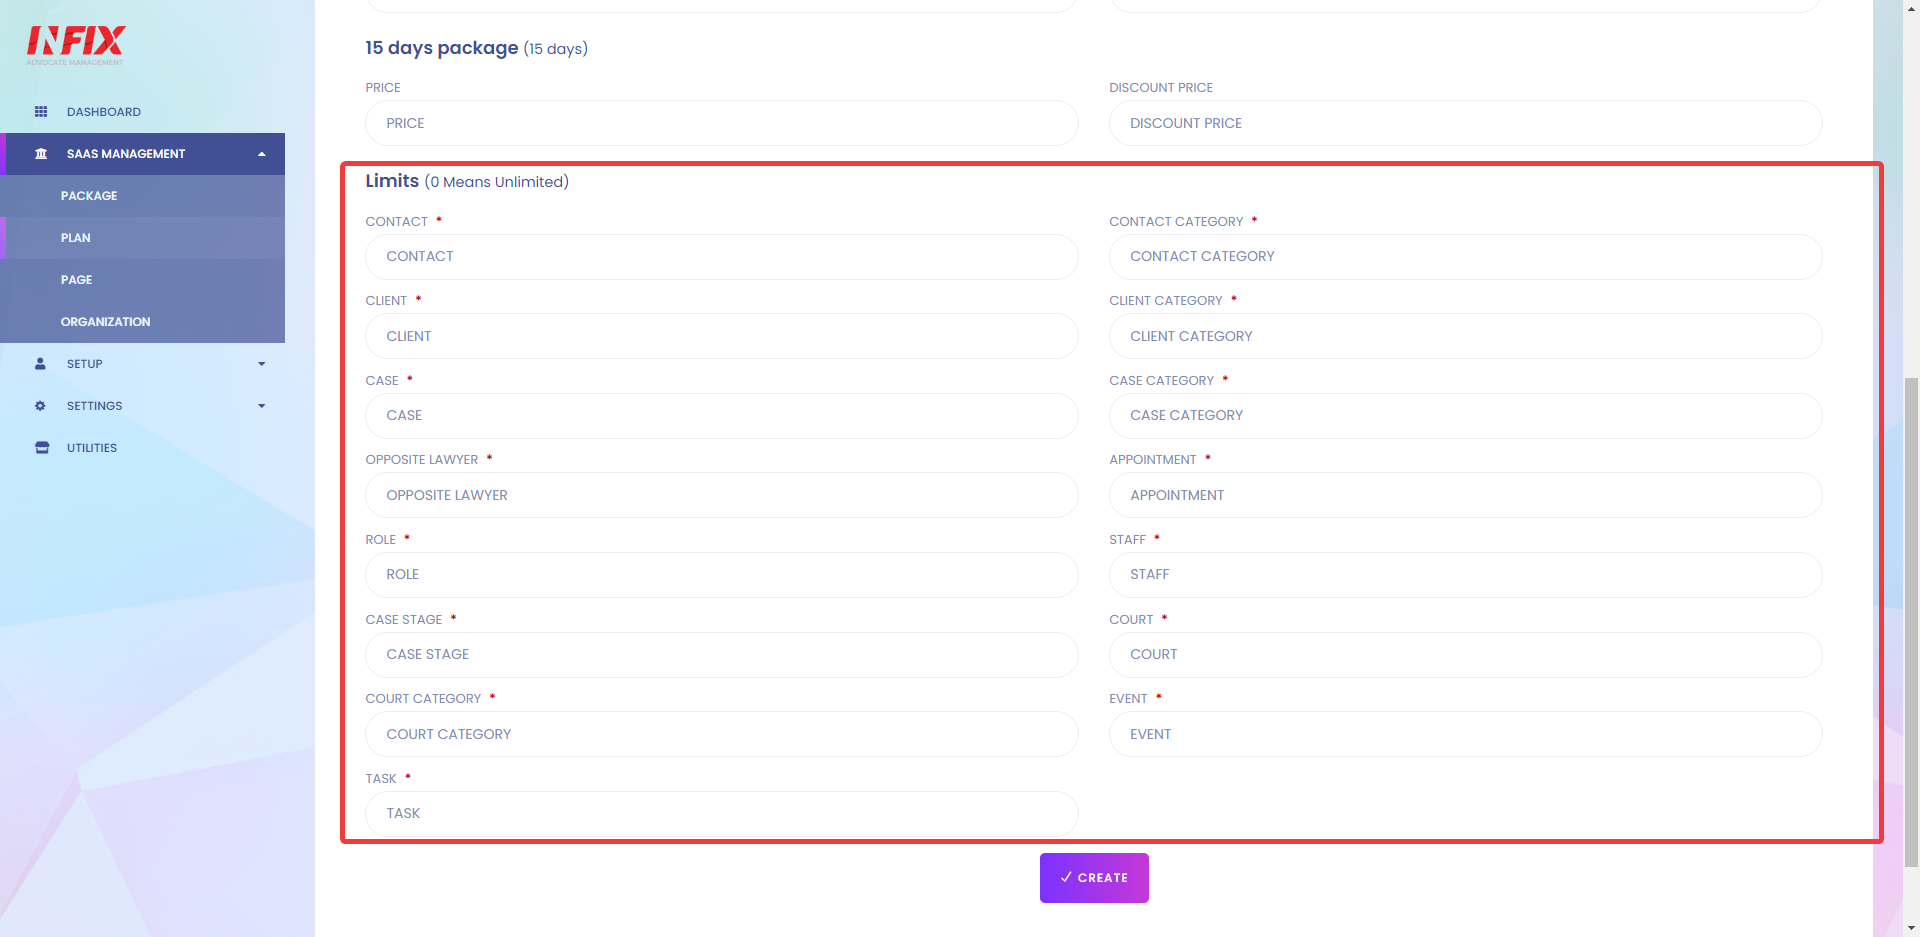
You can set limits on CONTACT[1], CONTACT CATEGORY[2], CLIENT[3], CLIENT CATEGORY[4], CASE[5], CASE CATEGORY[6], OPPOSITE LAWYER[7], APPOINTMENT[8], ROLE[9], STAFF[10], CASE STAGE[11], COURT[12], COURT CATEGORY[13], EVENT[14], TASK[15].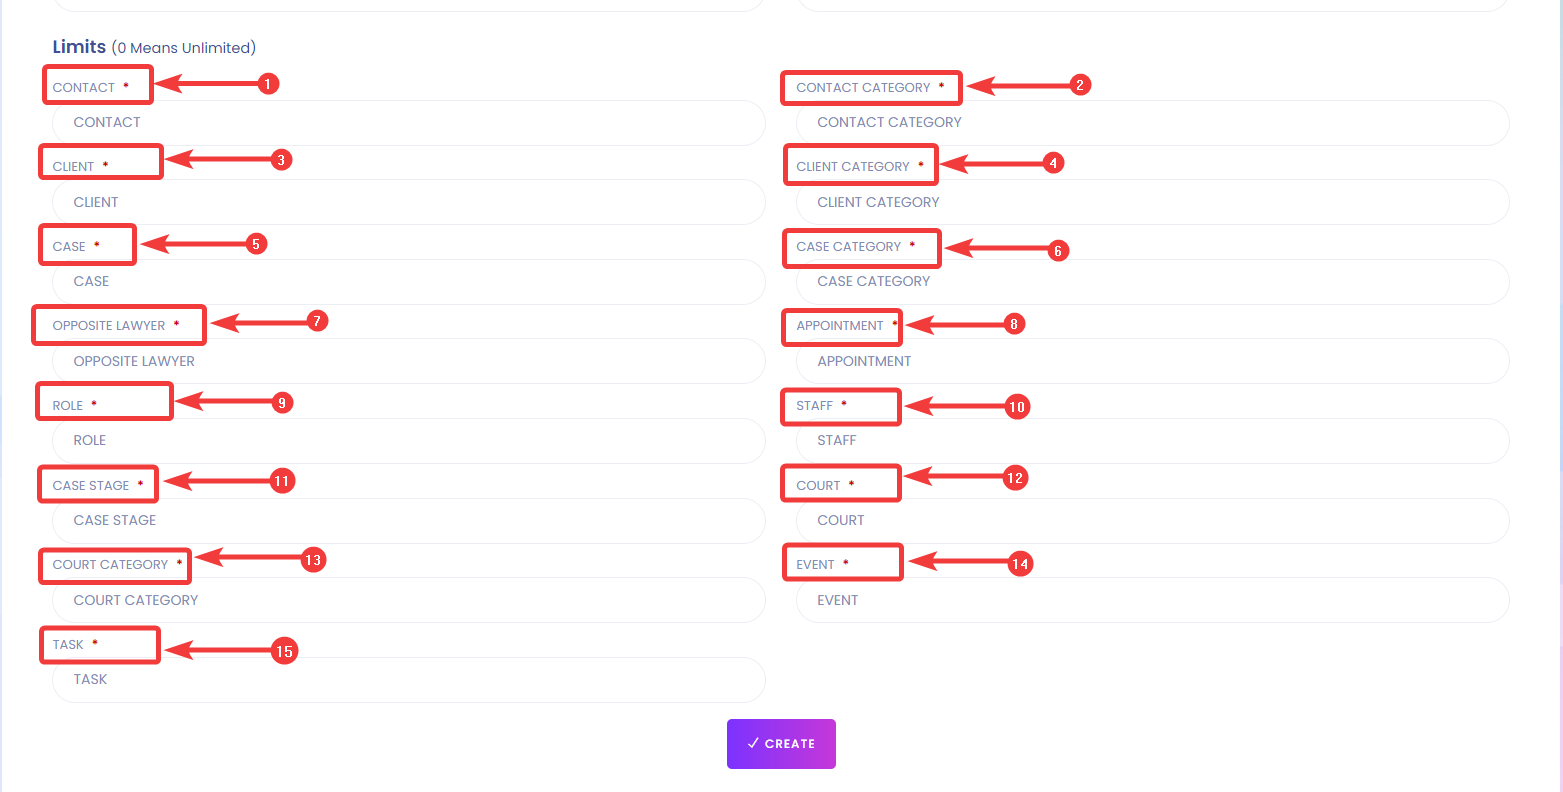
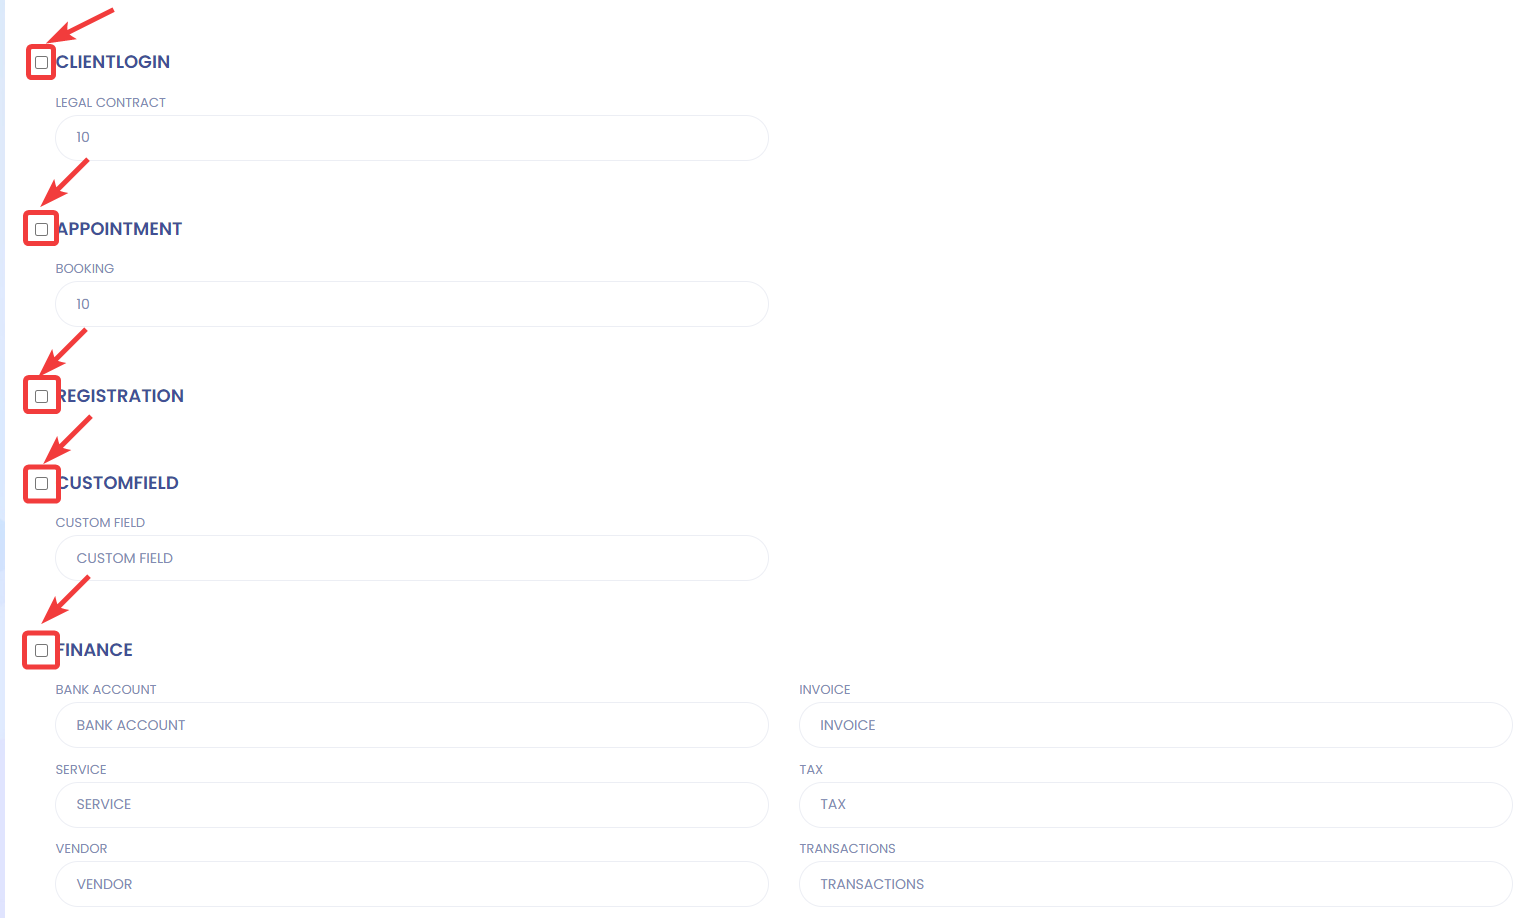
You can also Grant access to modules under a specific plan such as Client Login, Appointment, Registration, Customfield, Finance, Emailtocl, Caseprint, and Email Template with your plans.
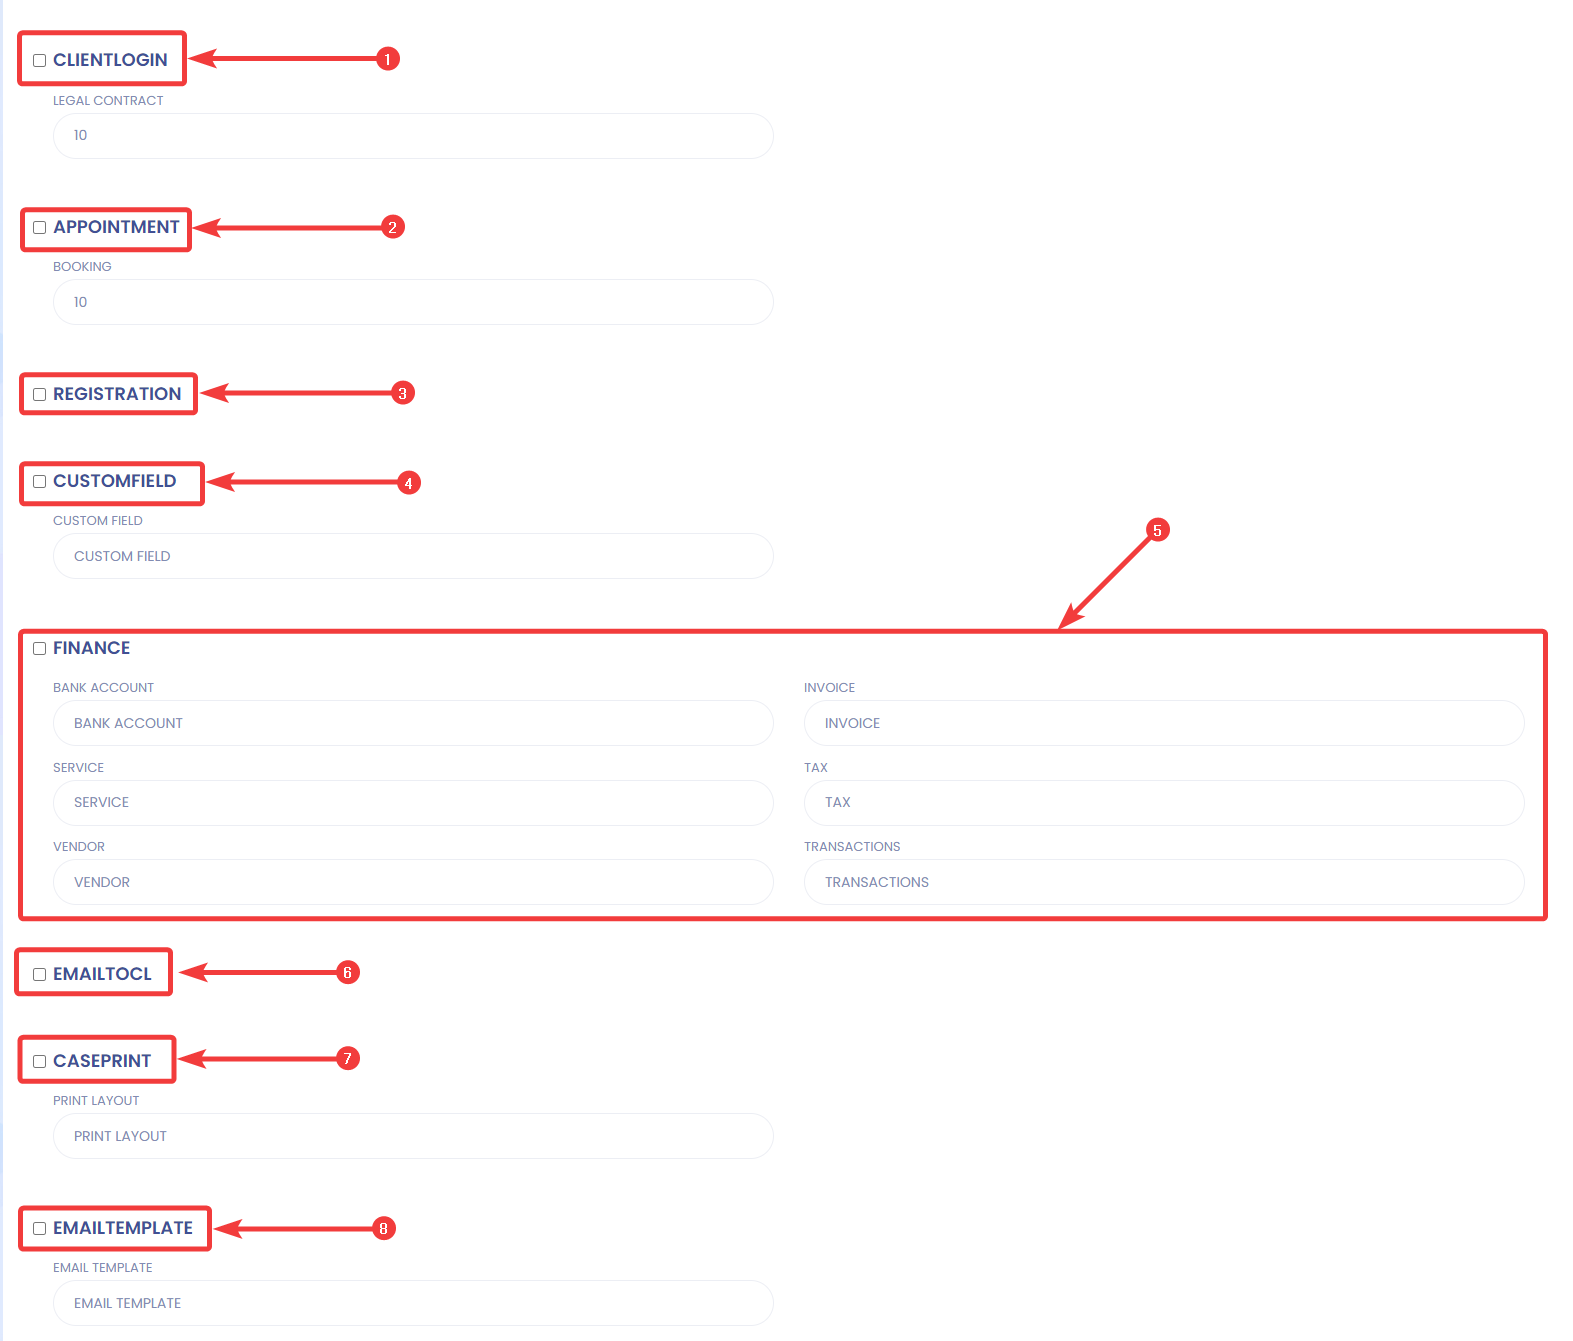
To grant access to modules under this Plan, just click on the checkboxes you see before the feature's name.
Finally, To save your Plan, just click on CREATE.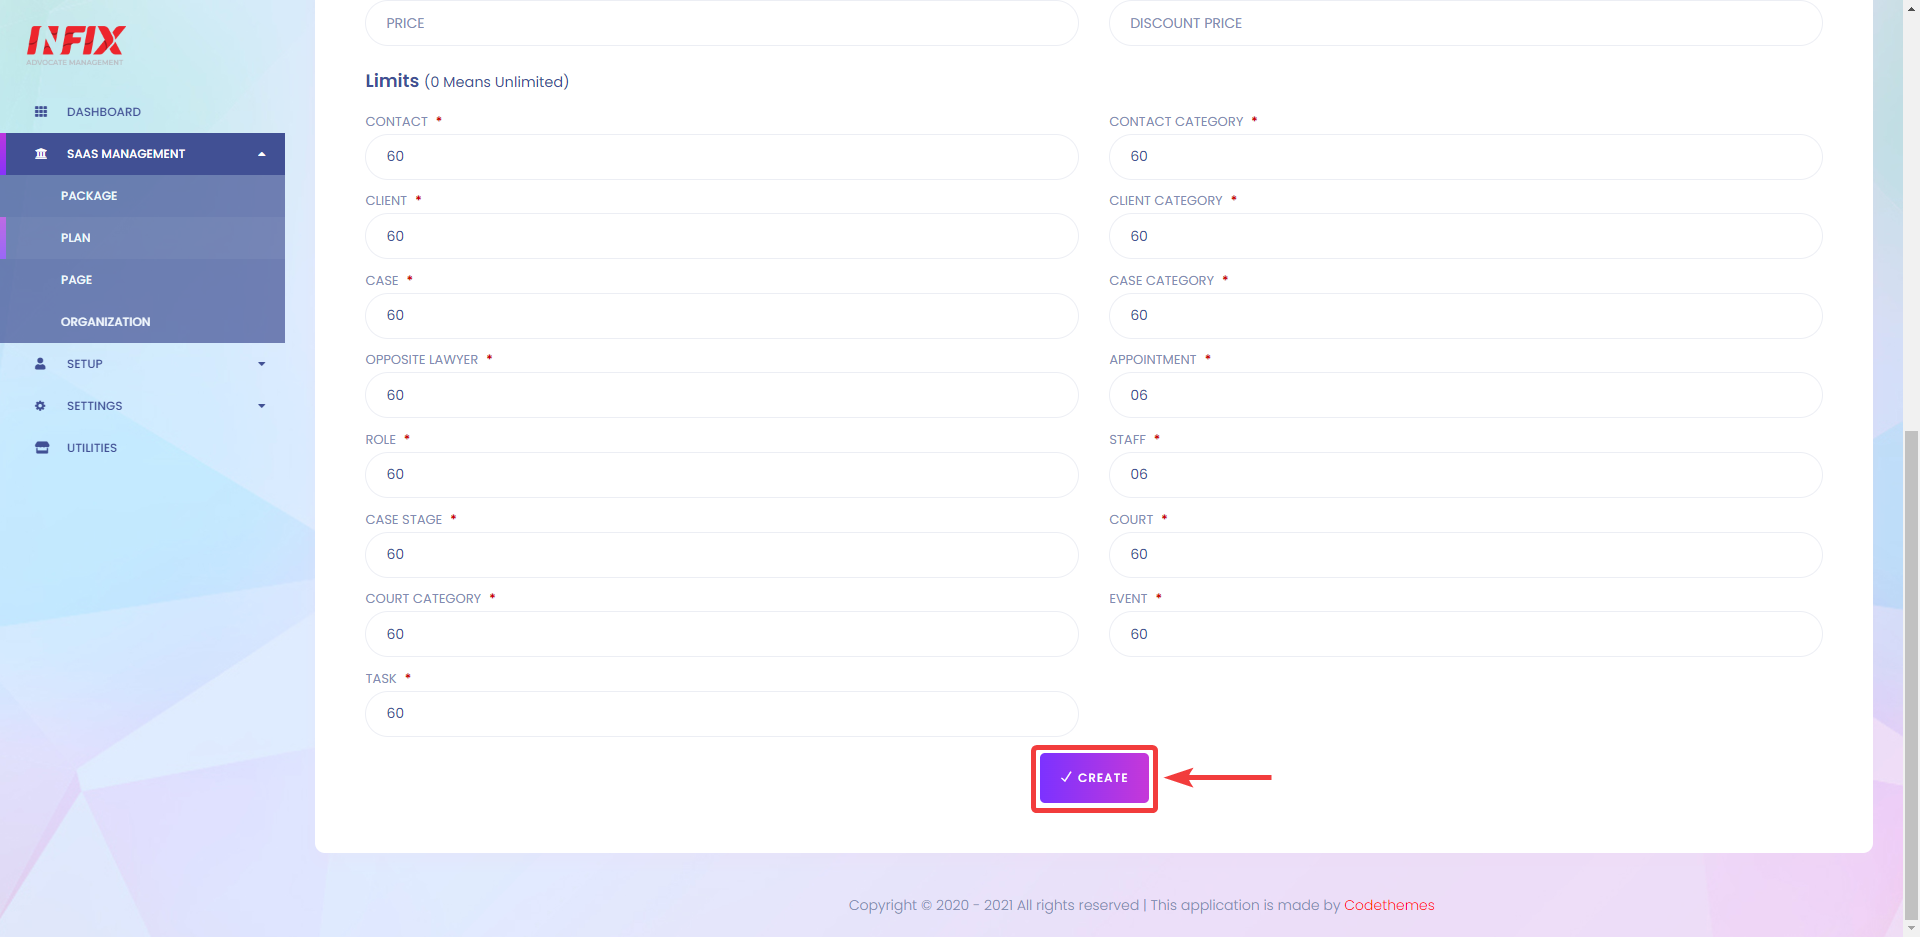
After clicking on CREATE, You will be able to see the list of all plans.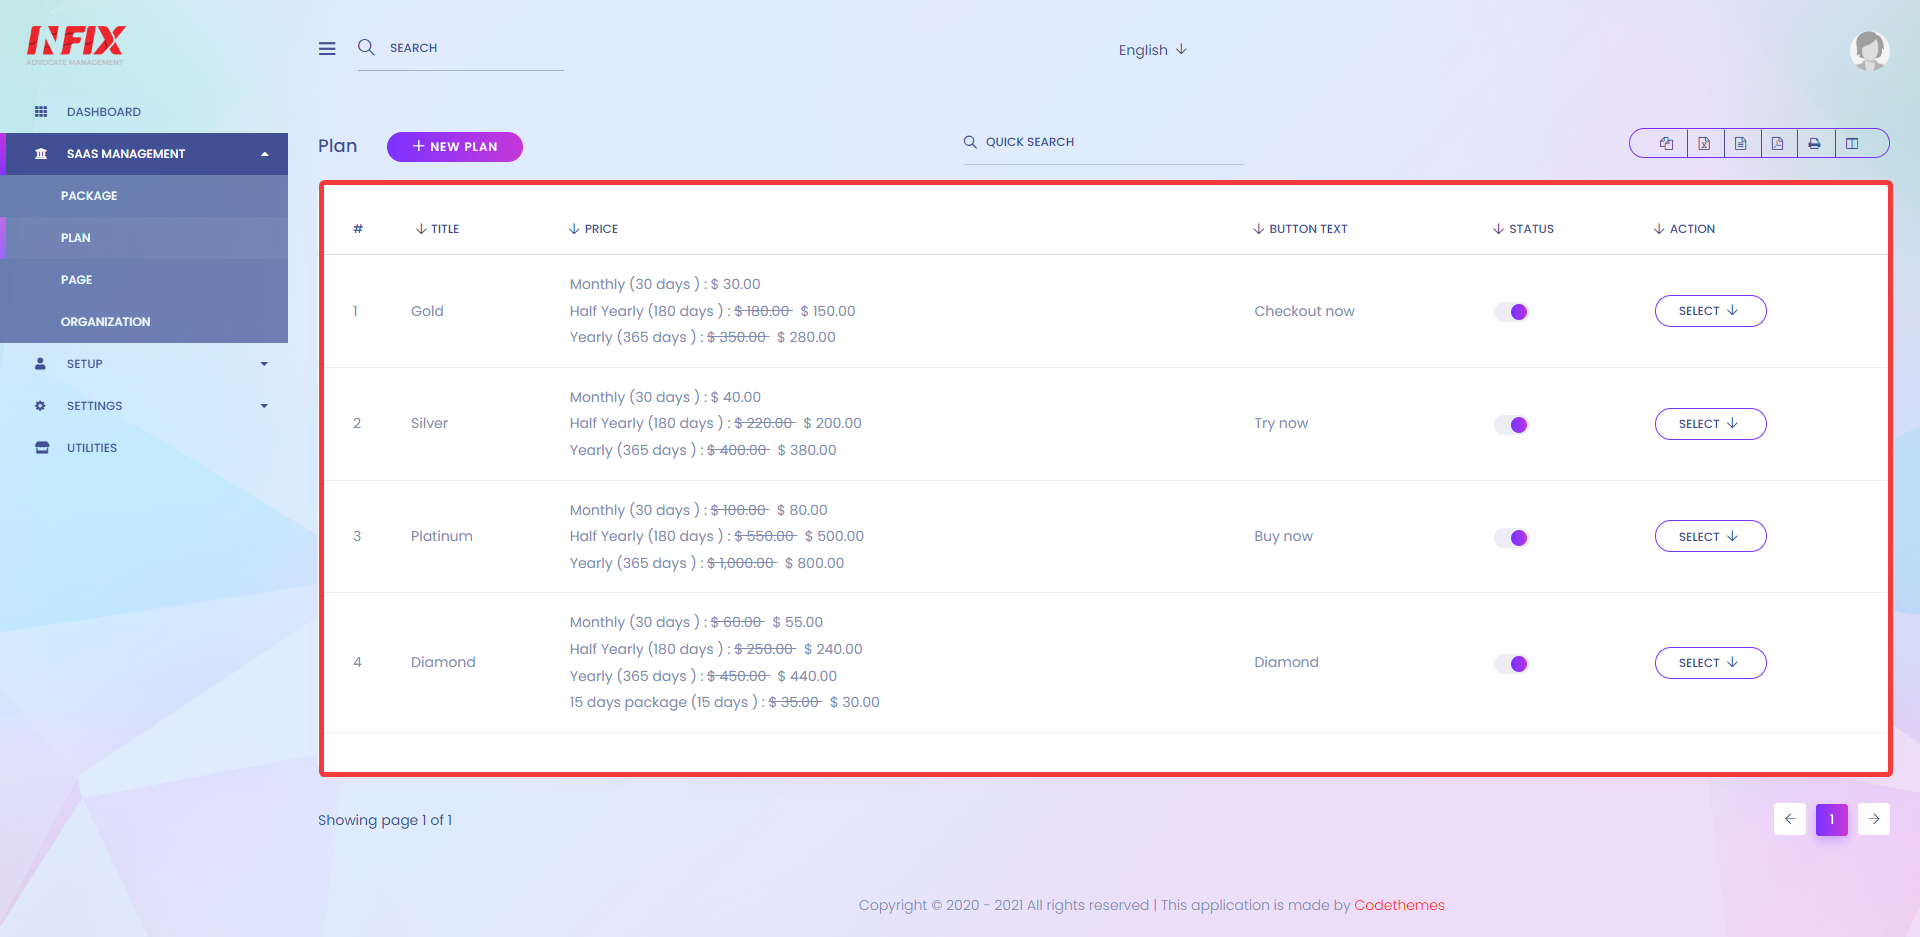
You can review the status of your Plan here. 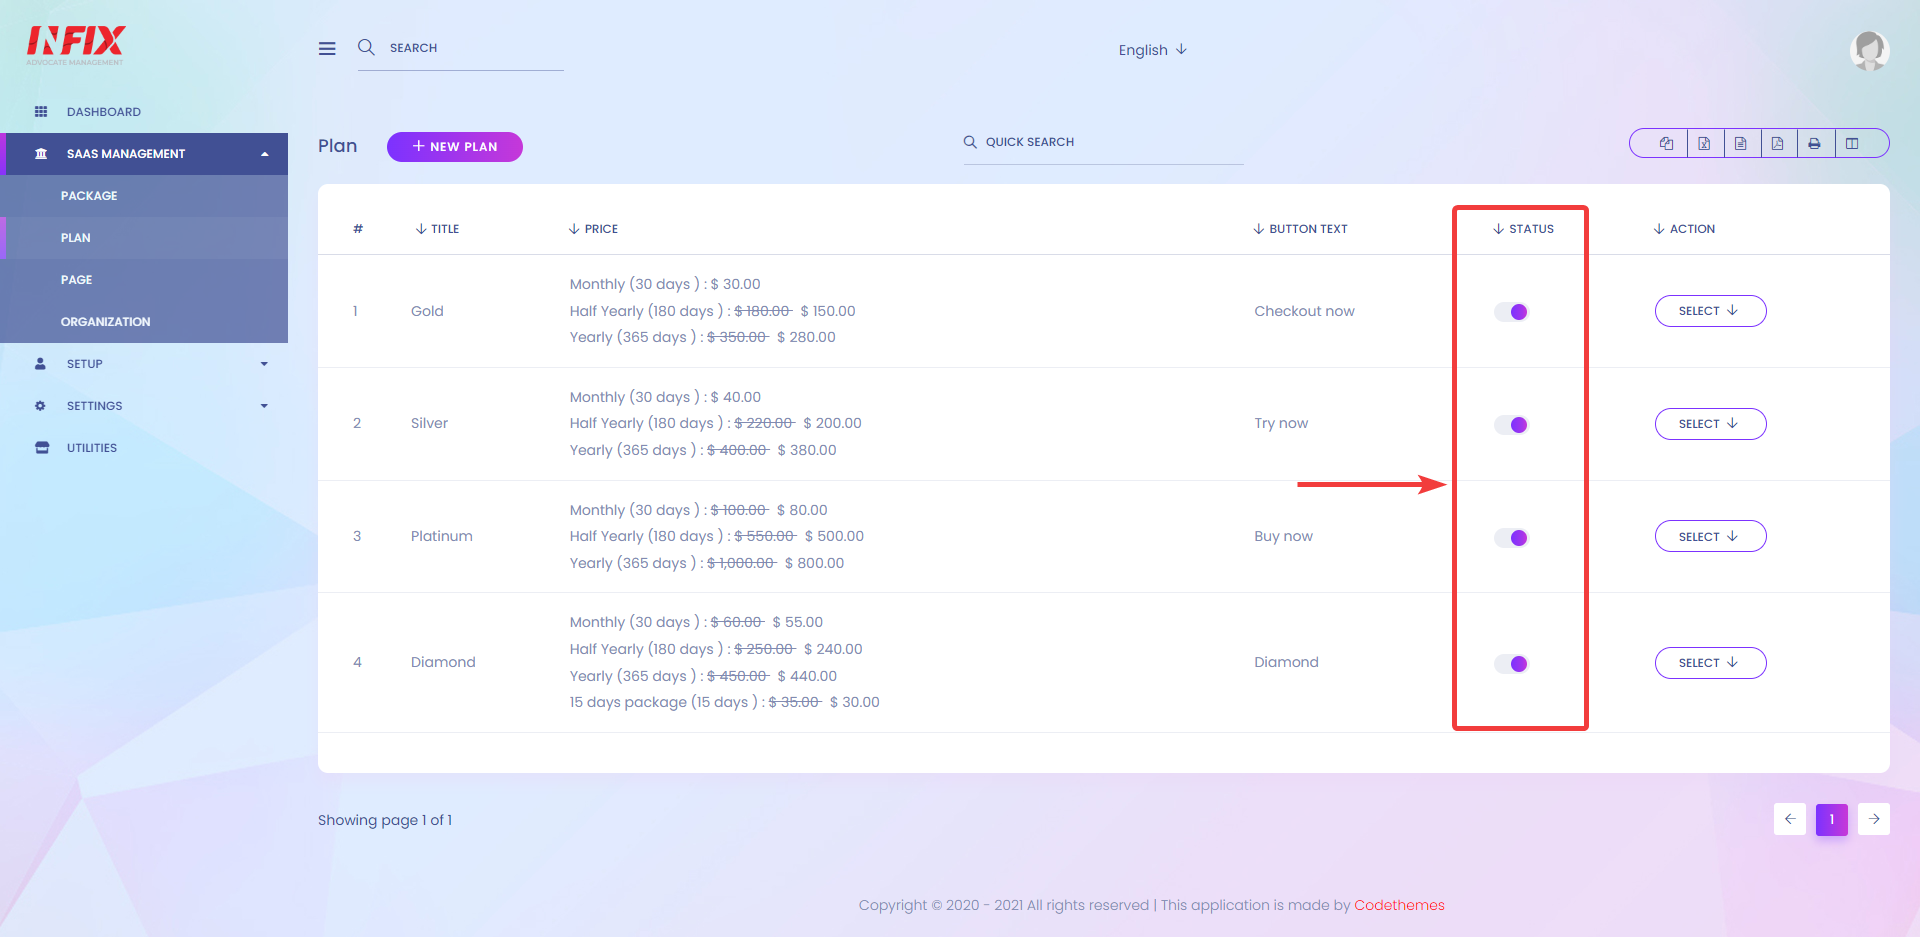
You can activate/deactivate your plans by clicking on the slide button.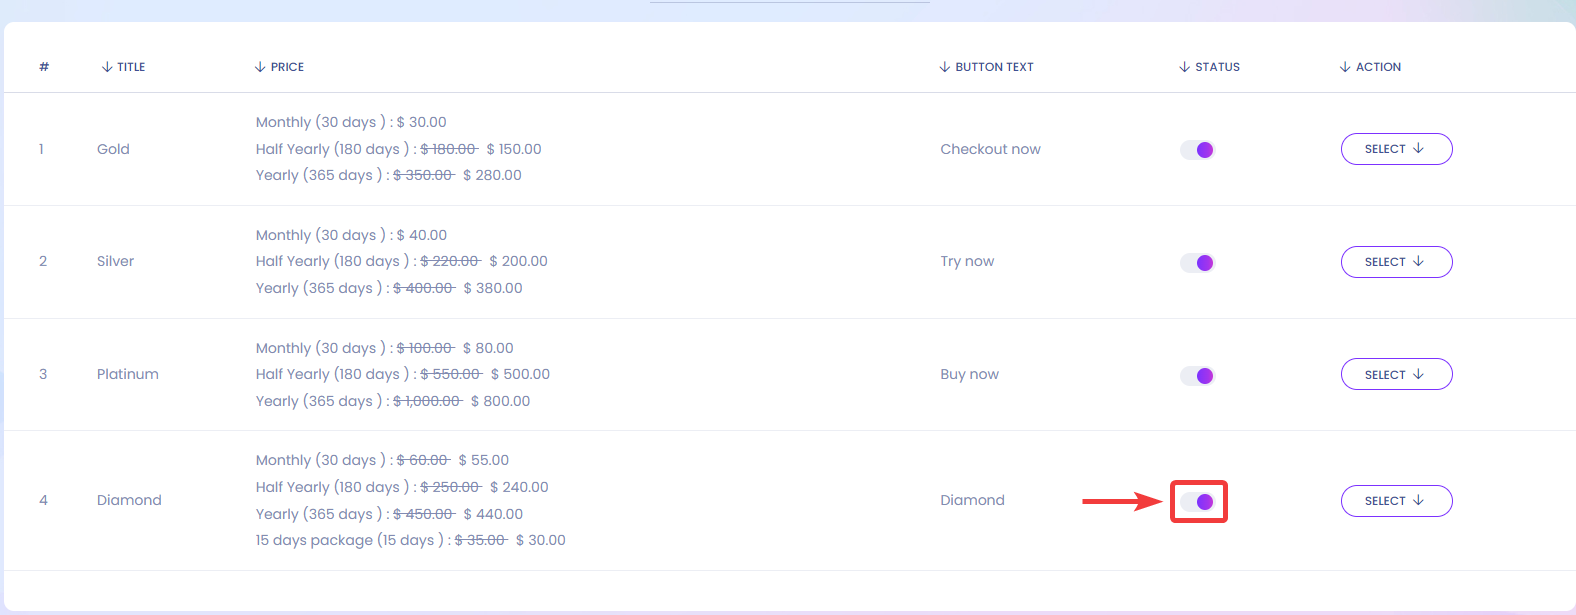
After you activate your plans, you will be able to see that it's added to your website's home page. Your users will be able to see the feature you are offering and the module they will get access to with that specific Plan.