7th Mar, 2025
Journal
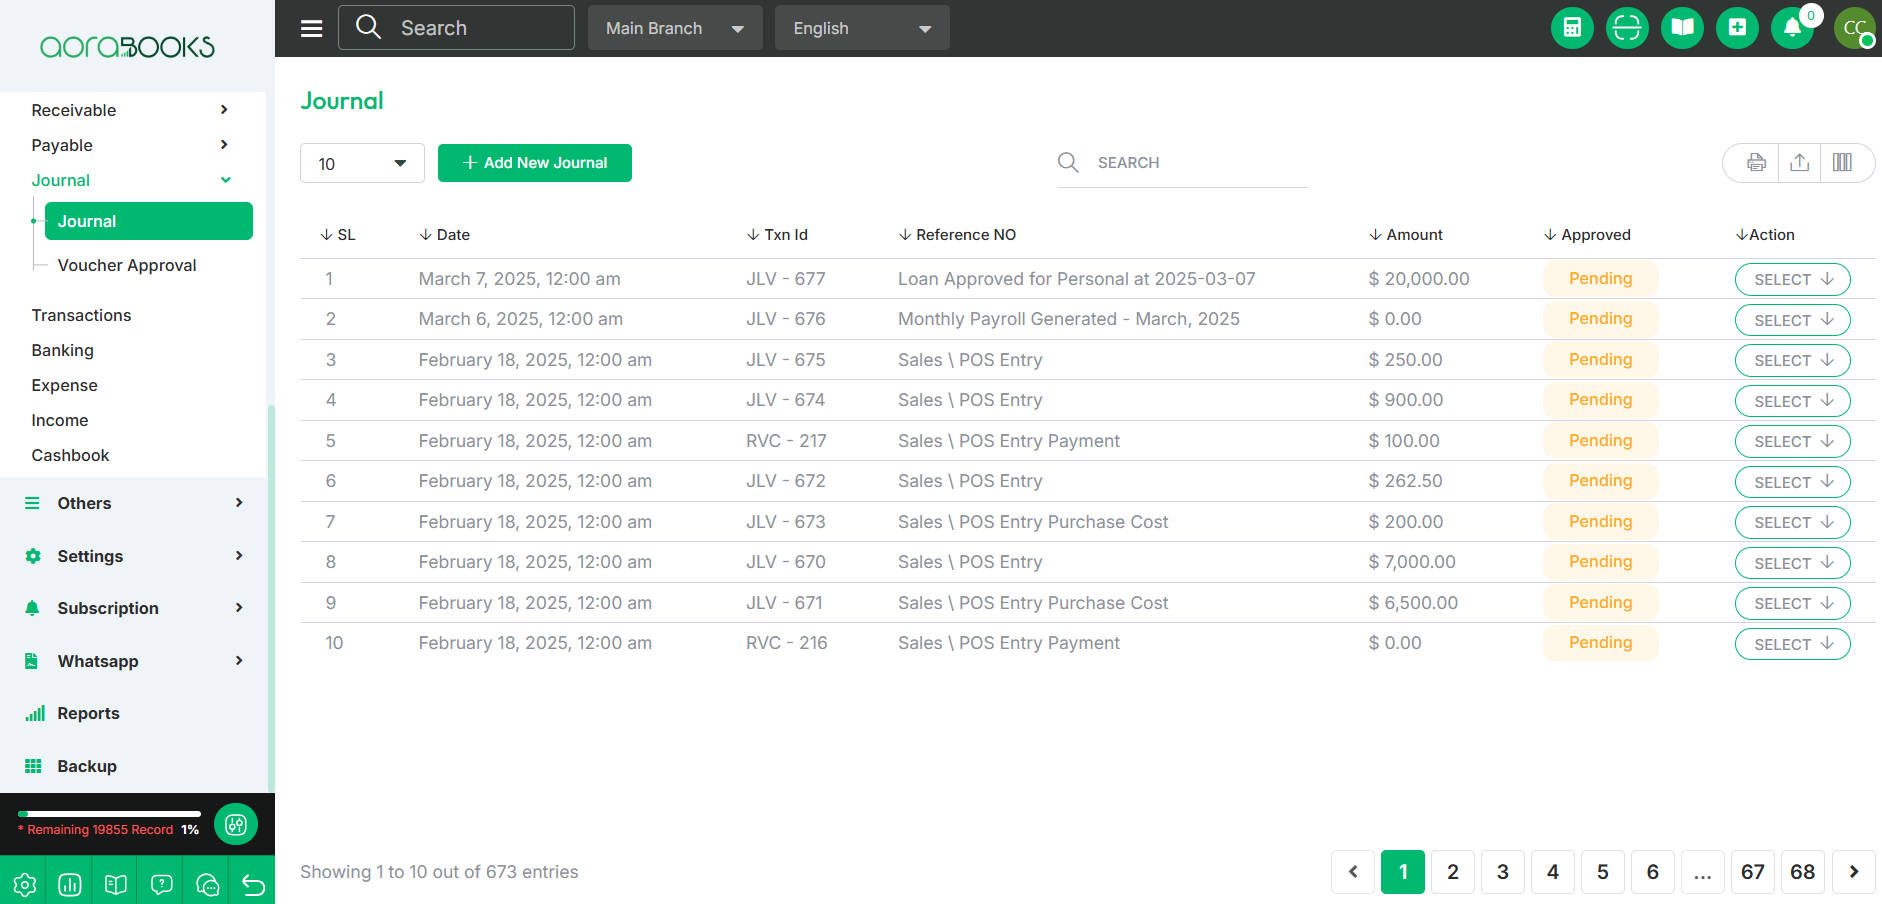
A Journal records all financial transactions in chronological order. From here, you can view all journal entries with details such as:
Date: The date of the transaction.
Txn ID: The unique transaction identifier.
Reference No: The reference number associated with the transaction.
Amount: The total amount of the transaction.
Approved: The approval status of the transaction.
Actions: By clicking this, you can perform multiple actions.

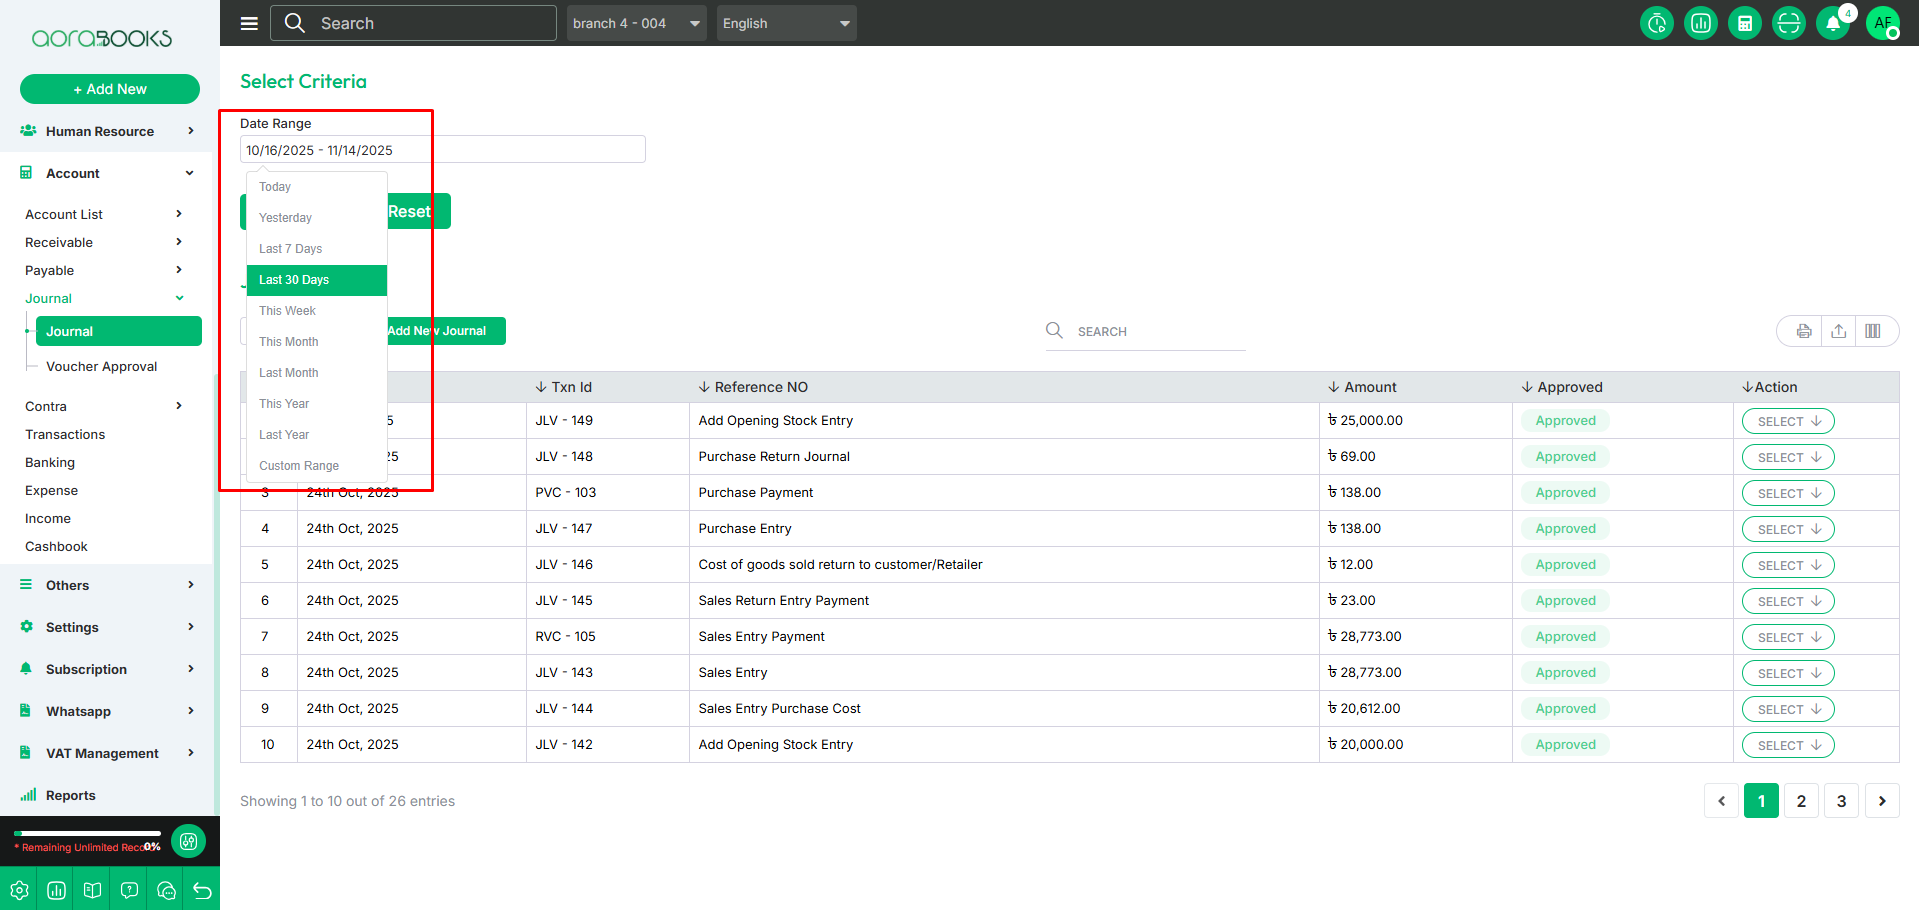
Date range: Select a specific date range to find your journal transaction.

Search: You can find a specific journal entry from the list using the search functionality.

Export Data: You can export the data table from here.

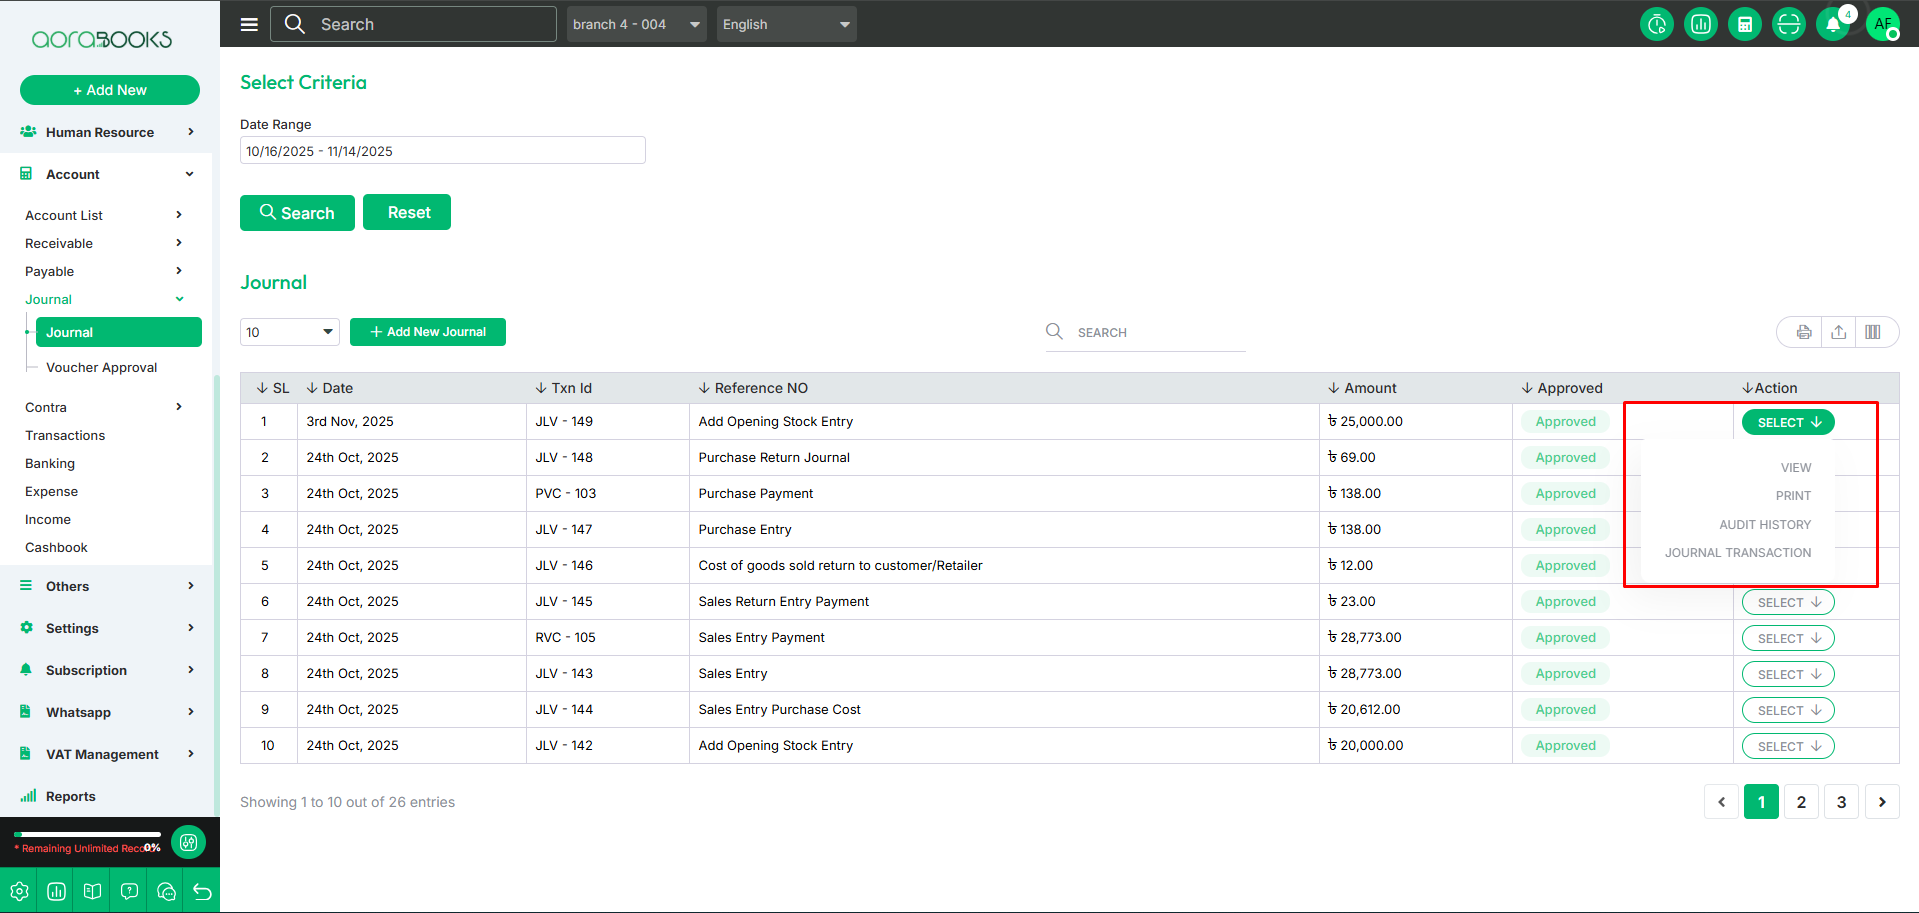
By clicking the select button, you can perform multiple actions such as:
View: See the details of the journal entry.
Print: Print the journal entry.
Audit History: View the audit log of changes.
Journal Transaction: See the related journal transactions.

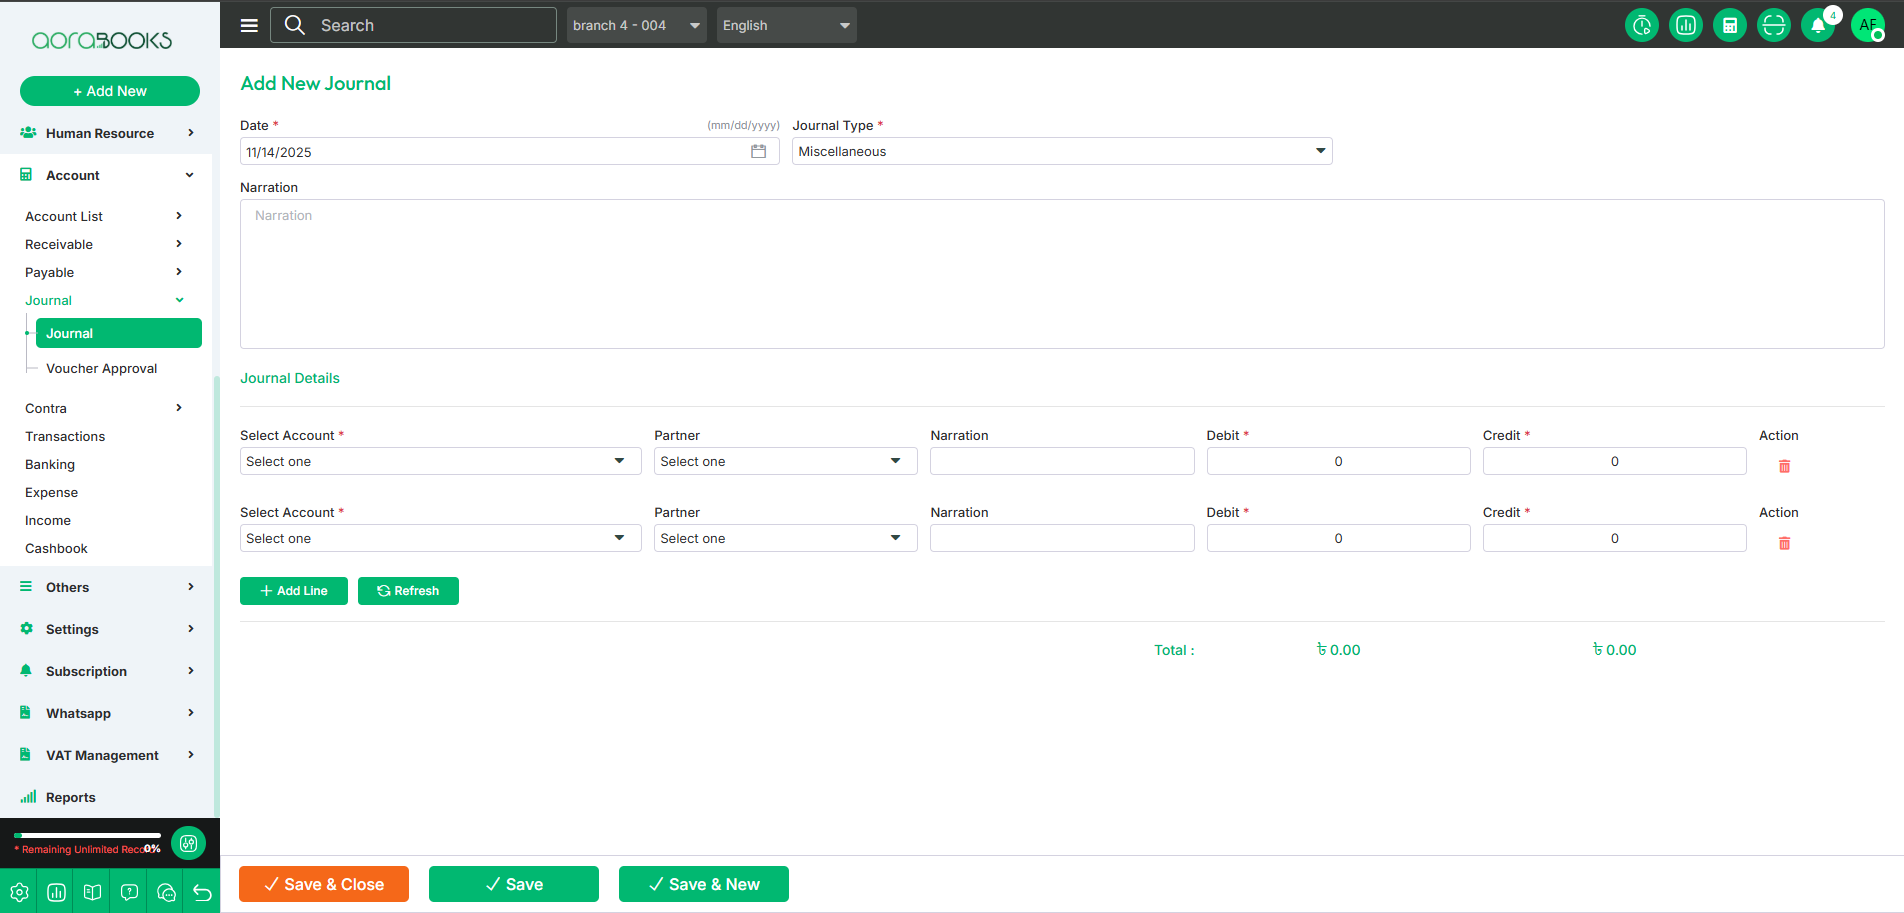
Add New Journal: By clicking this button, you can add a new journal entry. To do that, follow these steps:
Date: Set the date of the journal entry.
Journal Type: Choose the type of journal entry.
Narration: Enter relevant details about the transaction.
Select Account: Choose the account for the transaction.
Select Partner: Pick the partner associated with the transaction.
Narration: Enter relevant details about the transaction.
Debit: Enter the debit amount.
Credit: Enter the credit amount.
Add Line: Add more transaction details.
Action: Action for deleting the journal line.
Refresh: Update the journal entry.
Save: Save the journal entry.
Save & New: Save and create a new journal entry.
Save & Close: Save and exit the journal entry form.
