Income
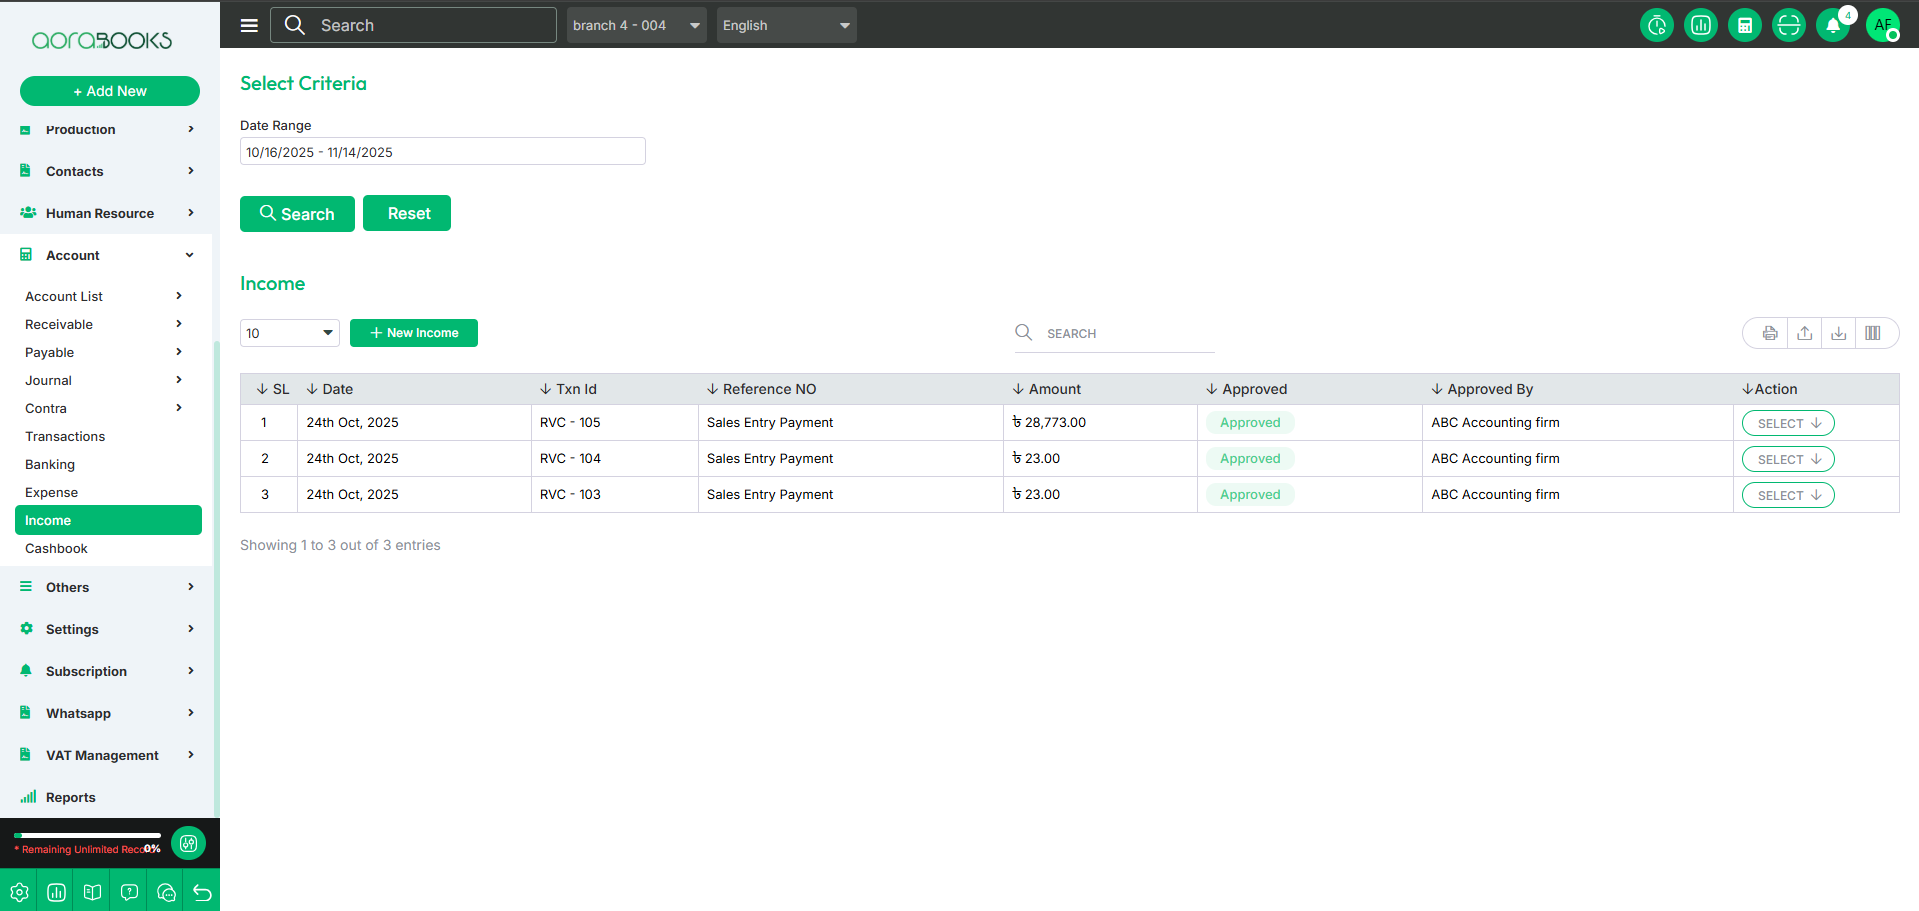
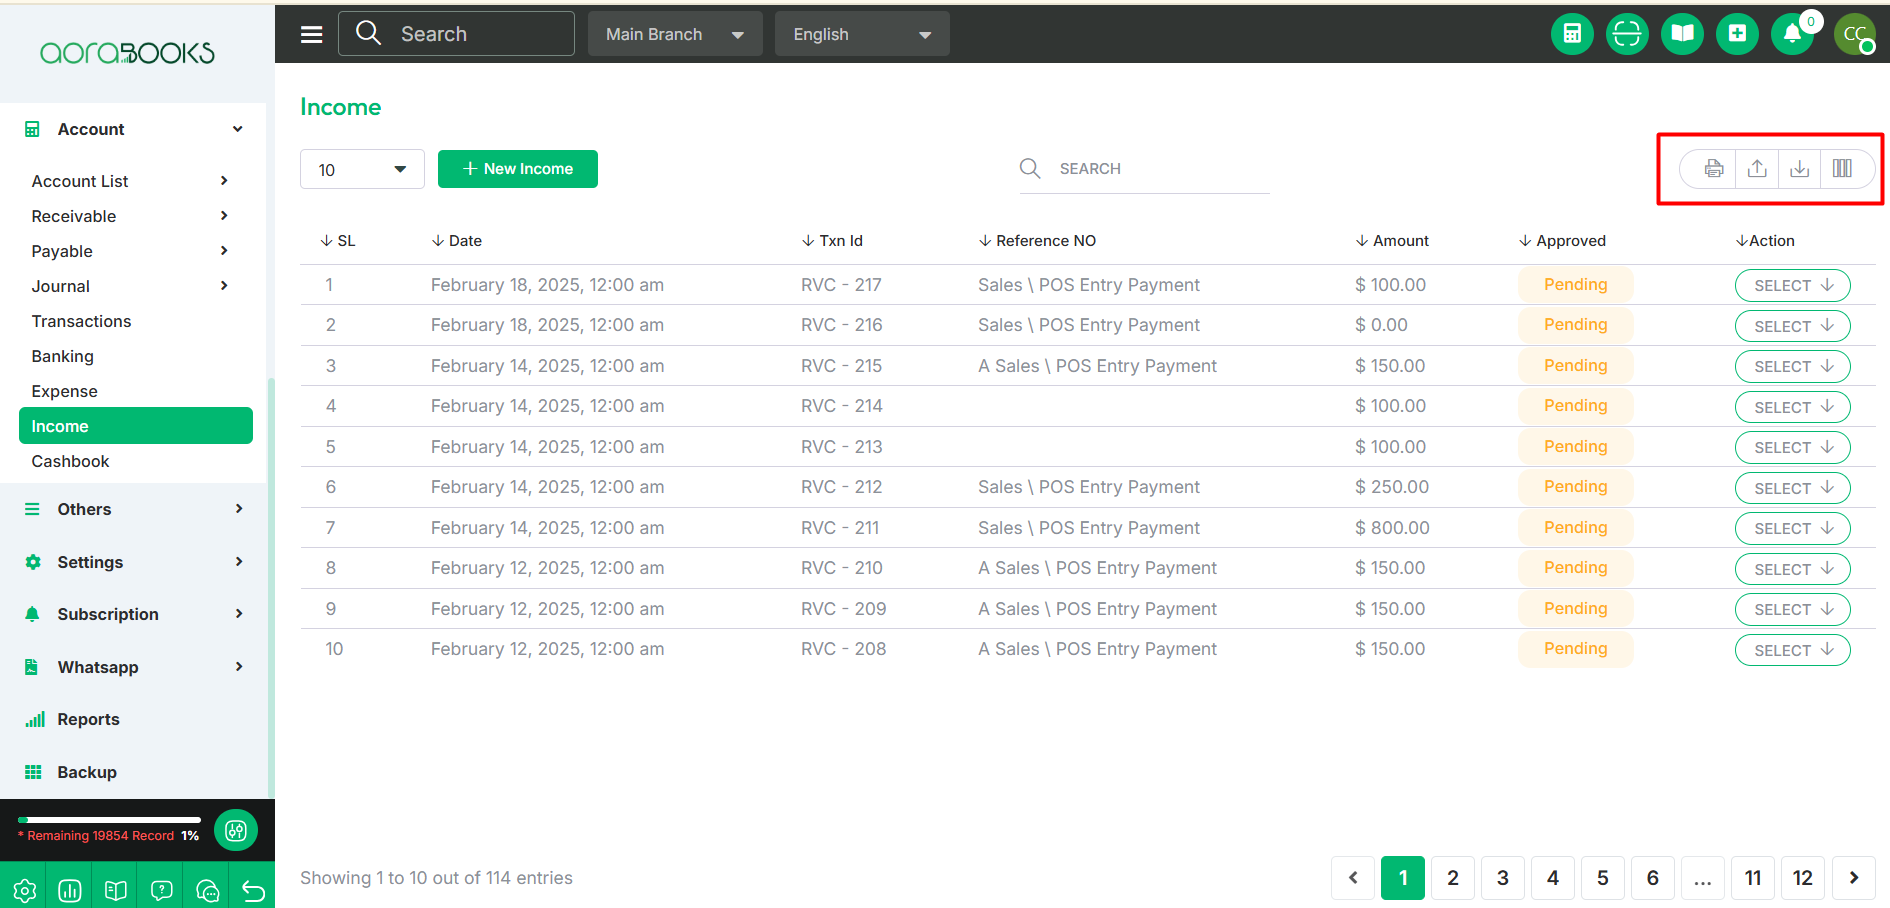
Income refers to the money received by a company or individual for goods sold, services provided, or other business activities. In this section, you can view and manage all income-related transactions. The details typically include:
Date: The date of the income transaction.
Txn ID: Unique identifier for the transaction.
Reference No: Reference number related to the income.
Amount: The total amount received.
Approved: Indicates if the income is approved or pending.
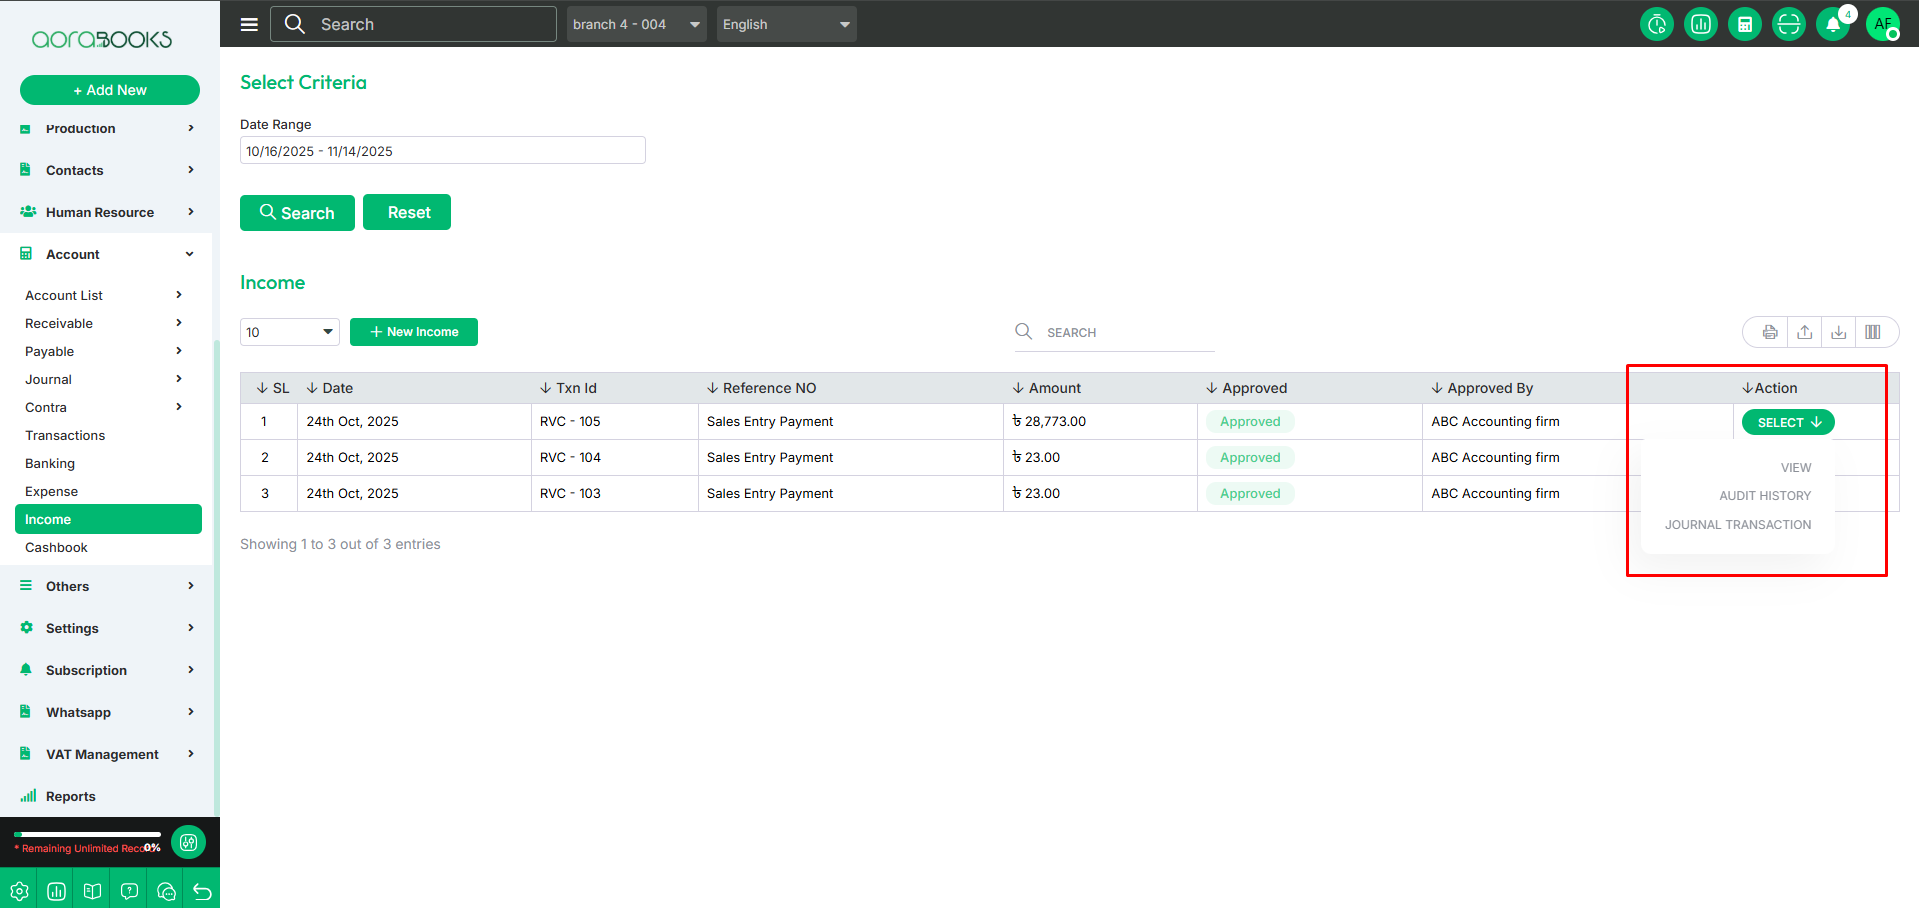
Approved by: Indicates the person who authorized the income.
Actions: Options to view, edit, or perform other actions related to the income transaction.
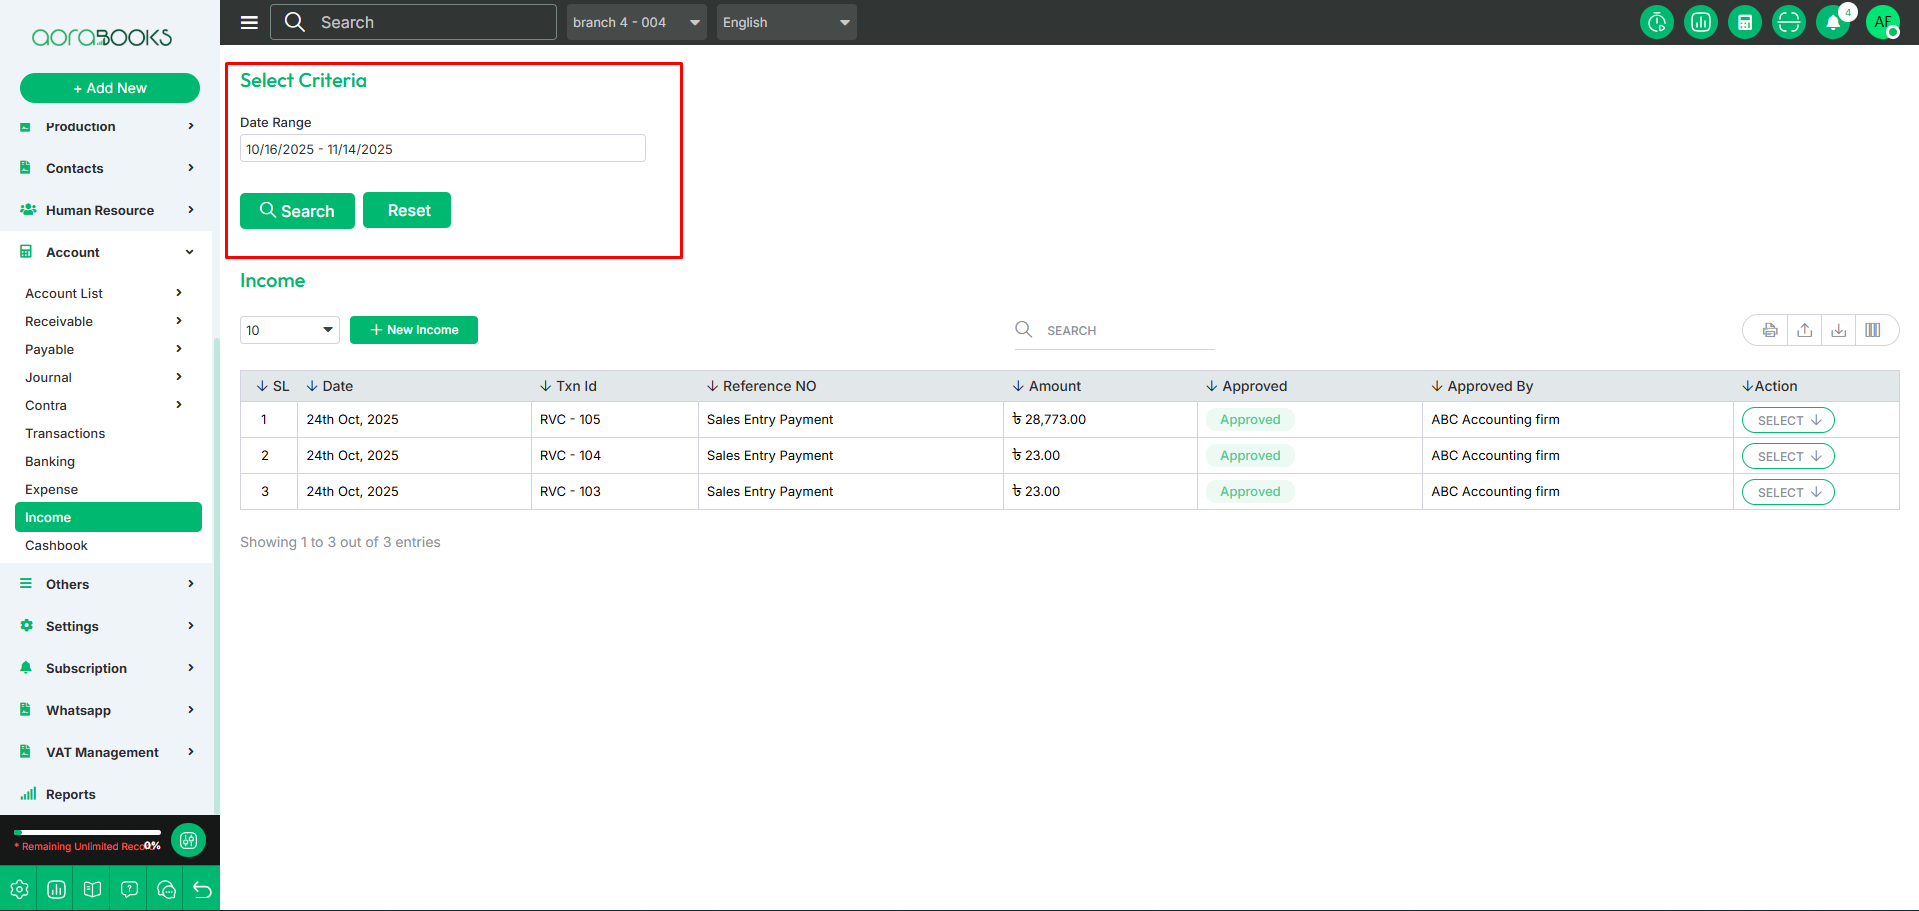
Date range: Select a specific date range to find your income transaction within the period.
Search: You can find out any specific income from the income list by using the search functionality.
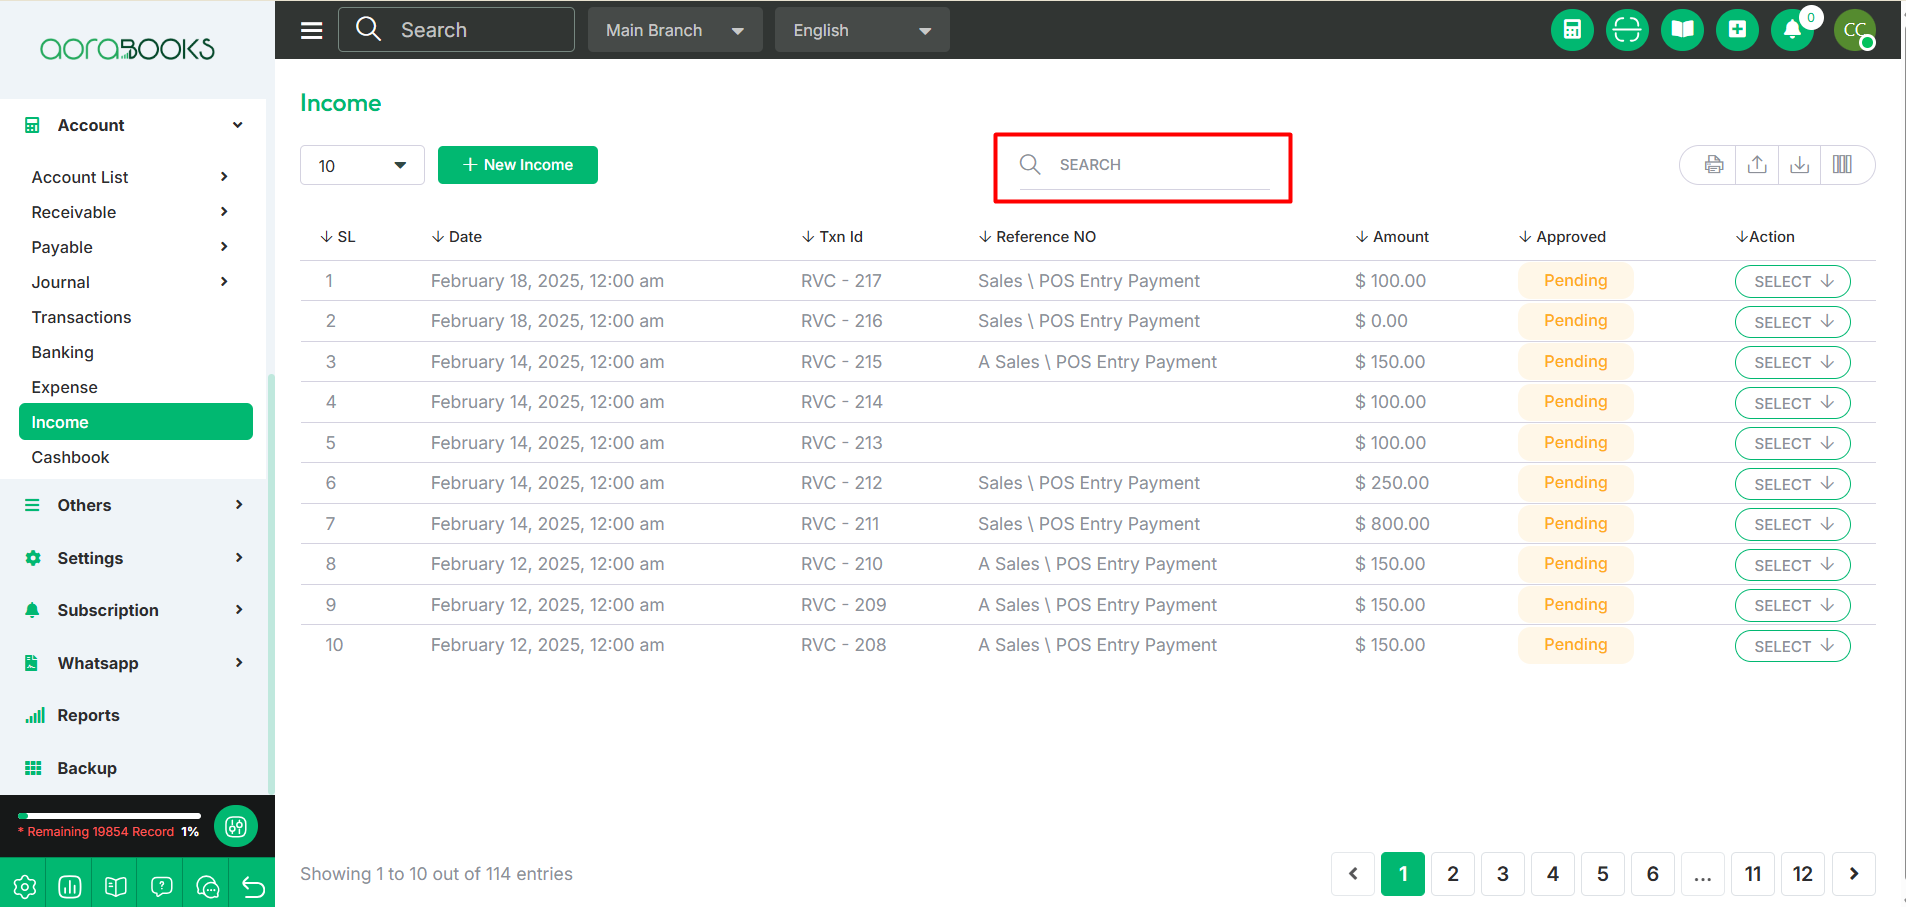
Export Data: You can export the data table from here.
By clicking the Select button, you can perform multiple actions, such as:
View: See the details of the income transaction.
Audit History: Track any changes or actions taken on the income entry.
Journal Transaction: View or link the journal transaction associated with the income.
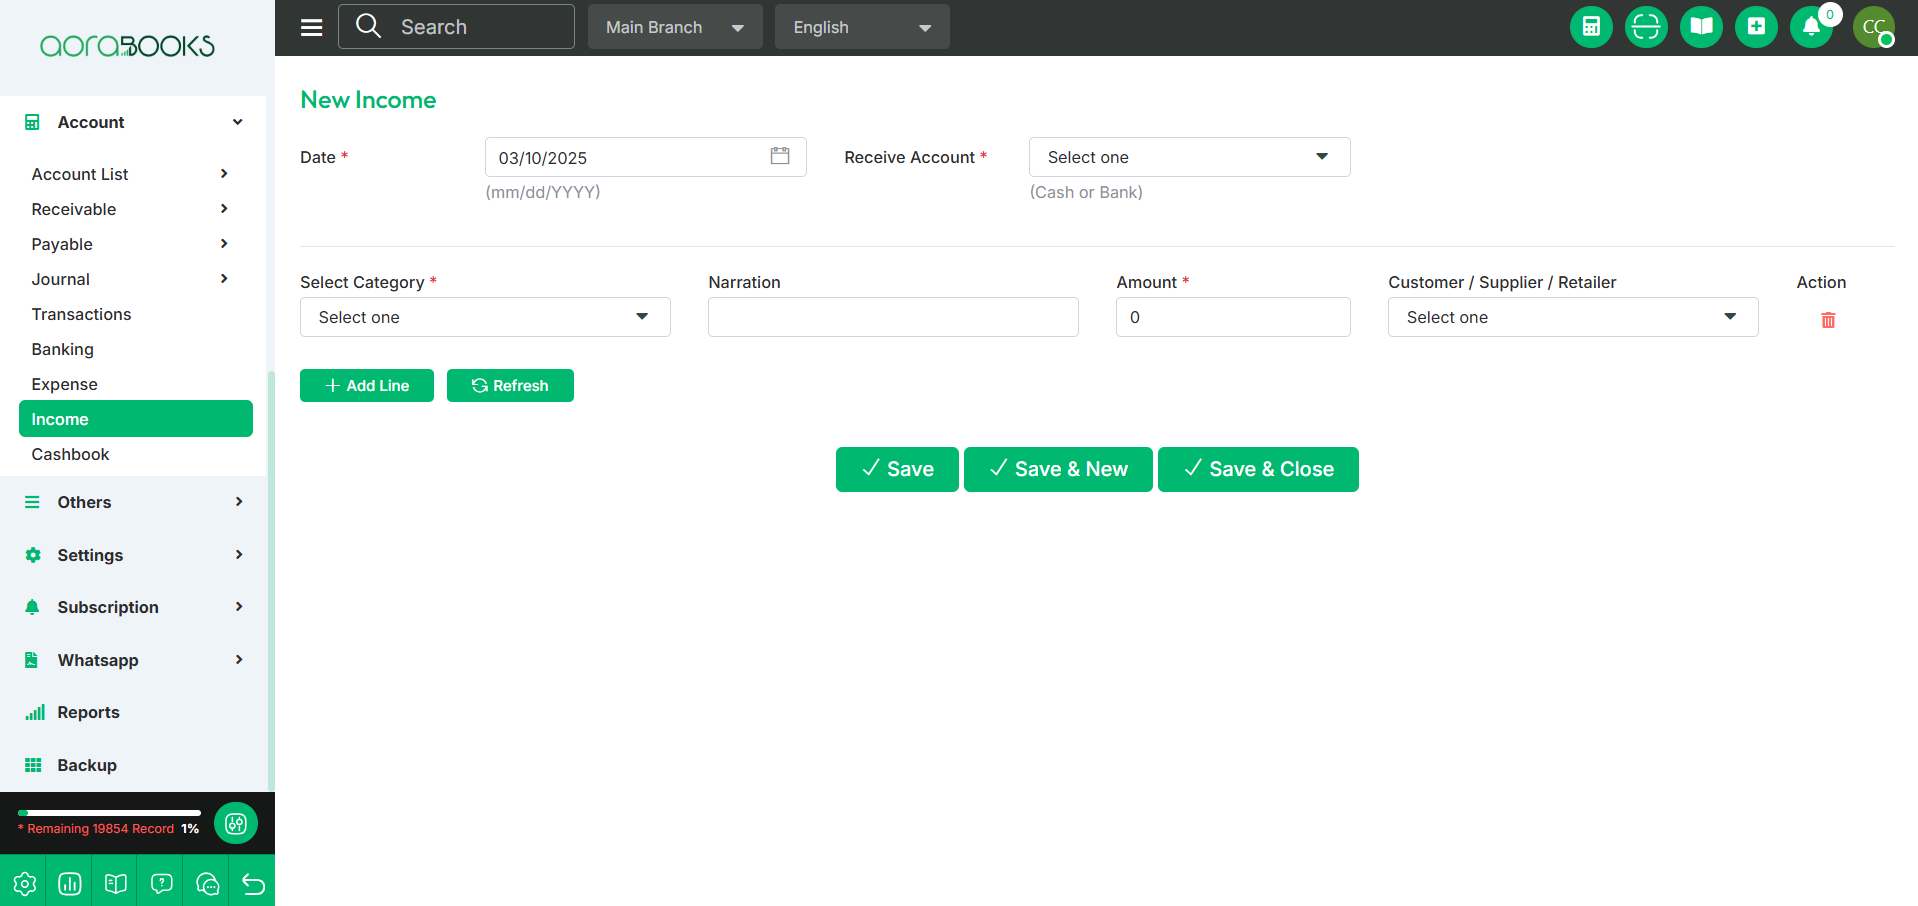
New Income: To create a new income, just click on the button. After clicking the button, just follow the steps below:
To add a new Income, follow the steps below:
Date: Select the date of the income transaction.
Receive Account: Choose the account where the income is received.
Select Category: Pick the category related to the income.
Narration: Enter a description or note about the income.
Amount: Input the total amount received.
Customer/Supplier/Retailer: Select the relevant party involved.
Action:From here you perform delete.
Add Line: Add additional income entries if needed.
Refresh: Reload the form to update data.
Save: Save the income transaction.
Save & New: Save the transaction and open a new entry form.
Save & Close: Save the transaction and close the form.