Add Disassembly
This option allows you to break down a finished product into its original components or parts. You can specify the product, quantity, disassembly date, and destination for the recovered components.
You can create an add disassembly either manually or automatically. If “Can Auto disassemble” is enabled and when you receive that product through a Purchase Order or return it, the system will automatically break it down into its parts and add those parts back into your stock.
To create an add disassembly , first ensure that the "Assemble" toggle is enabled when adding the product. Additionally, make sure that all required components have the "Component" toggle enabled. To Create the bill of materials just go to Production from sidebar and click on add assembly and then follow the below steps:
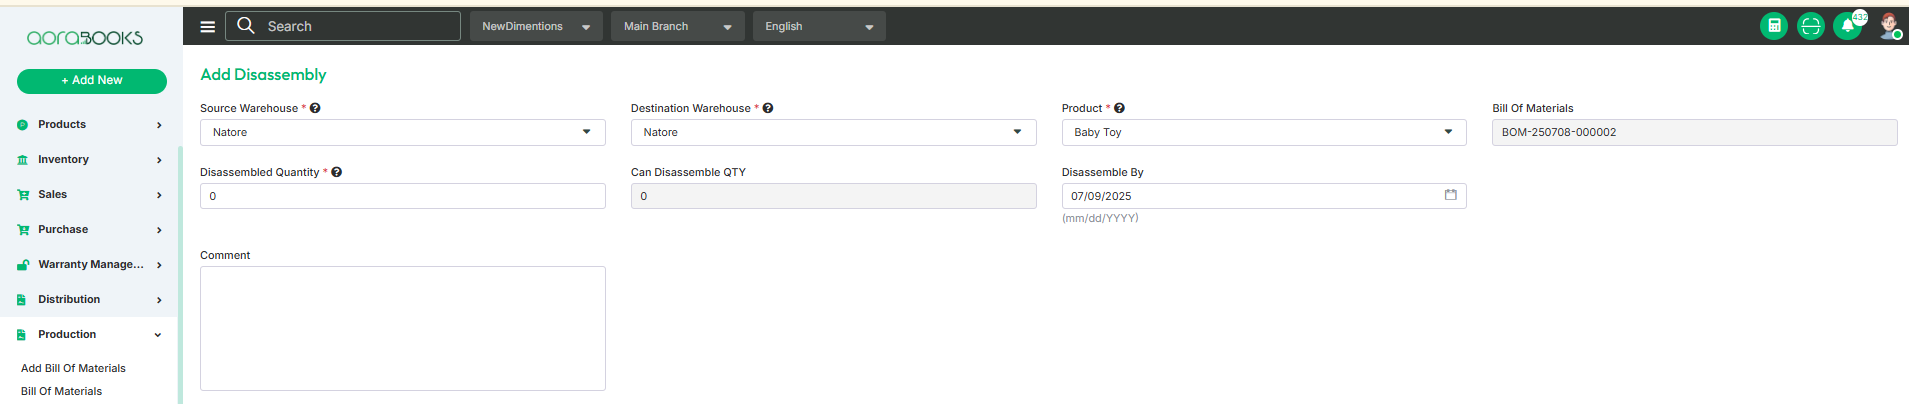
Source Warehouse: The warehouse from where all assembled products are taken to disassemble. When you take the product for disassembly , the total assembled product will decrease.
Destination Warehouse: The warehouse where all the components product will be added after disassembly. Here the component product of the warehouse will be increased.
Product: Search for the product which you want to disassemble into a component product and then select it from the list.
Bill of Materials: A unique, auto-generated identifier assigned to each Bill of Materials for tracking and reference purposes.Here your bill of materials will be added automatically after selecting the product.
Disassemble Quantity: The number of assembled products you want to break down into their component parts. Set the quantity from here.
Can Disassemble Quantity: The maximum number of assembled products that you are currently able to disassemble, based on how many of those products are available in stock.
Disassemble By: You can set the date when the disassembly was completed.
Comment: If you want to add any kind of additional information related to the disassemble note down it here.
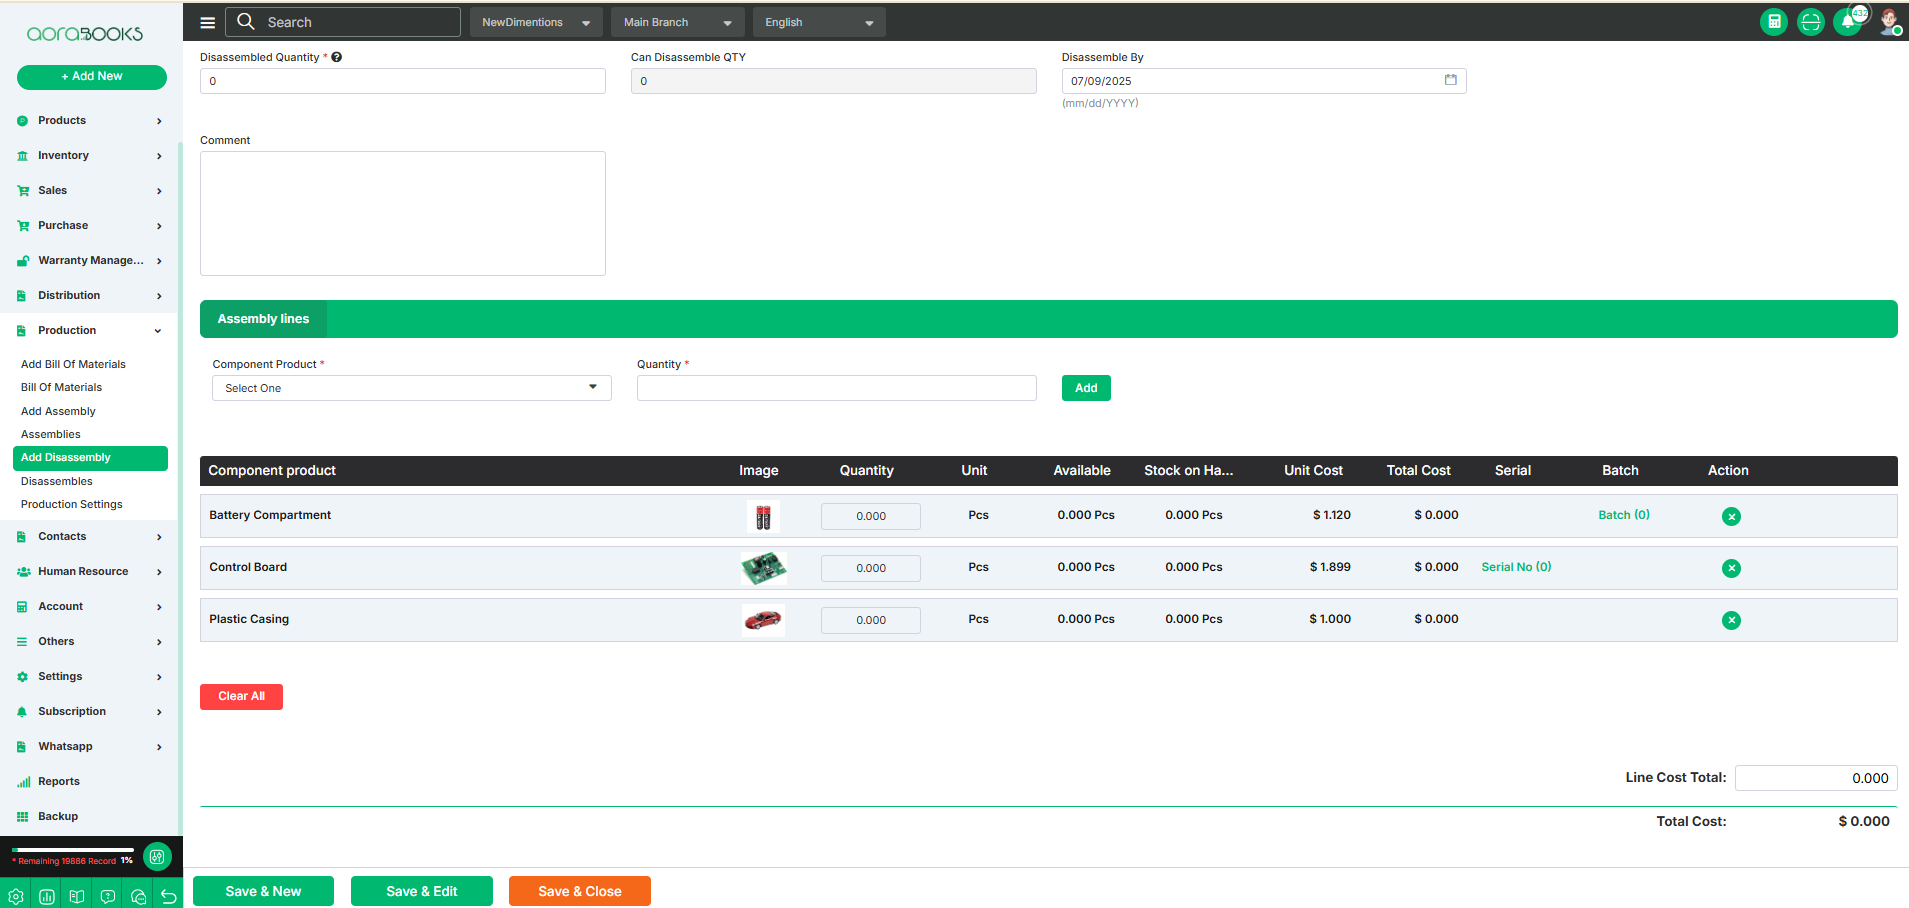
Assembly Line: From here you can set the assembly line for assembling the final product . Just follow the below steps:
Component Product: The component products are the items you will receive after disassembling the assembled product.
Quantity: Number of components you will get after disassembling the product.
Add: Click to add the product in the list.

After adding the product you can see the details of the product below. Such as:
Component Product: You can see the name of the component which you will get after disassembling the main product.
Image: You can see the image of the product.
Quantity: You can see the total quantity of the component. And you can also adjust the quantity from here.
Unit: Displays the unit type of the component product, such as pcs, kg, liters, etc., based on how it was defined when the product was created.
Available Quantity: The current amount of a product or component available in stock for use.
Stock On Hand: Displays the current available quantity of the component or product in the inventory.
Unit Cost: Shows the cost of one unit of the component product .
Total Cost: You can see the total cost of the product from here. Total Cost=Total Quantity * Unit Cost.
Serial: Use this field to add a serial number to the component product. You can only add serial numbers to products that have the Serial toggle enabled when the product is created.
Batch: Use this field to add a batch number to the component product. You can only add batch numbers to products that have the Batch toggle enabled when the product is created.
Delete: By clicking this you can remove any component from the list.
Clear All: Click the button to clear all the components from the list.

From here, you can view all cost-related calculations for the Bill of Materials. These include:
Line Cost Total: The total cost of all components before tax and other charges.
Total Cost: The overall cost to assemble the specified quantity of the final product.
Save & New: Saves the current bill of materials and opens a new blank form to create another.
Save & Edit: Saves the current data and keeps the form open for further editing.
Save & Close: Saves the current data and closes the form.