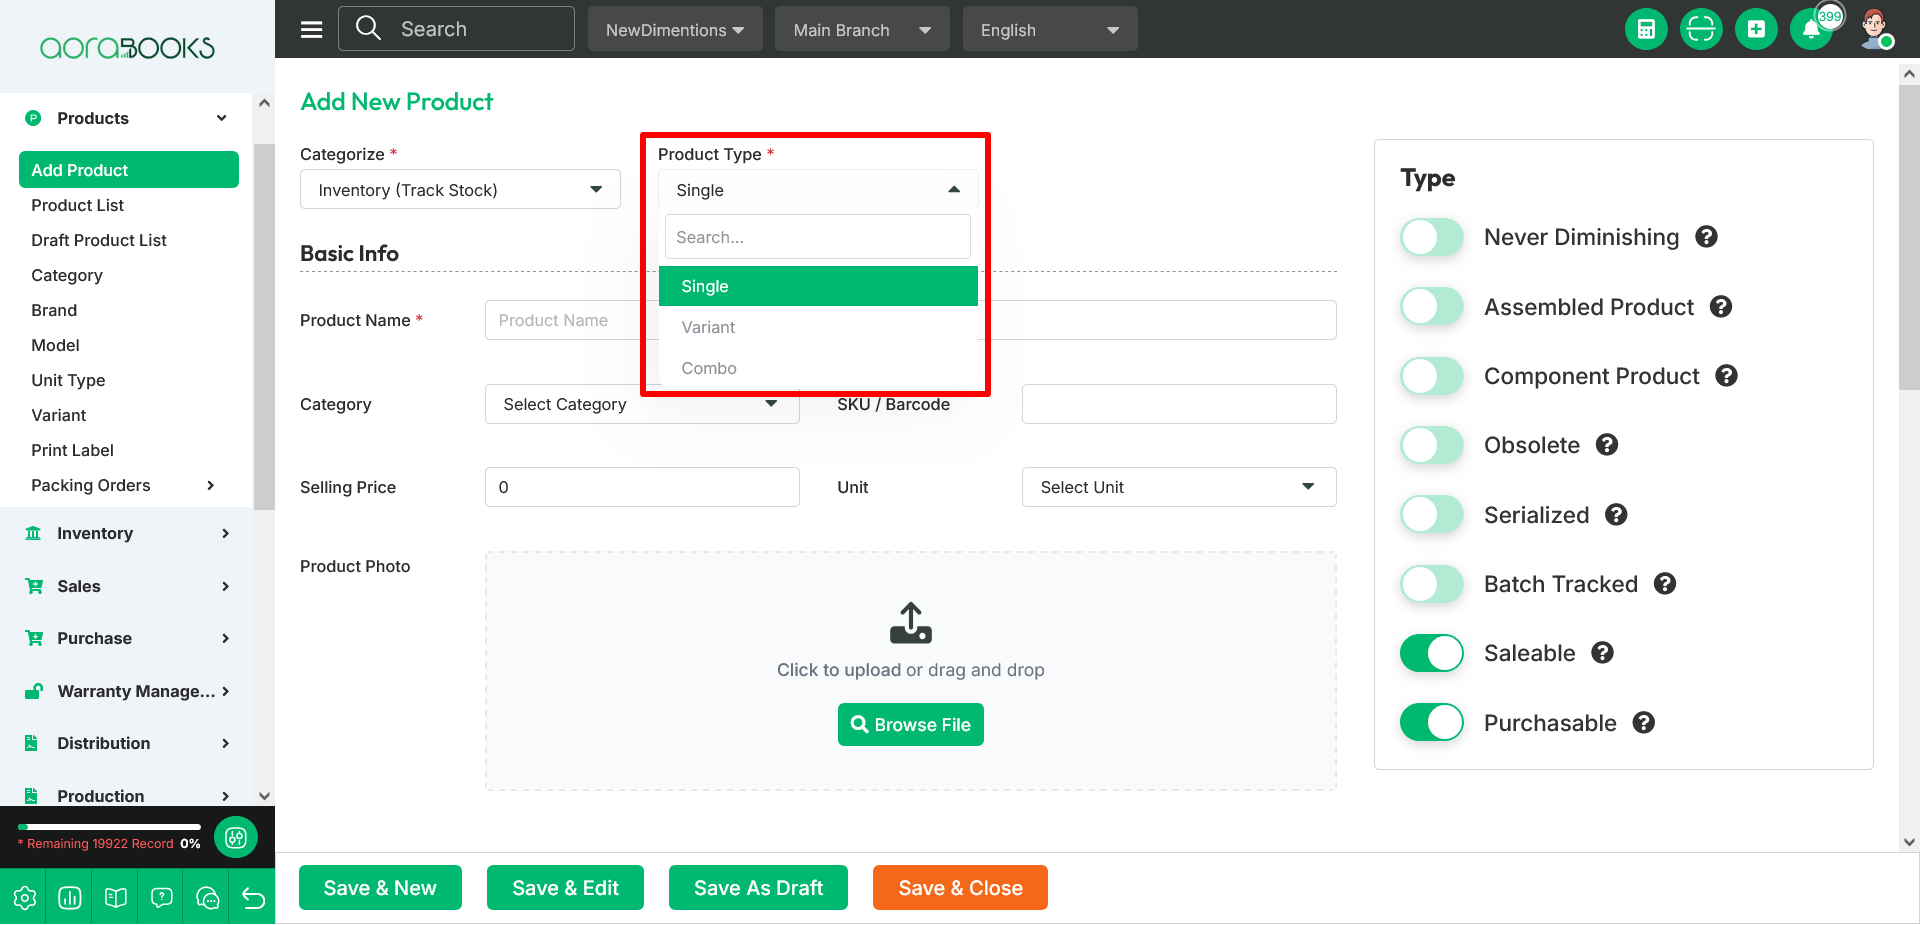
There are also some other types. These types will be shown only for the production module. These have been discussed in detail below.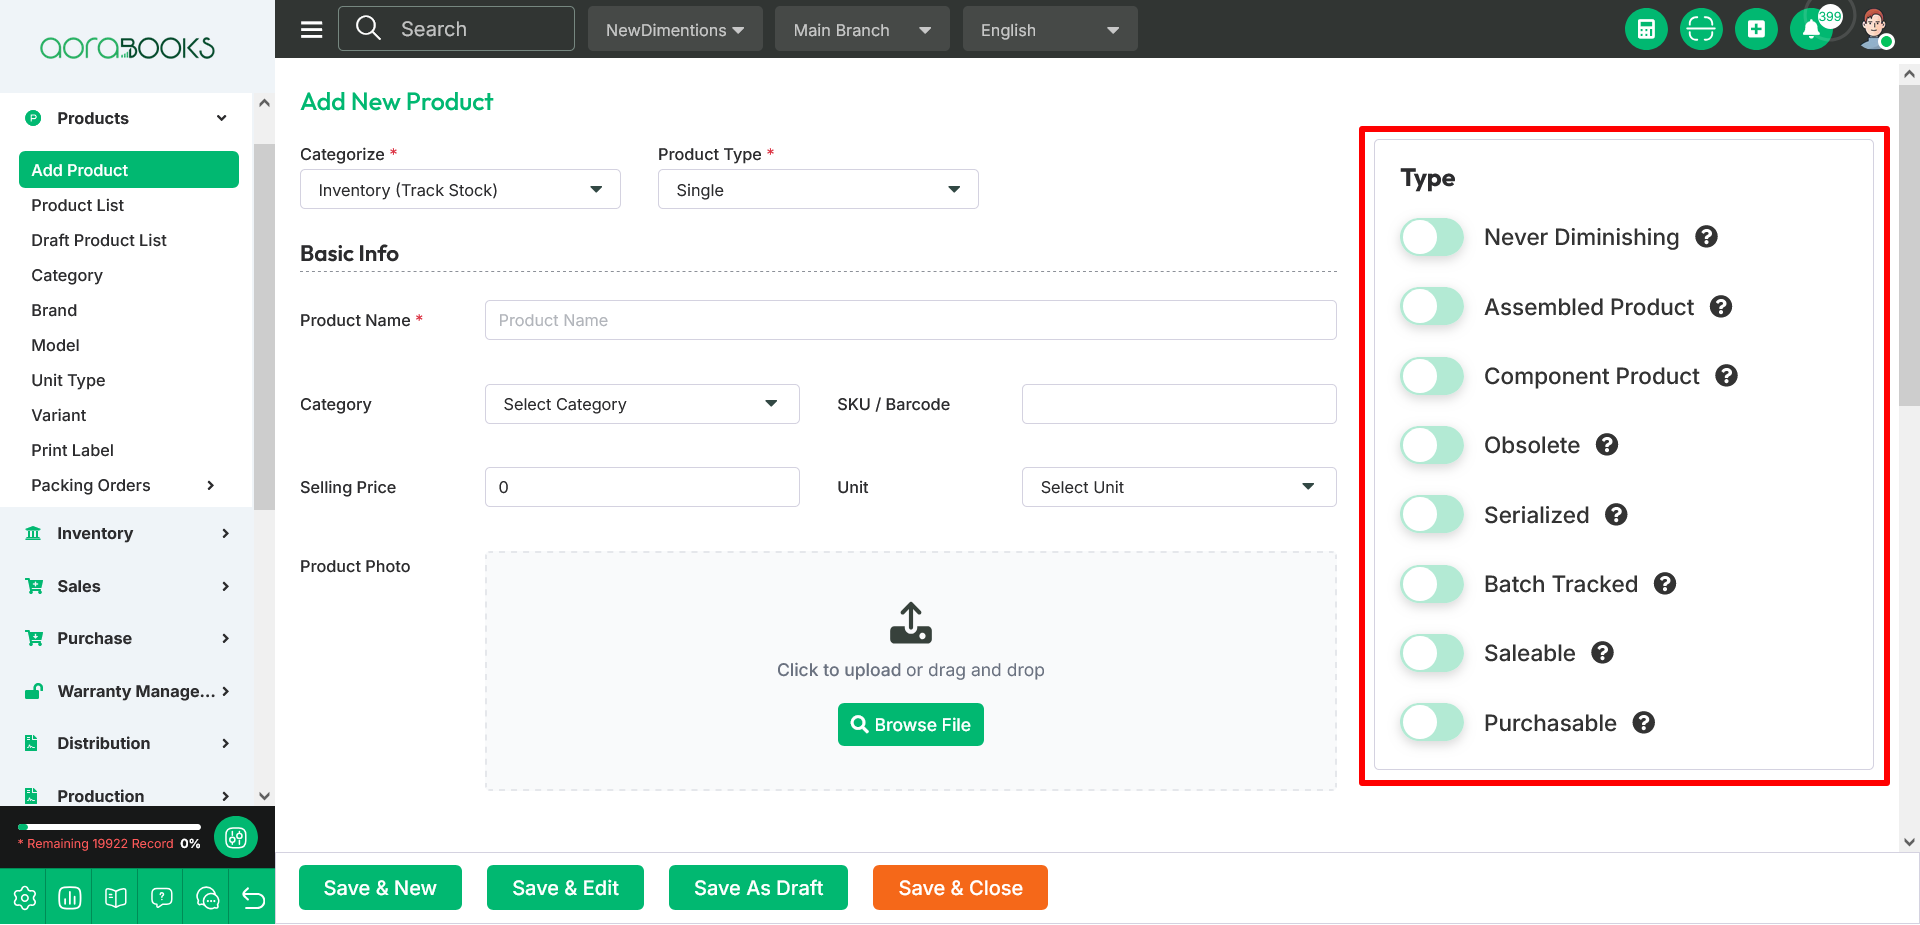
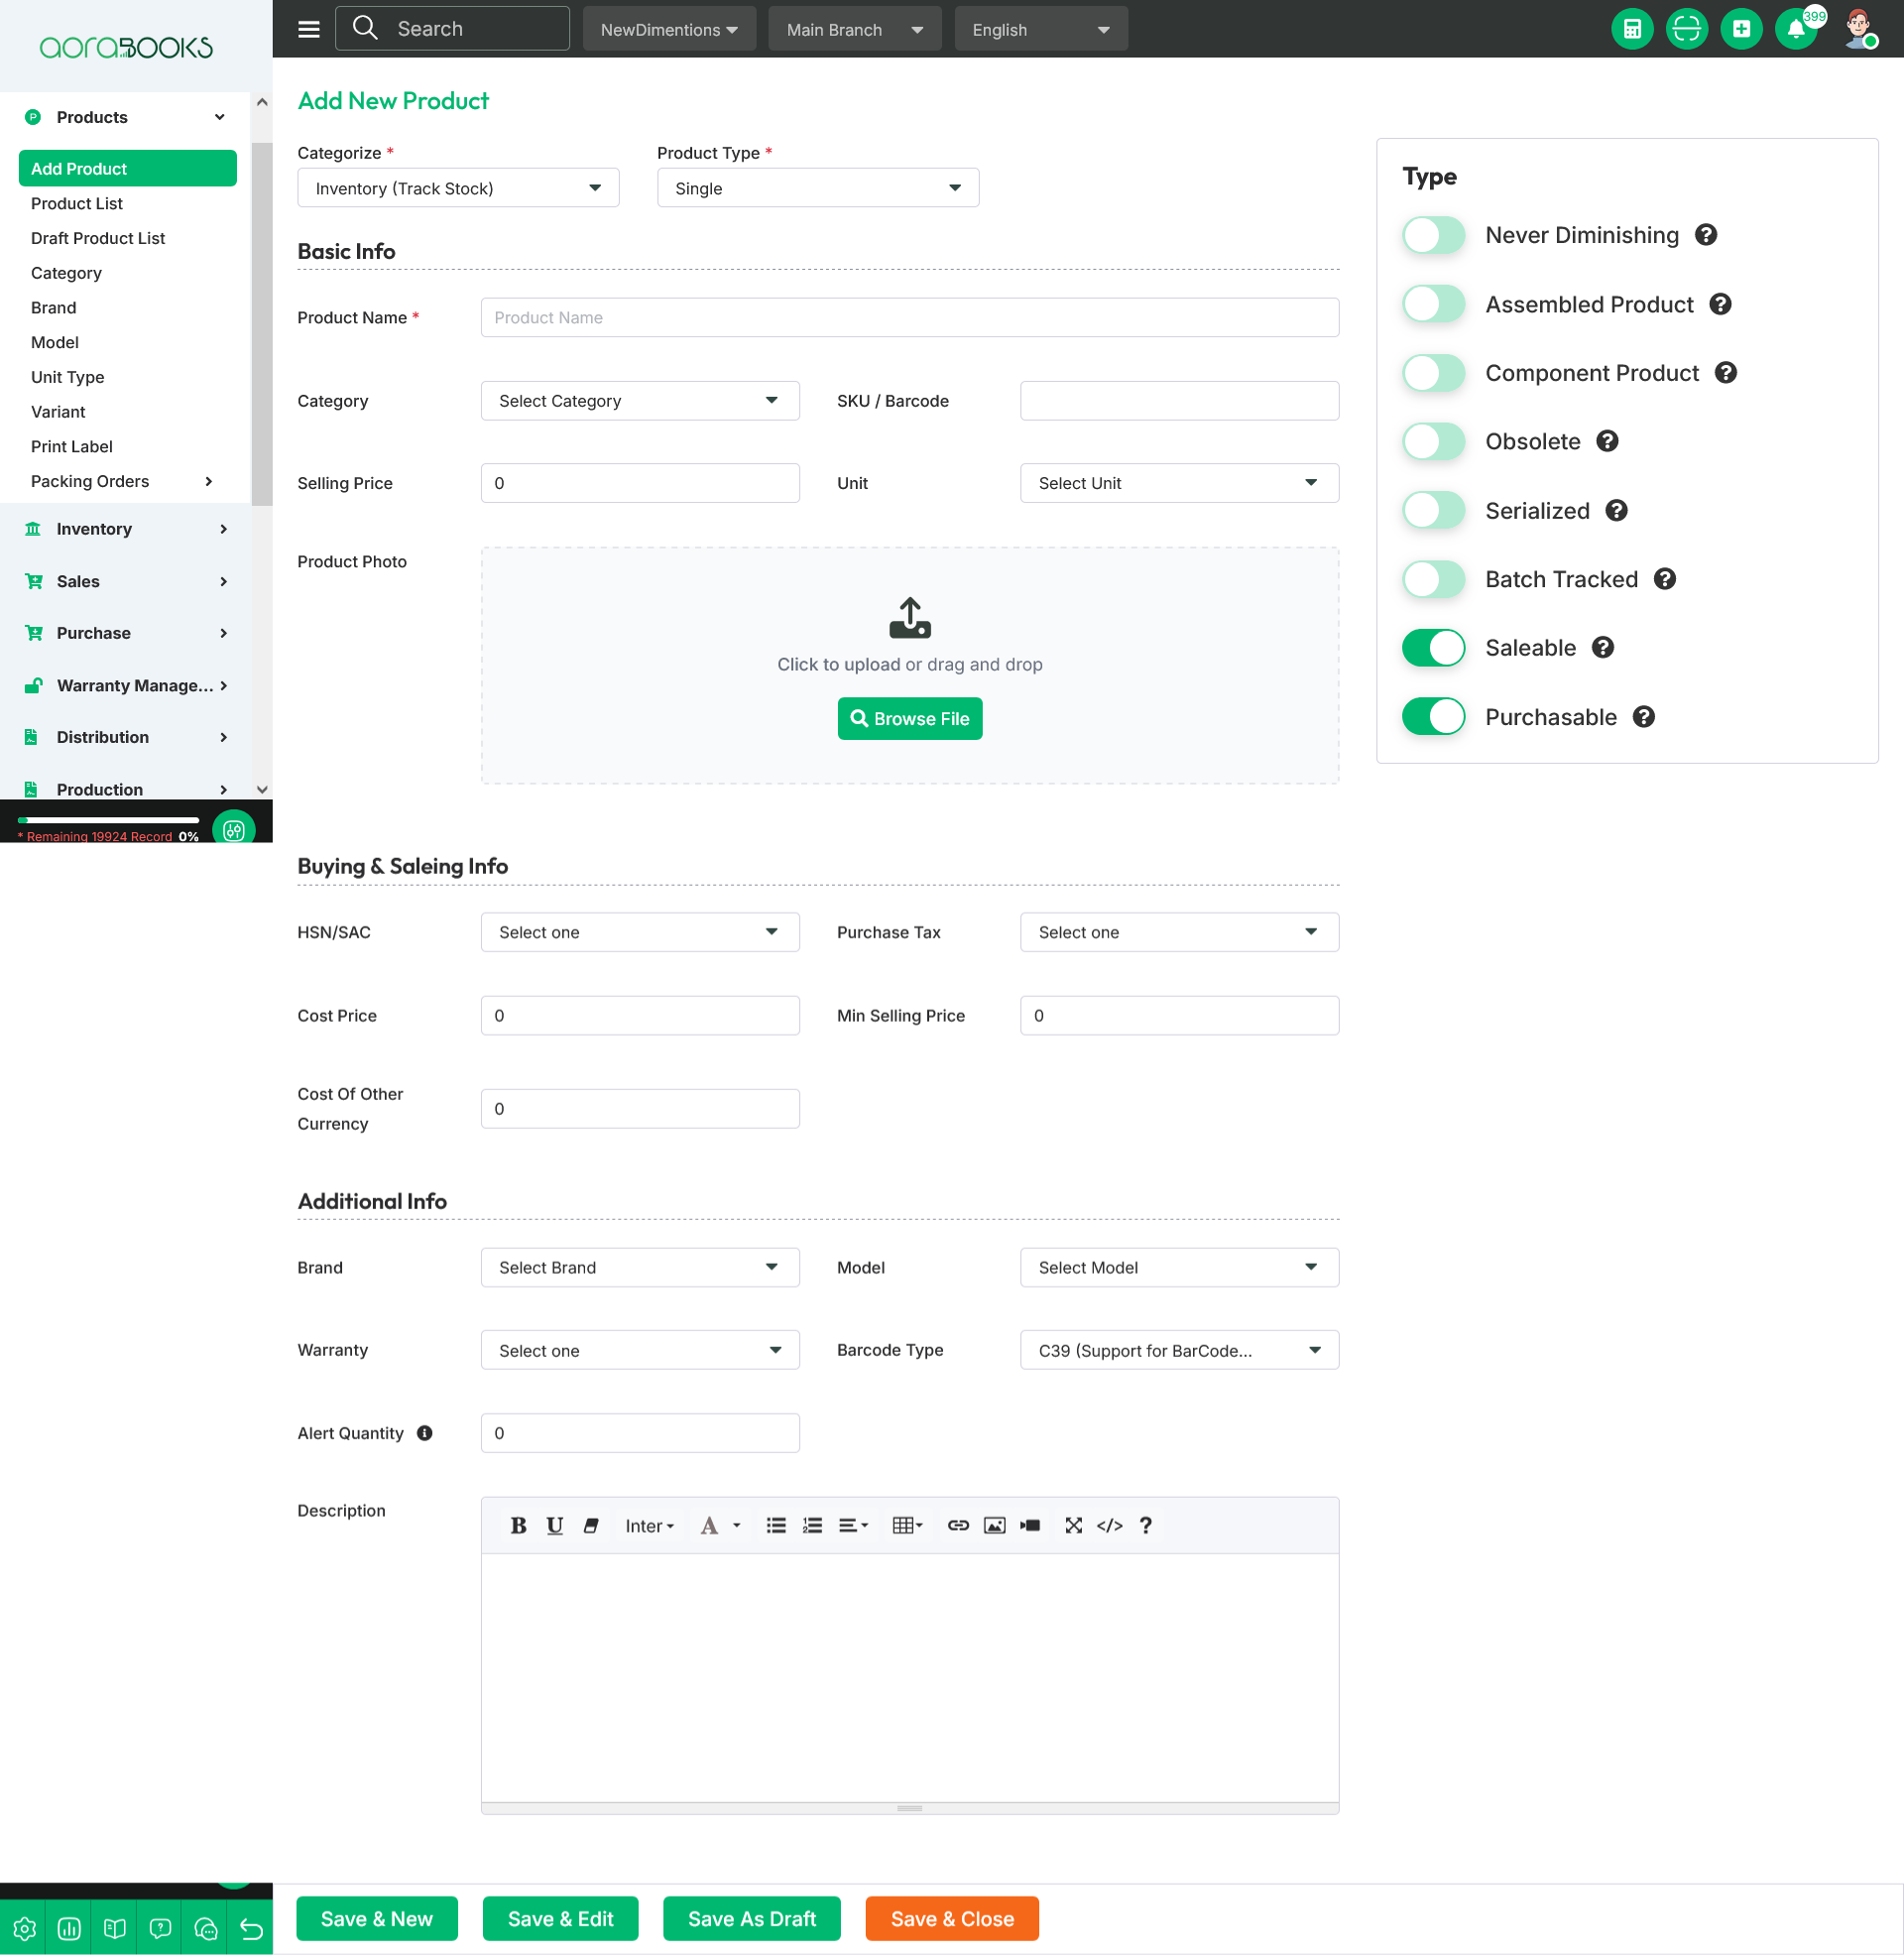
1. Never Diminishing : This type is used for services or digital goods. Its stock level is not tracked, and it cannot be combined with batch, serial, or assembled options. This setting cannot be changed after the product is created.
2. Assembled Product : This type is created by combining multiple component products. The product will either be assembled from component products in your inventory or broken down into individual parts and disassembled. It cannot be used with the never diminishing type.
3. Component Product : This type is used for creating products that are assembled from multiple components. A product can be both assembled and a component at the same time.
4. Obsolete : This type is no longer for used or sold.
5. Serialized : This type is tracked using unique serial numbers. It cannot be combined with batch or never diminishing types. It cannot be modified once it has been created.
6. Batch Tracked : This type is tracked using unique batch or lot numbers. It cannot be combined with serial or never diminishing types. It cannot be modified once it has been created.
7. Saleable : This type is available for sale to customers.
8. Purchasable : This type is available for purchase from suppliers.
Basic Info : From this section you can set the basic information of the product.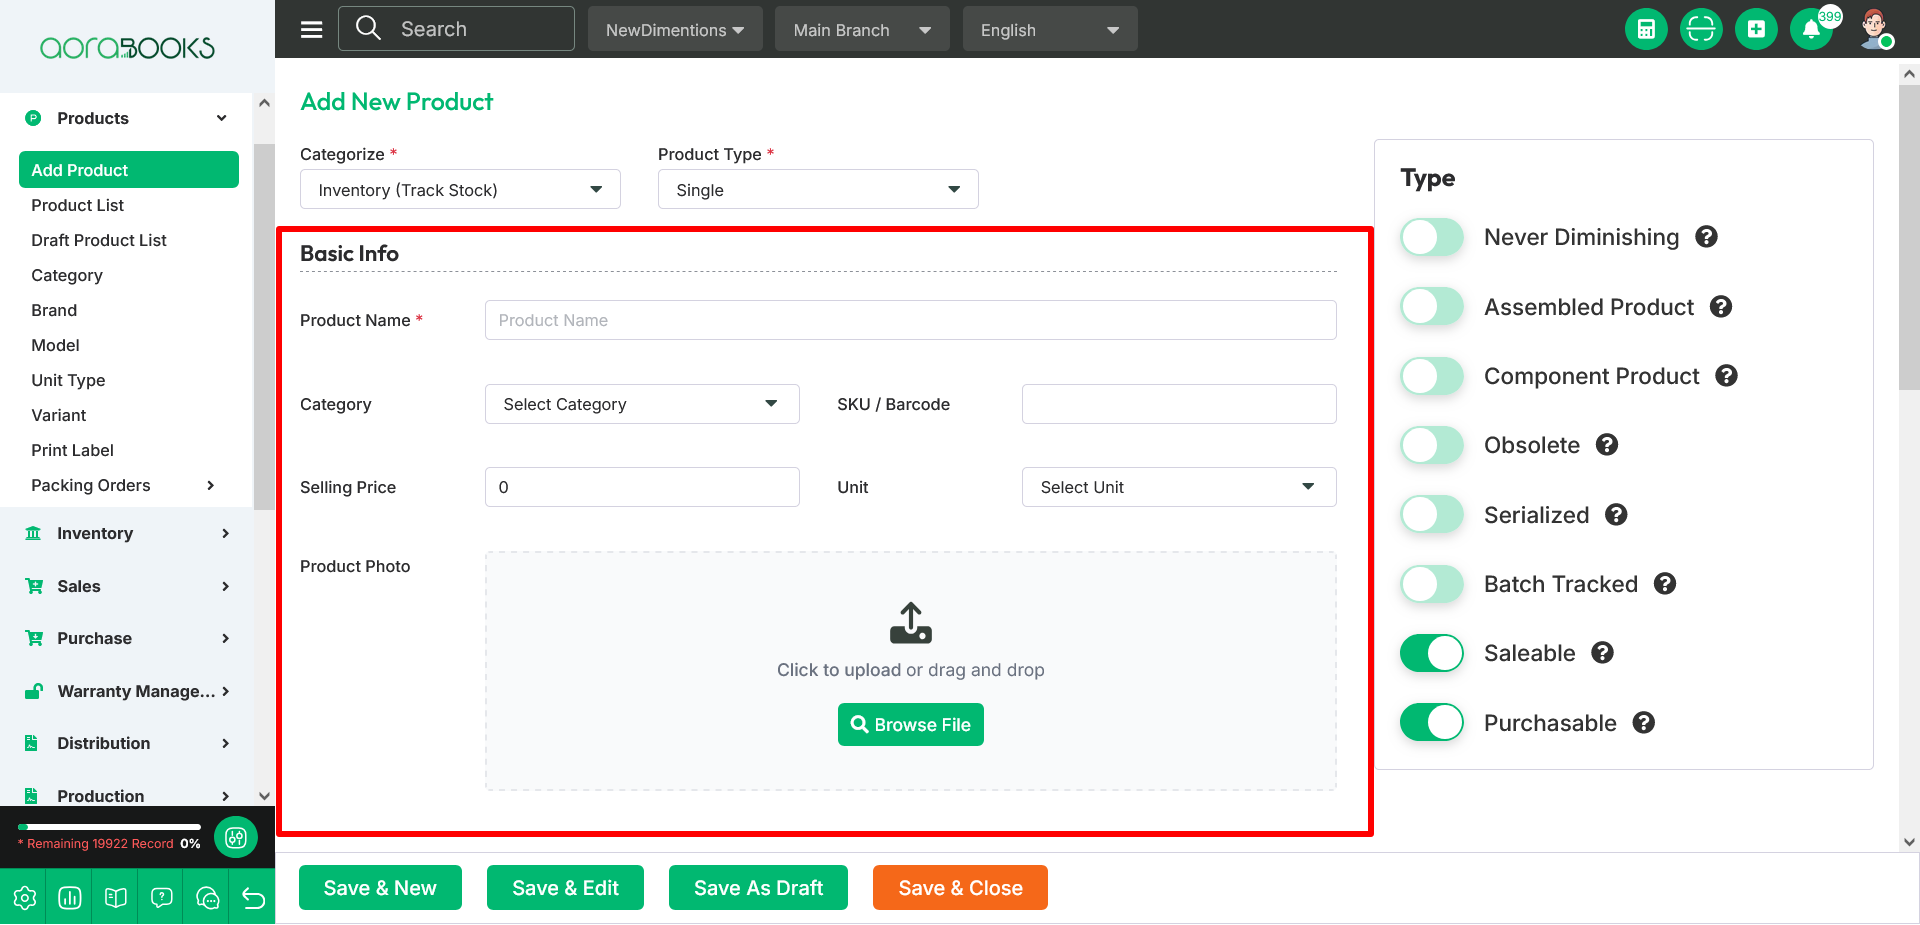
1. Product Name : To set your product name, please enter it in this section.
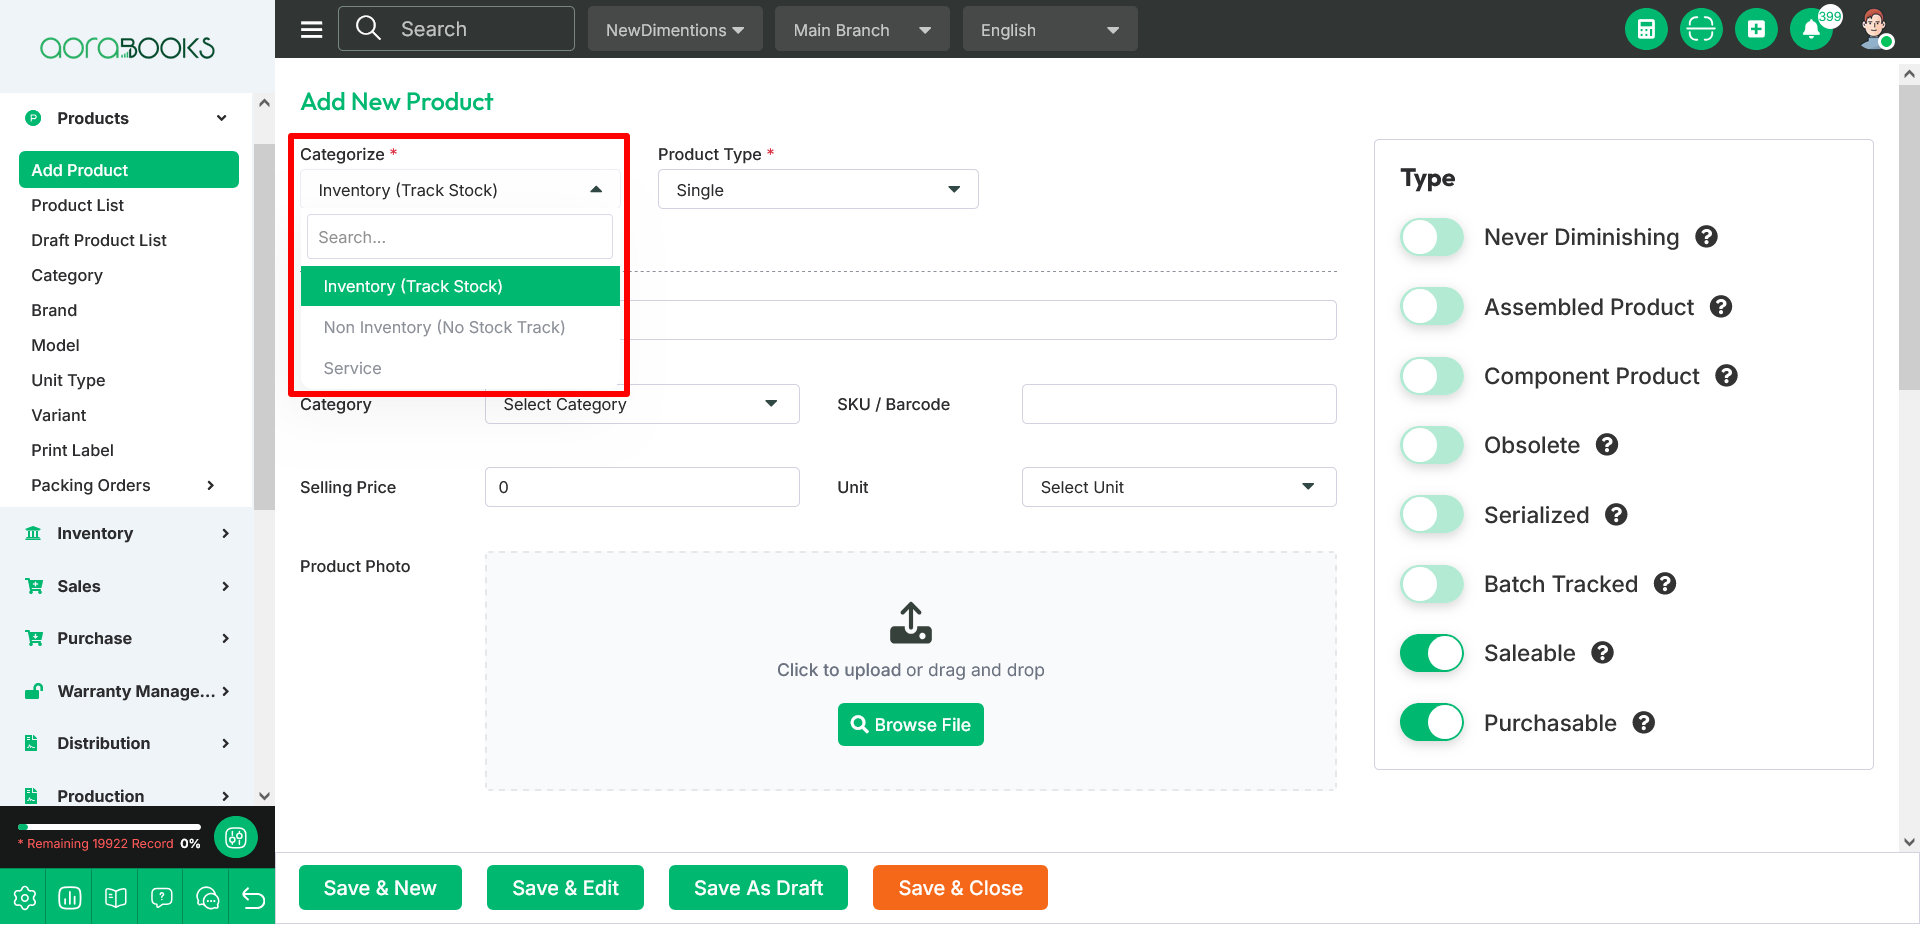
2. Category : To set your product category, please select one from this section. You can also create a new category from here.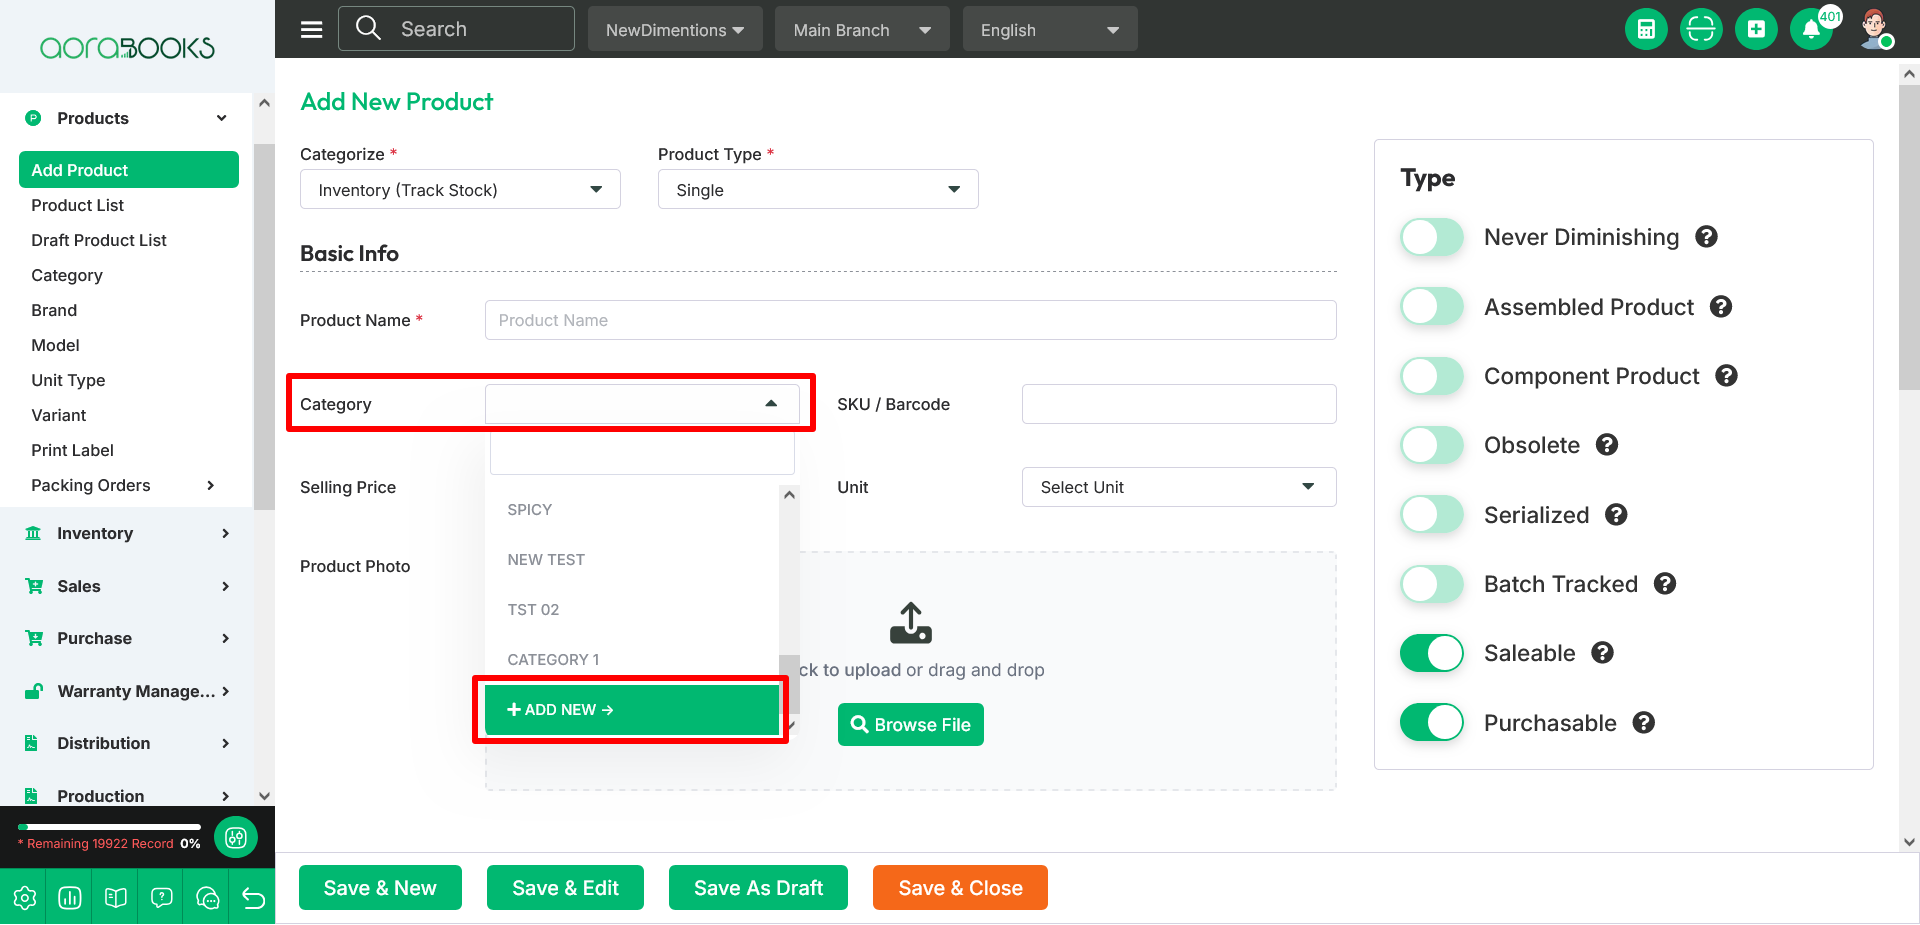
To create a new category, choose “Add New” from the dropdown menu in this section.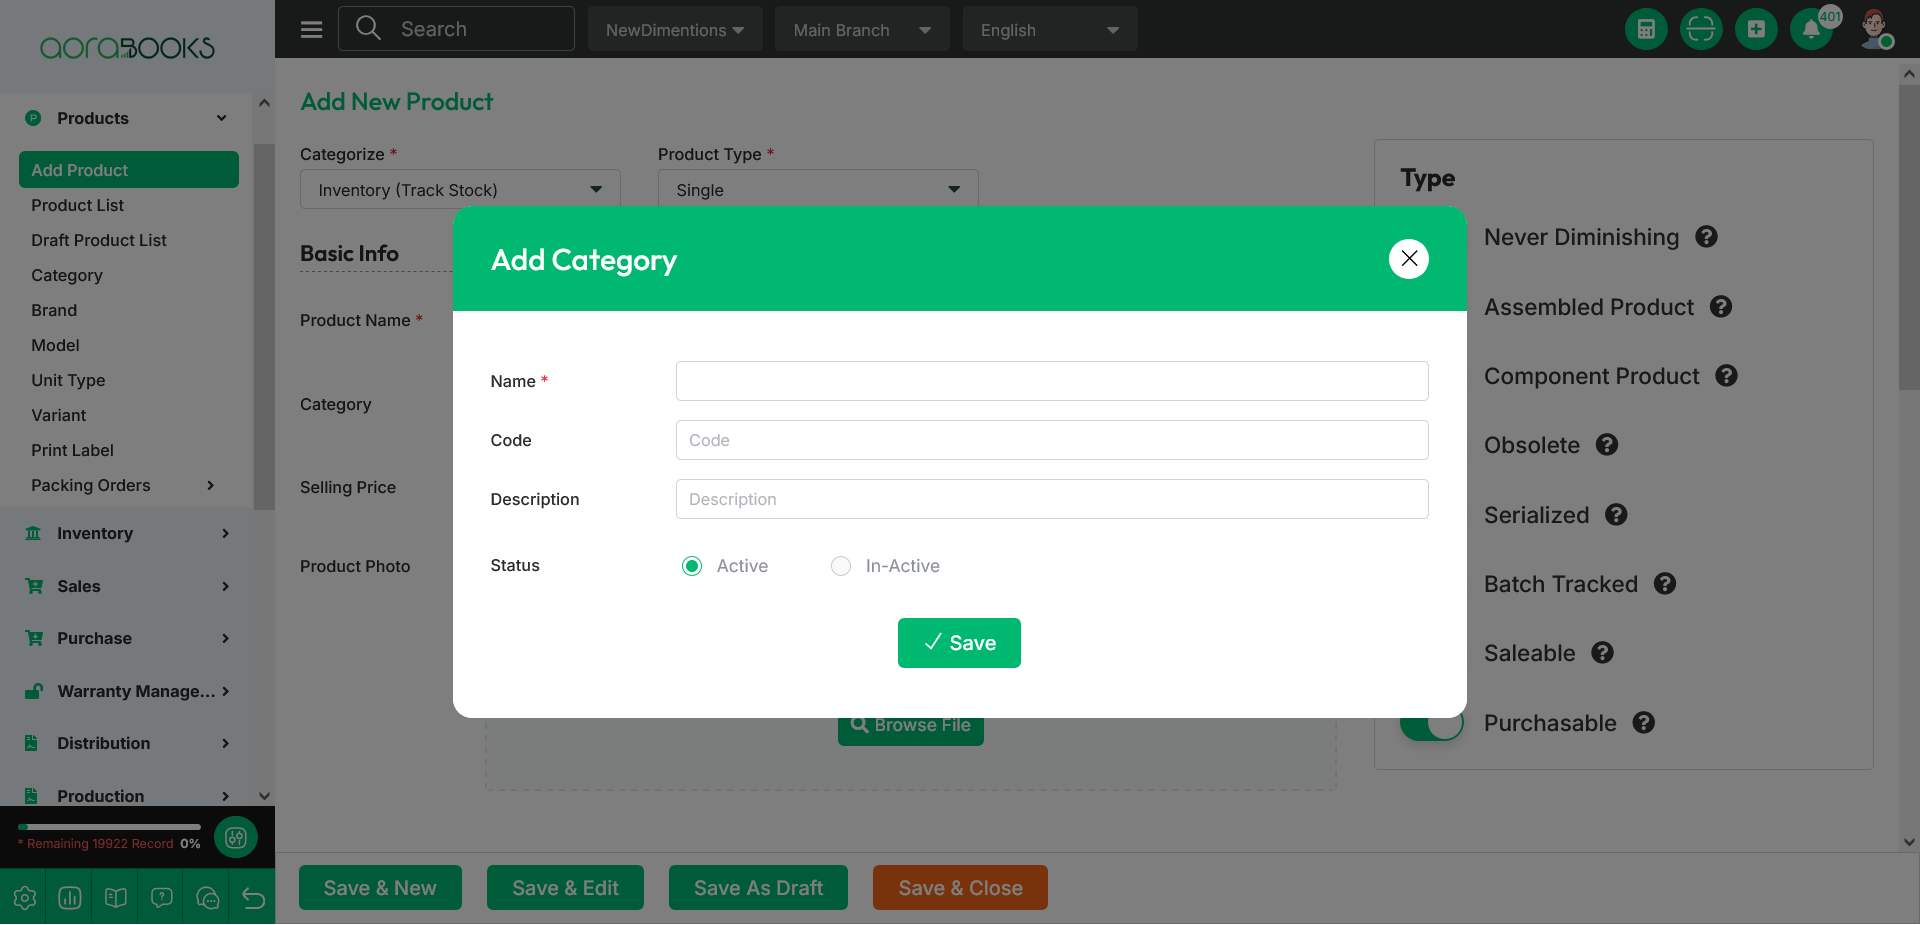 To add a category, enter the Name, Code, Description, and select the category Status. Then click the Save button to complete the process.
3. SKU/Barcode : To set your product SKU/Barcode please enter it in this section.
4. Selling Price : To set your product Selling Price, please enter it in this section.
5. Unit : To set your product unit, please select one from this section. You can also create a new unit from here.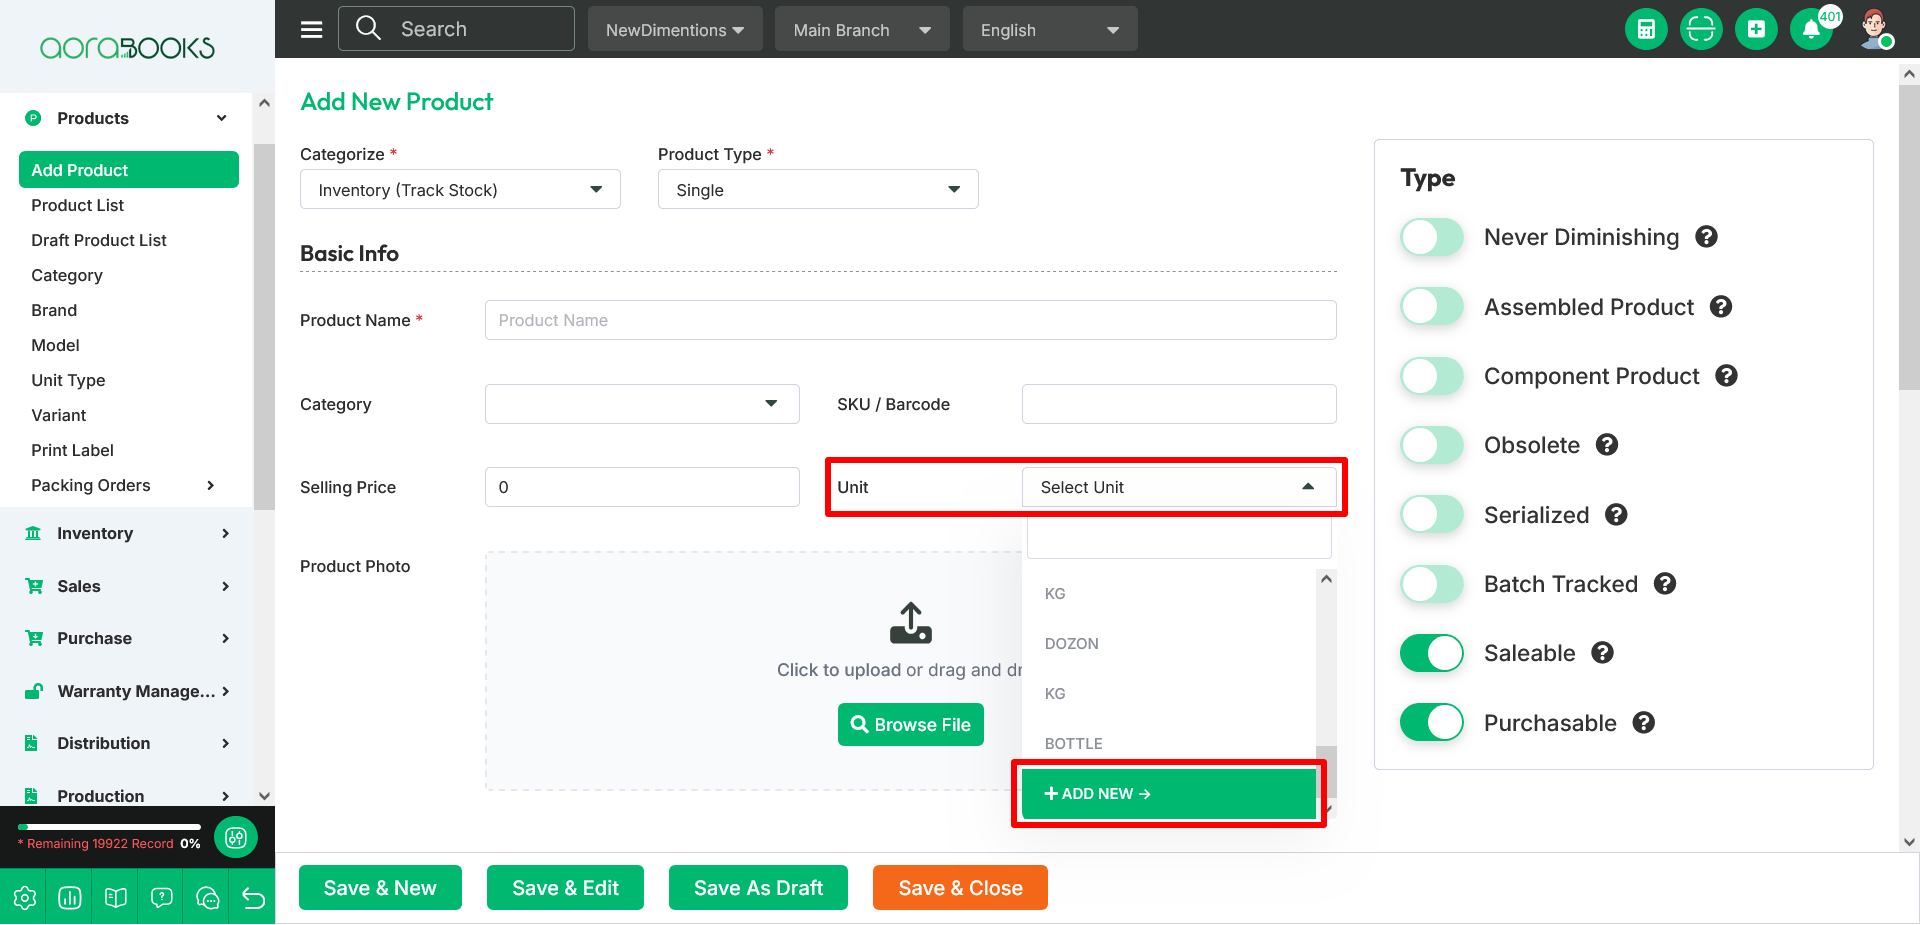
To create a new unit, choose “Add New” from the dropdown menu in this section. To add a unit, enter the Name, Description, and select the unit Status. Then click the Save button to complete the process.
6. Product Photo : To set your product photo, please tap on Browse File button and upload your file. You can also see the product photo after uploading the file.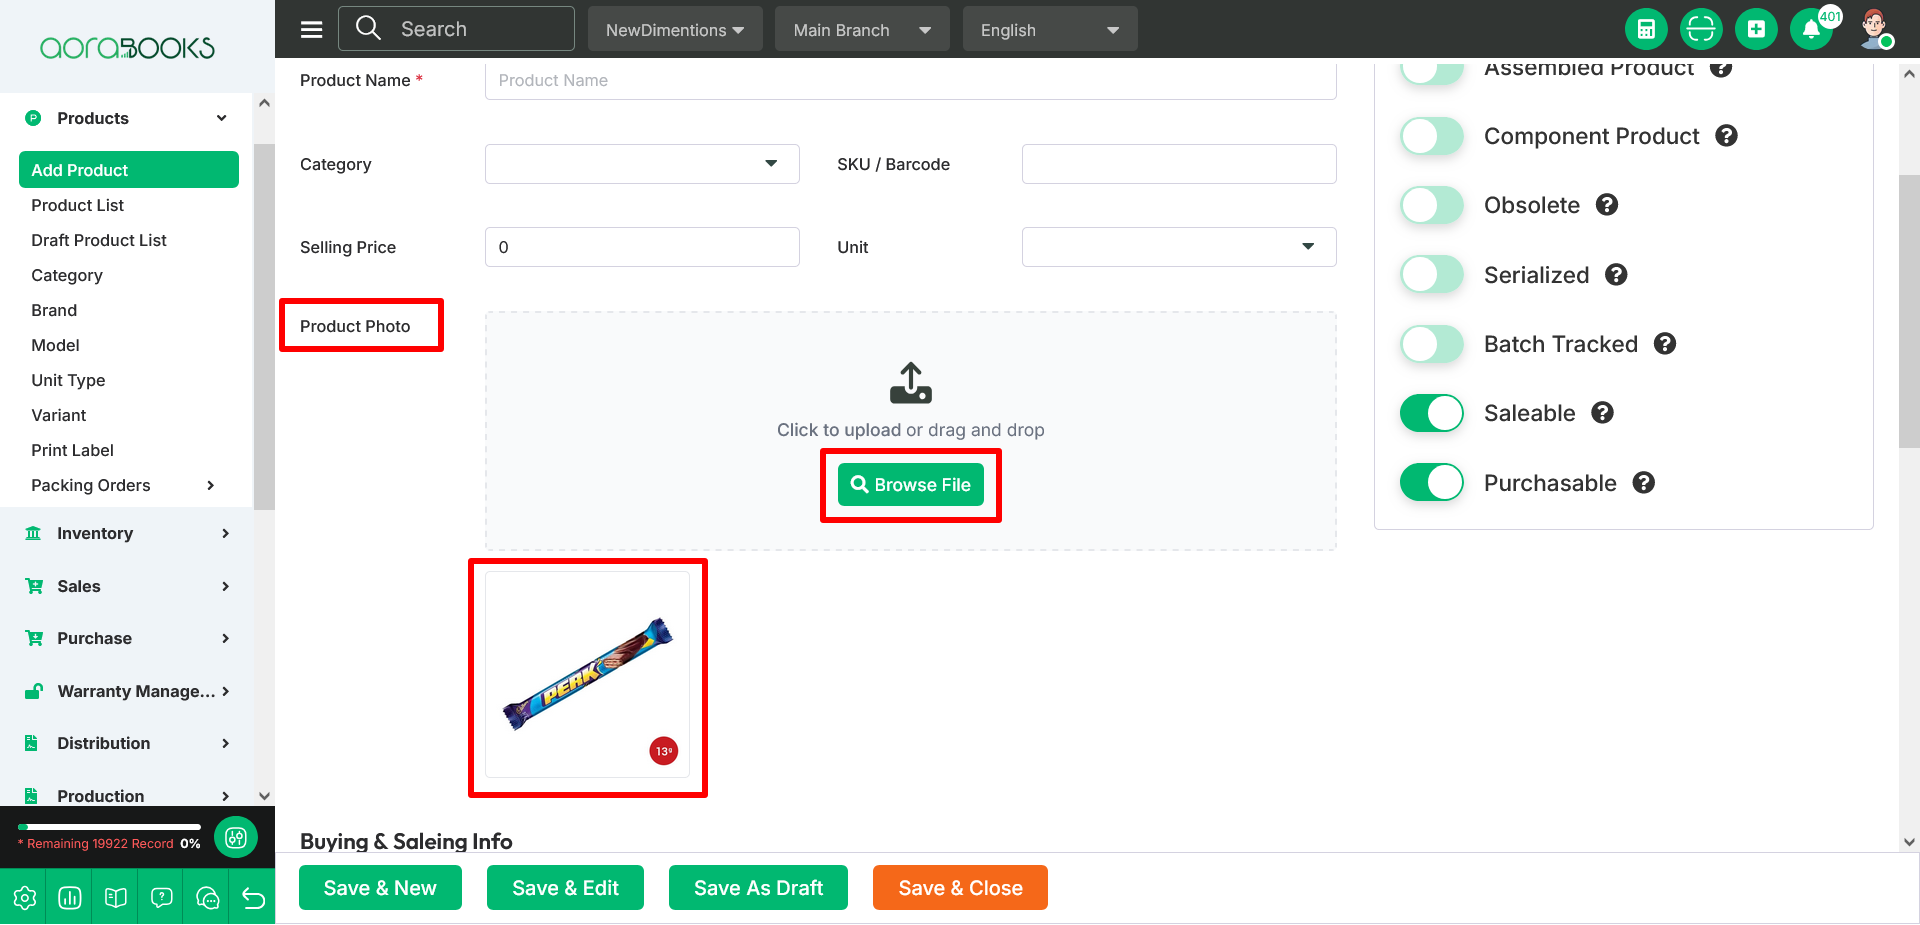
Buying & Saleing Price : You can set the product buying & selling price from this section.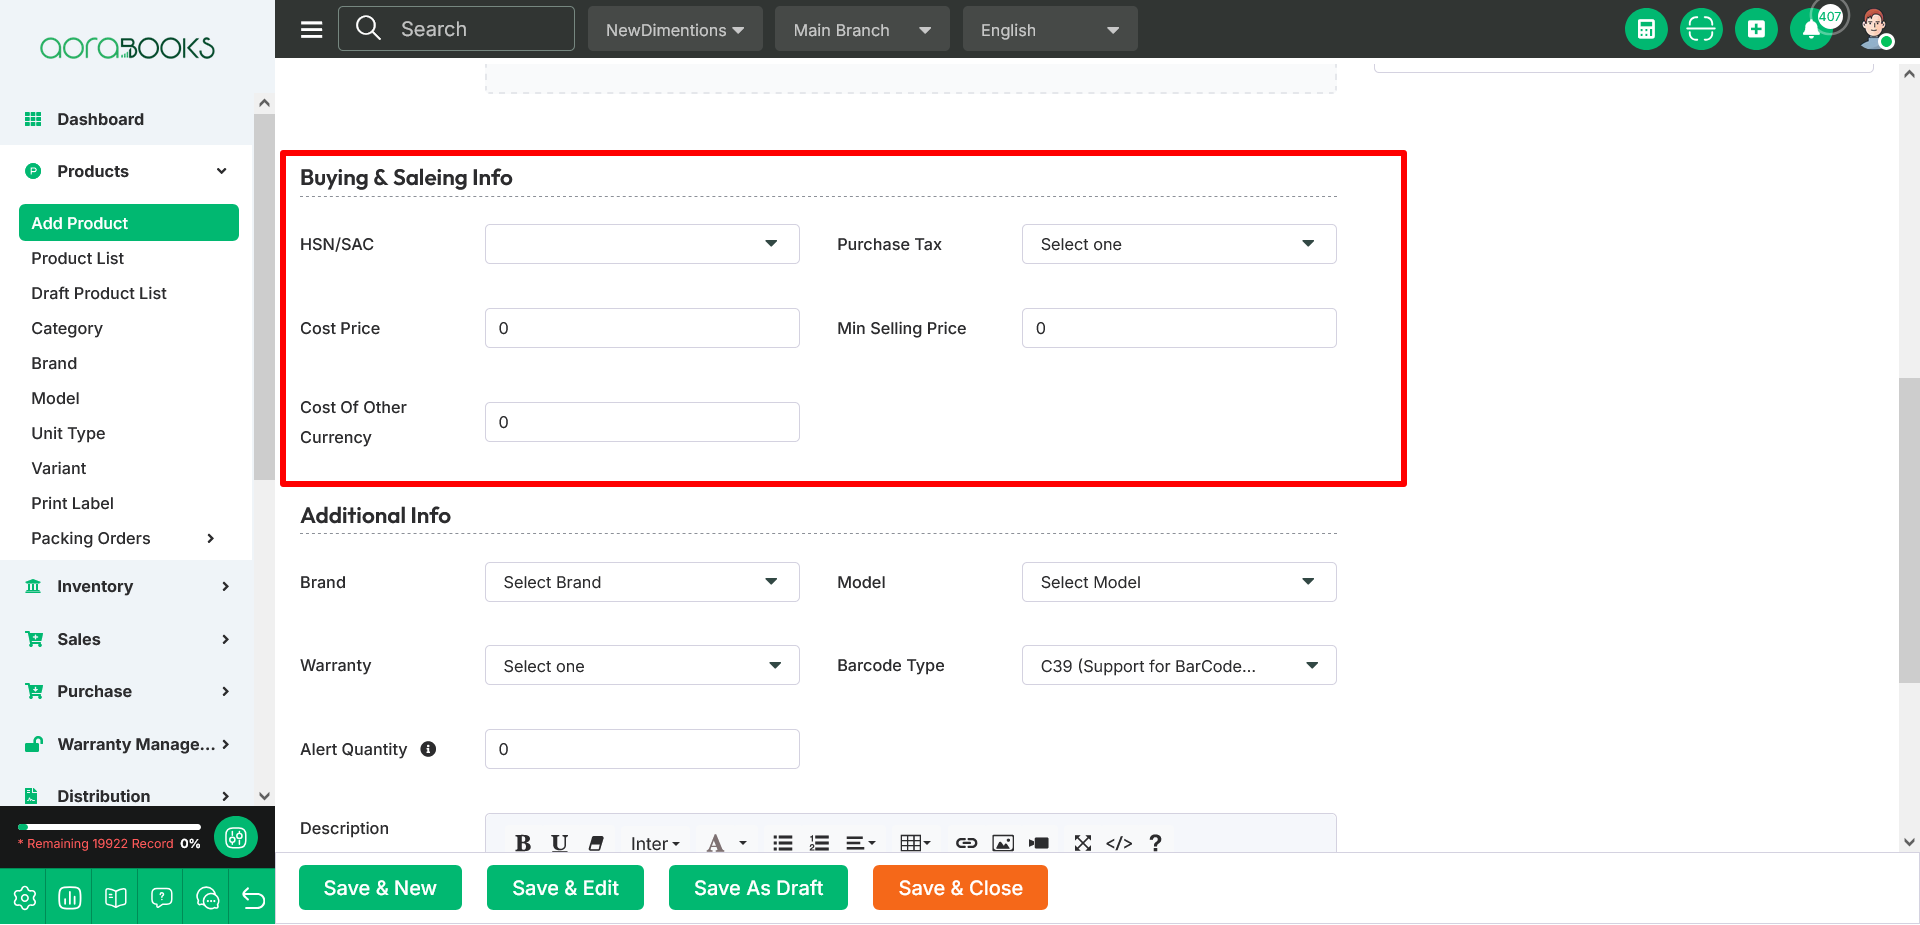
1. HSN/SAC : HSN stands for Harmonized System of Nomenclature. It is used to classify goods. Each product has an HSN code to specify what type of goods it is. SAC stands for Services Accounting Code. It is used to classify services. Each service has an SAC code to identify the type of service provided.
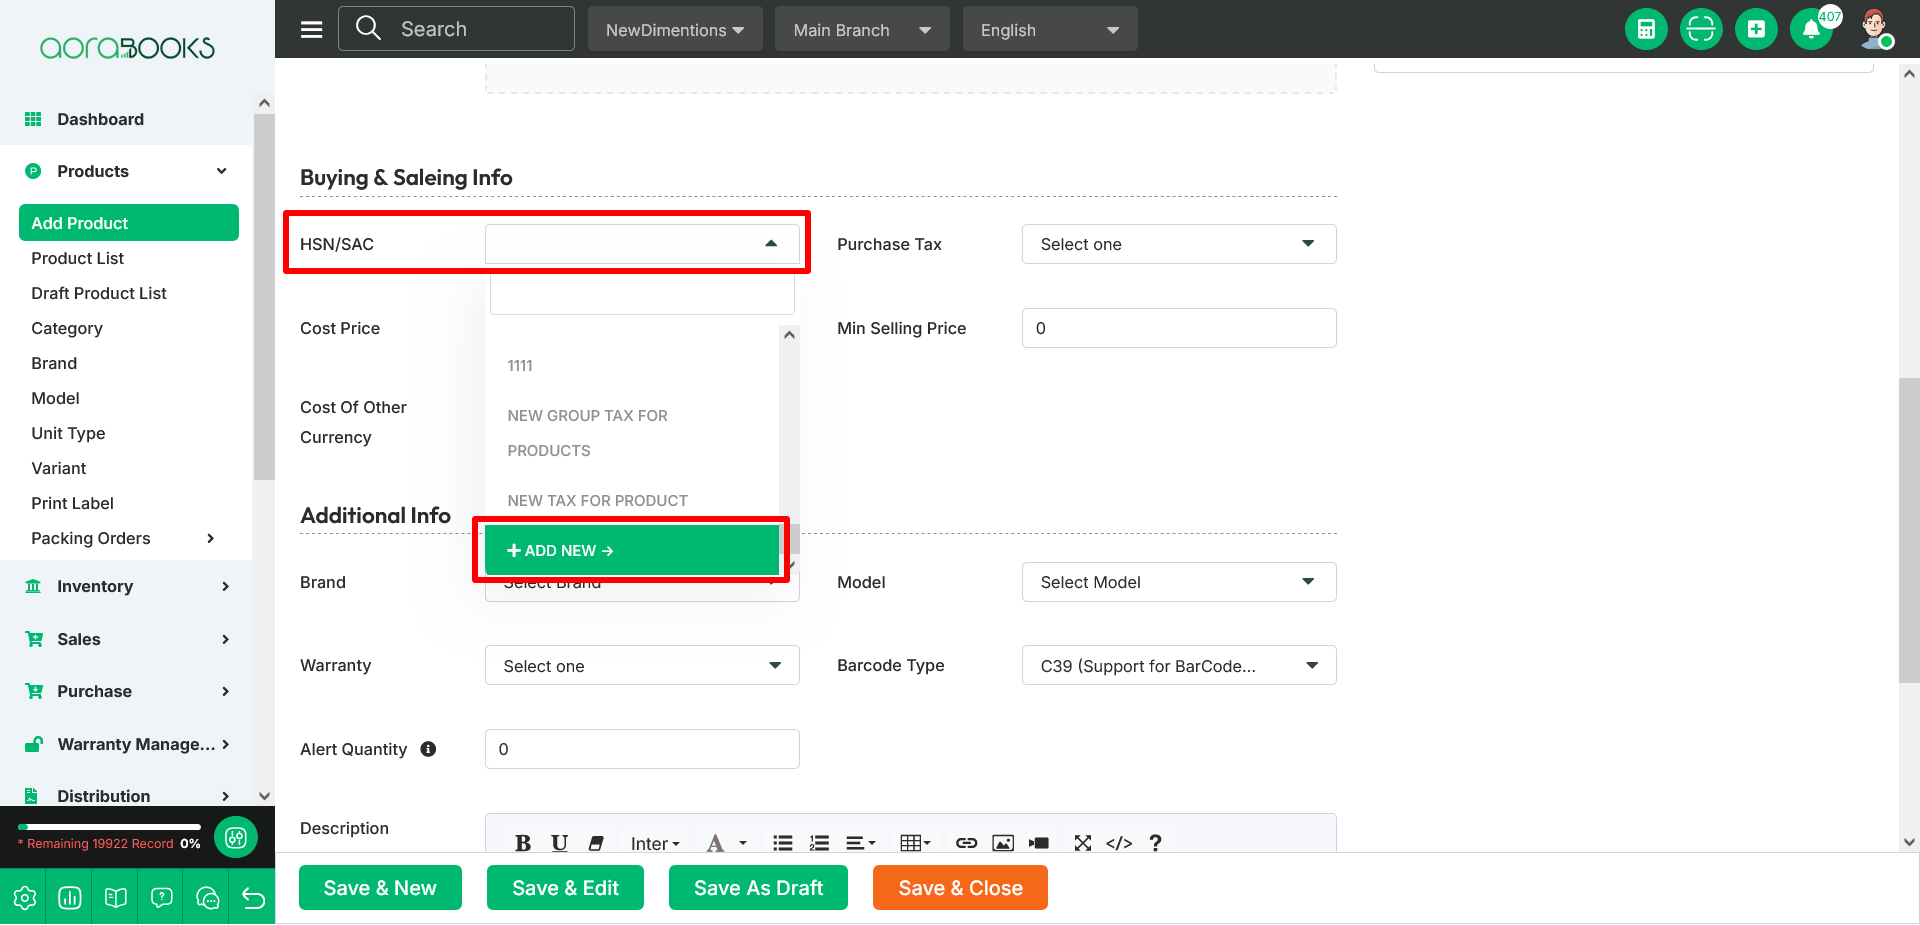
 To add a HSN/SAC, enter the Name, HSN/SAC, select it is non-GST or not, enter TAX/VAT and Description. Then click the Save button to complete the process.
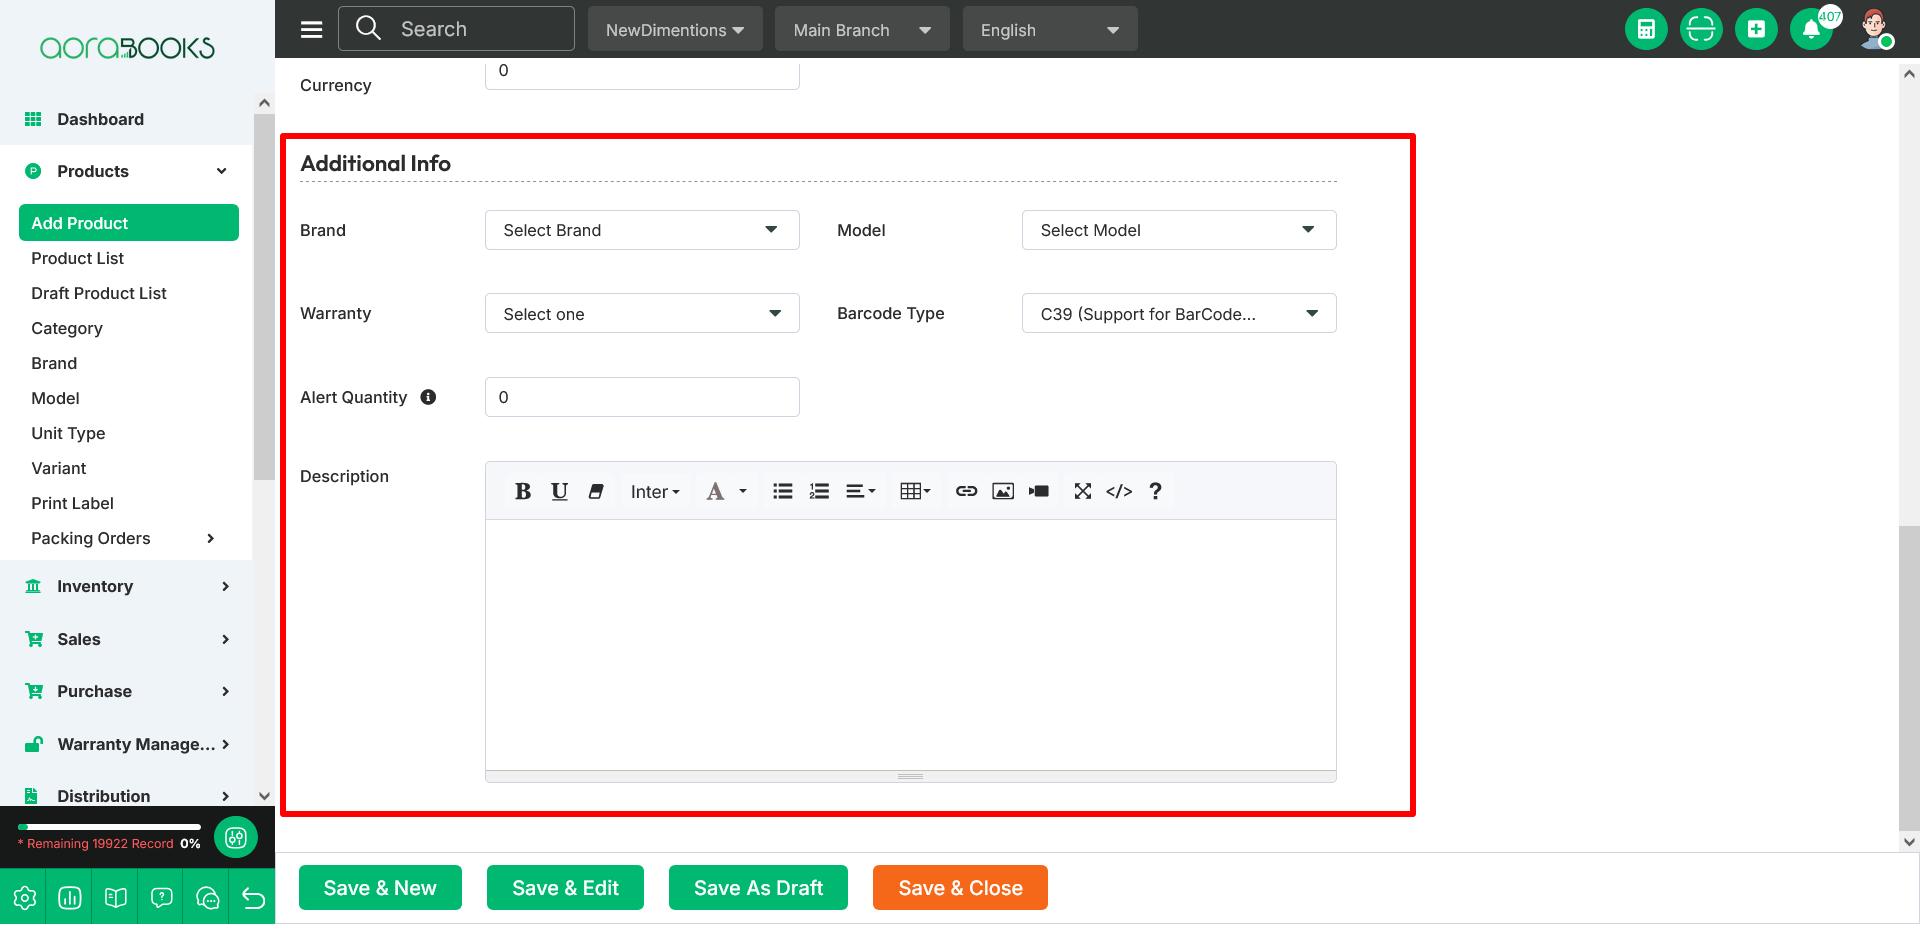
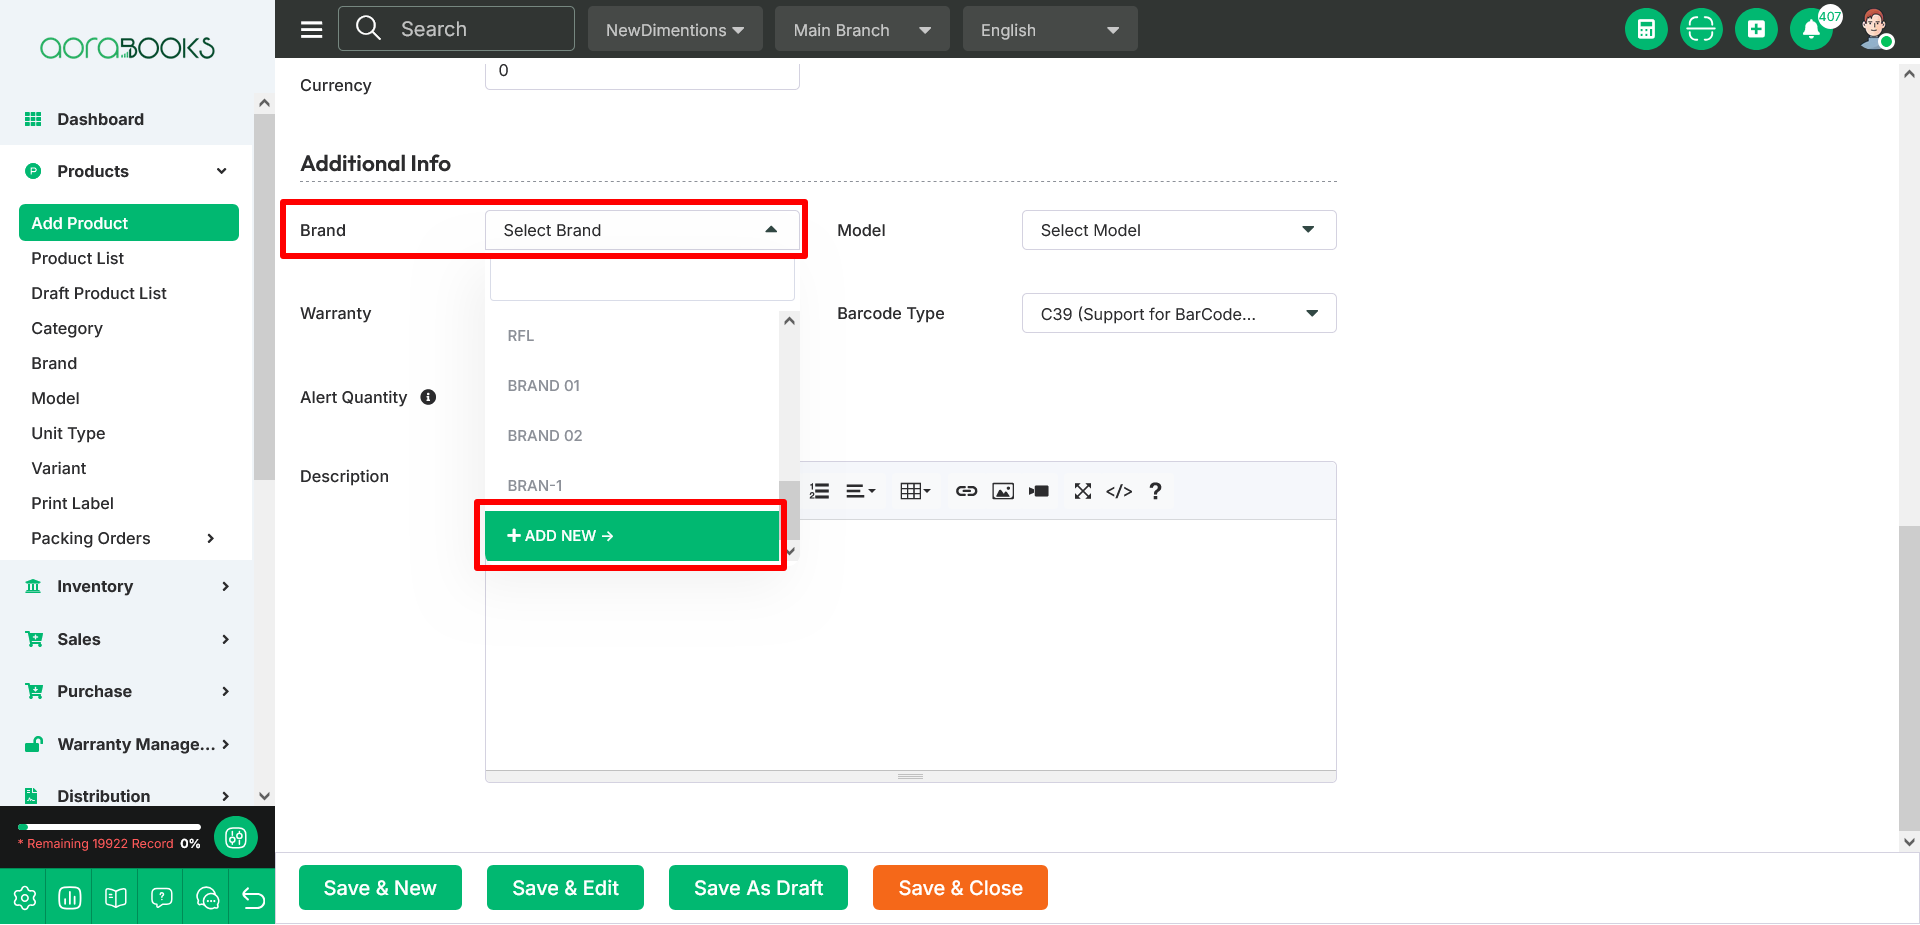 To create a new Brand, choose “Add New” from the dropdown menu in this section.
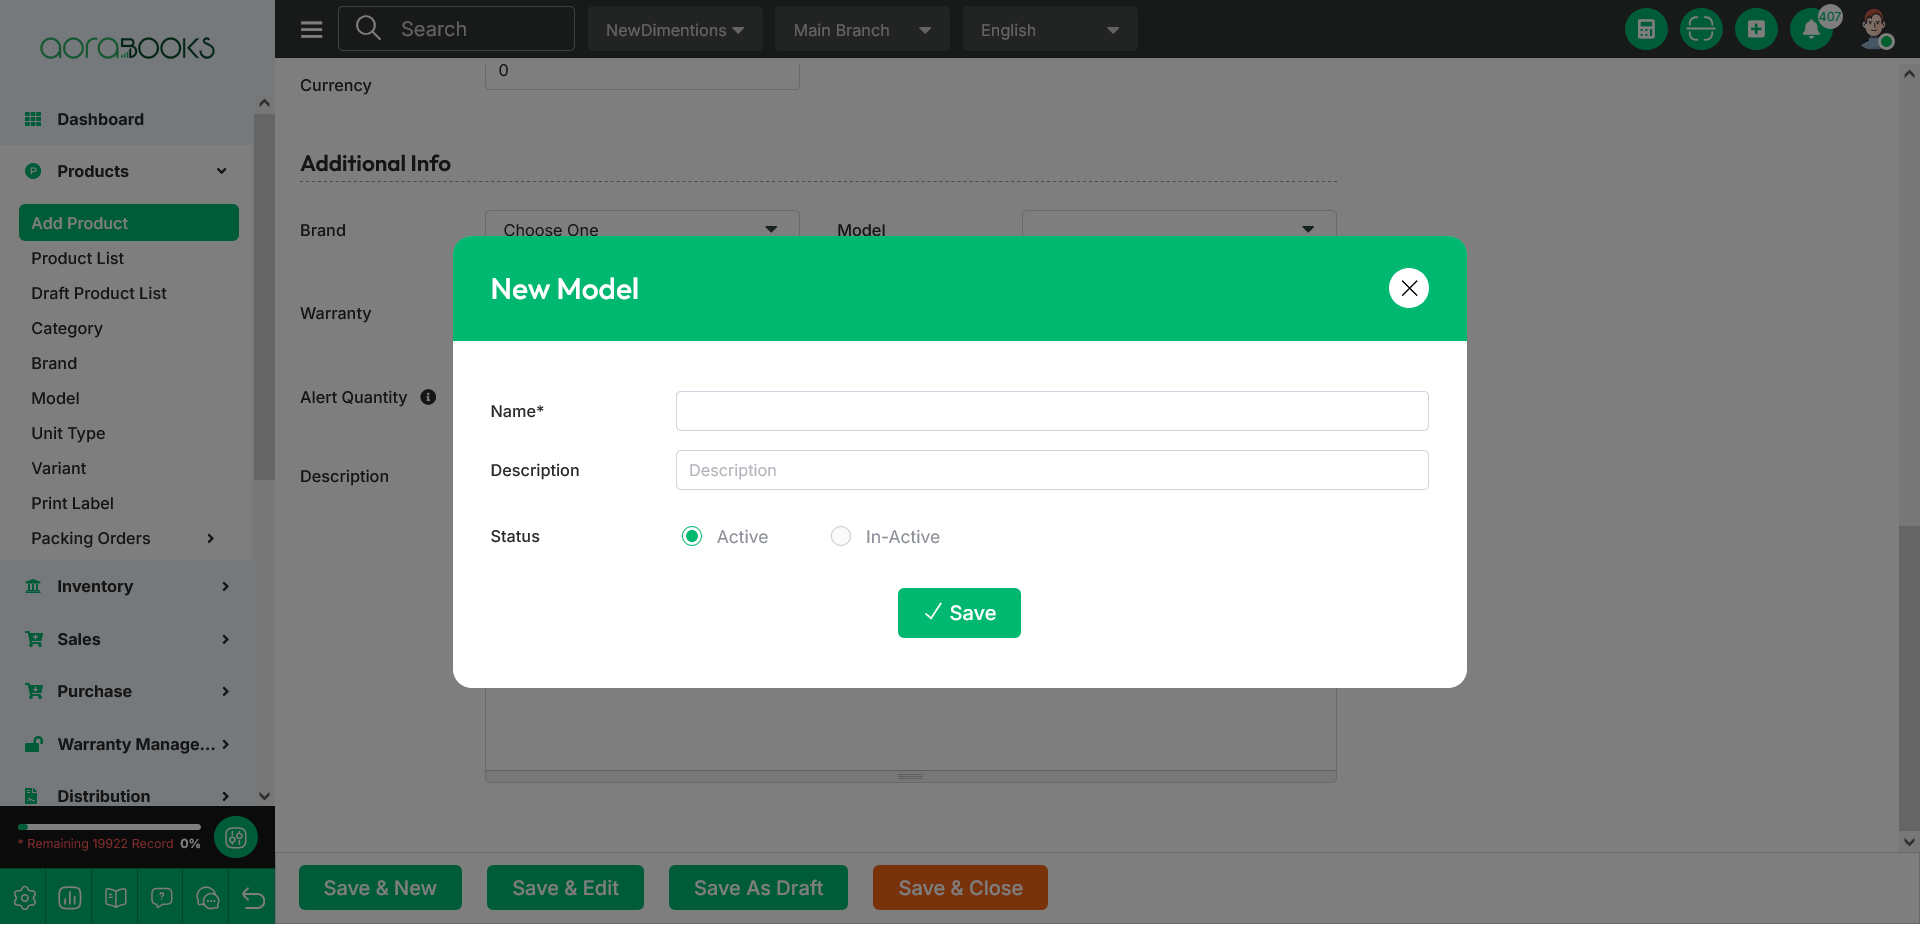
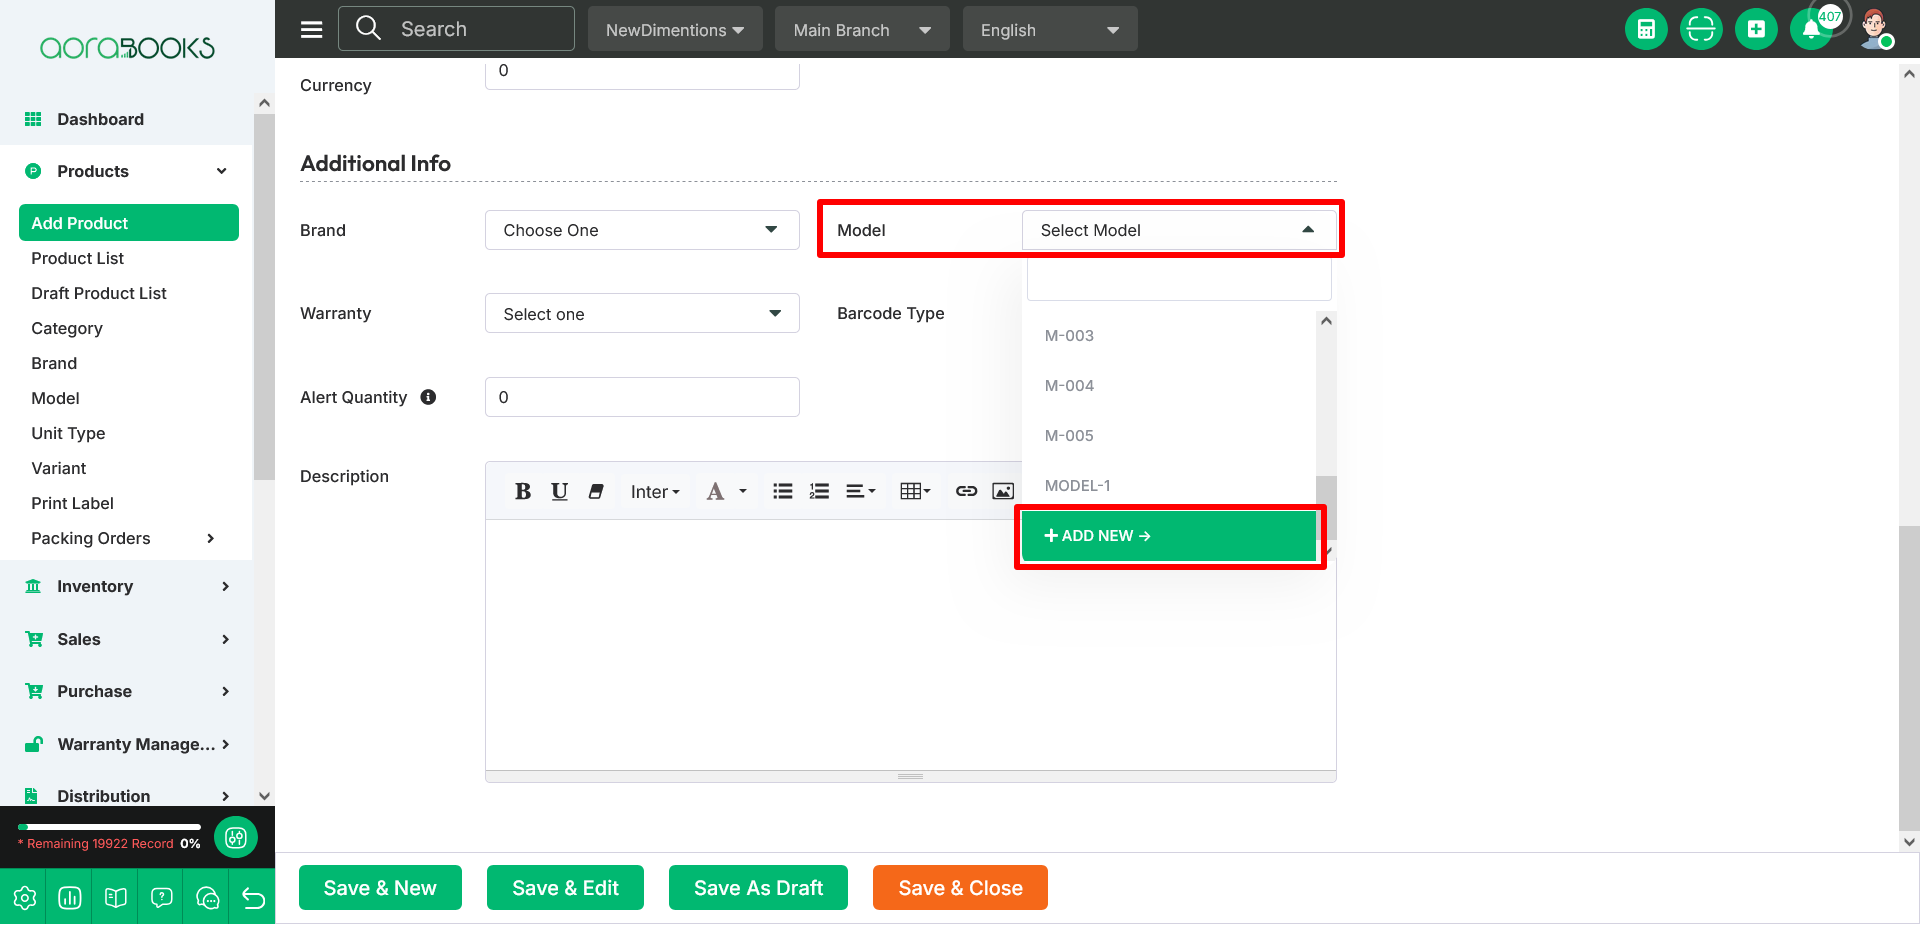 To create a new Model, choose “Add New” from the dropdown menu in this section.