The InfixLMS Chat module allows real-time messaging. Admins can chat with anyone, while instructors can chat with enrolled students. It supports Pusher, jQuery, invitations, and group chats.
Also, Know the Infix Module Installation process
Link: Infix Module Installation process
How to work:
InfixLMS should be pre-installed on your server.
Purchase the Chat Modules for InfixLMS from codecanyon.
Download and install this Chat Module to your InfixLMS portal.
Upload Chat Add-on From System Setting> Module Manager.
Setup Chat App and configure.
Opportunity for the Students:
Admin can Chat with Any Student and Instructor.
Instructor Can chat with Only Enrolled Students based on the course.
Students can chat with the course Instructor & invitation Requirements.
You can Block the User at any time.
Pusher and jQuery.
Users can Upload Files, Make a Group chat or Upload File Limits.
INFIXLMS CHAT MODULE READY TO LIVE CHAT SOLUTION
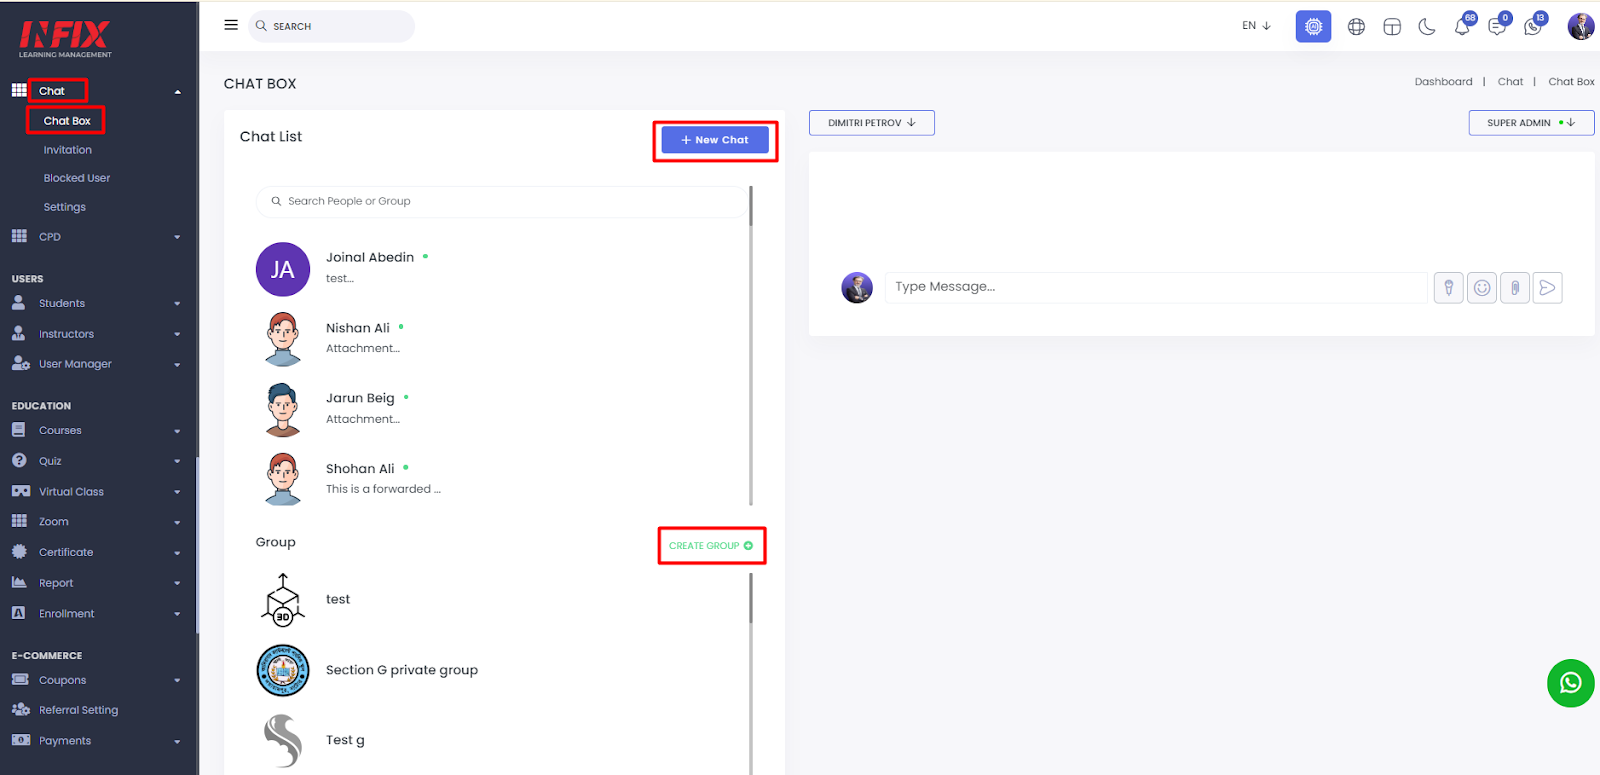
Chat Box:
Chat is a real-time experience add-on for InfixLMS to provide a better solution, this is the way to communicate with each one than it is using for the chat box module. The best way to connect and interact with your staff colleagues and connected clients, you can offer communication directly as well as build trust and increase staff loyalty.
Short Direction: {InfixLMS> Dashboard> Chat Box> Chat List> New Chat> Super admin> Opposite communicator details> Create Group.}
To chat with a new person or create a group, go to the InfixLMS dashboard and access the chat module. From there, you can explore the chat box, view your chat list, start a new chat, check communicator details, or create a group.
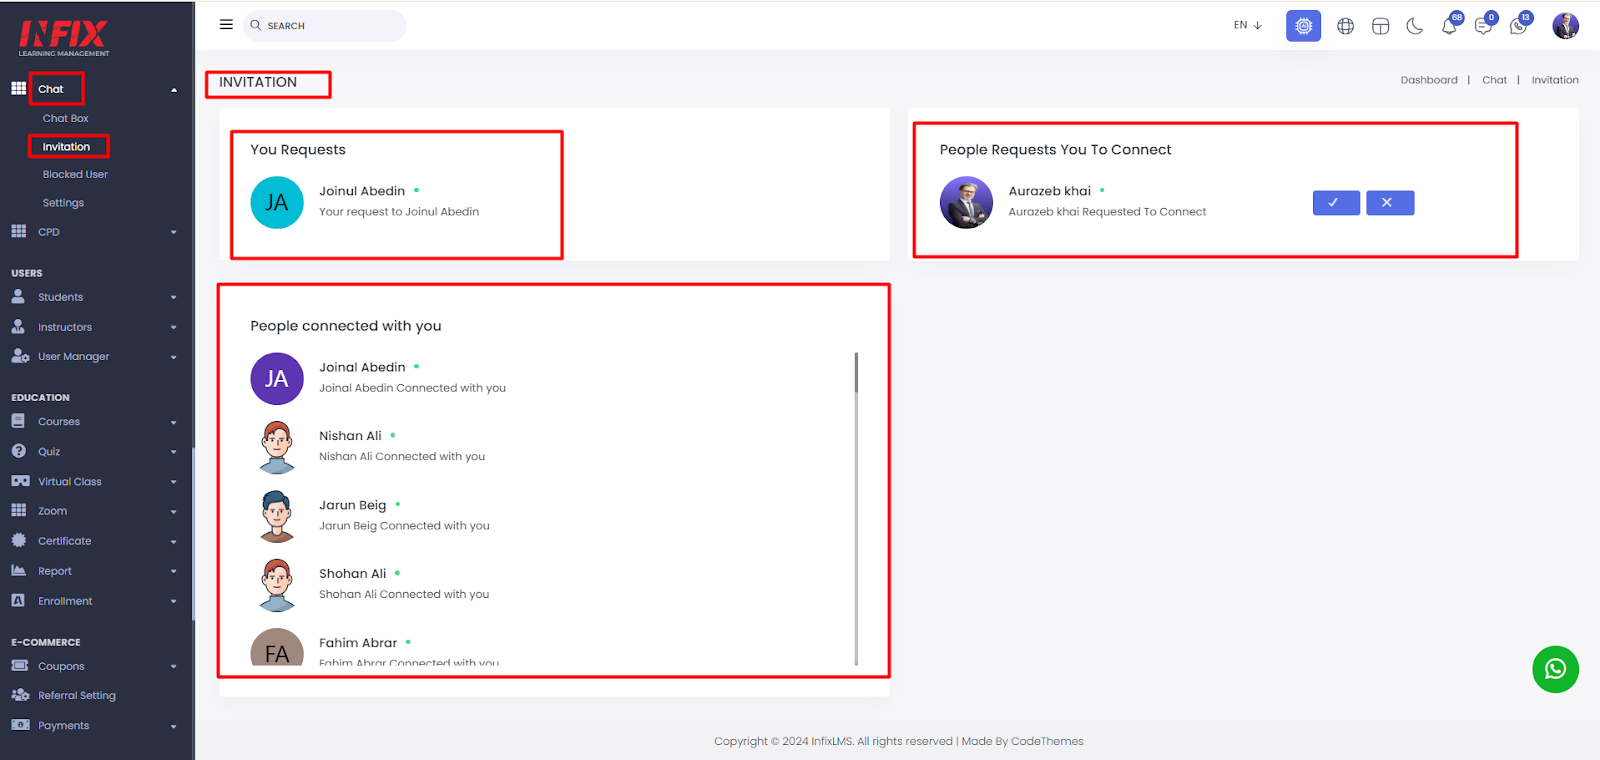
Invitation:
If you want to invite someone to InfixLMS' existing account then search the chat box to invite or as someone had invited you then it will show the people who request you to connect below.
Short Direction: {InfixLMS> Dashboard> Invitation> You Requests> People Requests You To Connect> Accept or cancel it> People Connected with you.}
To accept an invitation in the chat system, go to the InfixLMS dashboard and click on the invitation option. From there, you can view your requests, see requests from people wanting to connect, accept or cancel invitations, and manage the people connected with you.
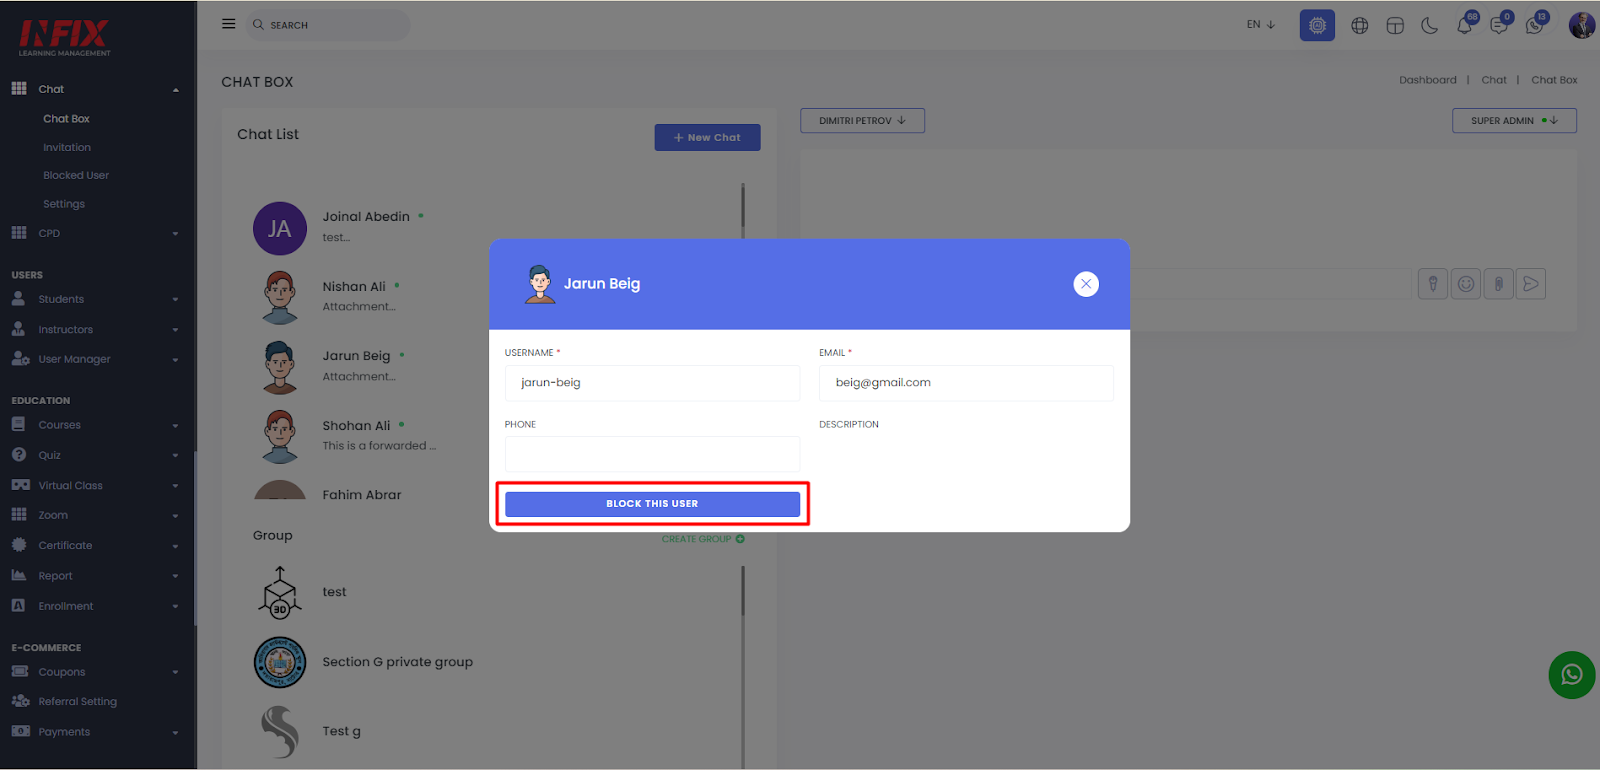
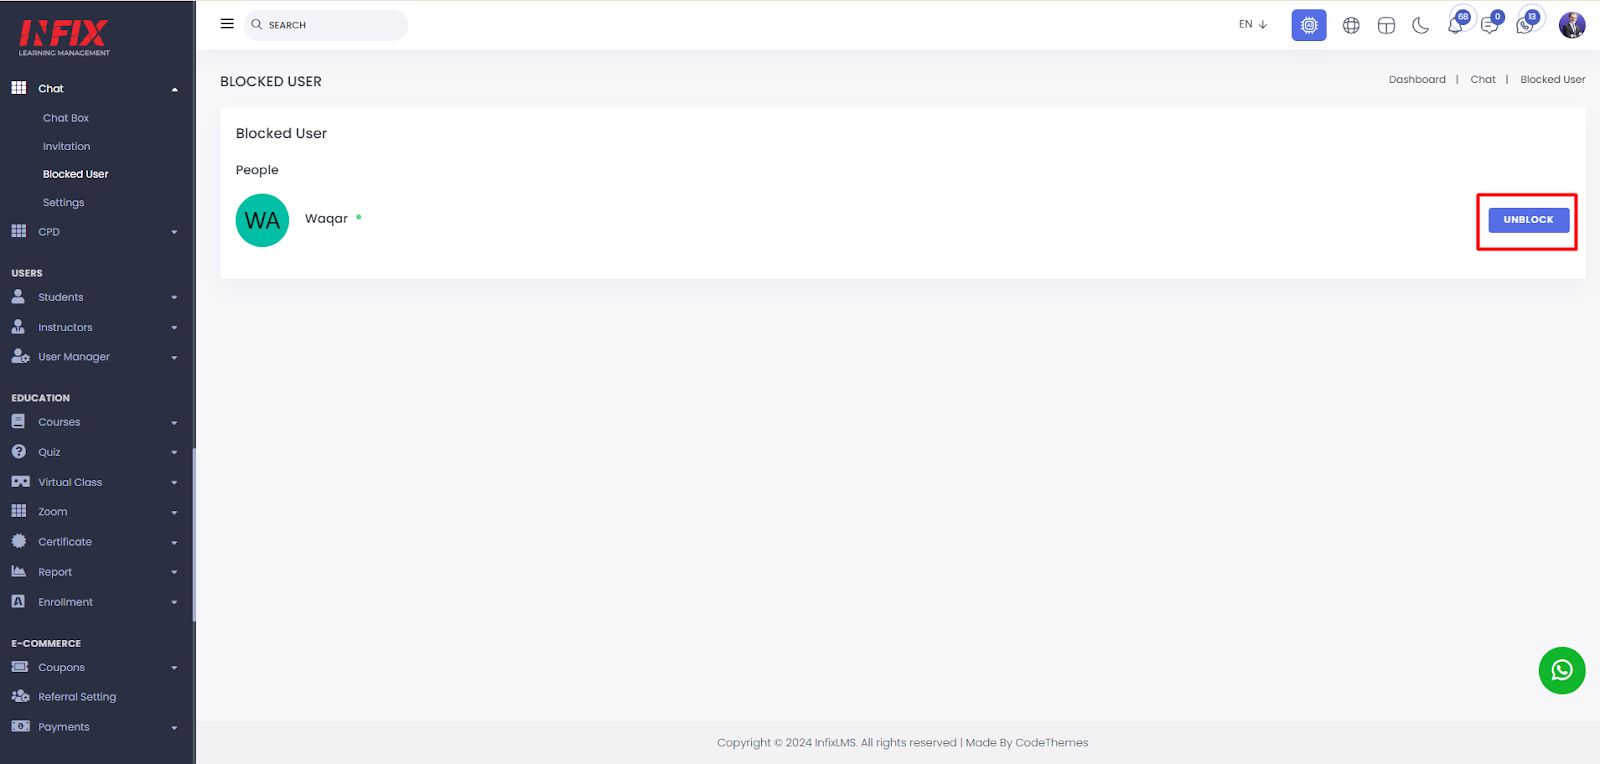
Blocked User:
If you want to block someone in the list of chats then click on the person's picture or name bar, and you will see the block this user option.
Short Direction: {InfixLMS> Dashboard> Block This User> Blocked User> Unblock.}
You can quickly block anyone using the chat module on your site. Simply select Block This User, view the Blocked User list, and choose Unblock if needed.
Here is the all-block list that you also can unblock this person to chat again.
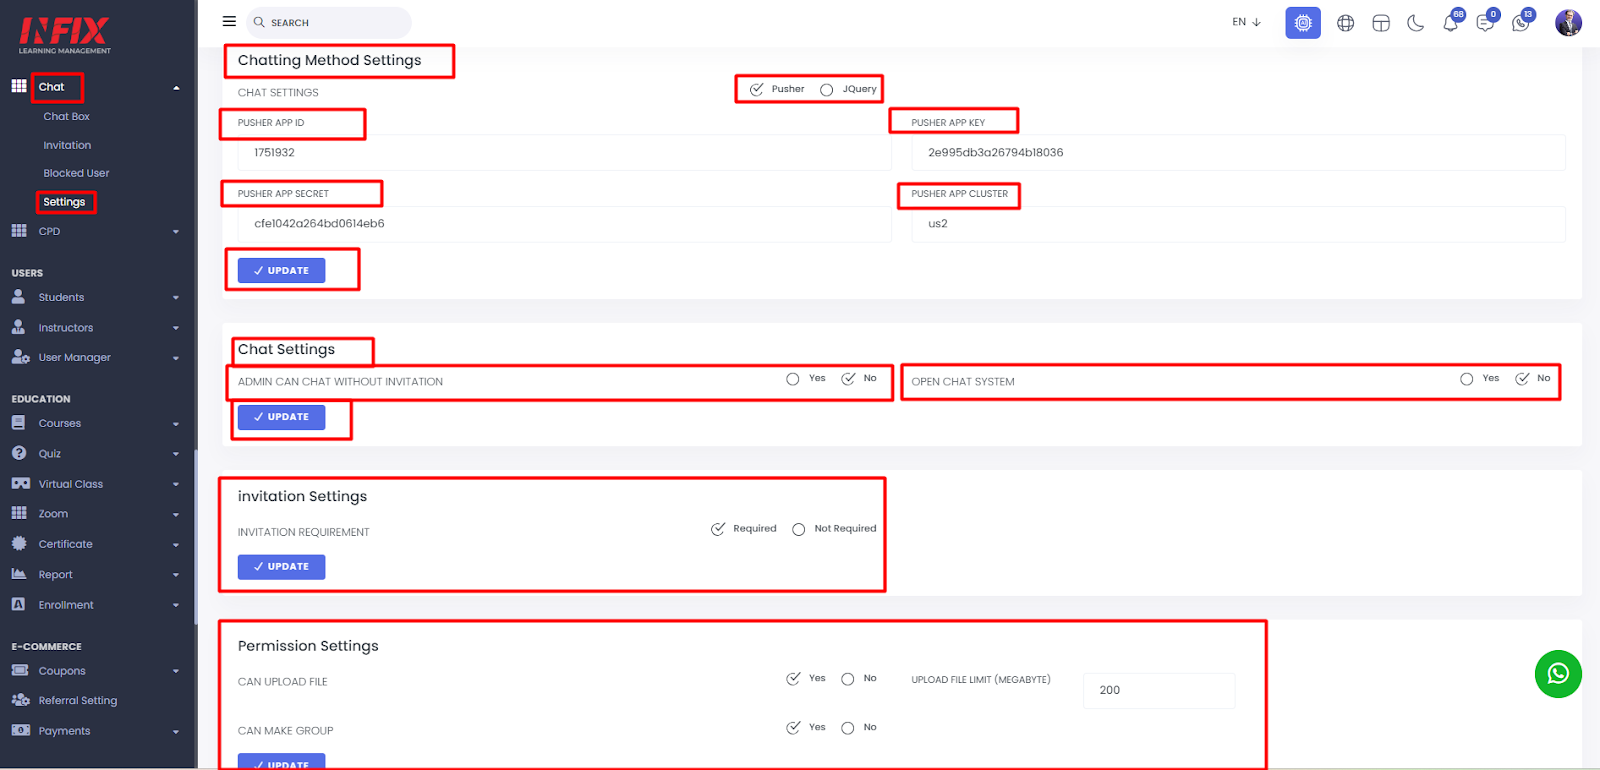
Settings:
Powering real-time experiences for mobile and web by using Pusher to setup APIs that are flexible, scalable and easy to use. InfixLMS Chat module system setting creates and maintains complex messaging infrastructure so you can build the real-time features your users need, fast.
Short Direction: {InfixLMS> Dashboard> Settings> Chatting Method Settings> Pusher or JQuery> General Setting Pusher APP ID> General Settings Pusher APP Key> General Settings Pusher APP Secret> General Settings Pusher APP Cluster> Update> Chat Settings> Admin Can Chat Without Invitation> Open Chat System> Update.}
To set up chat settings in the InfixLMS system or configure the Pusher extension, follow the link below to learn how to set up the Pusher settings with APP ID, Key, Secret, and Cluster.
Link: Regenerate API Key
You can adjust the chat settings, choose between Pusher or JQuery (free), and configure Pusher credentials like APP ID, Key, Secret, and Cluster. Additionally, you can set options like "Admin Can Chat Without Invitation" or "Open Chat System" to 'yes' or 'no.' You can also decide if an invitation requires approval, allow users to upload files, and enable or disable group creation. Once done, click Update to save your settings.
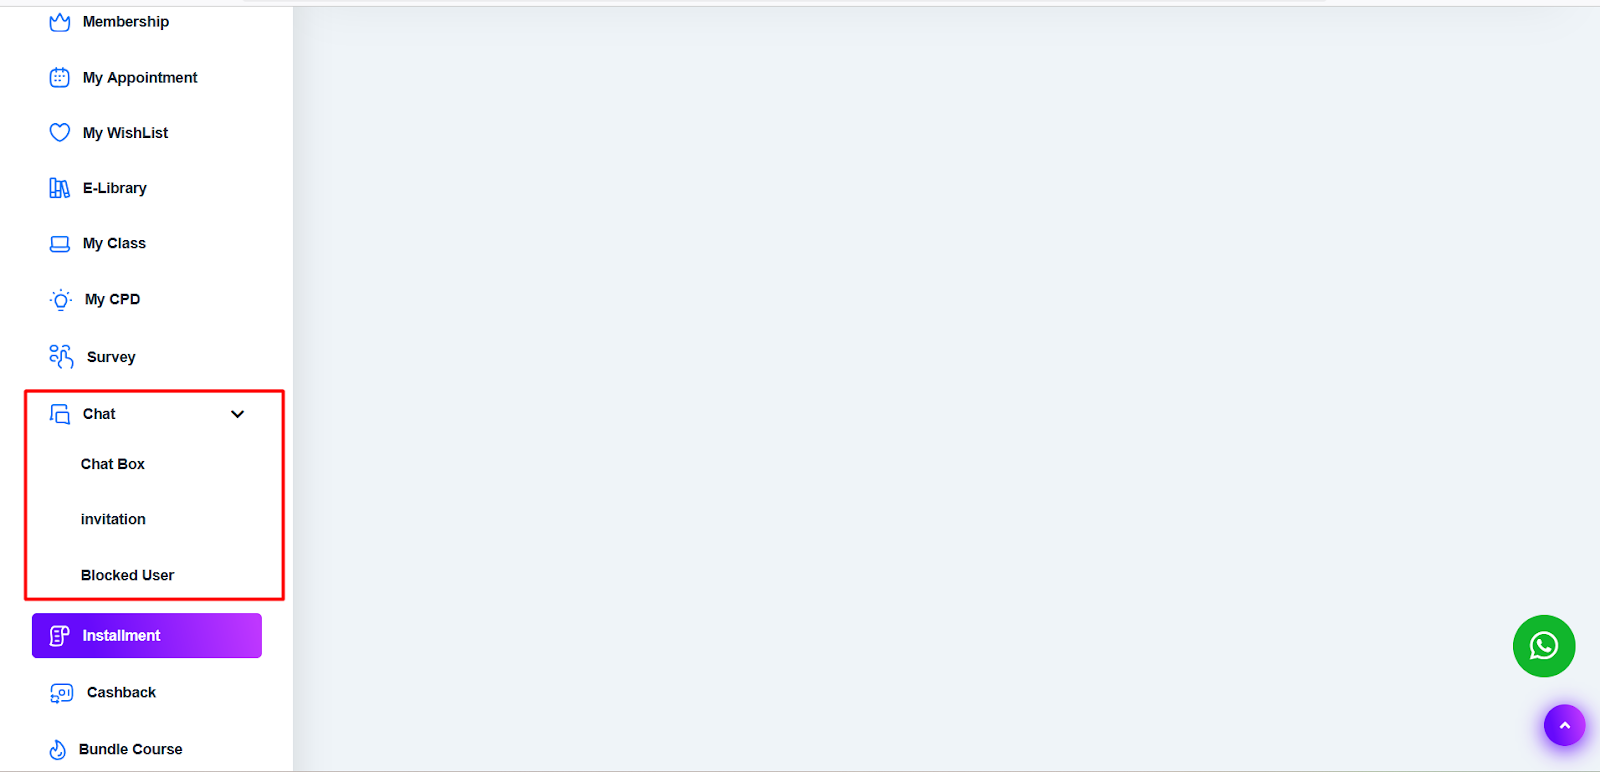
Student dashboard:
This is the student dashboard to see as a user can find their chatting function look like the picture below.