People shop on Google more than a billion times a day. With a Merchant Center account, you can add your product offerings to Google for free. Your listings can appear when customers are looking for products like yours on Google Search, Maps, YouTube, and more.
System Requirements for Google Merchant Center Module Installation
For Google Merchant Center module should be configured in your system.
Need the latest version of the system update (minimum 2.8.0).
Google Merchant Center Module Installation
Install Google Merchant Center Module In your Existing Amazcart System
1- Log into your Amazcart system and go to System Setting > Module Manager.
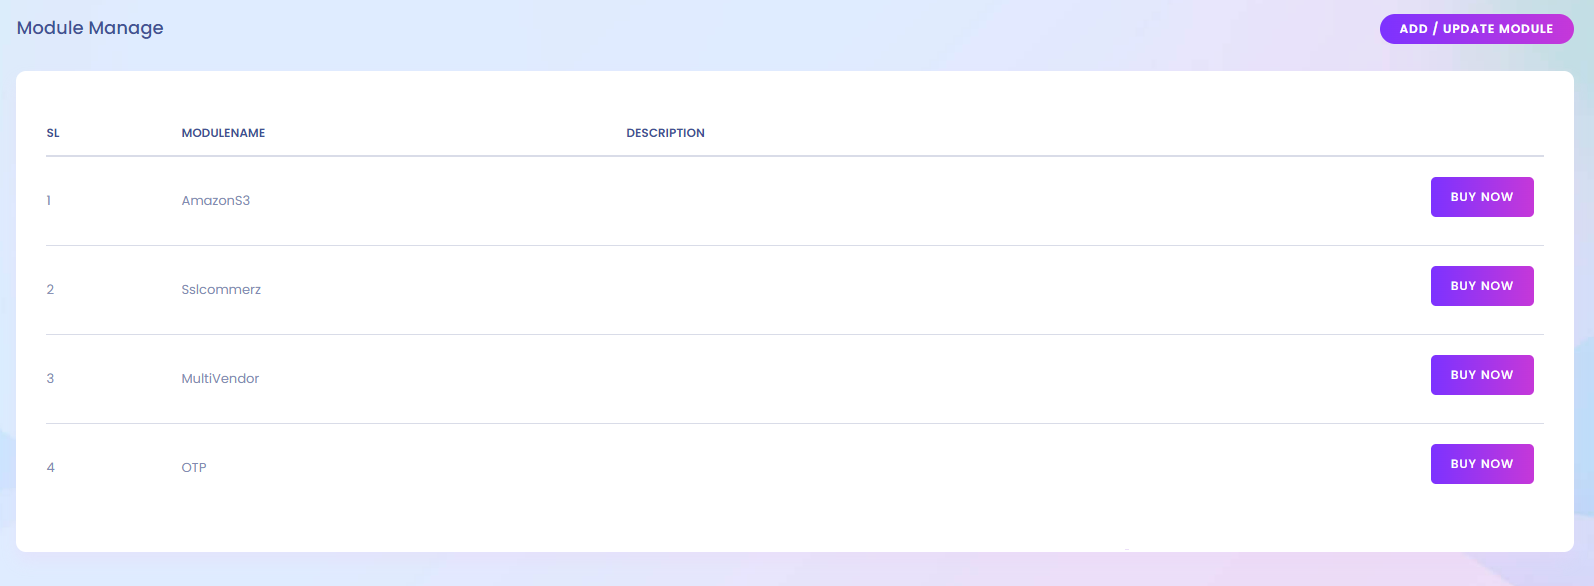
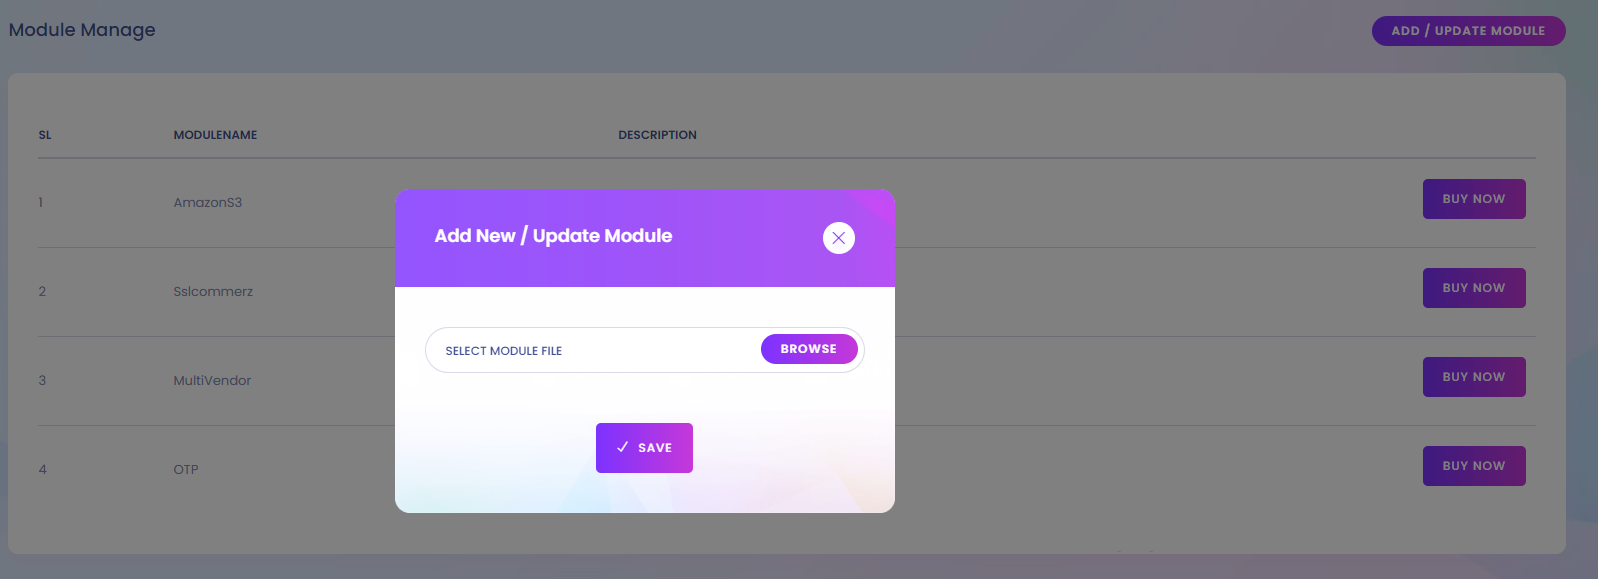
2- Click the Add Module, if you are not added it yet. Browse The module zip file, then Submit.
How to setup Google Merchant Center
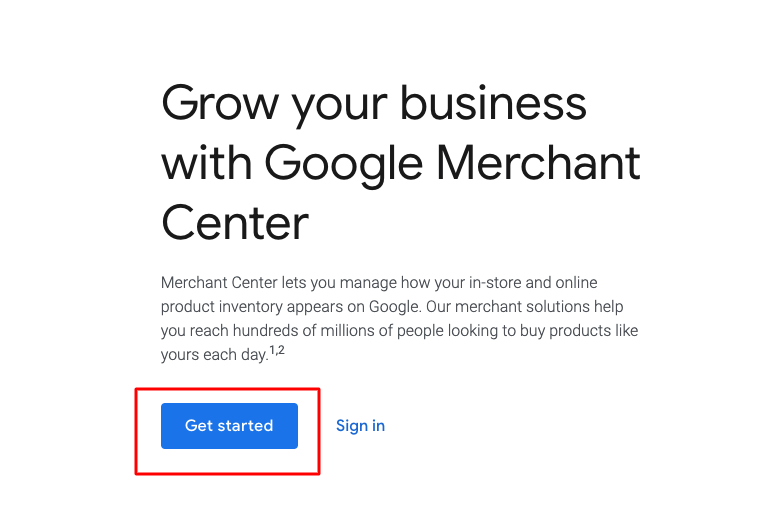
1- Go to Google Merchant Center and Click Get started button.
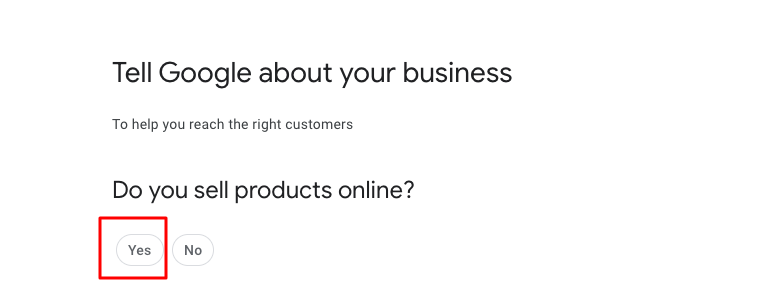
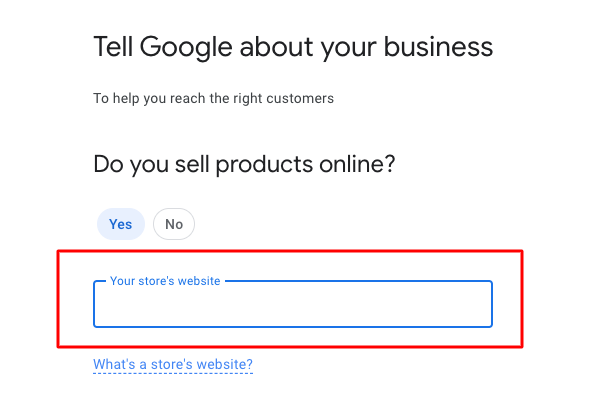
2- Do you sell products online?
3- Write your website address.
4- Next click Create a Google Merchant Center account button.

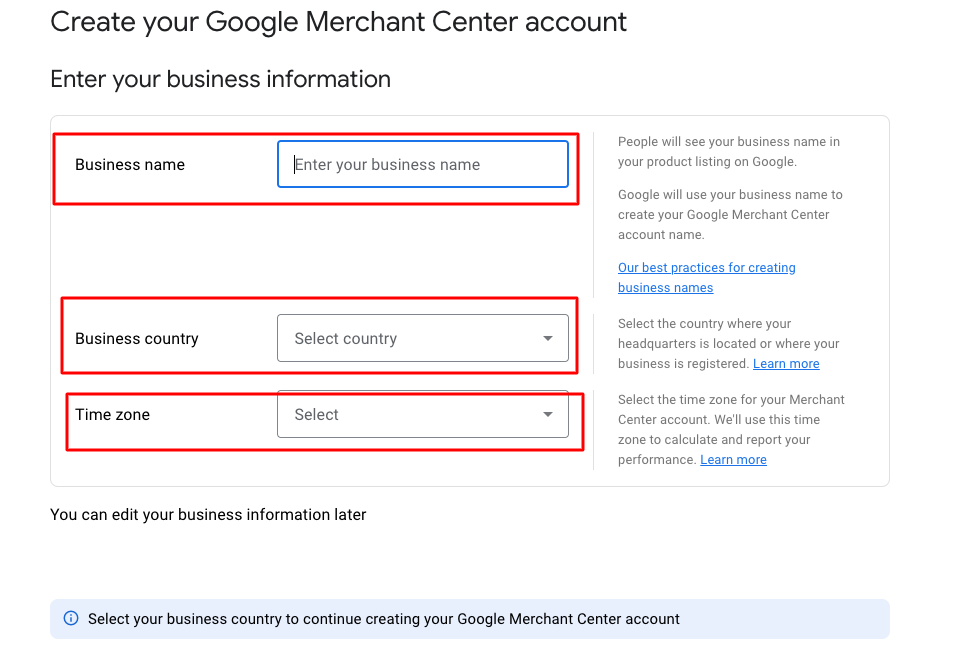
5- Enter your business information.
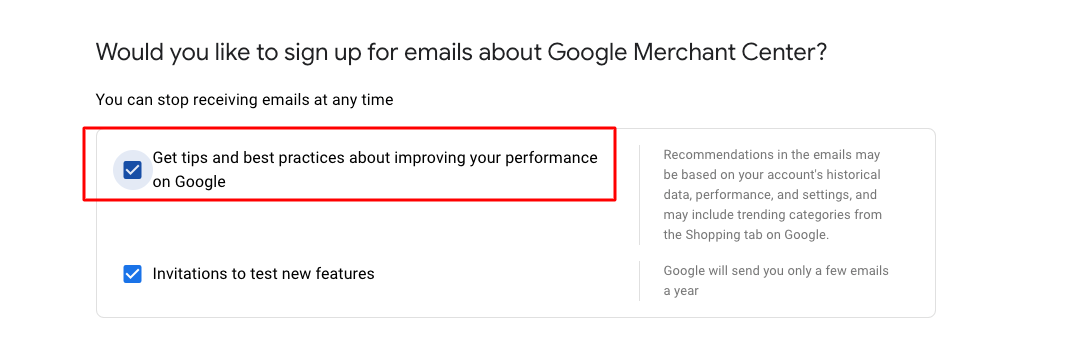
6- Next Checked Get tips and best practices about improving your performance on Google.
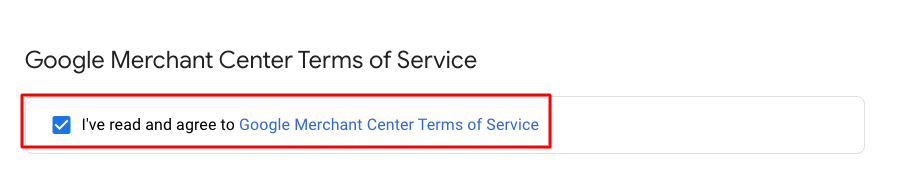
7- Next checked Google Merchant Center Terms of Service.
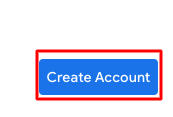
8- Next click Create Account Button.
9- Next, click the Continue button.

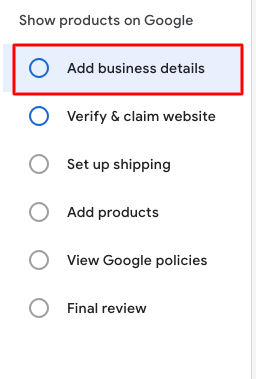
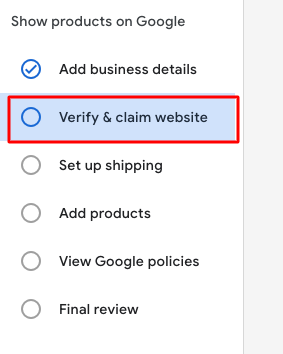
10- Next, select the sidebar Add business details option.
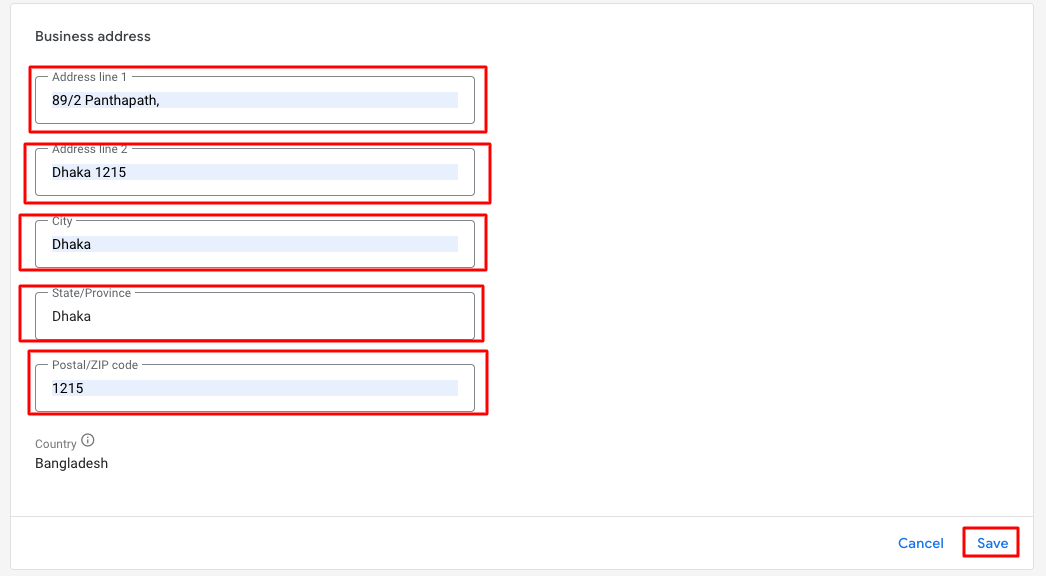
11- Fill up all Business addresses then click the save button.
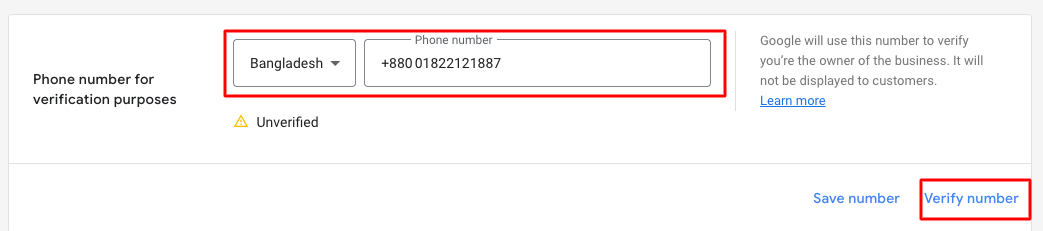
12- Next, fill up the Phone number then click verify number button.
13- Next, select the sidebar Verify & claim website option.
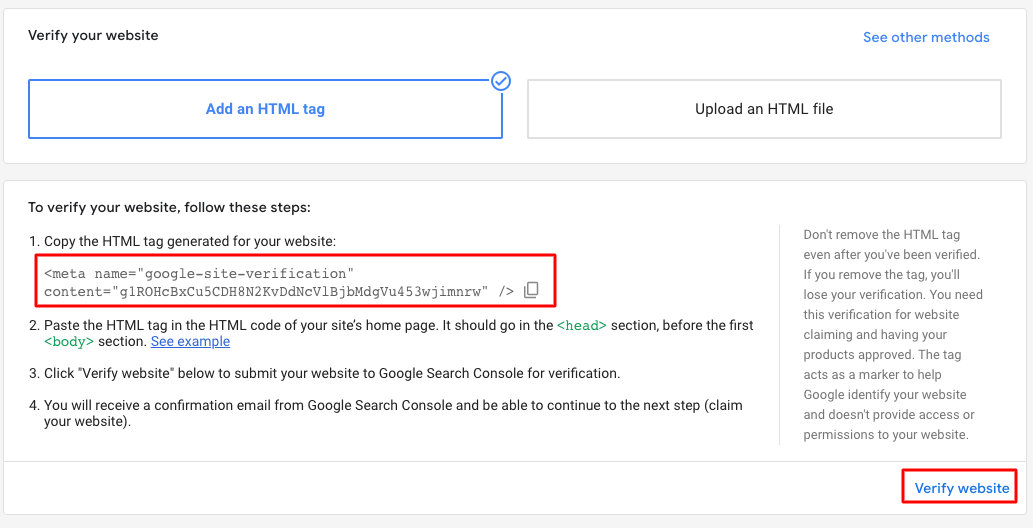
14- Next, Verify your website click Add an HTML tag tab then copy meta paste your website head tag then click verify website button.
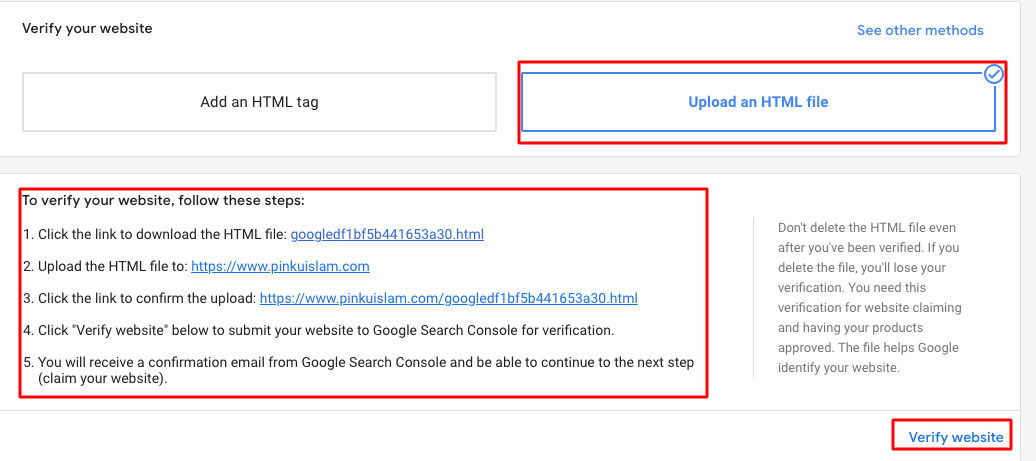
15- Or Verify your website click the Upload an HTML file tab then To verify your website, follow these steps then click Verify website button.
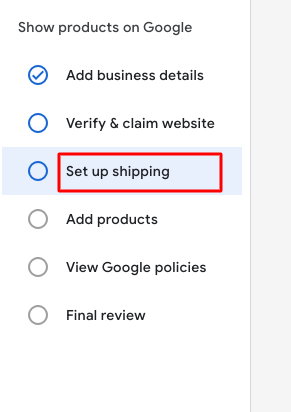
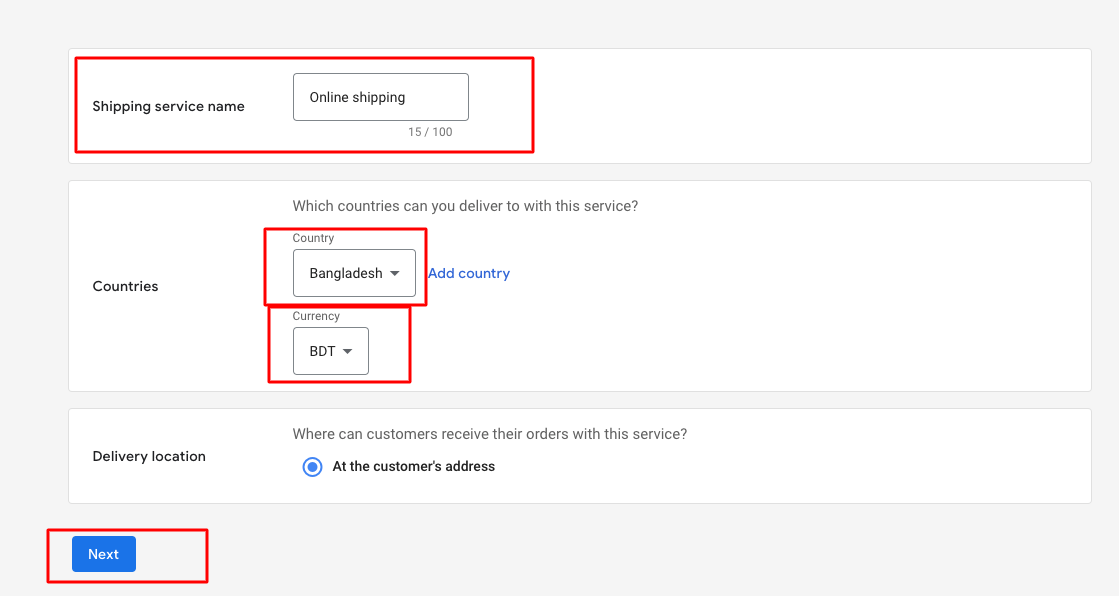
16- Next, select the sidebar Set up shipping option.
17- Next, fill up the Service Coverage information and click the next button.
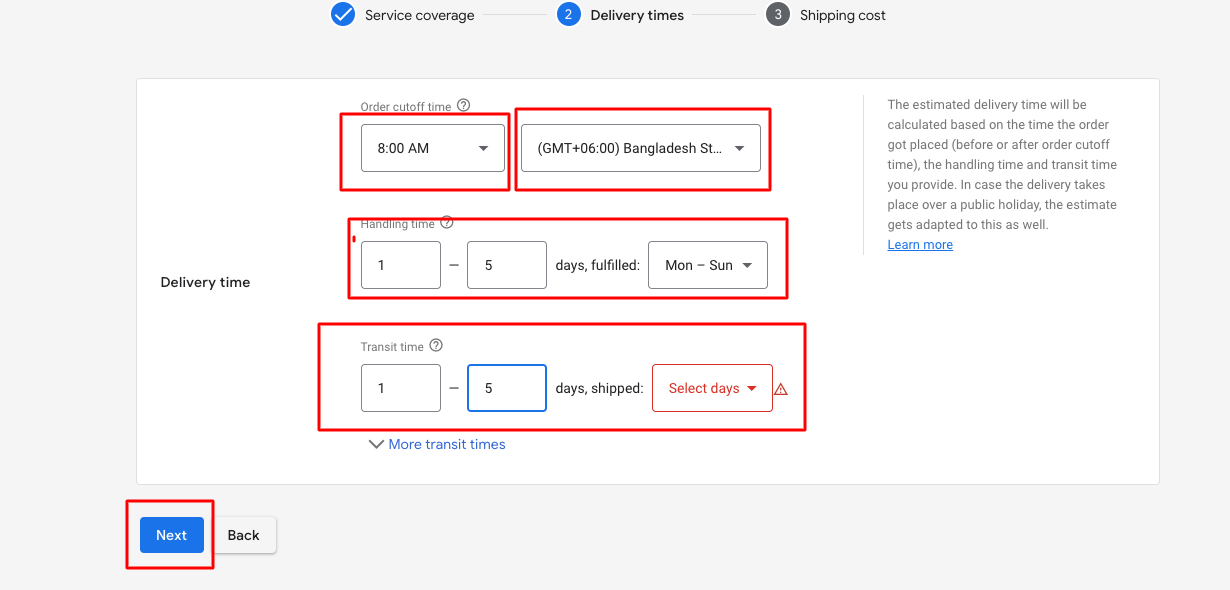
18- Next, fill up the Delivery times information then click the next button.
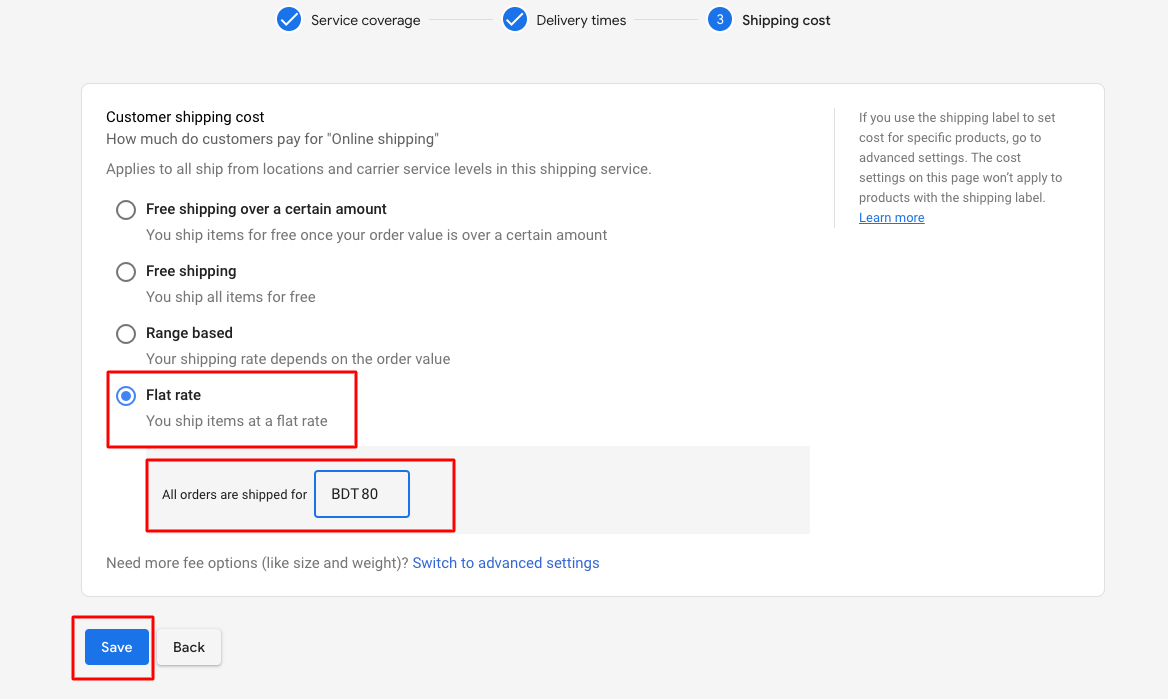
19- Next, select the Shipping cost option then click the save button.
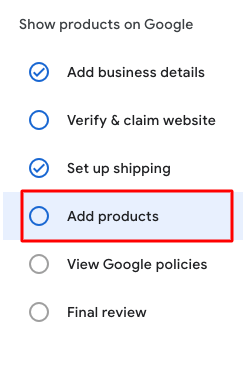
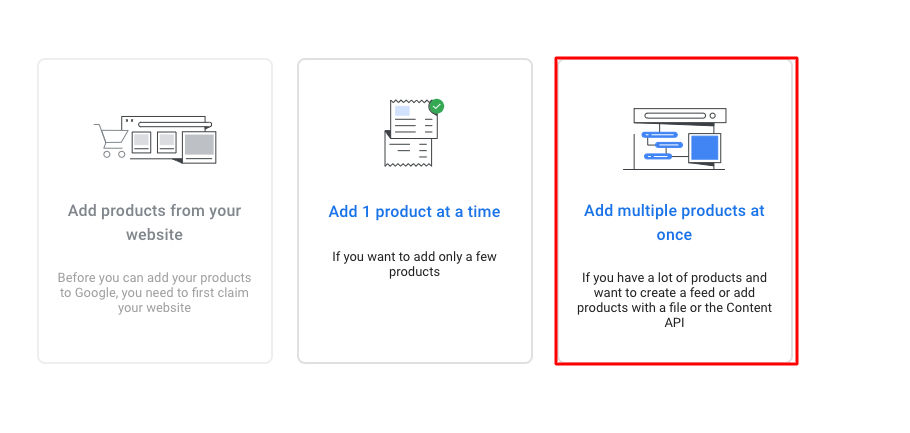
20- Next, select the sidebar Add products option.
21- Next click Add multiple products at once.
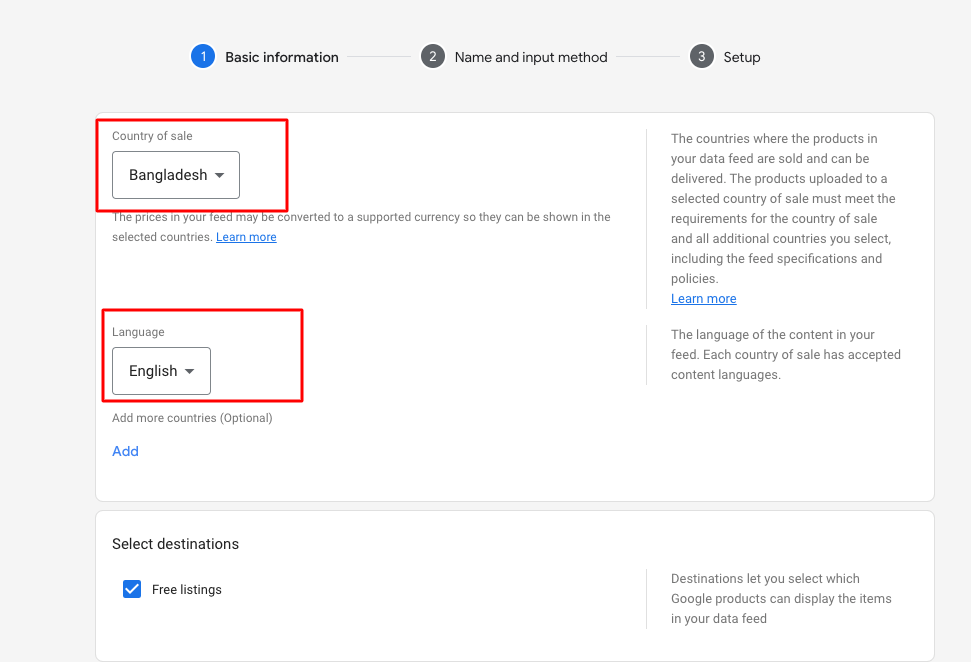
22- Next, fill up the Basic information then click the continue button.
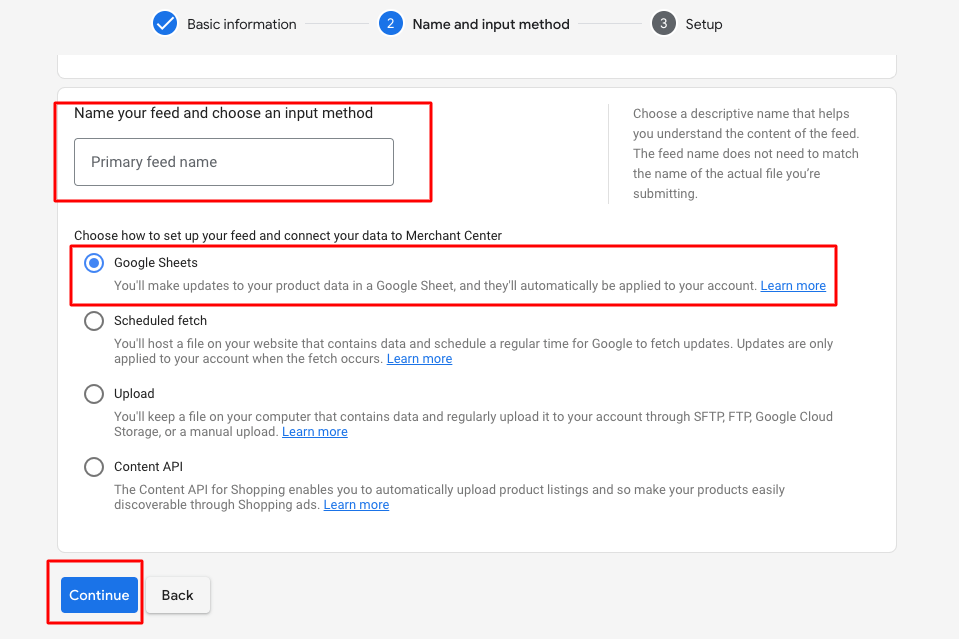
23- Next Name and input method fill up the Primary feed name select the Google Sheets option then click the Continue button.
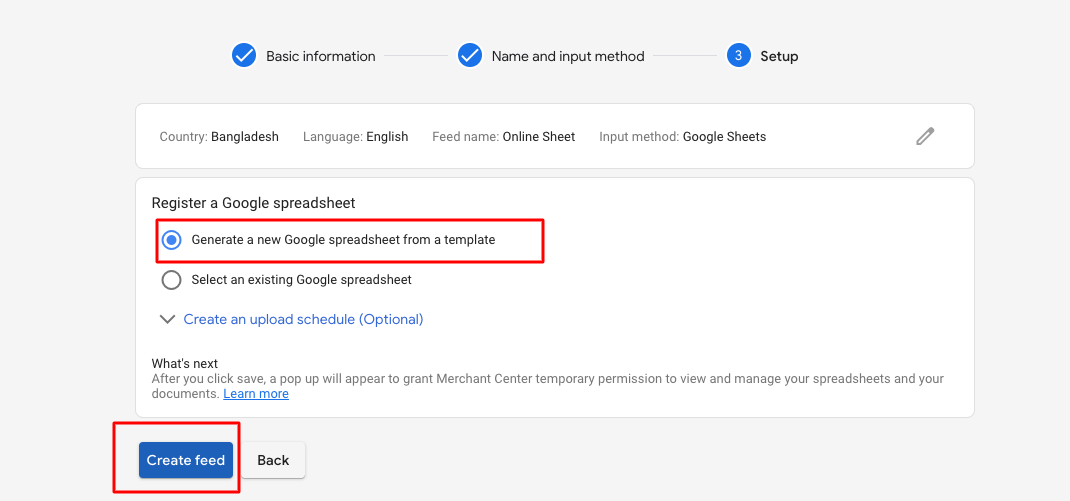
24- Next Setup select Generate a new Google spreadsheet from a template then click Create feed button.
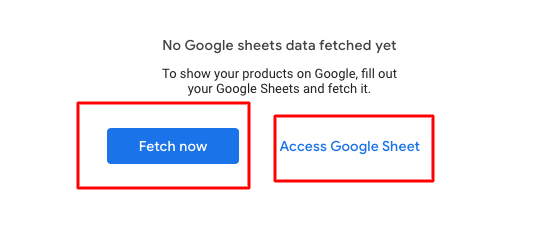
25- Next, click Access Google Sheet to open a new window. Then click Fetch now button.
26- Go to the AmazCart project click the Google merchant centre sidebar menu then select all or the category base option click the Products Export button download the excel file. Then follow the right side note.

GTIN, MPN & Product Condition:
These are the requirements you'll need to meet to show your product. If you don't follow these requirements, we'll disapprove your product and let you know on the Diagnostics page in your Merchant Center account. You might be required to submit the Product Condition, GTIN and MPN attributes. Also, you can use the UPC, EAN, JAN, ISBN & ITF-14.
1- Product Condition
2-GTIN A Global Trade Item Number is a unique and internationally recognized identifier for a product. it will appear next to the barcode on your product's packaging or book cover.
3- MPNs are used to uniquely identify a specific product among all products from the same manufacturer. Shoppers might search specifically for an MPN, so providing the MPN can help ensure that your product is shown in relevant situations.

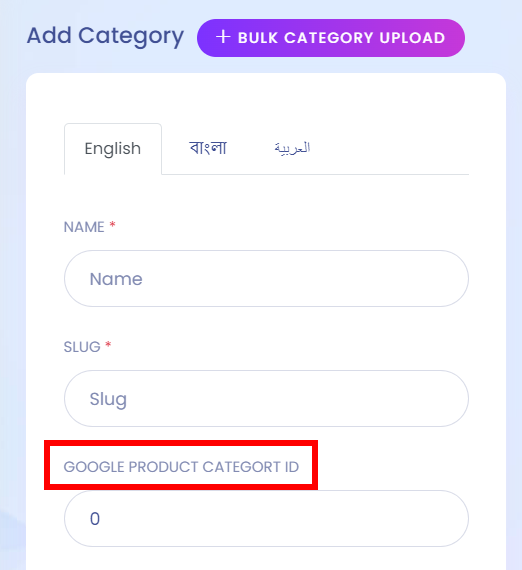
Google Product Category ID:
A Google product category is a category from Google's Taxonomy. Google automatically assigns one to products in your feed, but you can also set one manually. When sorted automatically, Google sorts your products based on the product title, description, brand, and pricing. This ID represents an individual product. Offered is unique to the set of offers in the Merchant Center database, and is usually a numeric sequential number.
Important Link:
1- https://support.google.com/merchants/answer/6324482?hl=en
2- https://support.google.com/merchants/answer/6324461?hl=en
Note:


