Shiprocket for AmazCart to verify the delivery attempts are legitimate, and not fake, Shiprocket has aligned with courier partners using APIs and receives regular updates about the whereabouts of your orders. ShipRocket ties up e-commerce stores with courier services around the globe and helps eCommerce businesses manage and track order shipments and returns.
If you want to know how to set up Shiprocket API email, password & Channel ID then click this link: Shiprocket API Email, Password & Channel ID with Usage Guidelines
First, you need to register with ShipRocket and create an account. Click on this link to complete the sign-up process.
After the sign-up process is complete, follow the enlisted steps to create an API user:
Open your Shiprocket account and navigate to the left-hand panel.
Click On Settings => API => Configure => Create an API user.
On the pop-up menu, fill in the email (this should be different from the one used to register to ShipRocket).
Fill in an appropriate password and confirm the password.
Click on 'Generate API Credential'. On successful completion, you should have a new API user-generated.
The next step will be to use the Authentication API to obtain an authentication token. Copy this token and use it to authenticate your further API calls.
Shiprocket Carriers:
An AmazCart user can calculate this cost by entering the pick-up and delivery pin codes along with the approximate weight of the user's shipment. ShipRocket charges for the higher of the two weights, the actual weight and the volumetric weight.
Short Direction: {AmazCart> Dashboard> Carriers> Add New> Manual Activation> Action> Shiprocket API Email> Shiprocket API Password> Shiprocket Channel ID> Upload Carrier Logo> Update> Shipping Rates> Add New Shipping Rate> Select Carrier as Shiprocket> Action> Shipping Orders> Search Carrier as Shiprocket> Select> Shipping Setting> Configuration> Carrier As Shiprocket> Update.}
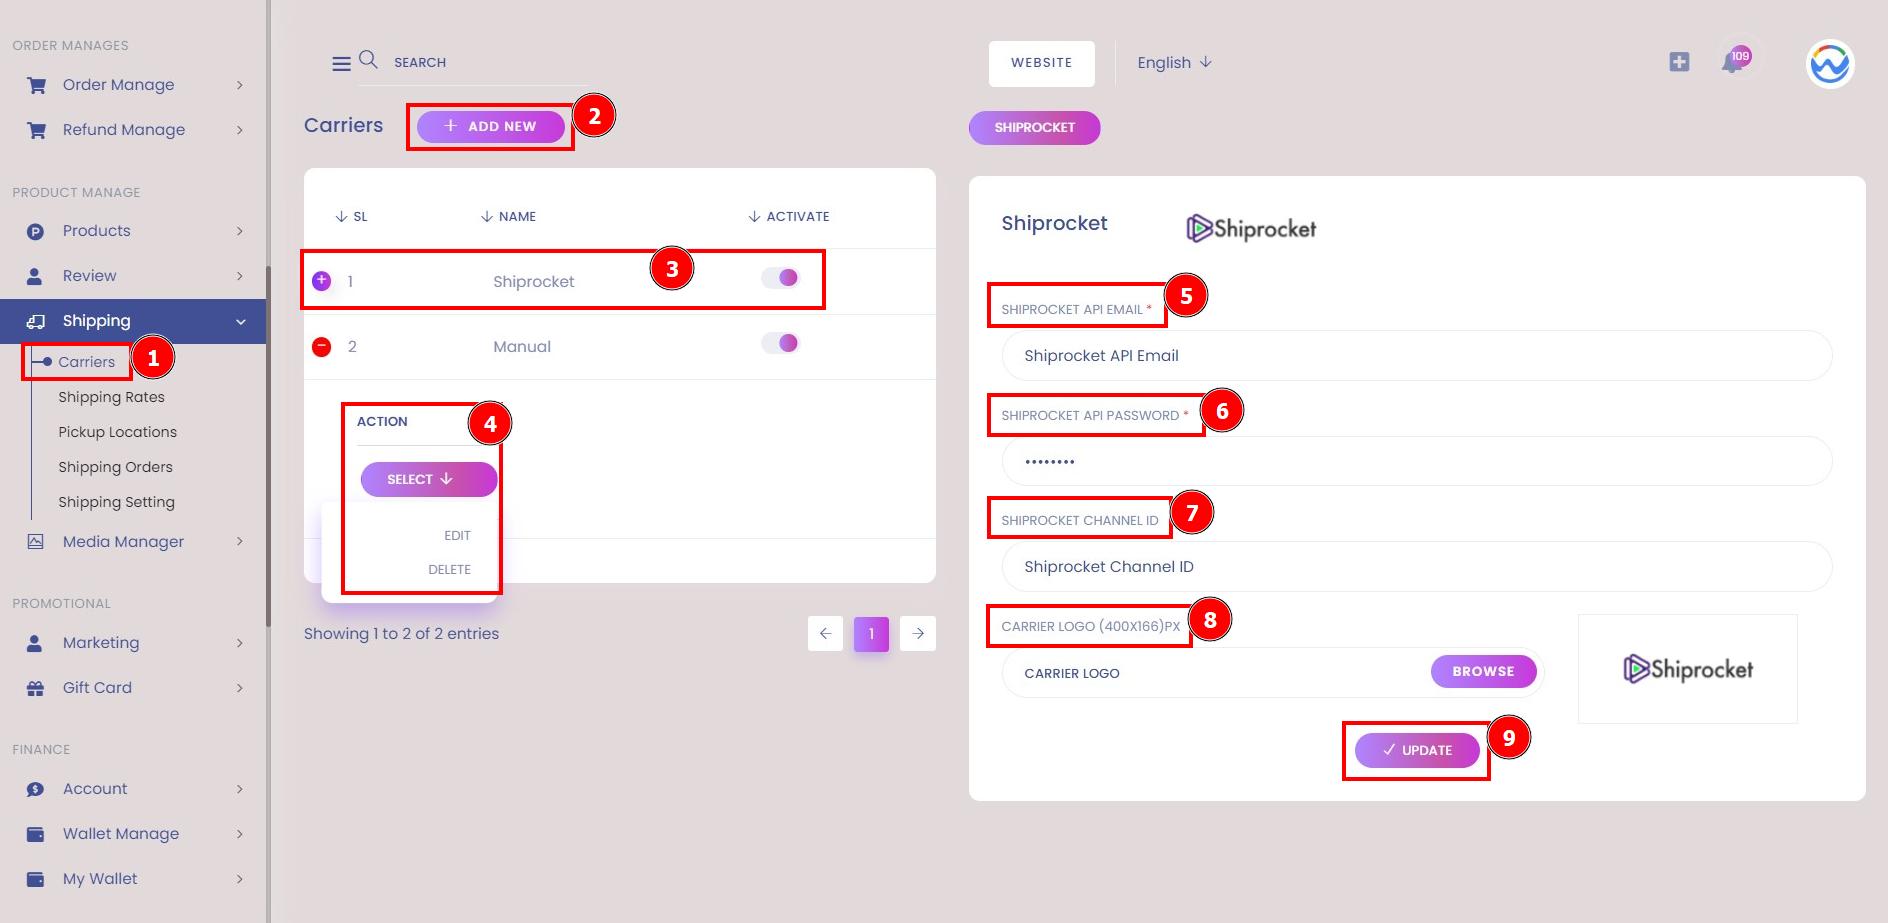
If you want to configure Shiprocket on AmazCart then go to the Admin panel dashboard to find the Shipping section to click on the carriers.
1- Carriers
2- Add a New
3- Manual Activation
4- Action for edit & delete.
5- Shiprocket API Email envisage a community of developers along with a learning platform for tech enthusiasts.
6- Shiprocket API Password is a code that you can integrate and customize in your current tech stack so that shipping capabilities can be communicated and accessed across multiple applications.
7- Shiprocket Channel ID for got to Shiprocket. Step 1: Go to Manage >> All Channels from the left menu. On the following page, click the Add New Channel button.
8- Upload Carrier Logo
9- Update
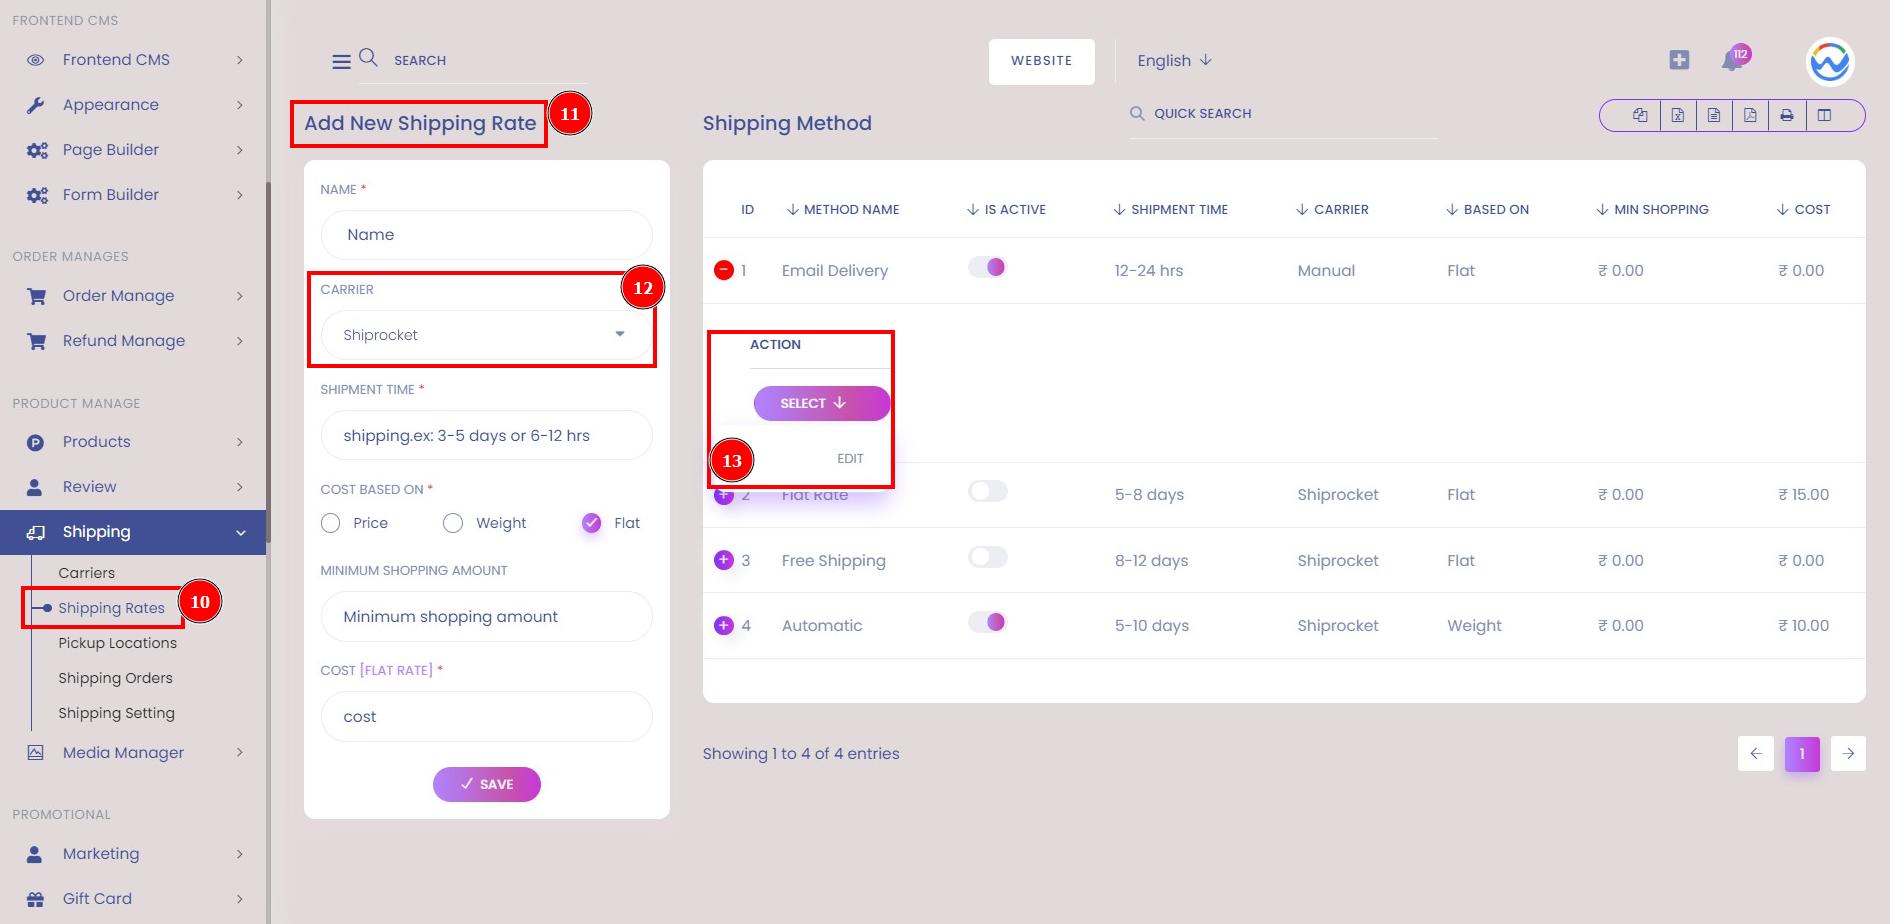
10- Shipping Rates
11- Add New Shipping Rate
12- Select Carrier as Shiprocket
13- Action for edit.
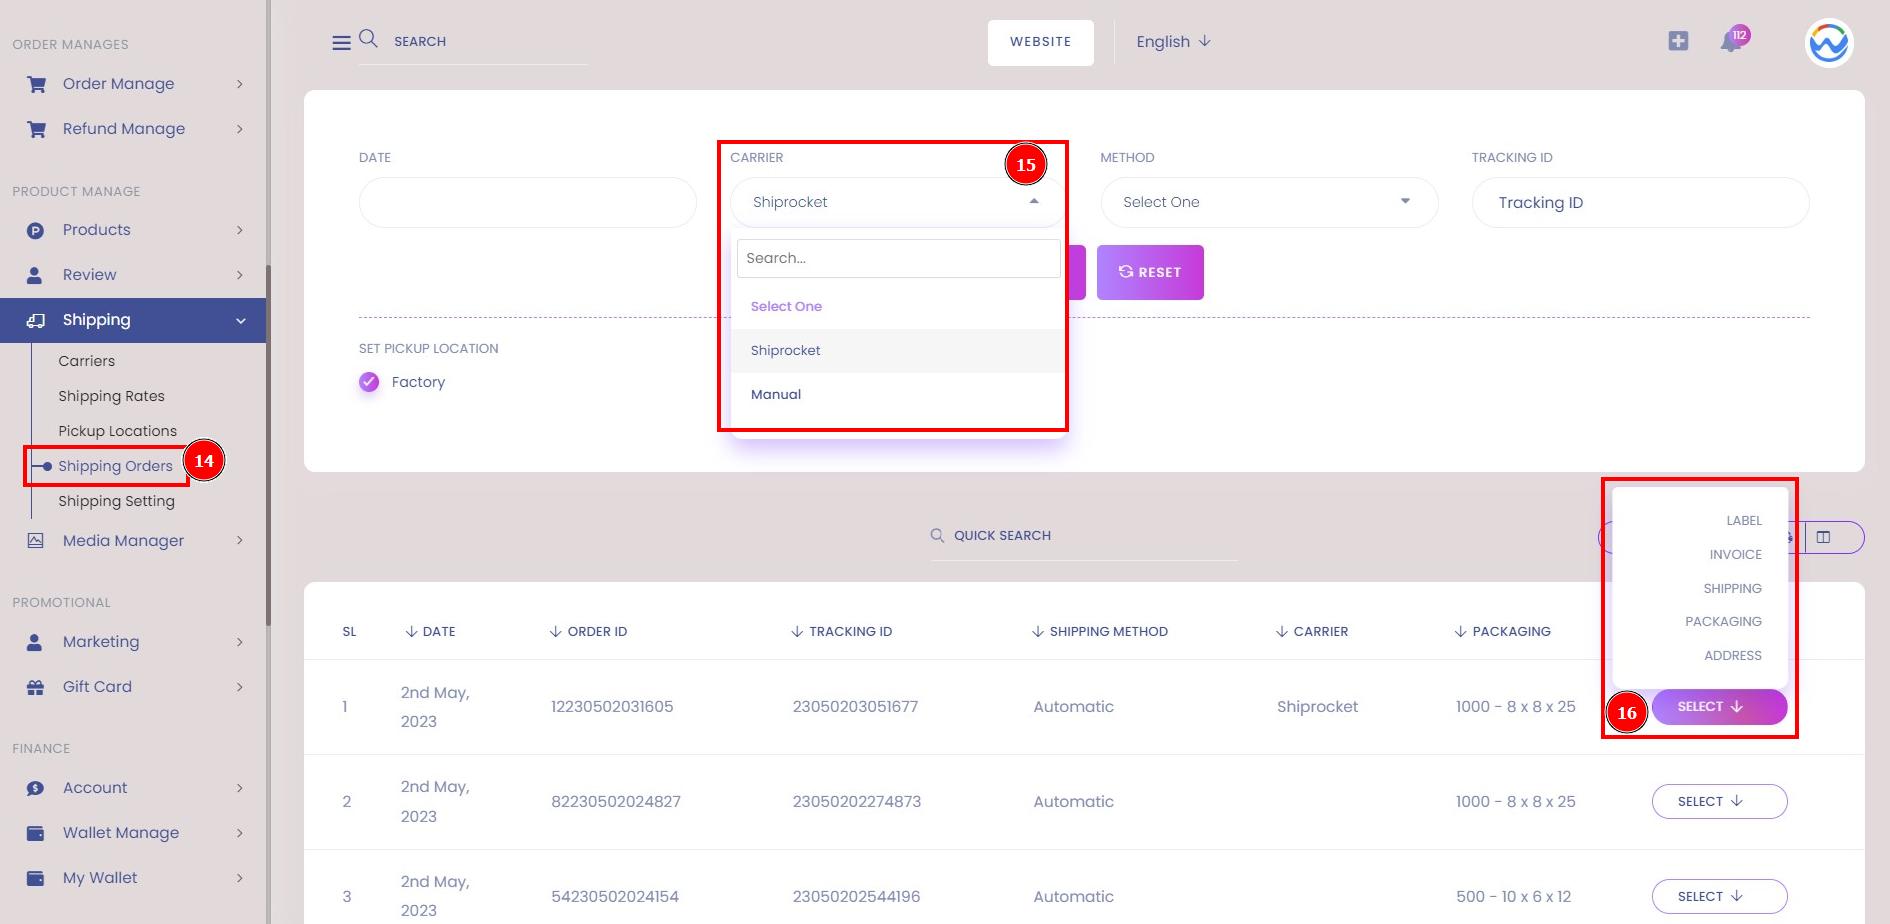
14- Shipping Orders
15- Search Carrier as Shiprocket
16- Select for the label, Invoice, Shipping, Packaging, and Address.
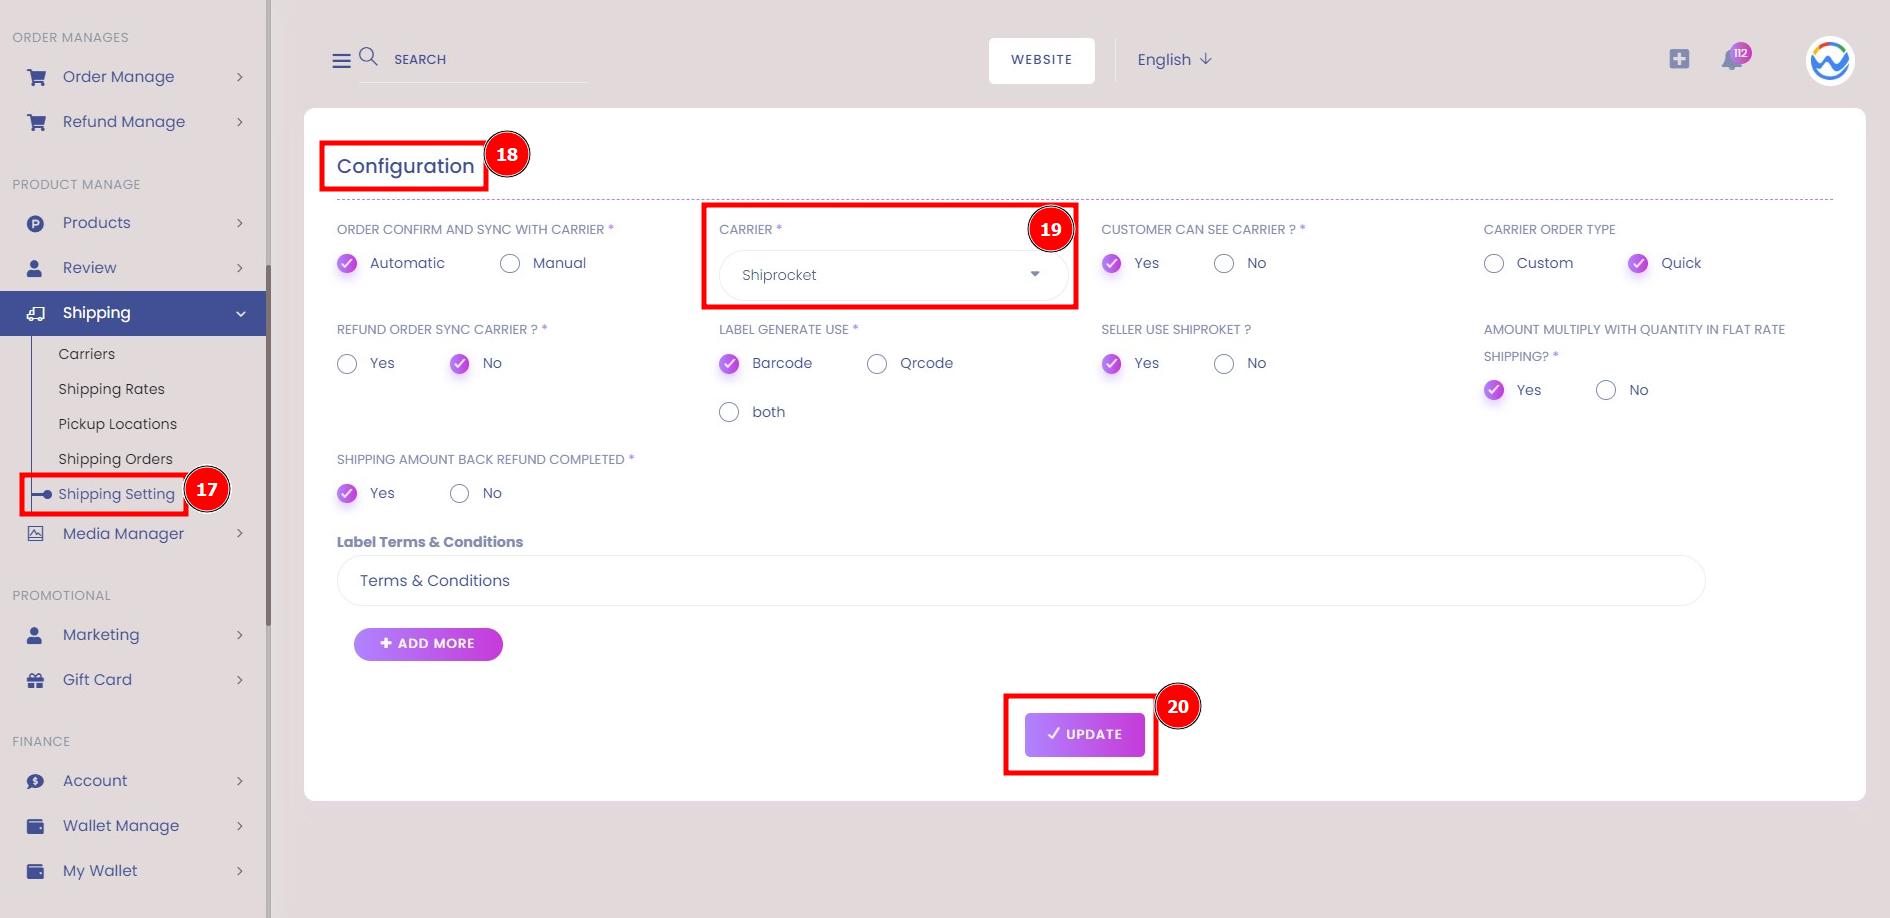
17- Shipping Setting
18- Configuration
19- Carrier As Shiprocket
20- Update it.
Shipping Rates As Shiprocket:
Dimensional weight takes into account the size of a package to determine the shipping cost. DIM weight is calculated by multiplying the length, width, and height of the package or box size, and then dividing by a standard DIM divisor.
Shipping Orders by Shiprocket:
In this section, a customer can find the carrier of order tracking where the Shiprocket exactly belongs right now. You can easily ship any number of orders, without committing to any specific number of shipments. Manage all orders hassle-free and schedule pickups to match your store's convenience and not the requirements of the platform.
Shipping Setting for Shiprocket:
Admin needs to configure the shipping setting from shiprocket. Although as a user to ship their first order, they need to recharge their shipping account. When you click Select Courier you will need to add money to your shipping wallet. After you recharge, you can select the courier you want to use.